2022 TOYOTA PROACE CITY tow
[x] Cancel search: towPage 75 of 320
75
Ease of use and comfort
3
Extenso cabin
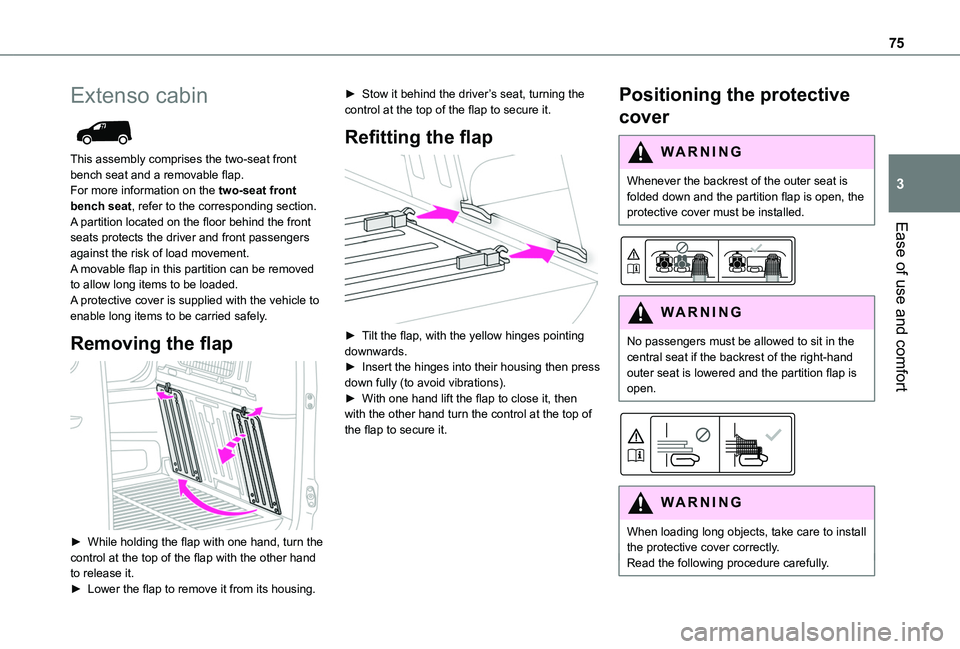
This assembly comprises the two-seat front bench seat and a removable flap.For more information on the two-seat front bench seat, refer to the corresponding section.A partition located on the floor behind the front seats protects the driver and front passengers against the risk of load movement.A movable flap in this partition can be removed to allow long items to be loaded.A protective cover is supplied with the vehicle to enable long items to be carried safely.
Removing the flap
► While holding the flap with one hand, turn the control at the top of the flap with the other hand to release it.► Lower the flap to remove it from its housing.
► Stow it behind the driver’s seat, turning the control at the top of the flap to secure it.
Refitting the flap
► Tilt the flap, with the yellow hinges pointing downwards.► Insert the hinges into their housing then press down fully (to avoid vibrations).► With one hand lift the flap to close it, then with the other hand turn the control at the top of the flap to secure it.
Positioning the protective
cover
WARNI NG
Whenever the backrest of the outer seat is folded down and the partition flap is open, the protective cover must be installed.
WARNI NG
No passengers must be allowed to sit in the central seat if the backrest of the right-hand outer seat is lowered and the partition flap is open.
WARNI NG
When loading long objects, take care to install the protective cover correctly.Read the following procedure carefully.
Page 80 of 320

80
► Position the strap(s) around the head restraint(s) (depending on the position of the partition).► Tighten the strap(s) using the adjustable section in order to correctly retain the items that have been loaded inside the cover.
WARNI NG
Do not place any load in the passenger
compartment outside the protective cover (especially over the cover).
NOTIC E
Regularly check the condition of the protective cover.When signs of wear and tear appear, contact a TOYOTA dealer to have it replaced by a protective cover that meets the specifications and qualities required by TOYOTA and your vehicle.
Heating and Ventilation
Advice
NOTIC E
Using the ventilation and air conditioning system► To ensure that air is distributed evenly,
keep the external air intake grilles at the base of the windscreen, the nozzles, the vents, the air outlets and the air extractor in the boot free from obstructions.► Do not cover the sunshine sensor located on the dashboard; this sensor is used to regulate the automatic air conditioning system.► Operate the air conditioning system for at least 5 to 10 minutes once or twice a month to keep it in perfect working order.► If the system does not produce cold air, switch it off and contact any authorized Toyota retailer or Toyota authorized repairer, or any reliable repairer.When towing the maximum load on a steep gradient in high temperatures, switching off the air conditioning increases the available engine power, enhancing the towing capacity.
WARNI NG
Avoid driving for too long with the ventilation off or with prolonged operation of interior air recirculation. Risk of misting and deterioration of the air quality!
If the interior temperature is very high after the vehicle has stood for a long time in the sunshine, air the passenger compartment for a few moments.Put the air flow control at a setting high enough to quickly change the air in the passenger compartment.
NOTIC E
Condensation created by the air conditioning results in a discharge of water underneath the vehicle. This is perfectly normal.
Page 84 of 320
84
NOTIC E
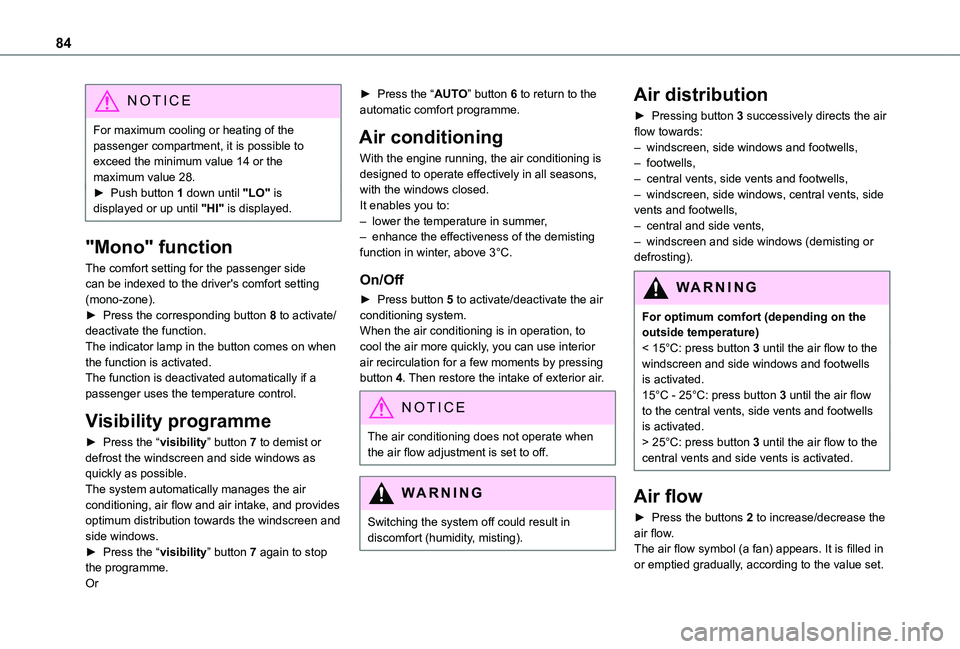
For maximum cooling or heating of the passenger compartment, it is possible to exceed the minimum value 14 or the maximum value 28.► Push button 1 down until "LO" is displayed or up until "HI" is displayed.
"Mono" function
The comfort setting for the passenger side can be indexed to the driver's comfort setting (mono-zone).► Press the corresponding button 8 to activate/deactivate the function.The indicator lamp in the button comes on when the function is activated.The function is deactivated automatically if a passenger uses the temperature control.
Visibility programme
► Press the “visibility” button 7 to demist or
defrost the windscreen and side windows as quickly as possible. The system automatically manages the air conditioning, air flow and air intake, and provides optimum distribution towards the windscreen and side windows.► Press the “visibility” button 7 again to stop the programme.Or
► Press the “AUTO” button 6 to return to the automatic comfort programme.
Air conditioning
With the engine running, the air conditioning is designed to operate effectively in all seasons, with the windows closed.It enables you to:– lower the temperature in summer,– enhance the effectiveness of the demisting function in winter, above 3°C.
On/Off
► Press button 5 to activate/deactivate the air conditioning system.When the air conditioning is in operation, to cool the air more quickly, you can use interior air recirculation for a few moments by pressing button 4. Then restore the intake of exterior air.
NOTIC E
The air conditioning does not operate when the air flow adjustment is set to off.
WARNI NG
Switching the system off could result in discomfort (humidity, misting).
Air distribution
► Pressing button 3 successively directs the air flow towards:– windscreen, side windows and footwells, – footwells,– central vents, side vents and footwells,– windscreen, side windows, central vents, side vents and footwells,– central and side vents, – windscreen and side windows (demisting or defrosting).
WARNI NG
For optimum comfort (depending on the outside temperature)< 15°C: press button 3 until the air flow to the windscreen and side windows and footwells is activated.15°C - 25°C: press button 3 until the air flow to the central vents, side vents and footwells is activated.> 25°C: press button 3 until the air flow to the
central vents and side vents is activated.
Air flow
► Press the buttons 2 to increase/decrease the air flow.The air flow symbol (a fan) appears. It is filled in or emptied gradually, according to the value set.
Page 85 of 320
85
Ease of use and comfort
3
Recirculation of interior air
The intake of exterior air helps avoid and eliminate misting of the windscreen and side windows.Recirculating the interior air isolates the passenger compartment from polluted air when passing through high-traffic areas or tunnels.
NOTIC E
When required, this function also allows faster heating or cooling of the air in the passenger compartment.
► Press button 4 to recirculate the interior air or allow the intake of exterior air.
WARNI NG
Avoid prolonged use of interior air recirculation in order to guarantee a good renewal of the air and reduce the risk of fogging (especially when there are several people on board, when the atmosphere is cold/humid...).
Front demisting
- defrosting
Heating
For optimal demisting/defrosting in winter, make the following settings:
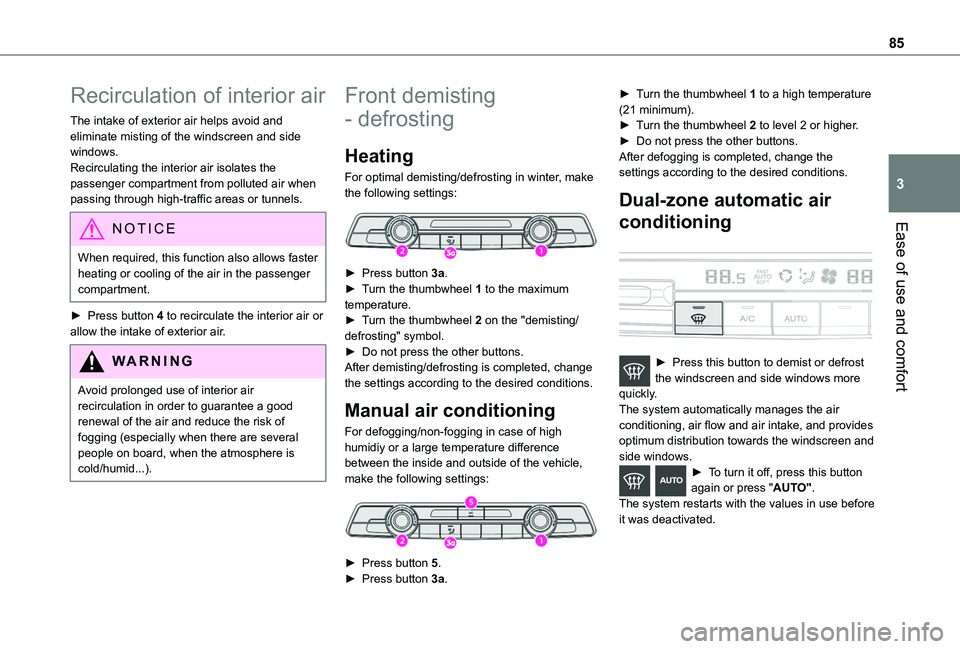
► Press button 3a.► Turn the thumbwheel 1 to the maximum temperature.► Turn the thumbwheel 2 on the "demisting/defrosting" symbol.► Do not press the other buttons.After demisting/defrosting is completed, change the settings according to the desired conditions.
Manual air conditioning
For defogging/non-fogging in case of high humidiy or a large temperature difference between the inside and outside of the vehicle, make the following settings:
► Press button 5.► Press button 3a.
► Turn the thumbwheel 1 to a high temperature (21 minimum).► Turn the thumbwheel 2 to level 2 or higher.► Do not press the other buttons.After defogging is completed, change the settings according to the desired conditions.
Dual-zone automatic air
conditioning
► Press this button to demist or defrost the windscreen and side windows more quickly.The system automatically manages the air conditioning, air flow and air intake, and provides optimum distribution towards the windscreen and side windows.► To turn it off, press this button again or press "AUTO".The system restarts with the values in use before it was deactivated.
Page 98 of 320
98
Without AUTO wiping
With AUTO wiping
Windscreen wipers
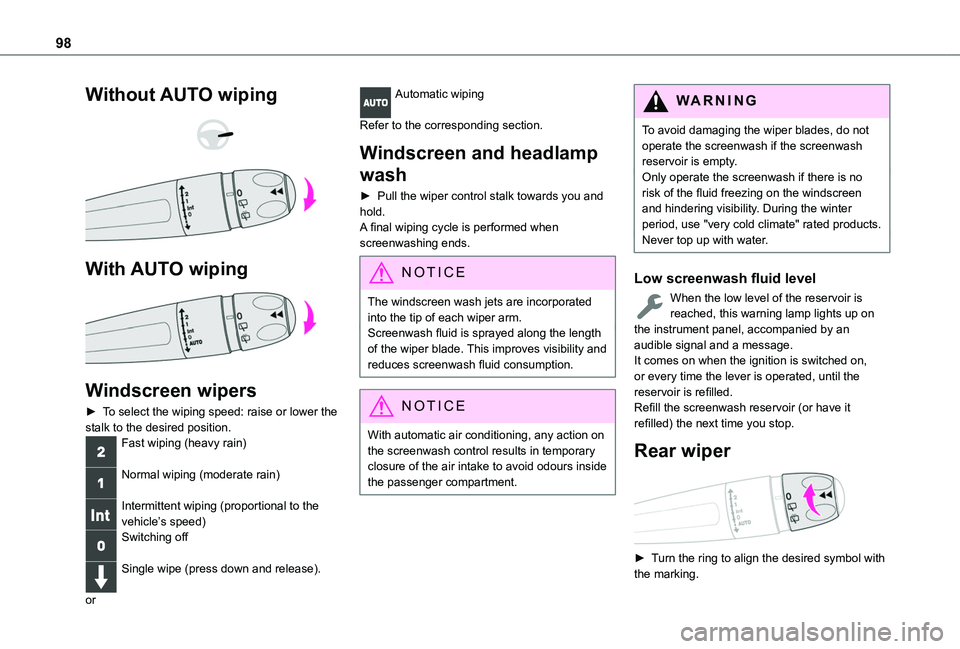
► To select the wiping speed: raise or lower the stalk to the desired position.Fast wiping (heavy rain)
Normal wiping (moderate rain)
Intermittent wiping (proportional to the vehicle’s speed)Switching off
Single wipe (press down and release).
or
Automatic wiping
Refer to the corresponding section.
Windscreen and headlamp
wash
► Pull the wiper control stalk towards you and hold.A final wiping cycle is performed when screenwashing ends.
NOTIC E
The windscreen wash jets are incorporated into the tip of each wiper arm.Screenwash fluid is sprayed along the length of the wiper blade. This improves visibility and reduces screenwash fluid consumption.
NOTIC E
With automatic air conditioning, any action on the screenwash control results in temporary closure of the air intake to avoid odours inside the passenger compartment.
WARNI NG
To avoid damaging the wiper blades, do not operate the screenwash if the screenwash reservoir is empty.Only operate the screenwash if there is no risk of the fluid freezing on the windscreen and hindering visibility. During the winter period, use "very cold climate" rated products.Never top up with water.
Low screenwash fluid level
When the low level of the reservoir is reached, this warning lamp lights up on the instrument panel, accompanied by an audible signal and a message.It comes on when the ignition is switched on, or every time the lever is operated, until the reservoir is refilled.Refill the screenwash reservoir (or have it refilled) the next time you stop.
Rear wiper
► Turn the ring to align the desired symbol with the marking.
Page 99 of 320
99
Lighting and visibility
4
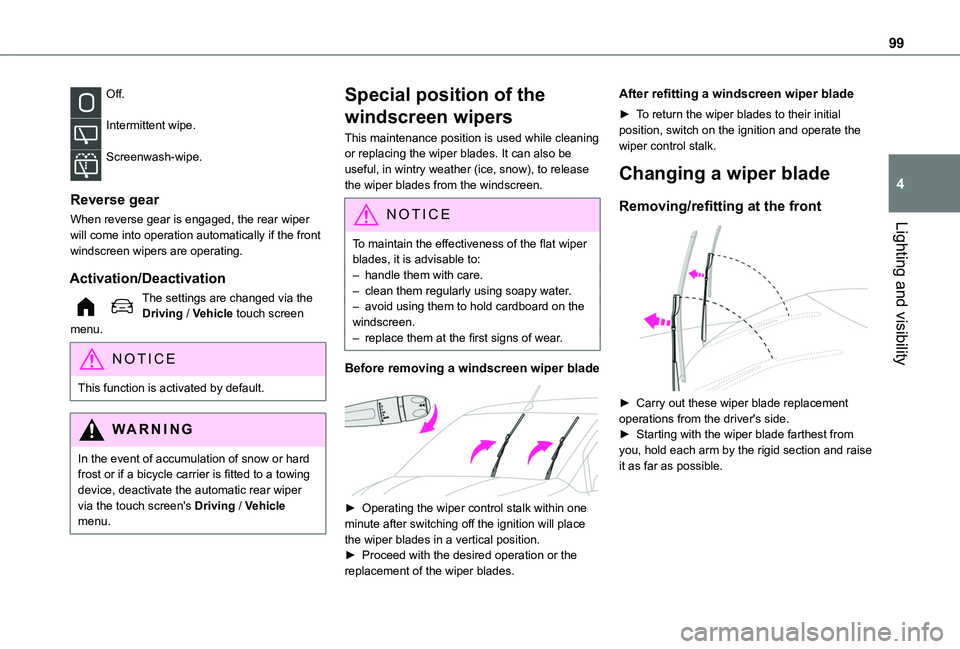
Off.
Intermittent wipe.
Screenwash-wipe.
Reverse gear
When reverse gear is engaged, the rear wiper will come into operation automatically if the front windscreen wipers are operating.
Activation/Deactivation
The settings are changed via the Driving / Vehicle touch screen menu.
NOTIC E
This function is activated by default.
WARNI NG
In the event of accumulation of snow or hard frost or if a bicycle carrier is fitted to a towing device, deactivate the automatic rear wiper via the touch screen's Driving / Vehicle menu.
Special position of the
windscreen wipers
This maintenance position is used while cleaning or replacing the wiper blades. It can also be useful, in wintry weather (ice, snow), to release the wiper blades from the windscreen.
NOTIC E
To maintain the effectiveness of the flat wiper blades, it is advisable to:– handle them with care.– clean them regularly using soapy water.– avoid using them to hold cardboard on the windscreen.– replace them at the first signs of wear.
Before removing a windscreen wiper blade
► Operating the wiper control stalk within one minute after switching off the ignition will place the wiper blades in a vertical position.► Proceed with the desired operation or the replacement of the wiper blades.
After refitting a windscreen wiper blade
► To return the wiper blades to their initial position, switch on the ignition and operate the wiper control stalk.
Changing a wiper blade
Removing/refitting at the front
► Carry out these wiper blade replacement operations from the driver's side.► Starting with the wiper blade farthest from
you, hold each arm by the rigid section and raise it as far as possible.
Page 106 of 320
106
Deactivation / Reactivation
In exceptional conditions (moving a vehicle that is bogged down in mud, stuck in snow, on loose
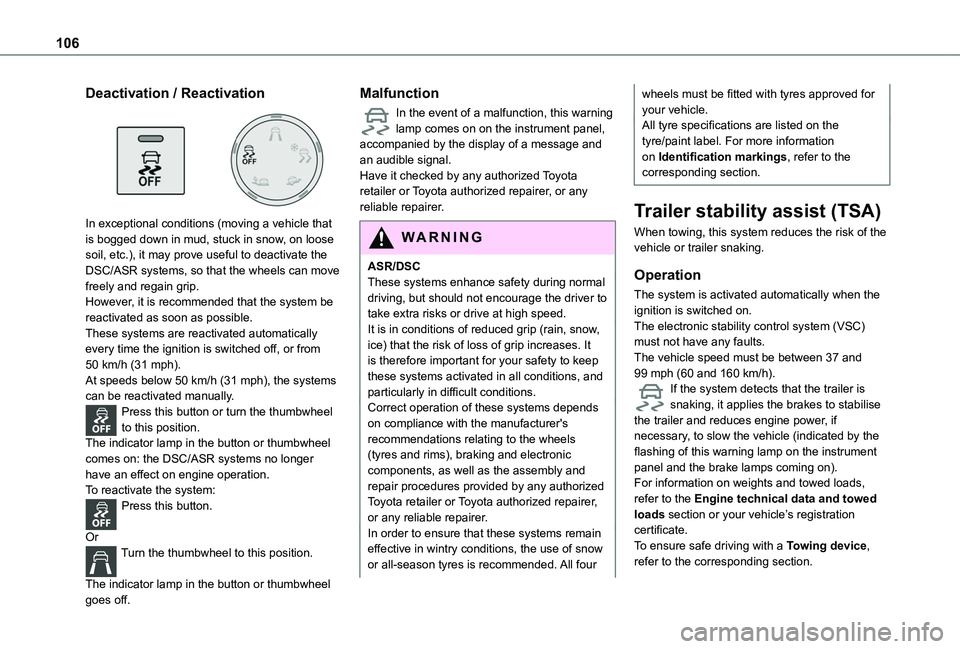
soil, etc.), it may prove useful to deactivate the DSC/ASR systems, so that the wheels can move freely and regain grip.However, it is recommended that the system be reactivated as soon as possible.These systems are reactivated automatically every time the ignition is switched off, or from 50 km/h (31 mph).At speeds below 50 km/h (31 mph), the systems can be reactivated manually.Press this button or turn the thumbwheel to this position.The indicator lamp in the button or thumbwheel comes on: the DSC/ASR systems no longer have an effect on engine operation.To reactivate the system:Press this button.
OrTurn the thumbwheel to this position.
The indicator lamp in the button or thumbwheel goes off.
Malfunction
In the event of a malfunction, this warning lamp comes on on the instrument panel, accompanied by the display of a message and an audible signal.Have it checked by any authorized Toyota retailer or Toyota authorized repairer, or any reliable repairer.
WARNI NG
ASR/DSCThese systems enhance safety during normal driving, but should not encourage the driver to take extra risks or drive at high speed.It is in conditions of reduced grip (rain, snow, ice) that the risk of loss of grip increases. It is therefore important for your safety to keep these systems activated in all conditions, and particularly in difficult conditions.Correct operation of these systems depends on compliance with the manufacturer's recommendations relating to the wheels
(tyres and rims), braking and electronic components, as well as the assembly and repair procedures provided by any authorized Toyota retailer or Toyota authorized repairer, or any reliable repairer.In order to ensure that these systems remain effective in wintry conditions, the use of snow or all-season tyres is recommended. All four
wheels must be fitted with tyres approved for your vehicle.All tyre specifications are listed on the tyre/paint label. For more information on Identification markings, refer to the corresponding section.
Trailer stability assist (TSA)
When towing, this system reduces the risk of the vehicle or trailer snaking.
Operation
The system is activated automatically when the ignition is switched on.The electronic stability control system (VSC) must not have any faults.The vehicle speed must be between 37 and 99 mph (60 and 160 km/h).If the system detects that the trailer is snaking, it applies the brakes to stabilise the trailer and reduces engine power, if necessary, to slow the vehicle (indicated by the
flashing of this warning lamp on the instrument panel and the brake lamps coming on).For information on weights and towed loads, refer to the Engine technical data and towed loads section or your vehicle’s registration certificate.To ensure safe driving with a Towing device, refer to the corresponding section.
Page 107 of 320
107
Safety
5
Malfunction
If a fault occurs, this warning lamp lights up on the instrument panel, accompanied by a message and an audible signal.To continue towing a trailer, reduce speed and drive carefully!Have it checked by any authorized Toyota retailer or Toyota authorized repairer, or any reliable repairer.
WARNI NG
The trailer stability control system provides an extra safety feature under normal driving conditions, when following the recommendations for use of trailers and current legislation in force in your country. It must not encourage the driver to take extra risks, such as using a trailer in unsuitable conditions of operation (e.g. excessive load, exceeded nose weight, worn or under-inflated tyres, faulty braking system) or driving at excessive speed.In certain cases, the system may not detect trailer snaking, particularly with a light trailer.When driving on slippery or poor surfaces, the system may not be able to prevent sudden trailer snaking.
Toyota Traction Select
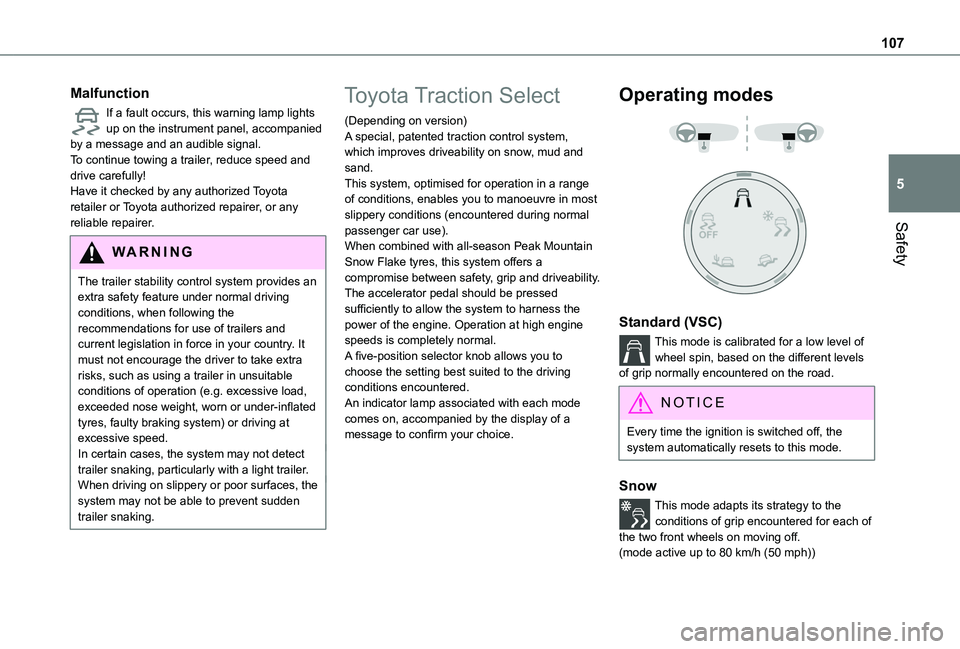
(Depending on version)A special, patented traction control system, which improves driveability on snow, mud and sand.This system, optimised for operation in a range of conditions, enables you to manoeuvre in most slippery conditions (encountered during normal passenger car use).When combined with all-season Peak Mountain Snow Flake tyres, this system offers a compromise between safety, grip and driveability.The accelerator pedal should be pressed sufficiently to allow the system to harness the power of the engine. Operation at high engine speeds is completely normal.A five-position selector knob allows you to choose the setting best suited to the driving conditions encountered.An indicator lamp associated with each mode comes on, accompanied by the display of a message to confirm your choice.
Operating modes
Standard (VSC)
This mode is calibrated for a low level of wheel spin, based on the different levels of grip normally encountered on the road.
NOTIC E
Every time the ignition is switched off, the system automatically resets to this mode.
Snow
This mode adapts its strategy to the conditions of grip encountered for each of the two front wheels on moving off.
(mode active up to 80 km/h (50 mph))