2022 TOYOTA PROACE CITY turn signal
[x] Cancel search: turn signalPage 94 of 320

94
► Within one minute after switching off the ignition, operate the lighting control lever upwards or downwards, depending on the side of the traffic (for example: when parking on the right; push the lighting control lever down to light up on the left).This is confirmed by an audible signal and illumination of the corresponding direction indicator lamp in the instrument panel.► To switch off the parking lamps, return the lighting control lever to the central position.
Automatic headlamp
illumination
When a low level of ambient light is detected by a sunshine sensor, the number plate lamps, sidelamps and dipped beam headlamps are switched on automatically, without any action on the part of the driver. They can also come on if rain is detected, at the same time as the automatic rain sensitive wipers.As soon as the brightness returns to a sufficient
level or after the windscreen wipers are switched off, the lamps are switched off automatically.
► Turn the ring to the "AUTO" position. When the function is activated, a message is also displayed.
► Turn the ring to another position. An onscreen message is displayed to confirm that the function has been deactivated.
Malfunction
In the event of a malfunction of the rain/sunshine sensor, the vehicle’s lamps come on and this warning lamp is displayed on the instrument panel, accompanied by an audible signal and/or the display of a message.Have it checked by any authorized Toyota retailer or Toyota authorized repairer, or any reliable repairer.
WARNI NG
Do not cover the rain/sunshine sensor located on the dashboard or at the top centre of the windscreen behind the interior rear view mirror (depending on equipment); the associated functions would no longer be controlled.
NOTIC E
In fog or snow, the rain/sunshine sensor may detect sufficient light. For this reason, the lighting will not come on automatically.
NOTIC E
The inner surface of the windscreen may become misted up and affect the proper operation of the rain/sunshine sensor.In humid and cold weather, demist the windscreen regularly.
Daytime running lamps /
Sidelamps
The front lamps light up automatically when the engine starts.They provide the following functions:– Daytime running lamps (lighting control lever in the "AUTO" position with adequate light level).– Sidelamps (lighting control lever in the "AUTO" position with low light levels or "Sidelamps only” or "Dipped/main beam headlamps").
Page 98 of 320
98
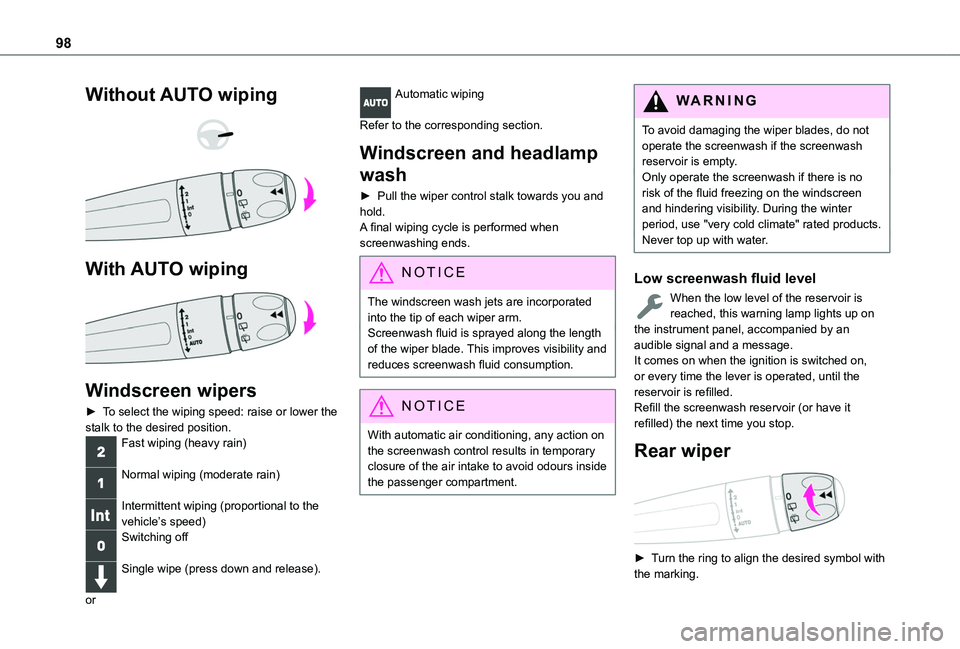
Without AUTO wiping
With AUTO wiping
Windscreen wipers
► To select the wiping speed: raise or lower the stalk to the desired position.Fast wiping (heavy rain)
Normal wiping (moderate rain)
Intermittent wiping (proportional to the vehicle’s speed)Switching off
Single wipe (press down and release).
or
Automatic wiping
Refer to the corresponding section.
Windscreen and headlamp
wash
► Pull the wiper control stalk towards you and hold.A final wiping cycle is performed when screenwashing ends.
NOTIC E
The windscreen wash jets are incorporated into the tip of each wiper arm.Screenwash fluid is sprayed along the length of the wiper blade. This improves visibility and reduces screenwash fluid consumption.
NOTIC E
With automatic air conditioning, any action on the screenwash control results in temporary closure of the air intake to avoid odours inside the passenger compartment.
WARNI NG
To avoid damaging the wiper blades, do not operate the screenwash if the screenwash reservoir is empty.Only operate the screenwash if there is no risk of the fluid freezing on the windscreen and hindering visibility. During the winter period, use "very cold climate" rated products.Never top up with water.
Low screenwash fluid level
When the low level of the reservoir is reached, this warning lamp lights up on the instrument panel, accompanied by an audible signal and a message.It comes on when the ignition is switched on, or every time the lever is operated, until the reservoir is refilled.Refill the screenwash reservoir (or have it refilled) the next time you stop.
Rear wiper
► Turn the ring to align the desired symbol with the marking.
Page 105 of 320
105
Safety
5
Vehicle stability control
(VSC)
The electronic stability control programme includes the following systems:– Anti-lock braking system (ABS) and Electronic brake force distribution (EBFD).– Emergency braking assistance (EBA).– Anti-slip regulation (ASR).– Dynamic stability control (DSC).– Trailer stability assist (TSA).
Anti-lock braking system
(ABS)/Electronic brake force
distribution (EBFD)
These systems enhance the vehicle’s stability and handling during braking, and enable greater control while cornering, particularly on poor or slippery road surfaces.ABS prevents wheel locking in the event of emergency braking.Electronic brake force distribution (EBFD)
manages overall braking pressure on each individual wheel.► When braking in an emergency, depress the pedal very firmly and maintain this pressure.
NOTIC E
Normal operation of the ABS may make itself felt by slight vibrations of the brake pedal.
The fixed illumination of this warning lamp signals that there is a fault with the ABS.The vehicle retains conventional braking. Drive carefully at a moderate speed.Have it checked by any authorized Toyota retailer or Toyota authorized repairer, or any reliable repairer.This warning lamp, when lit together with the STOP and ABS warning lamps, accompanied by a message and an audible signal, indicates an EBFD malfunction.You must stop the vehicle.Stop as soon as it is safe to do so and switch off the ignition.Contact any authorized Toyota retailer or Toyota authorized repairer, or any reliable repairer.
WARNI NG
When changing wheels (tyres and rims), ensure that these are approved for your vehicle.
WARNI NG
After an impactHave it checked by any authorized Toyota retailer or Toyota authorized repairer, or any reliable repairer.
Emergency braking
assistance (EBA)
This system reduces the emergency stopping distance, by optimising the braking pressure.It is triggered in relation to the speed at which the brake pedal is depressed. The effect of this is a reduction in the resistance of the pedal and an increase in breaking efficiency.
Anti-slip regulation (ASR)
/ Dynamic stability control
(DSC)
Anti-slip regulation (or traction control) optimises traction by using engine braking and by applying the brakes on the driving wheels to avoid one or more wheels spinning. It also enhances the vehicle's directional stability.If there is a difference between the vehicle’s trajectory and the path desired by the driver, the dynamic stability control system automatically uses engine braking and the brakes on one or
more wheels to return the vehicle to the desired path, within the limits of the laws of physics.These systems are activated automatically every time the vehicle is started.These systems are activated in the event of a problem with grip or trajectory (confirmed by this warning lamp flashing on the instrument panel).
Page 106 of 320
106
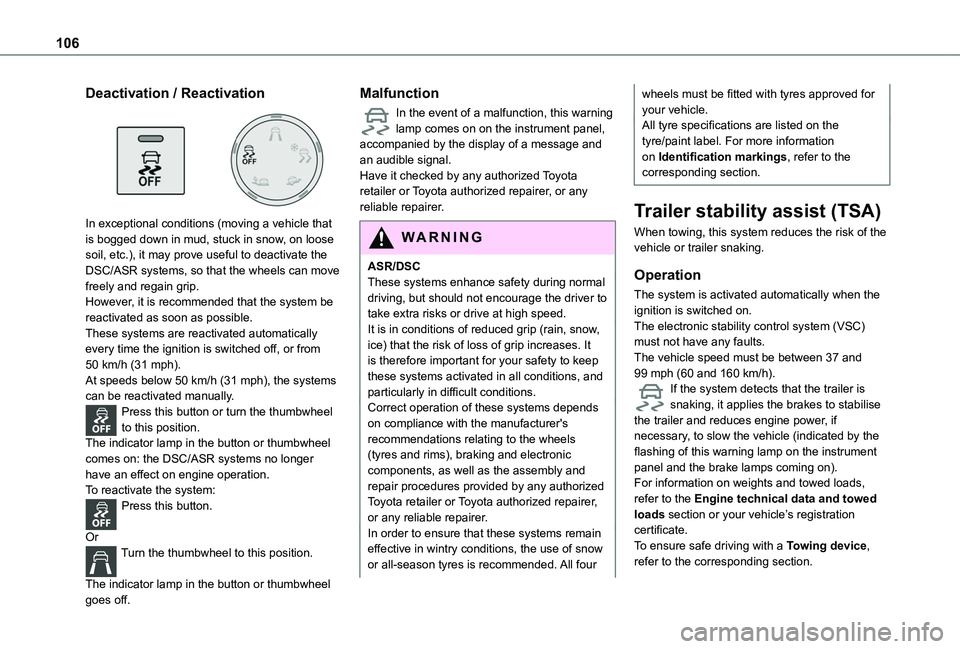
Deactivation / Reactivation
In exceptional conditions (moving a vehicle that is bogged down in mud, stuck in snow, on loose
soil, etc.), it may prove useful to deactivate the DSC/ASR systems, so that the wheels can move freely and regain grip.However, it is recommended that the system be reactivated as soon as possible.These systems are reactivated automatically every time the ignition is switched off, or from 50 km/h (31 mph).At speeds below 50 km/h (31 mph), the systems can be reactivated manually.Press this button or turn the thumbwheel to this position.The indicator lamp in the button or thumbwheel comes on: the DSC/ASR systems no longer have an effect on engine operation.To reactivate the system:Press this button.
OrTurn the thumbwheel to this position.
The indicator lamp in the button or thumbwheel goes off.
Malfunction
In the event of a malfunction, this warning lamp comes on on the instrument panel, accompanied by the display of a message and an audible signal.Have it checked by any authorized Toyota retailer or Toyota authorized repairer, or any reliable repairer.
WARNI NG
ASR/DSCThese systems enhance safety during normal driving, but should not encourage the driver to take extra risks or drive at high speed.It is in conditions of reduced grip (rain, snow, ice) that the risk of loss of grip increases. It is therefore important for your safety to keep these systems activated in all conditions, and particularly in difficult conditions.Correct operation of these systems depends on compliance with the manufacturer's recommendations relating to the wheels
(tyres and rims), braking and electronic components, as well as the assembly and repair procedures provided by any authorized Toyota retailer or Toyota authorized repairer, or any reliable repairer.In order to ensure that these systems remain effective in wintry conditions, the use of snow or all-season tyres is recommended. All four
wheels must be fitted with tyres approved for your vehicle.All tyre specifications are listed on the tyre/paint label. For more information on Identification markings, refer to the corresponding section.
Trailer stability assist (TSA)
When towing, this system reduces the risk of the vehicle or trailer snaking.
Operation
The system is activated automatically when the ignition is switched on.The electronic stability control system (VSC) must not have any faults.The vehicle speed must be between 37 and 99 mph (60 and 160 km/h).If the system detects that the trailer is snaking, it applies the brakes to stabilise the trailer and reduces engine power, if necessary, to slow the vehicle (indicated by the
flashing of this warning lamp on the instrument panel and the brake lamps coming on).For information on weights and towed loads, refer to the Engine technical data and towed loads section or your vehicle’s registration certificate.To ensure safe driving with a Towing device, refer to the corresponding section.
Page 120 of 320
120
WARNI NG
Vehicles not equipped with a deactivation/reactivation controlInstalling a "rearward facing" child seat on the front passenger seat or bench seat is strictly prohibited - risk of death or serious injury in the event of airbag deployment!
WARNI NG
With the Extenso cabin or the Crew cab, deactivate the front passenger airbag when transporting long objects.
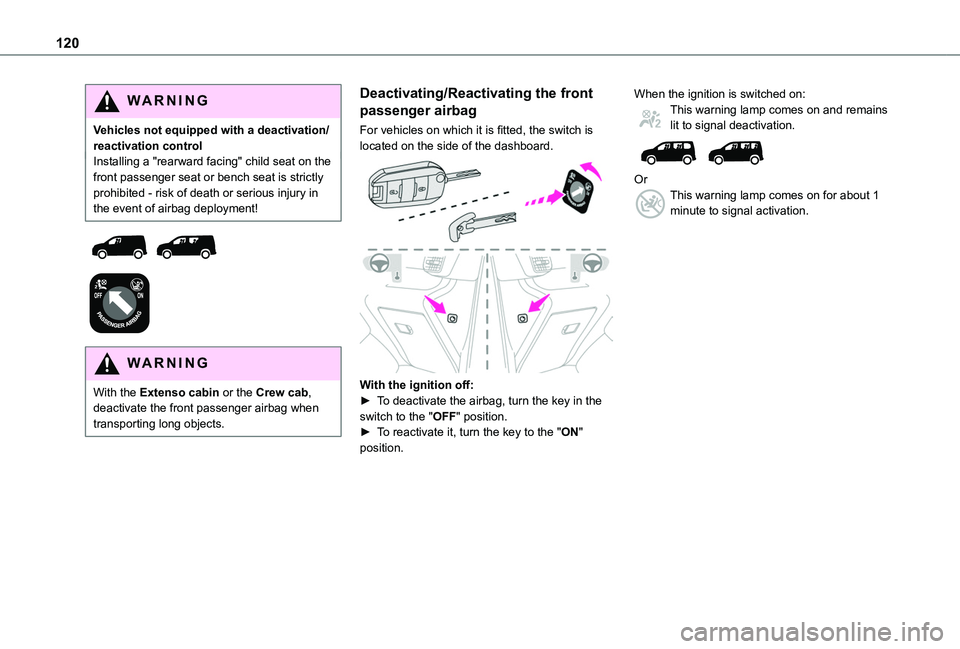
Deactivating/Reactivating the front
passenger airbag
For vehicles on which it is fitted, the switch is located on the side of the dashboard.
With the ignition off:► To deactivate the airbag, turn the key in the switch to the "OFF" position. ► To reactivate it, turn the key to the "ON" position.
When the ignition is switched on:This warning lamp comes on and remains lit to signal deactivation.
OrThis warning lamp comes on for about 1 minute to signal activation.
Page 131 of 320
131
Driving
6
When driving
Cooling
Towing a trailer uphill causes the coolant temperature to increase. The maximum towable load depends on the gradient and the exterior temperature. The fan’s cooling capacity does not increase with engine speed.► Reduce speed and lower the engine speed to limit the amount of heating produced.► Pay constant attention to the coolant temperatureIf this warning lamp and the STOP warning lamp come on, stop the vehicle and switch off the engine as soon as possible.
Brakes
Using the engine brake is recommended to limit the overheating of the brakes. Braking distances are increased when towing a trailer.
Side wind
Bear in mind that the vehicle will be more
susceptible to wind when towing.
Anti-theft protection
Electronic immobiliser
The remote control contains an electronic chip which has a special code. When the ignition is switched on, this code must be recognised in order for starting to be possible.A few seconds after switching off the ignition, this system locks the engine control system, therefore preventing the engine from being started in the event of a break-in.In the event of a fault, you are informed by illumination of this warning lamp, an audible signal and a message on the screen.The vehicle will not start; contact any authorized Toyota retailer or Toyota authorized repairer, or any reliable repairer as soon as possible.
Starting/switching off the
engine
Starting
The parking brake must be applied.
► With a manual gearbox, place the gear lever in neutral, fully depress the clutch pedal and keep the pedal down until the engine starts.► With an automatic gearbox, place the selector in position P then depress the brake pedal.
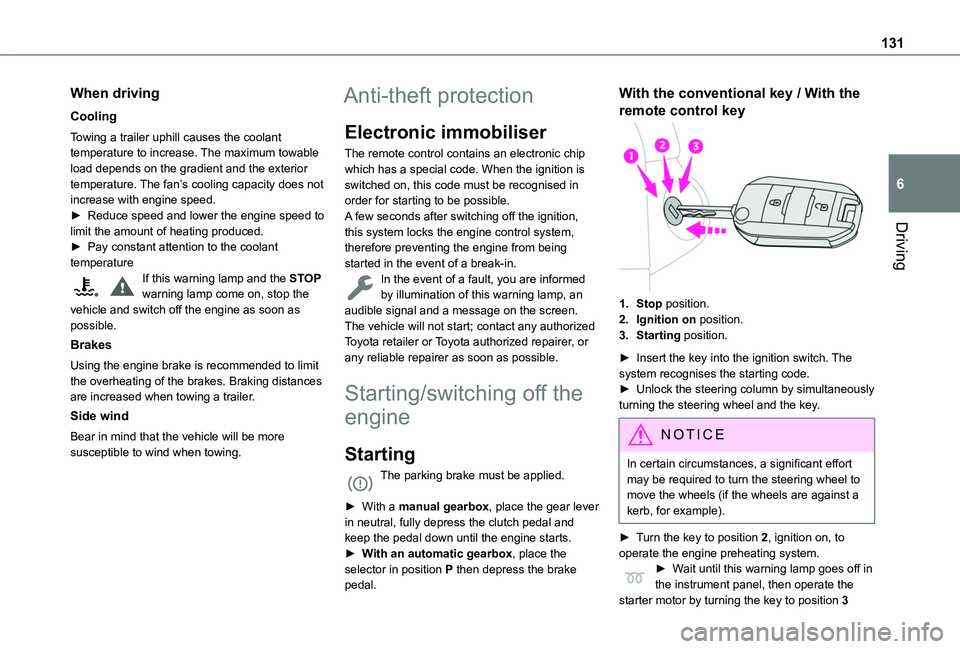
With the conventional key / With the
remote control key
1.Stop position.
2.Ignition on position.
3.Starting position.
► Insert the key into the ignition switch. The system recognises the starting code.► Unlock the steering column by simultaneously turning the steering wheel and the key.
NOTIC E
In certain circumstances, a significant effort may be required to turn the steering wheel to move the wheels (if the wheels are against a kerb, for example).
► Turn the key to position 2, ignition on, to operate the engine preheating system.► Wait until this warning lamp goes off in the instrument panel, then operate the
starter motor by turning the key to position 3
Page 134 of 320
134
Key left in the ignition
NOTIC E
When opening the driver's door, an alert message is displayed, accompanied by an audible signal, to remind you that the key is still in the ignition switch at position 1 (Stop).If the key has been left in the ignition switch at position 2 (Ignition on), the ignition will be
switched off automatically after one hour.To switch the ignition back on, turn the key to position 1 (Stop), then back to position 2 (Ignition on).
With Keyless Entry and Starting
► With the remote control in the recognition zone, press the "START/STOP" button.With a manual gearbox, the engine switches off and the steering column locks.With the EAT8 automatic gearbox, the engine switches off.
NOTIC E
If the vehicle is not immobilised, the engine will not stop.
WARNI NG
To avoid any risk of jamming the pedals:– only use mats which are suited to the fixings already present in the vehicle; these fixings must be used,– never place one mat on top of another.The use of mats not approved by TOYOTA may interfere with access to the pedals and hinder the operation of the cruise control / speed limiter.The mats approved by TOYOTA have two fixings located below the seat.
Starting/Switching off the
electric motor
Starting
The drive selector must be in mode P.► If using a conventional or remote control key, depress the brake pedal and turn the key to position 3 until the motor starts, without
depressing the accelerator. As soon as the motor starts, release the key so it returns to position 2.► If using Keyless Entry and Starting, depress the brake pedal and briefly press the "START/STOP" button.► Keep your foot on the brake pedal until the READY indicator lamp comes on and an audible signal is emitted, indicating that the vehicle is ready to drive.
► With your foot on the brake, select mode D or R.► Release the brake pedal, then accelerate.On starting, the instrument panel lights up and the power indicator cursor moves to the "neutral" position. The steering column automatically unlocks (you may hear a sound and feel the steering wheel move).
Switching off
► If using a conventional or remote control key, turn the key fully to position 1 (Stop).► If using Keyless Entry and Starting, press the "START/STOP" button.Before exiting the vehicle, check that:– The drive selector is in mode P.– The READY indicator lamp is off.
NOTIC E
The drive selector moves automatically to mode P when the motor is switched off or when the driver's door is opened.
NOTIC E
If the driver's door is opened while the required conditions for stopping are not satisfied, an audible signal is emitted,
accompanied by the display of a warning message.
Page 136 of 320
136
Manual parking brake
Application
► With your foot on the brake pedal, pull the parking brake lever up to immobilise your vehicle.
Release on level ground
► With your foot on the brake pedal, pull the parking brake lever up gently, press the release button, then lower the lever fully.When the vehicle is being driven, this warning lamp coming on, accompanied by an audible signal and a message, indicates that the parking brake is still applied or has not been fully released.
WARNI NG
When parking on a slope or on a steep slope with a loaded vehicle, turn the wheels against the kerb then apply the parking brake.
NOTIC E
Pressing the brake pedal facilitates the application and release of the manual parking brake.
WARNI NG
With a manual gearbox, engage a gear and then switch off the ignition.
WARNI NG
With an automatic gearbox, place the gear selector in position P, then switch off the ignition.
Electric parking brake
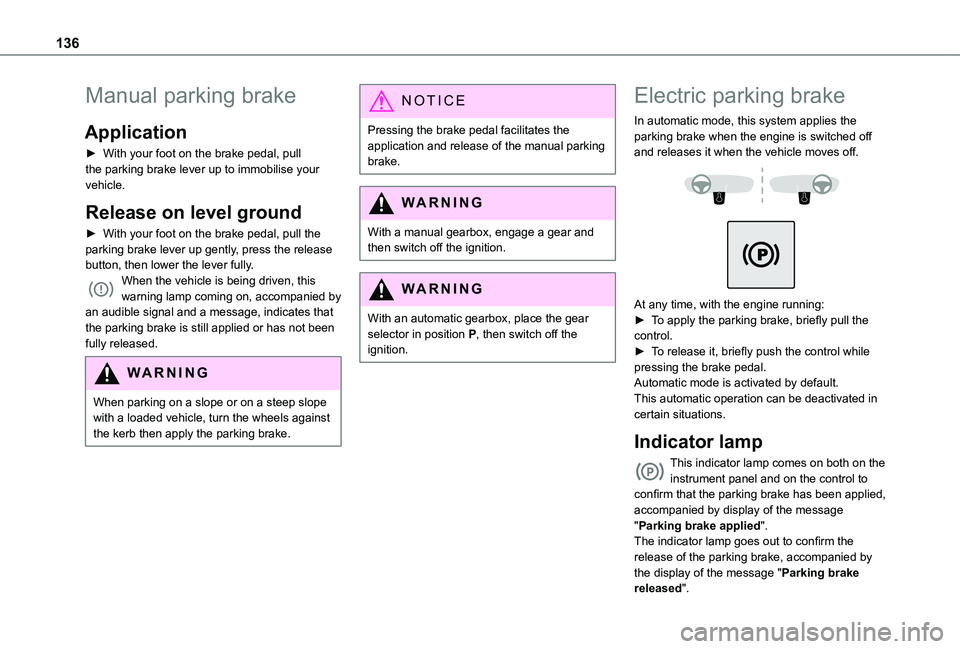
In automatic mode, this system applies the parking brake when the engine is switched off and releases it when the vehicle moves off.
At any time, with the engine running:► To apply the parking brake, briefly pull the control.► To release it, briefly push the control while pressing the brake pedal.Automatic mode is activated by default.This automatic operation can be deactivated in certain situations.
Indicator lamp
This indicator lamp comes on both on the instrument panel and on the control to confirm that the parking brake has been applied, accompanied by display of the message "Parking brake applied".The indicator lamp goes out to confirm the release of the parking brake, accompanied by the display of the message "Parking brake released".