2022 TOYOTA GR SUPRA tow
[x] Cancel search: towPage 279 of 356
2795-1. MOBILITY
5
MOBILITY
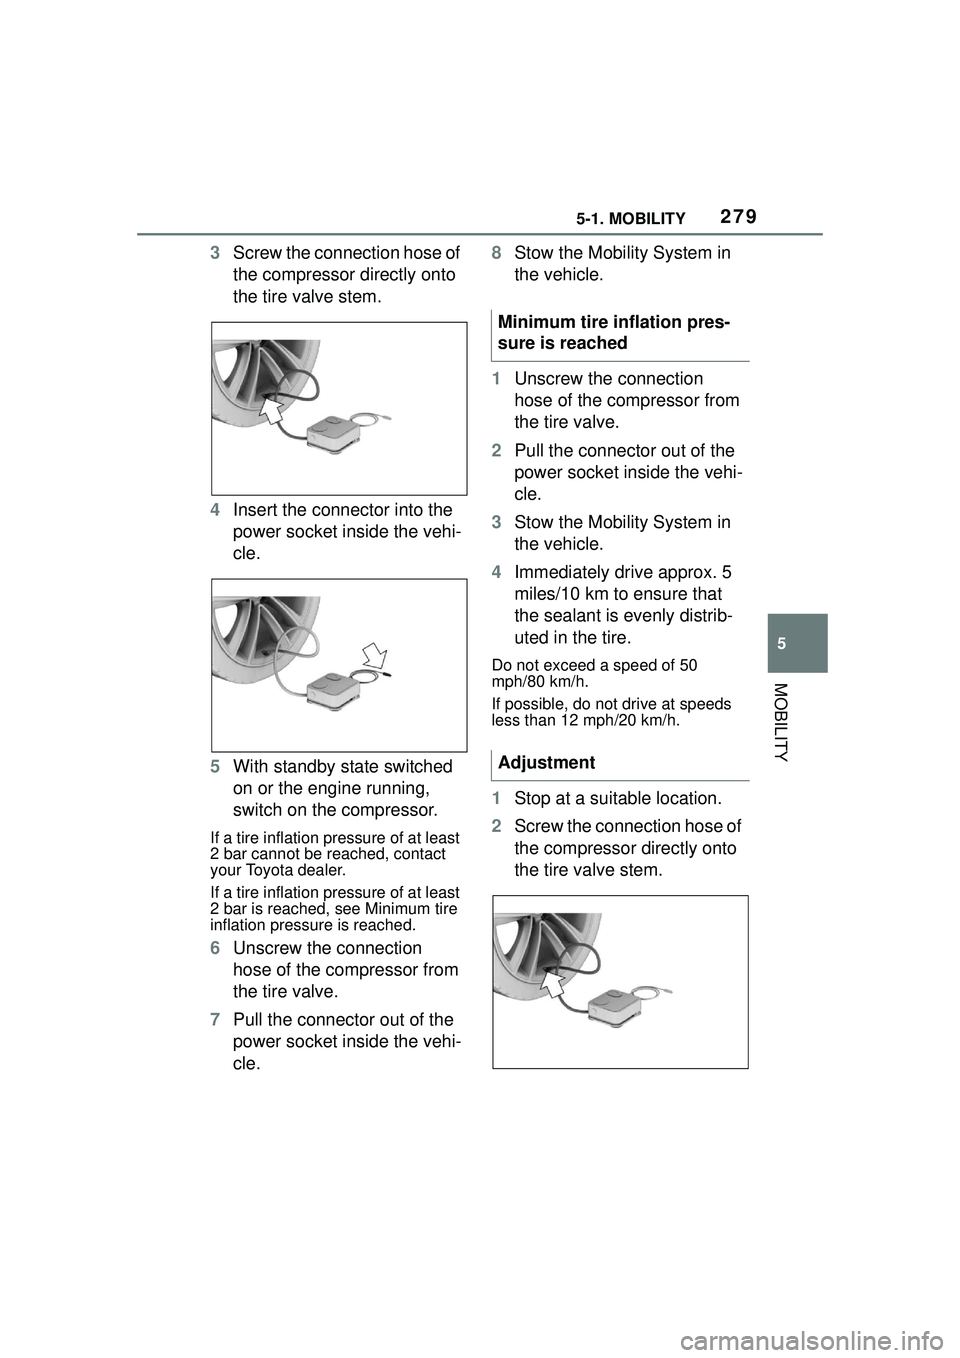
3Screw the connection hose of
the compressor directly onto
the tire valve stem.
4 Insert the connector into the
power socket inside the vehi-
cle.
5 With standby state switched
on or the engine running,
switch on the compressor.
If a tire inflation pressure of at least
2 bar cannot be reached, contact
your Toyota dealer.
If a tire inflation pressure of at least
2 bar is reached, see Minimum tire
inflation pressure is reached.
6Unscrew the connection
hose of the compressor from
the tire valve.
7 Pull the connector out of the
power socket inside the vehi-
cle. 8
Stow the Mobility System in
the vehicle.
1 Unscrew the connection
hose of the compressor from
the tire valve.
2 Pull the connector out of the
power socket inside the vehi-
cle.
3 Stow the Mobility System in
the vehicle.
4 Immediately drive approx. 5
miles/10 km to ensure that
the sealant is evenly distrib-
uted in the tire.
Do not exceed a speed of 50
mph/80 km/h.
If possible, do not drive at speeds
less than 12 mph/20 km/h.
1Stop at a suitable location.
2 Screw the connection hose of
the compressor directly onto
the tire valve stem.
Minimum tire inflation pres-
sure is reached
Adjustment
Page 280 of 356

2805-1. MOBILITY
3Insert the connector into the
power socket inside the vehi-
cle.
4 Correct the tire inflation pres-
sure to at least 2.0 bar.
• Increase tire inflation pres- sure: with standby state
switched on or the engine
running, switch on the com-
pressor.
• Reduce tire inflation pressure: press the button on the com-
pressor.
5 Unscrew the connection
hose of the compressor from
the tire valve.
6 Pull the connector out of the
power socket inside the vehi-
cle.
7 Stow the Mobility System in
the vehicle.
Do not exceed the maximum
permissible speed of 50 mph/80
km/h
Reset the Tire Pressure Monitor
TPM, refer to page 280.
Replace the nonworking tire and the sealant container of the
Mobility System promptly.
Tire chains cannot be mounted.
Snow tires should be used
instead.
The system monitors tire infla-
tion pressure in the four
mounted tires. The system
warns you if there is a loss of
pressure in one or more tires.
Sensors in the tire valves mea-
sure the tire inflation pressure
and tire temperature.
The system detects the
mounted tires automatically. The
system displays the specified
nominal pressure values on the
Control Display and compares
these values to the actual tire
Continuing the trip
Snow chains
NOTICE
■Driving with tire chains
Do not fit tire chains. Tire chains
may damage the vehicle body
and suspension, and adversely
affect driving performance.
Selecting tire chains
Tire Pressure Monitor
TPM
Concept
General information
Page 289 of 356
2895-1. MOBILITY
5
MOBILITY
or wheels on the vehicle that
prevent the TPMS from func-
tioning properly. Always
check the TPMS malfunction
telltale after replacing one or
more tires or wheels on your
vehicle to ensure that the
replacement or alternate tires
and wheels allow the TPMS
to continue to function prop-
erly.
If a tire is punctured and loses
pressure, it is not necessary to
replace the tire immediately if a
tire repair kit (Mobility System) is
used.
If needed, the tools for changing
wheels are available as acces-
sories from your Toyota dealer.
*: if equipped
The wheel lug bolts have a spe-
cial coding. The lug bolts can
only be released with the
adapter which matches the cod-
ing.
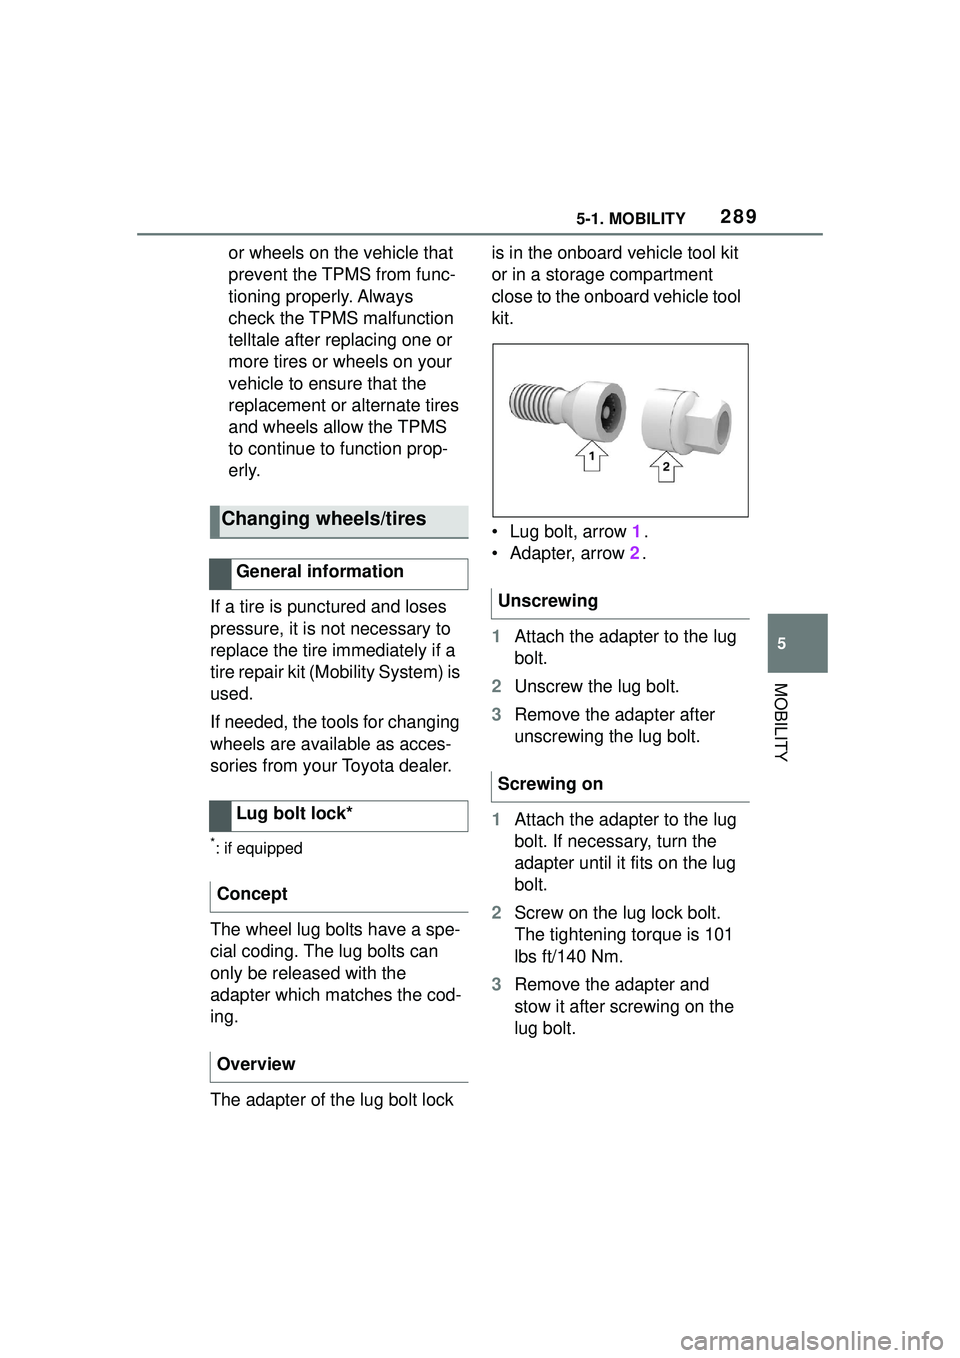
The adapter of the lug bolt lock is in the onboard vehicle tool kit
or in a storage compartment
close to the onboard vehicle tool
kit.
• Lug bolt, arrow
1.
• Adapter, arrow 2.
1 Attach the adapter to the lug
bolt.
2 Unscrew the lug bolt.
3 Remove the adapter after
unscrewing the lug bolt.
1 Attach the adapter to the lug
bolt. If necessary, turn the
adapter until it fits on the lug
bolt.
2 Screw on the lug lock bolt.
The tightening torque is 101
lbs ft/140 Nm.
3 Remove the adapter and
stow it after screwing on the
lug bolt.
Changing wheels/tires
General information
Lug bolt lock*
Concept
Overview
Unscrewing
Screwing on
Page 319 of 356
3195-1. MOBILITY
5
MOBILITY
order to allow the discharged bat-
tery to recharge.
3Let both engines run for sev-
eral minutes.
4 Disconnect the jumper
cables in the reverse order.
Check the battery and recharge,
if needed.
The vehicle is not permitted to
be towed. To remove a broken-down vehi-
cle from the danger area, it can
be pushed for a short distance.
For rolling or pushing the vehi-
cle, refer to page 128.
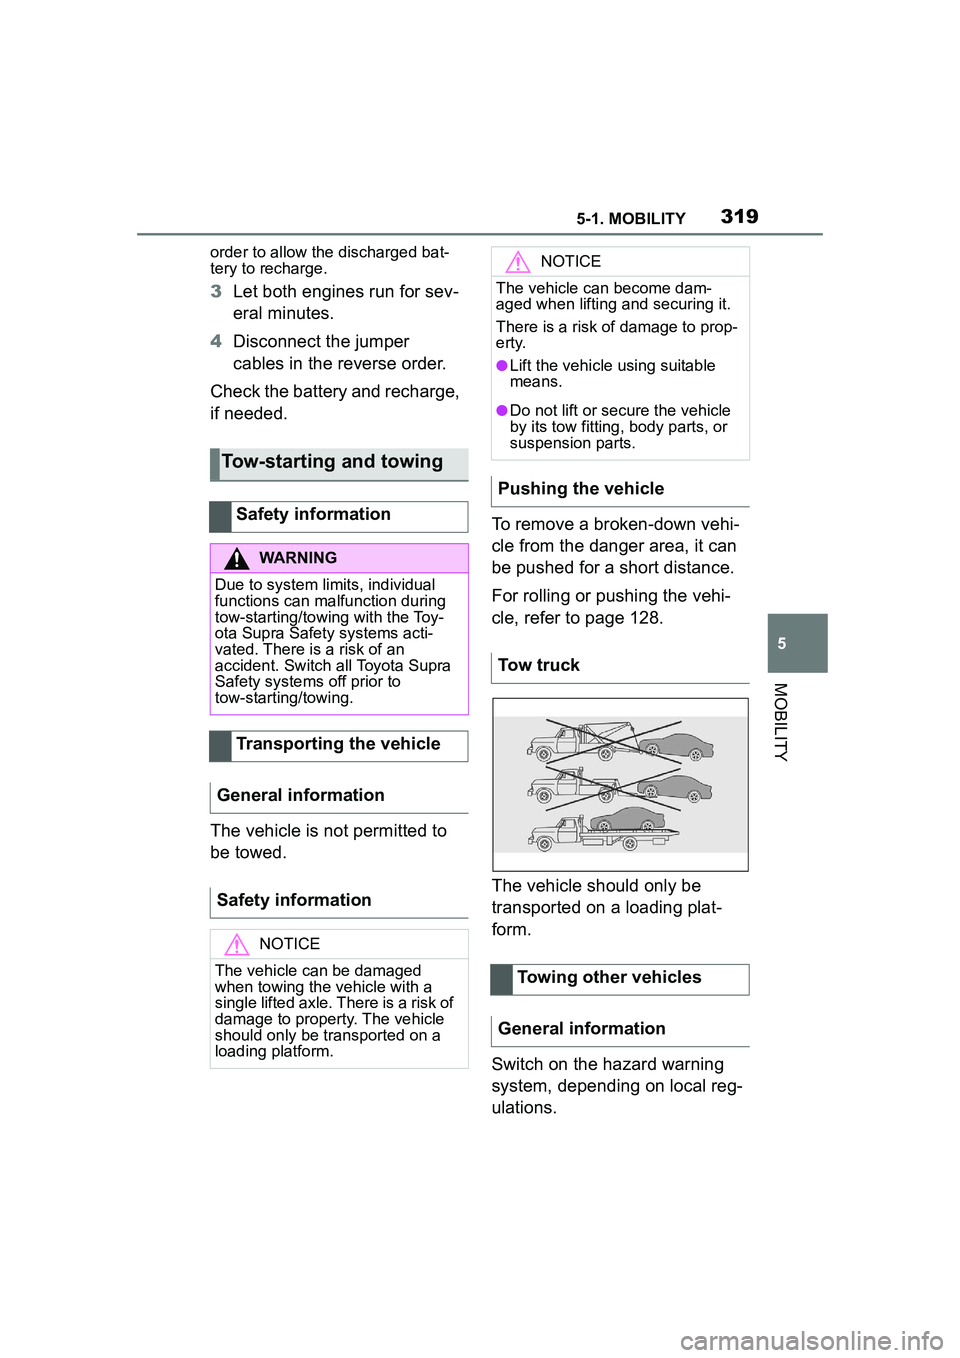
The vehicle should only be
transported on a loading plat-
form.
Switch on the hazard warning
system, depending on local reg-
ulations.
Tow-starting and towing
Safety information
WARNING
Due to system limits, individual
functions can malfunction during
tow-starting/towing with the Toy-
ota Supra Safety systems acti-
vated. There is a risk of an
accident. Switch all Toyota Supra
Safety systems off prior to
tow-starting/towing.
Transporting the vehicle
General information
Safety information
NOTICE
The vehicle can be damaged
when towing the vehicle with a
single lifted axle. There is a risk of
damage to property. The vehicle
should only be transported on a
loading platform.
NOTICE
The vehicle can become dam-
aged when lifting and securing it.
There is a risk of damage to prop-
erty.
●Lift the vehicle using suitable
means.
●Do not lift or secure the vehicle
by its tow fitting, body parts, or
suspension parts.
Pushing the vehicle
Tow truck
Towing other vehicles
General information
Page 320 of 356
3205-1. MOBILITY
If the electrical system has
failed, clearly identify the vehicle
being towed by placing a sign or
a warning triangle in the rear
window.
The tow fittings used should be
on the same side on both vehi-
cles.
Should it prove impossible to
avoid mounting the tow bar at
an offset angle, please follow
the following:
Maneuvering capabi lity is lim-
ited going around corners.
The tow bar will generate lat-
eral forces if it is secured with
an offset. Observe the following notes
when using the tow rope:
Use nylon ropes or straps,
which will enable the vehicle
to be towed without jerking.
Make sure the tow rope is not
twisted when fastening.
Check the fastening of the
tow fitting and tow rope in reg-
ular intervals.
Do not exceed a towing
speed of 30 mph/50 km/h.
Do not exceed a towing dis-
tance of 3 miles/5 km.
When starting to tow the vehi-
cle, make sure that the tow
rope is taut.
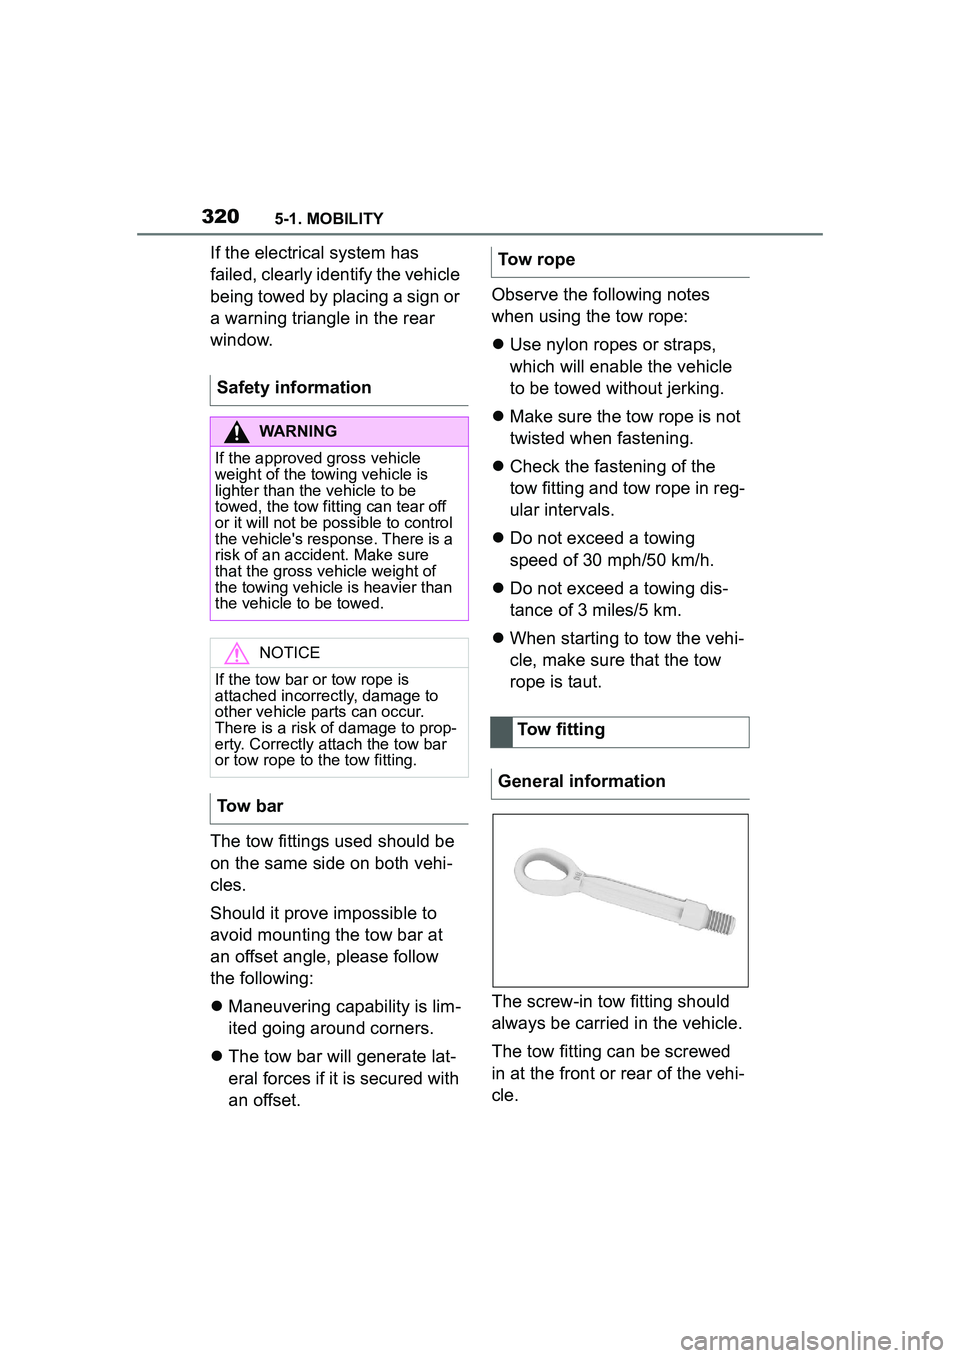
The screw-in tow fitting should
always be carried in the vehicle.
The tow fitting can be screwed
in at the front or rear of the vehi-
cle.
Safety information
WARNING
If the approved gross vehicle
weight of the towing vehicle is
lighter than the vehicle to be
towed, the tow fitting can tear off
or it will not be possible to control
the vehicle's response. There is a
risk of an accident. Make sure
that the gross vehicle weight of
the towing vehicle is heavier than
the vehicle to be towed.
NOTICE
If the tow bar or tow rope is
attached incorrectly, damage to
other vehicle parts can occur.
There is a risk of damage to prop-
erty. Correctly attach the tow bar
or tow rope to the tow fitting.
Tow bar
Tow rope
Tow fitting
General information
Page 321 of 356
3215-1. MOBILITY
5
MOBILITY
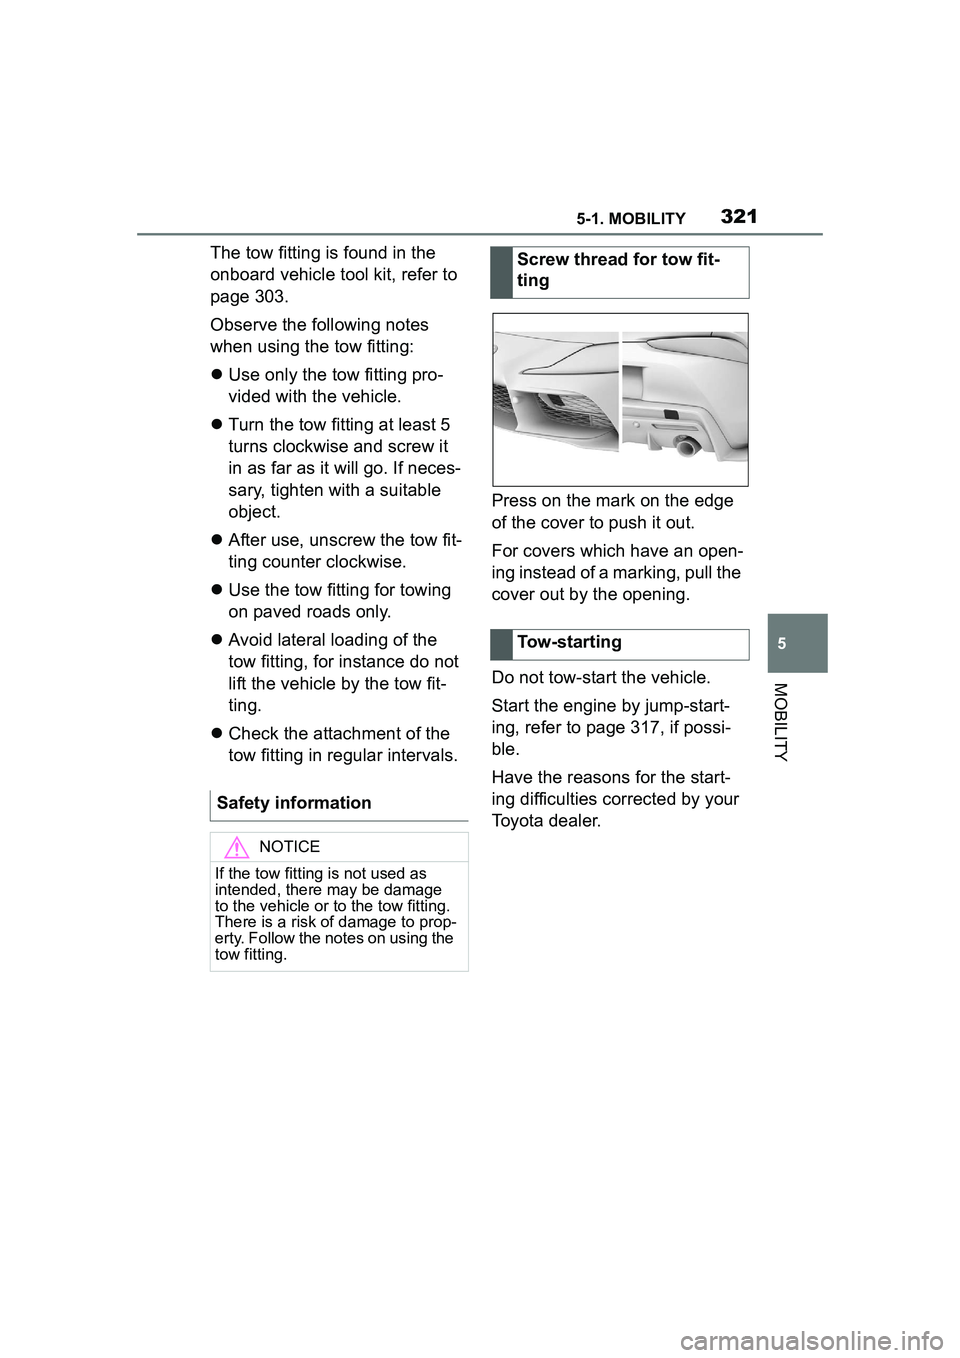
The tow fitting is found in the
onboard vehicle tool kit, refer to
page 303.
Observe the following notes
when using the tow fitting:
Use only the tow fitting pro-
vided with the vehicle.
Turn the tow fitting at least 5
turns clockwise and screw it
in as far as it will go. If neces-
sary, tighten with a suitable
object.
After use, unscrew the tow fit-
ting counter clockwise.
Use the tow fitting for towing
on paved roads only.
Avoid lateral loading of the
tow fitting, for instance do not
lift the vehicle by the tow fit-
ting.
Check the attachment of the
tow fitting in regular intervals. Press on the mark on the edge
of the cover to push it out.
For covers which have an open-
ing instead of a marking, pull the
cover out by the opening.
Do not tow-start the vehicle.
Start the engine by jump-start-
ing, refer to page 317, if possi-
ble.
Have the reasons for the start-
ing difficulties corrected by your
Toyota dealer.
Safety information
NOTICE
If the tow fitting is not used as
intended, there may be damage
to the vehicle or to the tow fitting.
There is a risk of damage to prop-
erty. Follow the notes on using the
tow fitting.
Screw thread for tow fit-
ting
Tow-starting
Page 327 of 356

3275-1. MOBILITY
5
MOBILITY
Dirty belt straps impede the reel-
ing action and thus have a neg-
ative impact on safety.
Use only a mild soapy solution
for cleaning the installed belt
straps.
Safety belts should only be
allowed to retract if they are dry.
The floor mats can be removed
from the car's interior for clean-
ing.
If the floor carpets are very dirty, clean with a microfiber cloth and
water or a textile cleaner. To
prevent matting of the carpet,
rub back and forth in the direc-
tion of travel only.
To clean sensors and camera
lenses, use a cloth moistened
with a small amount of glass
detergent.
Use a dry, clean antistatic micro-
fiber cloth.
Clean the protective glass of the
Head-up Display, refer to page
150, using a microfiber cloth and
commercially available
dish-washing soap.
Safety belts
WARNING
Chemical cleansers can destroy
the safety belt webbing. Missing
protective effect of the safety
belts. There is a risk of injuries or
danger to life. Use only a mild
soapy solution for cleaning the
safety belts.
Carpets and floor mats
WARNING
Objects in the driver's floor area
can limit the peda
l distance or
block a depressed pedal. There is
a risk of an accident. Stow objects
in the vehicle such that they are
secured and cannot enter into the
driver's floor area. Use floor mats
that are suitable for the vehicle
and can be safely attached to the
floor. Do not use loose floor mats
and do not layer several floor
mats. Make sure that there is suf-
ficient clearance for the pedals.
Ensure that the floor mats are
securely fastened again after they
were removed, for instance for
cleaning.
Sensors and camera lenses
Displays, screens, and pro-
tective glass of the Head-up
Display
NOTICE
Chemical cleansers, moisture or
fluids of any kind can damage the
surface of displays and screens.
There is a risk of damage to prop-
erty. Clean with a clean, antistatic
microfiber cloth.
NOTICE
The surface of displays can be
damaged with improper cleaning.
There is a risk of damage to prop-
erty. Avoid pressure that is too
high and do not use any scratch-
ing materials.
Page 344 of 356

344Alphabetical Index
Alphabetical Index
A
A/C button, see Air conditioning
............................................... 228
ABS, Antilock Brake System . 194
ACC, see Dynamic radar cruise control with full-speed range............................................... 203
Acceleration Assistant, see Launch Control..................... 130
Accessories and parts ............... 6
Activated charcoal filter ........ 231
Active Guard, see Toyota Supra Safety .................................... 172
Adaptive brake assist ............ 195
Adaptive variable suspension ............................................... 224
Additional coolant tank cooling, Capacity ................................ 332
Additives, engine oil types .... 297
Air circulation, see Recircu- lated-air mode....................... 229
Air conditioning ...................... 228
Air distribution, manual ......... 230
Air flow, automatic air condition- ing .......................................... 230
Air outlets, see Ventilation .... 231
Air pressure, tires .................. 264
Airbags .................................... 160
Airbags, indicator and warning light........................................ 162
Alarm system ............................ 92
Alarm, unintentional................. 93
All-season tires, see Winter tires ............................................... 274
Antilock Brake System, ABS . 194
Anti-slip control, see VSC ..... 195
Anti-theft protection, locking .. 79
Anti-theft protection, see Lug bolt lock ................................ 289
Apple CarPlay, connection to the vehicle ..................................... 73 Approved axle load ................331
Approved total weight ............331
Assistance when driving off, see
Hill-start assist control.........195
Assistance with breakdown ..315
AUTO program, automatic air
conditioning ........ ..................229
Auto Start/Stop function ........ 116
Automatic air conditioning ....226
Automatic cruise control with Stop & Go ..............................203
Automatic Curb Monitor, exte- rior mirror ..............................106
Automatic deactivation, front-seat passenger airbags...............................................170
Automatic headlight control ..153
Automatic high-beam .............156
Automatic locking ....................91
Automatic transmission.........126
Automatic transmission, Fluid ...............................................332
Automatic transmission, see Automatic transm ission.......126
Automatic unlocking ................91
Automatic vehicle wash .........322
Autonomous Emergency Brak- ing ..........................................192
Axle loads, weights ................331
B
Backrest curvature, see Lumbar support ................ ....................99
Backrest tilt ...............................99
Backrest, seats .........................96
Backrest, width .........................99
Bar for tow-starting/towing....320
Battery, changing, remote con- trol of the vehicle ....................81
Battery, disposing of ..............306
Battery, vehicle .......................305