2022 TOYOTA AVALON HYBRID ECO mode
[x] Cancel search: ECO modePage 391 of 584

3915-4. Other interior features
5
Interior features
■The wireless charger can be operated when
The power switch is in ACCESSORY or ON mode.
■ Portable devices that can be charged
●Portable devices compatible with the Qi wireless charging stand ard can be
charged by the wireless charger. However, compatibility with all devices
which meet the Qi wireless charging standard is not guaranteed.
● The wireless charger is designed to supply low power electricit y (5 W or
less) to a cellular phone, smartphone, or other portable device .
■ If a cover or accessory is attach ed to the portable device
Do not charge a portable device if a cover or accessory which i s not Qi com-
patible is attached. Depending on the type of cover and/or acce ssory
attached, it may not be possible to charge the portable device. If the portable
device is placed on the charging area and does not charge, remo ve the cover
and/or accessories.
■ If interference is heard in AM ra dio broadcasts while charging
Turn off the wireless charger and check if the noise is reduced. If noise is
reduced, press and hold the power supply switch of the wireless charger for 2
seconds. The frequency of the wireless charger is changed and n oise may be
reduced. When the frequency is changed, the operation indicator light will
blink (orange) 2 times.
■ Charging precautions
●If the electronic key cannot be detected in the cabin, charging cannot be
performed. When a door is opened and closed, charging may be te mporarily
suspended.
● While charging, the wireless charger and the portable device wi ll become
warm. This is not a malfunction.
If a portable device becomes warm while charging and charging stops due
to the protection function of the portable device, wait until the portable
device cools down and charge it again.
■ Sound generated during operation
When the power supply switch is turned on or while a portable d evice is being
identified, operation sounds may be heard. This is not a malfunction.
■ Cleaning the wireless charger
P. 412
Page 408 of 584
4086-1. Maintenance and care
●Working from top to bottom, liberally apply water to the vehicl e
body, wheel wells and underside of the vehicle to remove any di rt
and dust.
● Wash the vehicle body using a sponge or soft cloth, such as a
chamois.
● For hard-to-remove marks, use car wash soap and rinse thoroughl y
with water.
● Wipe away any water.
● Wax the vehicle when the wate rproof coating deteriorates.
If water does not bead on a clean surface, apply wax when the vehicle
body is cool.
■Automatic car washes
●Fold the mirrors before washing the vehicle. Start washing from the front of
the vehicle. Make sure to extend the mirrors before driving.
● Brushes used in automatic car washes may scratch the vehicle su rface,
parts (wheel, etc.) and harm your vehicle's paint.
● Vehicles with a rear spoiler: In certain automatic car washes, the rear spoiler
may interfere with machine operation. This may prevent the vehicle from
being cleaned properly or result in damage to the rear spoiler.
■ High pressure car washes
As water may enter the cabin, do not bring the nozzle tip near the gaps
around the doors or perimeter of the windows, or spray these ar eas continu-
ously.
■ When using a car wash
If the door handle becomes wet while the electronic key is within the effective
range, the door may lock and unlock repeatedly. In that case, f ollow the fol-
lowing correction procedures to wash the vehicle:
● Place the key in a position 6 ft. (2 m) or more separate from t he vehicle
while the vehicle is being washed. (Take care to ensure that th e key is not
stolen.)
● Set the electronic key to battery-saving mode to disable the sm art key sys-
tem. ( P. 154)
Cleaning and prot ecting the vehicle
exterior
Perform the following to protect the vehicle and maintain it in
prime condition:
Page 422 of 584
4226-3. Do-it-yourself maintenance
Tire inflation
pressure
( P. 449)• Tire pressure gauge
• Compressed air source
Washer fluid
( P. 432)• Water or washer fluid containing antifreeze (for win-
ter use)
• Funnel (used only for adding water or washer fluid)
WARNING
The engine compartment contains many mechanisms and fluids that may
move suddenly, become hot, or become electrically energized. To avoid death
or serious injury, observe the following precautions.
■ When working on the engine compartment
● Make sure that the “ACCESSORY” or “IGNITION ON” on the multi-in for-
mation display and the “READY” indicator are both off.
● Keep hands, clothing and tools away from the moving fan and engine
drive belt.
● Be careful not to touch the engine, power control unit, radiato r, exhaust
manifold, etc. right after driving as they may be hot. Oil and other fluids
may also be hot.
● Do not leave anything that may burn easily, such as paper and r ags, in the
engine compartment.
● Do not smoke, cause sparks or expose an open flame to fuel. Fuel fumes
are flammable.
■ When working near the electric cooling fan or radiator grille
Be sure the power switch is off.
With the power switch in ON mode, the electric cooling fan may automati-
cally start to run if the air conditioning is on and/or the coolant temperature
is high. (P. 430)
■ Safety glasses
Wear safety glasses to prevent flying or falling material, fluid spray, etc.
from getting in your eyes.
NOTICE
■If you remove the air cleaner filter
Driving with the air cleaner filter removed may cause excessive engine wear
due to dirt in the air.
ItemsParts and tools
Page 434 of 584
4346-3. Do-it-yourself maintenance
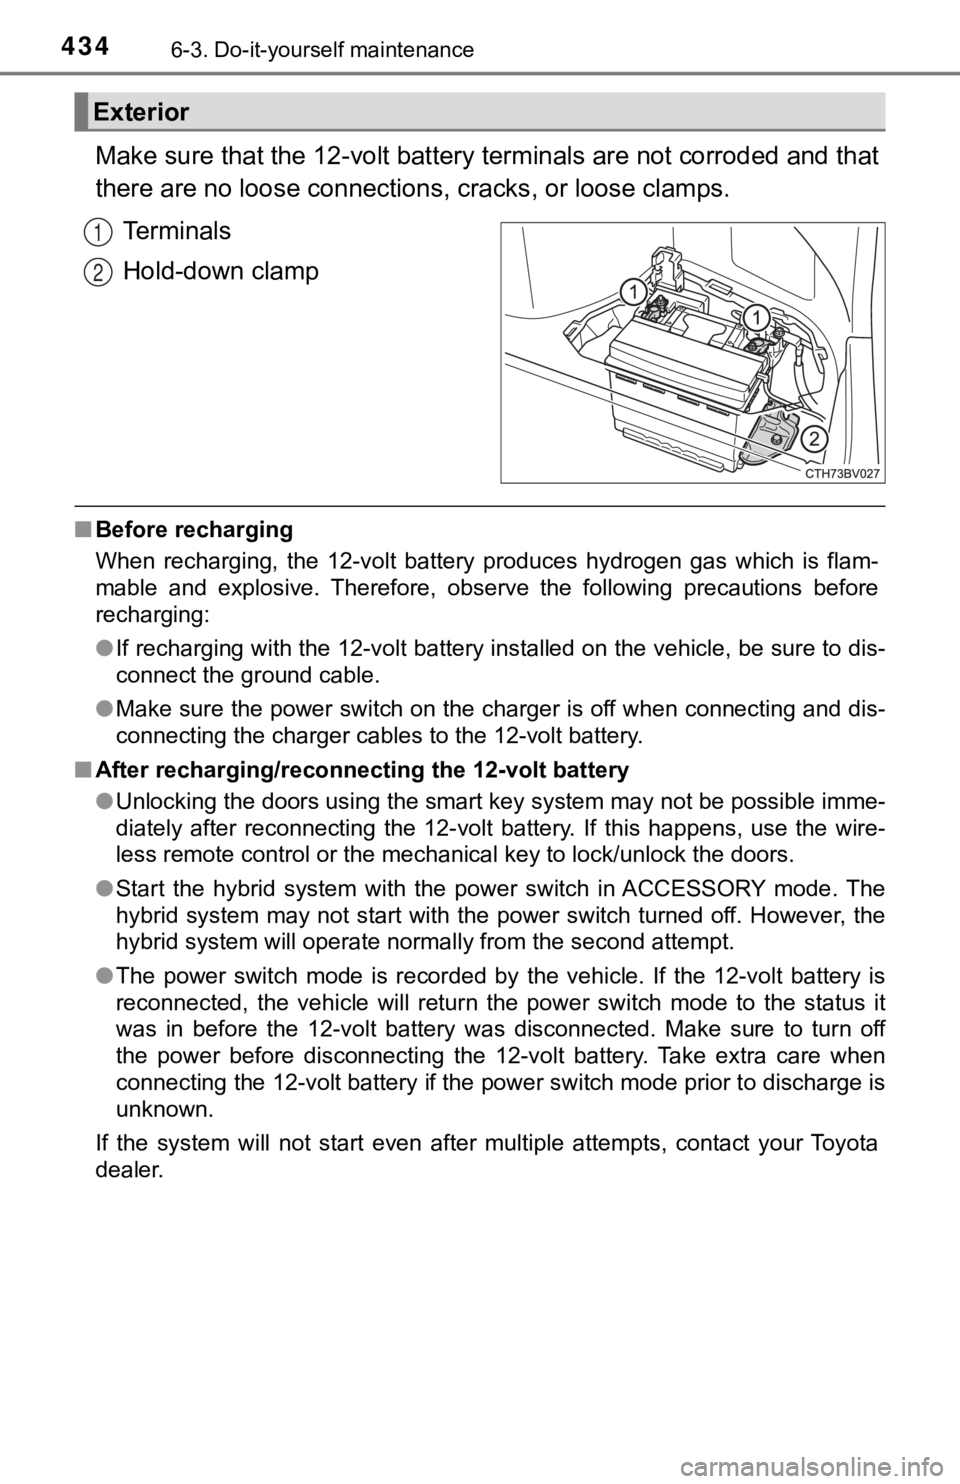
Make sure that the 12-volt battery terminals are not corroded and that
there are no loose connections, cracks, or loose clamps.
Terminals
Hold-down clamp
■ Before recharging
When recharging, the 12-volt battery produces hydrogen gas which is flam-
mable and explosive. Therefore, observe the following precautio ns before
recharging:
● If recharging with the 12-volt battery installed on the vehicle , be sure to dis-
connect the ground cable.
● Make sure the power switch on the charger is off when connectin g and dis-
connecting the charger cables to the 12-volt battery.
■ After recharging/reconnecting the 12-volt battery
●Unlocking the doors using the smart key system may not be possi ble imme-
diately after reconnecting the 12-volt battery. If this happens, use the wire-
less remote control or the mechanical key to lock/unlock the do ors.
● Start the hybrid system with the power switch in ACCESSORY mode . The
hybrid system may not start with the power switch turned off. However, the
hybrid system will operate normally from the second attempt.
● The power switch mode is recorded by the vehicle. If the 12-vol t battery is
reconnected, the vehicle will return the power switch mode to t he status it
was in before the 12-volt battery was disconnected. Make sure t o turn off
the power before disconnecting the 12-volt battery. Take extra care when
connecting the 12-volt battery if the power switch mode prior t o discharge is
unknown.
If the system will not start even after multiple attempts, contact your Toyota
dealer.
Exterior
1
2
Page 446 of 584

4466-3. Do-it-yourself maintenance
■Canceling ID code registration
●To cancel ID code registration after it has been started, turn the power
switch off before driving the vehicle.
If the vehicle is driven after ID code registration is started, to cancel reg-
istration, perform the ID code r egistration start procedure aga in and turn
the power switch off before driving.
●If ID code registration has been canceled, the tire pressure wa rning light
will blink for approximately 1 mi nute when the power switch is turned to
ON mode and then illuminate. The tire pressure warning system will be
operational when the tire pres sure warning light turns off.
●If the warning light does not turn off even after several minut es have
elapsed, ID code registration may not have been cancelled corre ctly. To
cancel registration, perform the ID code registration start procedure
again and then turn the power switch off before driving.
■If ID codes are not registered properly
●In the following situations, ID code registration may take long er than
usual to be completed or may not be possible. (Usually, the veh icle will
need to be driven for approximately 10 to 30 minutes to complet e ID
code registration.)
If ID code registration is not complete after driving for appro ximately 30
minutes, continue driving for a while.
• If the vehicle is driven on an unpaved road, it may take longe r than
normal to complete registration.
• If the vehicle is backed up while performing registration, dat a col-
lected during registration will be cleared, and it will take longer than
normal to complete.
• If the vehicle is driven in heavy traffic or another situation where other
vehicles are driven close by, i t may take time for the system to recog-
nize the tire pressure warning valve and transmitters of your v ehicle
over those of other vehicles.
• If a wheel with a tire pressure warning valve and transmitter installed
is inside or near the vehicle, registration of the ID codes for the
installed wheels may not be possible.
If ID registration is not complete after driving for approximately 1 hour,
park the vehicle in a safe place for approximately 20 minutes and then
perform the ID code regi stration procedure again.
●In the following situations, ID c ode registration will not be started or was
not completed properly and the system will not operate properly. Per-
form the ID code registr ation procedure again.
• If, when attempting to start ID code registration, the tire pr essure
warning light does not blink slowly 3 times.
• If, when the vehicle has been driven for about 20 minutes afte r per-
forming ID code registration, the tire pressure warning light b links for
approximately 1 minute and then illuminates.
●If ID code registration cannot be completed after performing th e above
procedure, contact your Toyota dealer.
Page 447 of 584
4476-3. Do-it-yourself maintenance
6
Maintenance and care
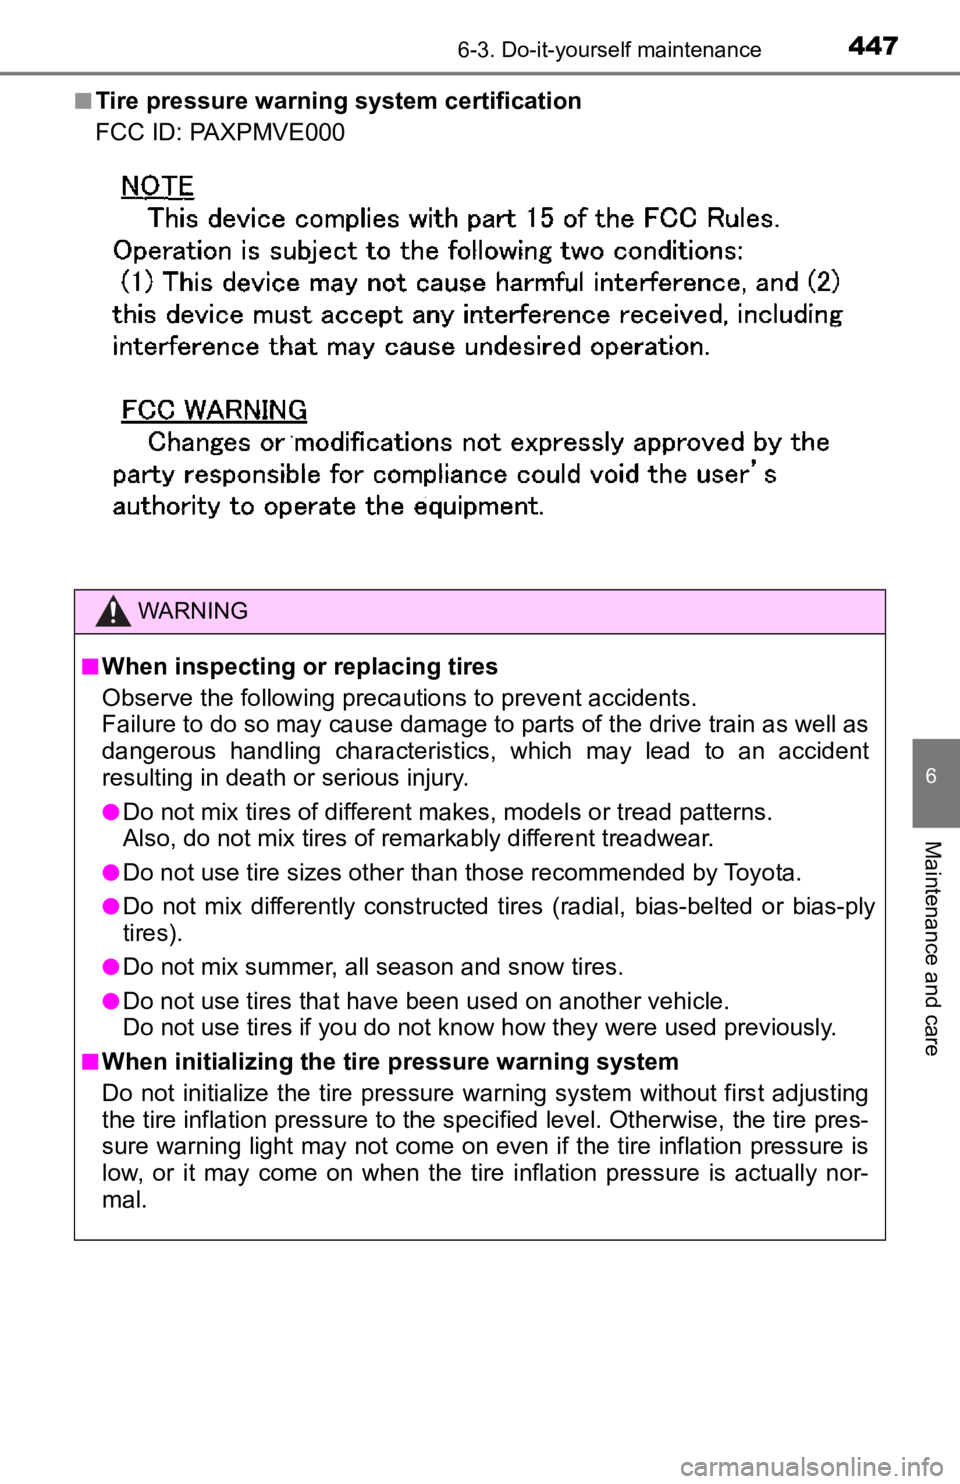
■Tire pressure warning system certification
FCC ID: PAXPMVE000
WARNING
■When inspecting or replacing tires
Observe the following precaut ions to prevent accidents.
Failure to do so may cause damage to parts of the drive train as well as
dangerous handling characteristics, which may lead to an accide nt
resulting in death o r serious injury.
●Do not mix tires of different ma kes, models or tread patterns.
Also, do not mix tires of remarkably different treadwear.
●Do not use tire sizes other th an those recommended by Toyota.
●Do not mix differently constructed tires (radial, bias-belted o r bias-ply
tires).
●Do not mix summer, all season and snow tires.
●Do not use tires that have been used on another vehicle.
Do not use tires if you do not kn ow how they were used previously.
■When initializing the tire pressure warning system
Do not initialize the tire press ure warning system without firs t adjusting
the tire inflation pressure to t he specified level. Otherwise, the tire pres-
sure warning light may not come on even if the tire inflation p ressure is
low, or it may come on when the tire inflation pressure is actu ally nor-
mal.
Page 506 of 584
5067-2. Steps to take in an emergency
One of the following may be the cause of the problem:
● The 12-volt battery may be discharged. ( P. 510)
● One or both of the 12-volt battery terminals may be disconnecte d.
( P. 433)
Contact your Toyota dealer if the problem cannot be repaired, o r if repair
procedures are unknown.
When the hybrid system does not start, the following steps can be
used as an interim measure to sta rt the hybrid system if the power
switch is functioning normally.
Do not use this starting procedure except in case of emergency.
Set the parking brake.
Shift the shift lever to P.
Turn the power switch to ACCESSORY mode.
Press and hold the power switch for about 15 seconds while
depressing the brake pedal firmly.
Even if the hybrid system can be started using the above steps, the
system may be malfunctioning. Hav e the vehicle inspected by your
Toyota dealer.
The interior lights and headlights do not turn on, or the horn
does not sound.
Emergency start function
1
2
3
4
Page 509 of 584

5097-2. Steps to take in an emergency
7
When trouble arises
■Stopping the hybrid system
Shift the shift lever to P and press the power switch as you normally do when
stopping the hybrid system.
■ Replacing the key battery
As the above procedure is a temporary measure, it is recommended that the
electronic key battery be replaced immediately when the battery is depleted.
(P. 461)
■ Changing power switch modes
Release the brake pedal and press the power switch in step above.
The hybrid system does not start and modes will be changed each time the
switch is pressed. ( P. 201)
■ When the electronic key does not work properly
●Make sure that the smart key system has not been deactivated in the cus-
tomization setting. If it is off, turn the function on.
(Customizable features: P. 548)
● Check if battery-saving mode is set. If it is set, cancel the f unction.
( P. 154)
WARNING
■ When using the mechanical key and operating the power windows or
moon roof
Operate the power window or moon roof after checking to make su re that
there is no possibility of any passenger having any of their body parts
caught in the window or moon roof. Also, do not allow children to operate
the mechanical key. It is possible for children and other passe ngers to get
caught in the power window or moon roof.
3