Page 4 of 156

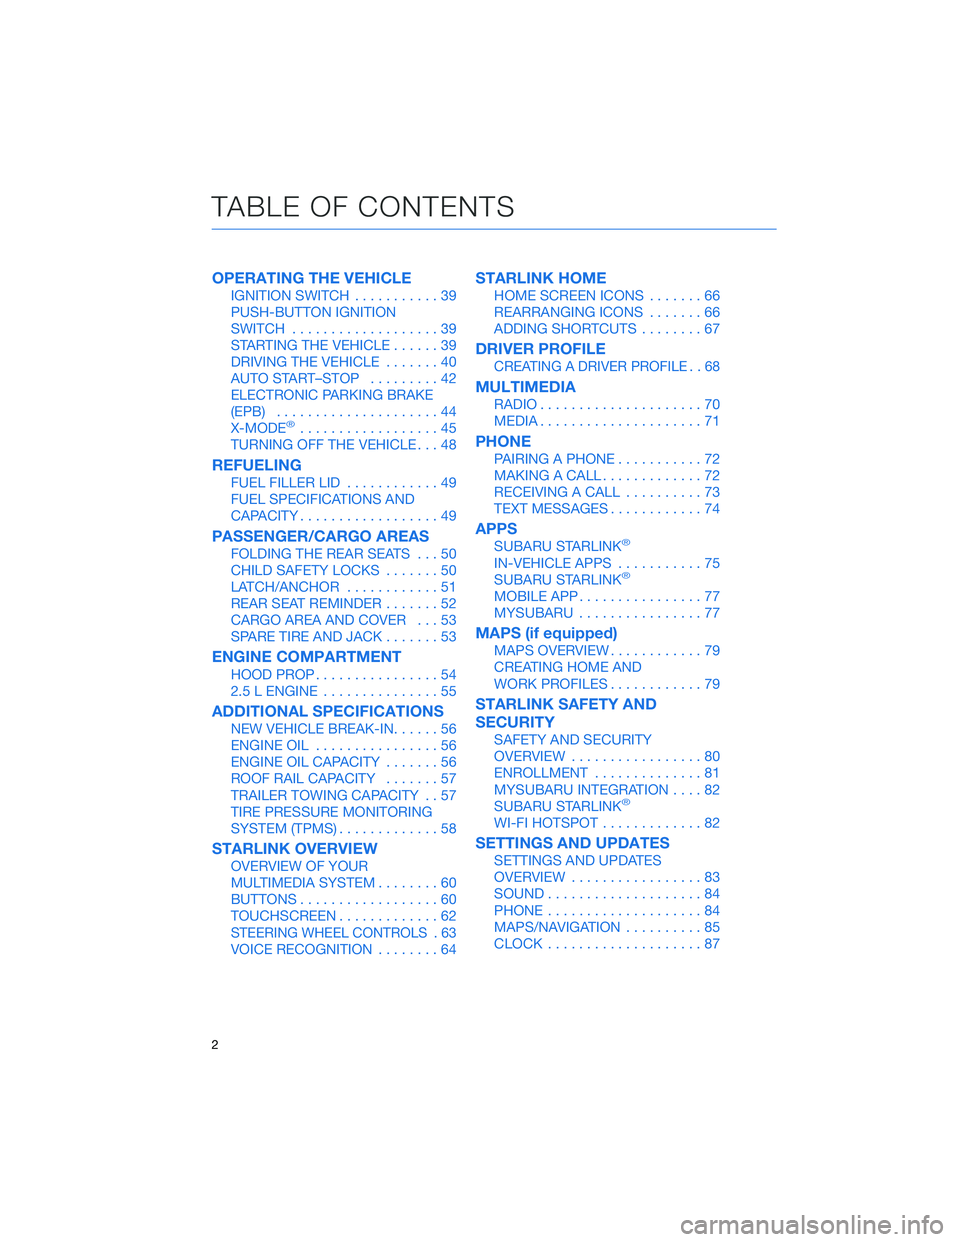
OPERATING THE VEHICLE
IGNITION SWITCH...........39
PUSH-BUTTON IGNITION
SWITCH ...................39
STARTING THE VEHICLE ......39
DRIVING THE VEHICLE .......40
AUTO START–STOP .........42
ELECTRONIC PARKING BRAKE
(EPB) .....................44
X-MODE
®..................45
TURNING OFF THE VEHICLE ...48
REFUELING
FUEL FILLER LID............49
FUEL SPECIFICATIONS AND
CAPACITY ..................49
PASSENGER/CARGO AREAS
FOLDING THE REAR SEATS ...50
CHILD SAFETY LOCKS .......50
LATCH/ANCHOR ............51
REAR SEAT REMINDER .......52
CARGO AREA AND COVER ...53
SPARE TIRE AND JACK .......53
ENGINE COMPARTMENT
HOOD PROP................54
2.5 L ENGINE ...............55
ADDITIONAL SPECIFICATIONS
NEW VEHICLE BREAK-IN ......56
ENGINE OIL ................56
ENGINE OIL CAPACITY .......56
ROOF RAIL CAPACITY .......57
TRAILER TOWING CAPACITY . . 57
TIRE PRESSURE MONITORING
SYSTEM (TPMS) .............58
STARLINK OVERVIEW
OVERVIEW OF YOUR
MULTIMEDIA SYSTEM ........60
BUTTONS ..................60
TOUCHSCREEN .............62
STEERING WHEEL CONTROLS . 63
VOICE RECOGNITION ........64
STARLINK HOME
HOME SCREEN ICONS .......66
REARRANGING ICONS .......66
ADDING SHORTCUTS ........67
DRIVER PROFILE
CREATING A DRIVER PROFILE . . 68
MULTIMEDIA
RADIO.....................70
MEDIA .....................71
PHONE
PAIRING A PHONE ...........72
MAKING A CALL .............72
RECEIVING A CALL ..........73
TEXT MESSAGES ............74
APPS
SUBARU STARLINK®
IN-VEHICLE APPS ...........75
SUBARU STARLINK®
MOBILE APP ................77
MYSUBARU ................77
MAPS (if equipped)
MAPS OVERVIEW ............79
CREATING HOME AND
WORK PROFILES ............79
STARLINK SAFETY AND
SECURITY
SAFETY AND SECURITY
OVERVIEW.................80
ENROLLMENT ..............81
MYSUBARU INTEGRATION ....82
SUBARU STARLINK
®
WI-FI HOTSPOT .............82
SETTINGS AND UPDATES
SETTINGS AND UPDATES
OVERVIEW.................83
SOUND ....................84
PHONE ....................84
MAPS/NAVIGATION ..........85
CLOCK ....................87
TABLE OF CONTENTS
2
Page 10 of 156
Automatic Door Locking/Unlocking
This feature allows you to set when your Subaru automatically locks or unlocks the doors
through the Combination Meter Display (use the i/Set Switch to navigate to “Vehicle
Setting”) or through the STARLINK
®Touchscreen (select “Settings” then “Vehicle”).
The available settings are listed in the table below.
AVAILABLE SETTINGS
AUTO DOOR LOCK Vehicle Speed
(12 mph)Shift into or
out of PARKOFF
AUTO DOOR UNLOCK Ignition OFF Driver’s Door
OpenShift into or
out of PARK OFF
ENTRY AND EXIT
8
Page 25 of 156

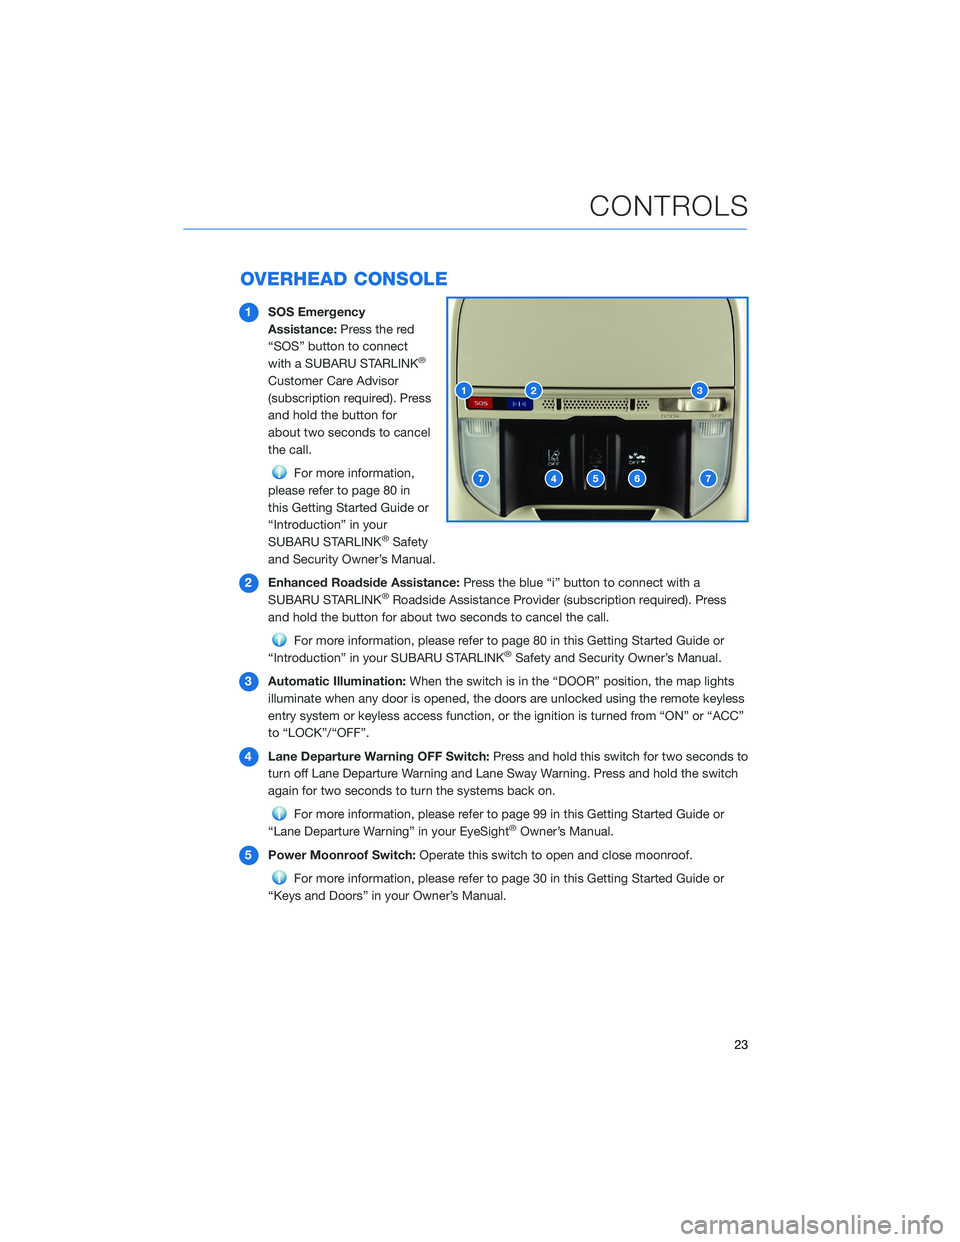
OVERHEAD CONSOLE
1SOS Emergency
Assistance: Press the red
“SOS” button to connect
with a SUBARU STARLINK
®
Customer Care Advisor
(subscription required). Press
and hold the button for
about two seconds to cancel
the call.
For more information,
please refer to page 80 in
this Getting Started Guide or
“Introduction” in your
SUBARU STARLINK
®Safety
and Security Owner’s Manual.
2 Enhanced Roadside Assistance: Press the blue “i” button to connect with a
SUBARU STARLINK
®Roadside Assistance Provider (subscription required). Press
and hold the button for about two seconds to cancel the call.
For more information, please refer to page 80 in this Getting Started Guide or
“Introduction” in your SUBARU STARLINK®Safety and Security Owner’s Manual.
3 Automatic Illumination: When the switch is in the “DOOR” position, the map lights
illuminate when any door is opened, the doors are unlocked using the remote keyless
entry system or keyless access function, or the ignition is turned from “ON” or “ACC”
to “LOCK”/“OFF”.
4 Lane Departure Warning OFF Switch: Press and hold this switch for two seconds to
turn off Lane Departure Warning and Lane Sway Warning. Press and hold the switch
again for two seconds to turn the systems back on.
For more information, please refer to page 99 in this Getting Started Guide or
“Lane Departure Warning” in your EyeSight®Owner’s Manual.
5 Power Moonroof Switch: Operate this switch to open and close moonroof.
For more information, please refer to page 30 in this Getting Started Guide or
“Keys and Doors” in your Owner’s Manual.
CONTROLS
23
Page 30 of 156
POWER EXTERIOR MIRRORS
The power mirror knob works with
the ignition in the “ON” or “ACC”
position. Turn the knob to “L” (left
side) or “R” (right side) to select a
mirror. Push the knob in the
direction you want to move the
mirror. Turn the knob back to the
center position when finished.
Auto Tilt-down Mirror(if equipped)
The passenger side mirror will automatically tilt down when you move the select lever to
the "R" position, giving better visibility when backing up. The mirror returns to its normal
position a few seconds after you move the select lever out of the "R" position. You can
turn the tilt-down mirror off or on in the Combination Meter Display (CMD).
Power Mirror Knob
GETTING COMFORTABLE
28
Page 32 of 156
POWER WINDOWS
To open or close a window,
partially press down or pull up
and hold the corresponding
switch. The driver’s window has a
one-touch auto up/down
function, and the front
passenger’s window may also
have an auto up/down function, if
equipped. Fully press down or
pull up and release to
automatically open or close a
one-touch window.
POWER MOONROOF(if equipped)
The moonroof operates with the
ignition in the “ON” position.
1 Opening: Press, briefly hold,
and release the switch to
automatically open the
moonroof. This also
automatically opens the
sunshade if it is closed.
The moonroof will stop
slightly before the fully-open
position to reduce wind
noise. Press, briefly hold,
and release the switch again
to fully open it.
2 Closing: Press, briefly hold, and release the switch to close the moonroof.
To stop the moonroof partway while opening or closing, press either side of the switch.
Power Window Switches
GETTING COMFORTABLE
30
Page 39 of 156
Heated Seats(if equipped)
The heated seat switches are
located between the driver and
passenger seats. There is a
separate switch for the driver and
passenger. Press the “HI” button
for more rapid heating or press
the “LO” button for normal
heating. Return the switch to the
center position to turn off the
heated seat.
Rear Heated Seats (if equipped)
There are separate heated seat
switches for each side on the rear
center console. Press the switch
to activate the heated seat. The
heating mode changes to High,
Low, and Off each time you press
the switch, and yellow indictors
illuminate indicating the level.
Heated Steering Wheel (if equipped)
To activate, pull the heated steering wheel switch with
the ignition in “ON” or “ACC”. The indicator light on
the switch illuminates. To deactivate, pull the switch
again. The heater will stay on for approximately
30 minutes.
Heated Seat Switches
GETTING COMFORTABLE
37
Page 41 of 156

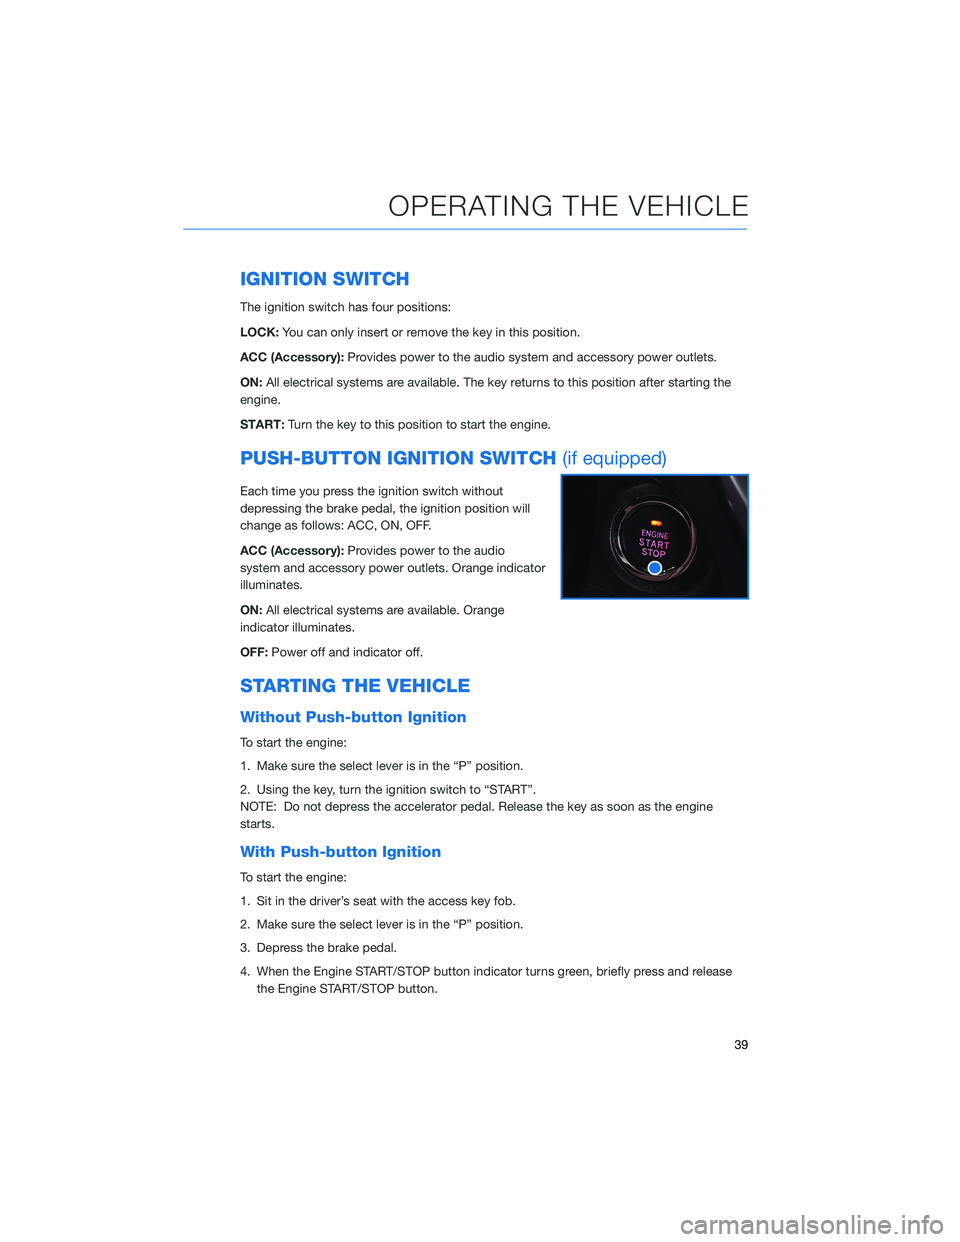
IGNITION SWITCH
The ignition switch has four positions:
LOCK:You can only insert or remove the key in this position.
ACC (Accessory): Provides power to the audio system and accessory power outlets.
ON: All electrical systems are available. The key returns to this position after starting the
engine.
START: Turn the key to this position to start the engine.
PUSH-BUTTON IGNITION SWITCH (if equipped)
Each time you press the ignition switch without
depressing the brake pedal, the ignition position will
change as follows: ACC, ON, OFF.
ACC (Accessory):Provides power to the audio
system and accessory power outlets. Orange indicator
illuminates.
ON: All electrical systems are available. Orange
indicator illuminates.
OFF: Power off and indicator off.
STARTING THE VEHICLE
Without Push-button Ignition
To start the engine:
1. Make sure the select lever is in the “P” position.
2. Using the key, turn the ignition switch to “START”.
NOTE: Do not depress the accelerator pedal. Release the key as soon as the engine
starts.
With Push-button Ignition
To start the engine:
1. Sit in the driver’s seat with the access key fob.
2. Make sure the select lever is in the “P” position.
3. Depress the brake pedal.
4. When the Engine START/STOP button indicator turns green, briefly press and release
the Engine START/STOP button.
OPERATING THE VEHICLE
39
Page 46 of 156

Auto Start-Stop Warning Light
The Auto Start-Stop warning light will illuminate in yellow when initially turning
the ignition switch to the “ON” position. The light will turn off after the engine
has started.
NOTE: If the Auto Start-Stop warning light does not turn off after the engine
has started or is flashing, the Auto Start-Stop system may be malfunctioning. We
recommend that you contact your authorized SUBARU retailer for an inspection.
INDICATOR PATTERN CONDITION
Solid green This indicator light illuminates when the engine has beentemporarily stopped by the Auto Start-Stop system.
It will turn off when the engine is restarted.
Solid White Operational conditions have not been met, the enginewill not stop and this light will illuminate. The light turns
off once the brake pedal is released.
Solid Yellow This light indicates that the system has been turned off.The light will turn off once the system is turned back on.
Flashing
Yellow A fault has been detected with the Start-Stop system.
Please contact your authorized Subaru Retailer.
ELECTRONIC PARKING BRAKE (EPB)
To apply the parking brake,
depress the brake pedal and pull
the parking brake switch up. The
indicator light on the parking
brake switch will illuminate and
“PARK” will appear in the
Combination Meter.
To release the parking brake
manually, depress the brake pedal
and push the parking brake
switch down with the ignition in
the “ON” position. To
automatically release the parking
brake, gently press the
accelerator pedal with the select lever in the “D” or “R” position.
NOTE: Automatic parking brake release will not work unless all the doors are closed and
your seatbelt is fastened.
OPERATING THE VEHICLE
44