Page 4 of 132

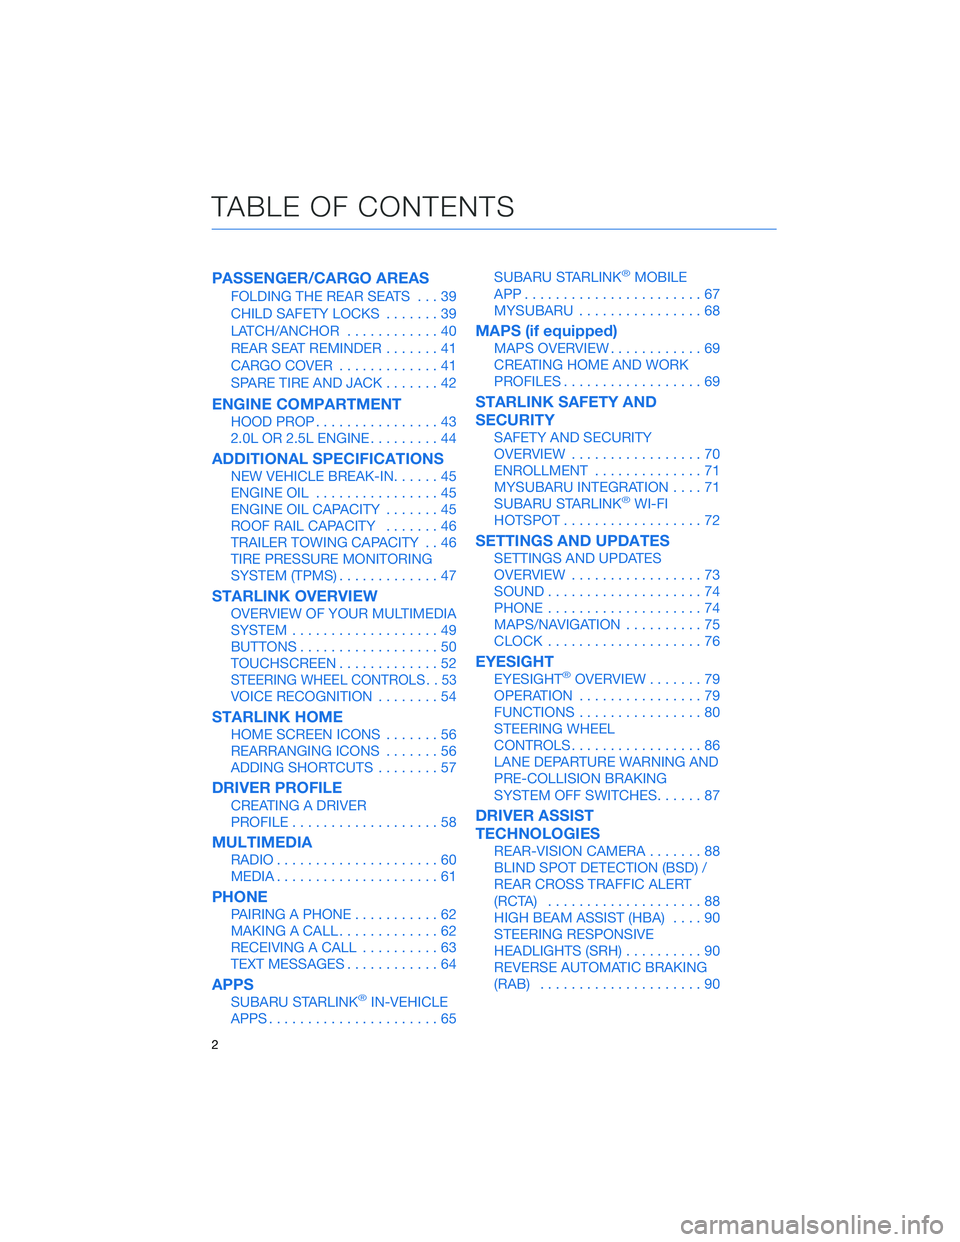
PASSENGER/CARGO AREAS
FOLDING THE REAR SEATS...39
CHILD SAFETY LOCKS.......39
LATCH/ANCHOR............40
REAR SEAT REMINDER.......41
CARGO COVER.............41
SPARE TIRE AND JACK.......42
ENGINE COMPARTMENT
HOOD PROP................43
2.0L OR 2.5L ENGINE.........44
ADDITIONAL SPECIFICATIONS
NEW VEHICLE BREAK-IN......45
ENGINE OIL................45
ENGINE OIL CAPACITY.......45
ROOF RAIL CAPACITY.......46
TRAILER TOWING CAPACITY . . 46
TIRE PRESSURE MONITORING
SYSTEM (TPMS).............47
STARLINK OVERVIEW
OVERVIEW OF YOUR MULTIMEDIA
SYSTEM...................49
BUTTONS..................50
TOUCHSCREEN.............52
STEERING WHEEL CONTROLS . . 53
VOICE RECOGNITION........54
STARLINK HOME
HOME SCREEN ICONS.......56
REARRANGING ICONS.......56
ADDING SHORTCUTS........57
DRIVER PROFILE
CREATING A DRIVER
PROFILE...................58
MULTIMEDIA
RADIO.....................60
MEDIA.....................61
PHONE
PAIRING A PHONE...........62
MAKING A CALL.............62
RECEIVING A CALL..........63
TEXT MESSAGES............64
APPS
SUBARU STARLINK®IN-VEHICLE
APPS......................65SUBARU STARLINK
®MOBILE
APP.......................67
MYSUBARU................68
MAPS (if equipped)
MAPS OVERVIEW............69
CREATING HOME AND WORK
PROFILES..................69
STARLINK SAFETY AND
SECURITY
SAFETY AND SECURITY
OVERVIEW.................70
ENROLLMENT..............71
MYSUBARU INTEGRATION....71
SUBARU STARLINK
®WI-FI
HOTSPOT..................72
SETTINGS AND UPDATES
SETTINGS AND UPDATES
OVERVIEW.................73
SOUND....................74
PHONE....................74
MAPS/NAVIGATION..........75
CLOCK....................76
EYESIGHT
EYESIGHT®OVERVIEW.......79
OPERATION................79
FUNCTIONS................80
STEERING WHEEL
CONTROLS.................86
LANE DEPARTURE WARNING AND
PRE-COLLISION BRAKING
SYSTEM OFF SWITCHES......87
DRIVER ASSIST
TECHNOLOGIES
REAR-VISION CAMERA.......88
BLIND SPOT DETECTION (BSD) /
REAR CROSS TRAFFIC ALERT
(RCTA)....................88
HIGH BEAM ASSIST (HBA)....90
STEERING RESPONSIVE
HEADLIGHTS (SRH)..........90
REVERSE AUTOMATIC BRAKING
(RAB).....................90
TABLE OF CONTENTS
2
Page 14 of 132
COMBINATION METER
1Tachometer
2Select Lever/Gear Position Indicator
3Trip Meter and Odometer4Fuel Gauge
5ECO Gauge
6Speedometer
1Tachometer
2Select Lever/Gear Position Indicator
3Trip Meter and Odometer4Fuel Gauge
5Speedometer
E
ASET
SRF
B
Fkm
miles MPH km/h
ABS
AWD
AT OIL
TEMP
CHECK
ENGINE
1
23
4
5
6
A
A
2.4–inch Combination Meter Display
ABS
AWD
AT OIL
TEMP
CHECK
ENGINEEFmi mi
MPG MPGAVG
13371327.0
22.0
B
B
OFF
123
4
5
4.2–inch Color Combination Meter Display
GAUGES AND WARNING LIGHTS
12
Page 15 of 132
WARNING AND INDICATOR LIGHTS
Redlights indicate immediate attention is required. Some examples are:
Seatbelt warning Door open Brake system
Yellowlights indicate caution. Some examples are:
Low fuelEngine low oil level
warning lightTire pressure warning light
Greenandbluelights are for information. Some examples are:
Headlight indicator light Cold coolant temperatureHigh beam
indicator light
GAUGES AND WARNING LIGHTS
13
Page 20 of 132

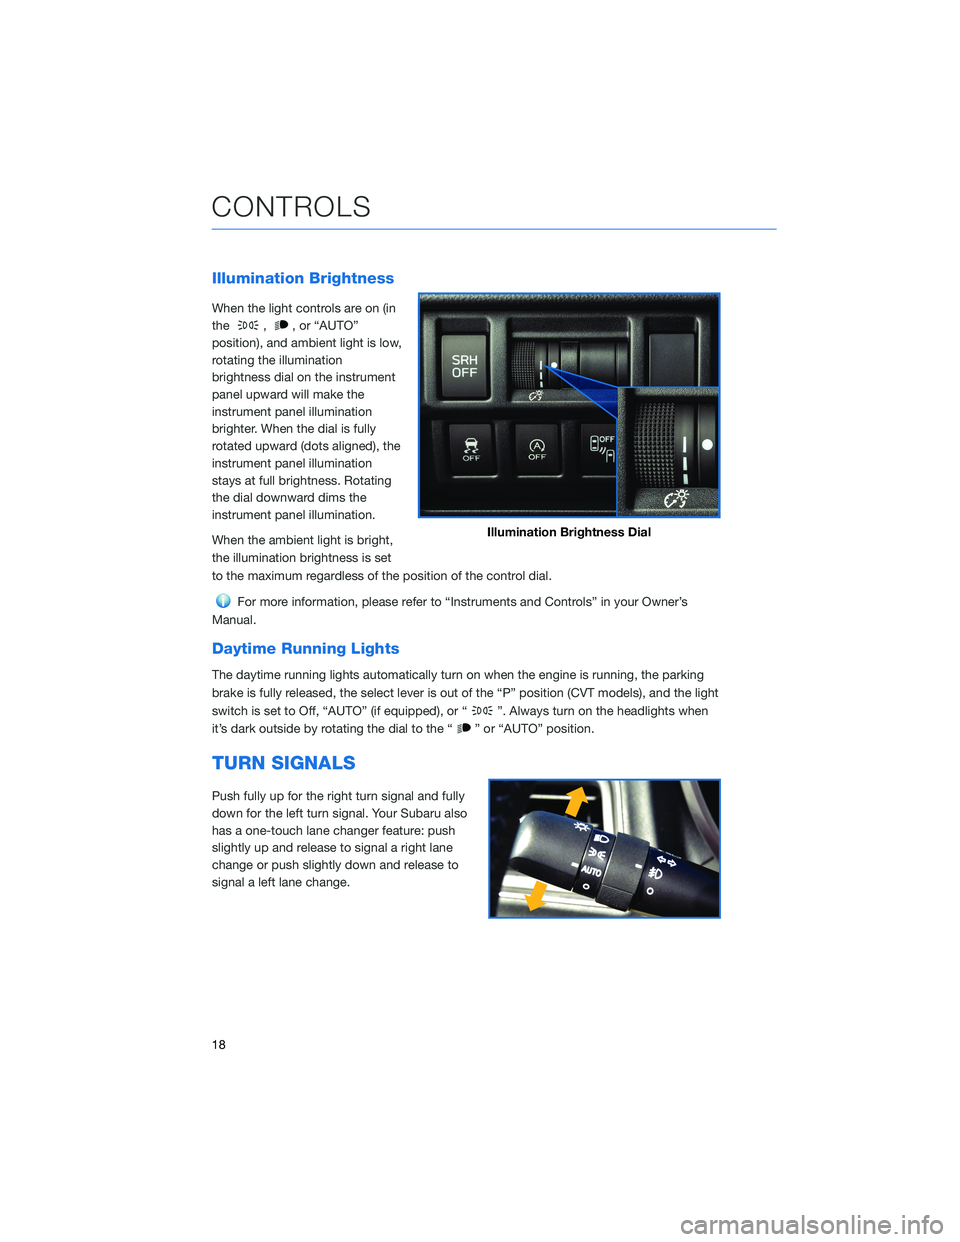
Illumination Brightness
When the light controls are on (in
the
,, or “AUTO”
position), and ambient light is low,
rotating the illumination
brightness dial on the instrument
panel upward will make the
instrument panel illumination
brighter. When the dial is fully
rotated upward (dots aligned), the
instrument panel illumination
stays at full brightness. Rotating
the dial downward dims the
instrument panel illumination.
When the ambient light is bright,
the illumination brightness is set
to the maximum regardless of the position of the control dial.
For more information, please refer to “Instruments and Controls” in your Owner’s
Manual.
Daytime Running Lights
The daytime running lights automatically turn on when the engine is running, the parking
brake is fully released, the select lever is out of the “P” position (CVT models), and the light
switch is set to Off, “AUTO” (if equipped), or “
”. Always turn on the headlights when
it’s dark outside by rotating the dial to the “
” or “AUTO” position.
TURN SIGNALS
Push fully up for the right turn signal and fully
down for the left turn signal. Your Subaru also
has a one-touch lane changer feature: push
slightly up and release to signal a right lane
change or push slightly down and release to
signal a left lane change.
Illumination Brightness Dial
CONTROLS
18
Page 30 of 132

9Rear Window Defogger Button:Press this button to turn on the rear window
defogger. If equipped, the outside mirror defogger and windshield wiper deicer will
also activate. It will automatically turn off after about 15 minutes. If the window clears
before then, press the button again to turn the defogger off. You can customize this
function for continuous operation through the Combination Meter Display (CMD) or
the STARLINK
®Touchscreen by selecting “Settings” then “Vehicle”.
Remote Engine Start with Climate Control(if equipped)
You can remotely start your Subaru and adjust the temperature using the STARLINK®
Safety and Security features through theMySubaruApp (subscription required). Please
refer to “SUBARU STARLINK Features” in your SUBARU STARLINK®Safety and Security
Owner's Manual for a list of required vehicle conditions for this feature.
Heated Seats(if equipped)
The heated seat switches are
located between the driver and
passenger seats. There is a
separate switch for the driver and
passenger. Press the “HI” button
for more rapid heating or press
the “LO” button for normal
heating. Return the switch to the
center position to turn off the
heated seat.
Heated Seat Switches
GETTING COMFORTABLE
28
Page 32 of 132

IGNITION SWITCH
The ignition switch has four positions:
LOCK:You can only insert or remove the key in this position.
ACC (Accessory):Provides power to the audio system and accessory power outlets.
ON:All electrical systems are available. The key returns to this position after starting the
engine.
START:Turn the key to this position to start the engine.
PUSH-BUTTON IGNITION SWITCH(if equipped)
Each time you press the ignition switch without
depressing the brake pedal (or clutch pedal for manual
transmission vehicles), the ignition position will change
as follows: ACC, ON, OFF.
ACC (Accessory):Provides power to the audio
system and accessory power outlets. Orange indicator
illuminates.
ON:All electrical systems are available. Orange indicator illuminates.
OFF:Power off and indicator off.
STARTING THE VEHICLE
Without Push-button Ignition
To start the engine:
1. Make sure the select lever is in the “P” position (or neutral position and depress the
clutch for manual transmission vehicles).
2. Using the key, turn the ignition switch to “START”.
NOTE: Do not depress the accelerator pedal. Release the key as soon as the engine
starts.
With Push-button Ignition
To start the engine:
1. Sit in the driver’s seat with the access key fob.
2.
Make sure the select lever is in the “P” position or neutral for manual transmission vehicles.
3. Depress the brake pedal (and clutch pedal for manual transmission vehicles).
4. When the Engine START/STOP button indicator turns green, briefly press and release
the Engine START/STOP button.
OPERATING THE VEHICLE
30
Page 33 of 132

DRIVING THE VEHICLE
6-Speed Manual Transmission
The manual transmission is a fully synchronised 6-forward and 1-reverse speed
transmission. To shift into reverse gear, raise and hold the slider ring, shift to the “R”
position, and release the slider ring. Only pull the slider ring up when shifting into reverse
gear.
Automatic Transmission Shift Mode
The Continuously Variable Transmission (CVT)
is electronically controlled and provides two
different driving mode combinations: normal
and manual or normal and low.
Normal Mode
When the select lever is in the “D” (Drive)
position, the transmission is in normal shift
mode. The select lever position indicator in the
Combination Meter Display (CMD) shows “D”
and the transmission automatically shifts into a
suitable forward gear.
Low Mode(if equipped)
Low Mode is for using engine braking when
going downhill, etc. Moving the select lever left
into the “L” position from the “D” (Drive)
position causes the transmission to change into Low Mode. The shift position indicator
shows “L” as the selected gear.
Manual Mode(if equipped)
In manual mode, you select the desired gear position to obtain necessary acceleration and
engine braking. Move the select lever left from the “D” position into the “M” position to
select manual mode. The gear position indicator in the Combination Meter Display (CMD)
shows the currently selected gear. Arrow-shaped indicators show when upshifting or
downshifting is available. To shift, use the paddle shift control switches behind the steering
wheel.
CVT Select Lever
OPERATING THE VEHICLE
31
Page 34 of 132

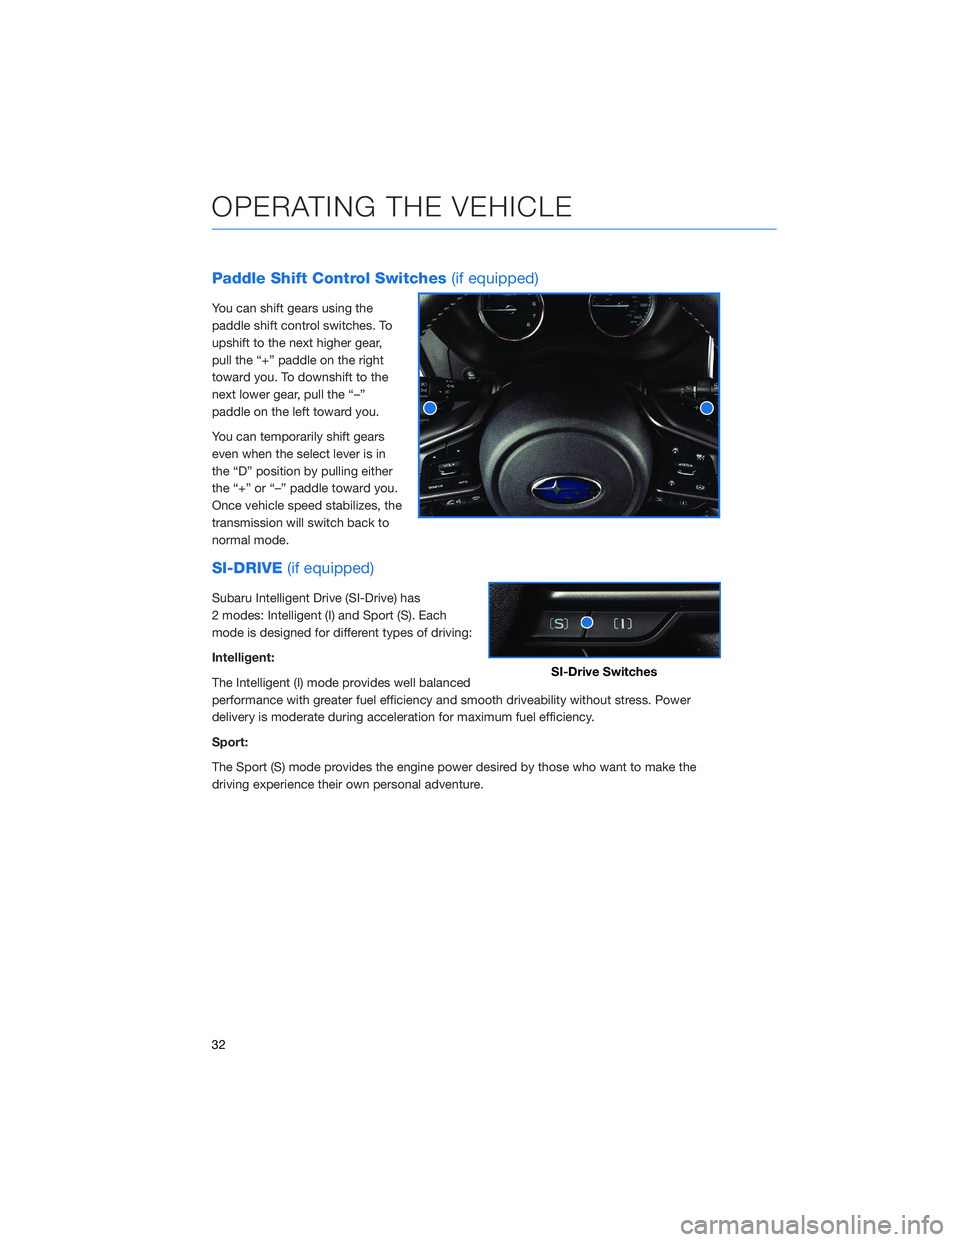
Paddle Shift Control Switches(if equipped)
You can shift gears using the
paddle shift control switches. To
upshift to the next higher gear,
pull the “+” paddle on the right
toward you. To downshift to the
next lower gear, pull the “–”
paddle on the left toward you.
You can temporarily shift gears
even when the select lever is in
the “D” position by pulling either
the “+” or “–” paddle toward you.
Once vehicle speed stabilizes, the
transmission will switch back to
normal mode.
SI-DRIVE(if equipped)
Subaru Intelligent Drive (SI-Drive) has
2 modes: Intelligent (I) and Sport (S). Each
mode is designed for different types of driving:
Intelligent:
The Intelligent (I) mode provides well balanced
performance with greater fuel efficiency and smooth driveability without stress. Power
delivery is moderate during acceleration for maximum fuel efficiency.
Sport:
The Sport (S) mode provides the engine power desired by those who want to make the
driving experience their own personal adventure.
SI-Drive Switches
OPERATING THE VEHICLE
32