2022 SUBARU ASCENT instruments and controls
[x] Cancel search: instruments and controlsPage 21 of 148

ADVANCED ADAPTIVE CRUISE CONTROL
1Adaptive Cruise Control On/Off
2Lane Keep Assist
3Increase Distance
4Decrease Distance
5Resume (RES)/Increase Speed and Set
(SET)/Decrease Speed
For more information on the Advanced
Adaptive Cruise Control switches, please refer
to page 97 in this Getting Started Guide or
“Advanced Adaptive Cruise Control” in your
EyeSight
®Owner’s Manual.
i/SET SWITCH
The “i/Set” switch allows you to cycle through
useful driving information in the Combination
Meter Display such as fuel consumption, driving
time, speed, and tire pressure. You can change
the information displayed using the up and
down arrows.
When the Menu Entering Screen is displayed,
pull and hold the “i/Set” switch to enter the
Menu Screen for the ability to modify a number
of settings.
For more information about the Combination Meter Display, please refer to
“Instruments and Controls” in your Owner’s Manual.
CONTROLS
19
Page 22 of 148

VIEW/ENTER SWITCH
Use the arrows to cycle through
useful information in the
Multi-Function Display (MFD).
Navigate to the “Settings” menu
and hold the “VIEW/ENTER”
switch to adjust a number of
settings.
For more information, please
refer to “Instruments and
Controls” in your Owner’s Manual.
LIGHT CONTROLS
1AUTO:Rotate the end of the lever to set
your headlights to automatically turn on
or off, depending on the level of light
outside. When in the “AUTO” position,
the headlights will automatically turn on
when the windshield wipers operate
several times.
NOTE: The sensitivity of the automatic
headlights can be adjusted through the
STARLINK
®multimedia display.
2Parking Lights:Rotate the end of the lever to turn on the instrument panel
illumination, parking lights, side marker lights, tail lights, and license plate lights.
3Headlights:Rotate the end of the lever to turn on the headlights, instrument panel
illumination, parking lights, side marker lights, tail lights, and license plate lights. To
flash the headlights, pull the lever toward you, then release. The high beams will stay
on as long as you hold the lever.
4High Beams:Push the lever forward to change from low beam to high beam. When
set to the “AUTO” position, pushing the lever forward also activates the High Beam
Assist (HBA) system. Pull the lever back to center to return to low beam.
5Fog Lights:If equipped, rotate the dial to turn on the fog lights when the headlights
are on low beams in the “
” or “AUTO” position.
CONTROLS
20
Page 23 of 148

Illumination Brightness
When the light controls are on
(in the
,, or “AUTO”
position), and ambient light is low,
rotating the illumination
brightness dial on the instrument
panel upward will make the
instrument panel illumination
brighter. When the dial is fully
rotated upward (dots aligned),
the instrument panel illumination
stays at full brightness. Rotating
the dial downward dims the
instrument panel illumination.
When the ambient light is bright,
the illumination brightness is set
to the maximum regardless of the position of the control dial.
For more information, please refer to “Instruments and Controls” in your Owner’s
Manual.
Daytime Running Lights
The daytime running lights automatically turn on when the engine is running, the parking
brake is fully released, the select lever is out of the “P” position, and the light switch is set
to Off, “AUTO”, or “
”. Always turn on the headlights when it’s dark outside by rotating
the dial to the “
” or “AUTO” position.
TURN SIGNALS
Push fully up for the right turn signal and fully
down for the left turn signal. Your Subaru also
has a one-touch lane changer feature: push
slightly up and release to signal a right lane
change or push slightly down and release to
signal a left lane change.
Illumination Brightness Dial
CONTROLS
21
Page 33 of 148

REAR VIEW MIRROR
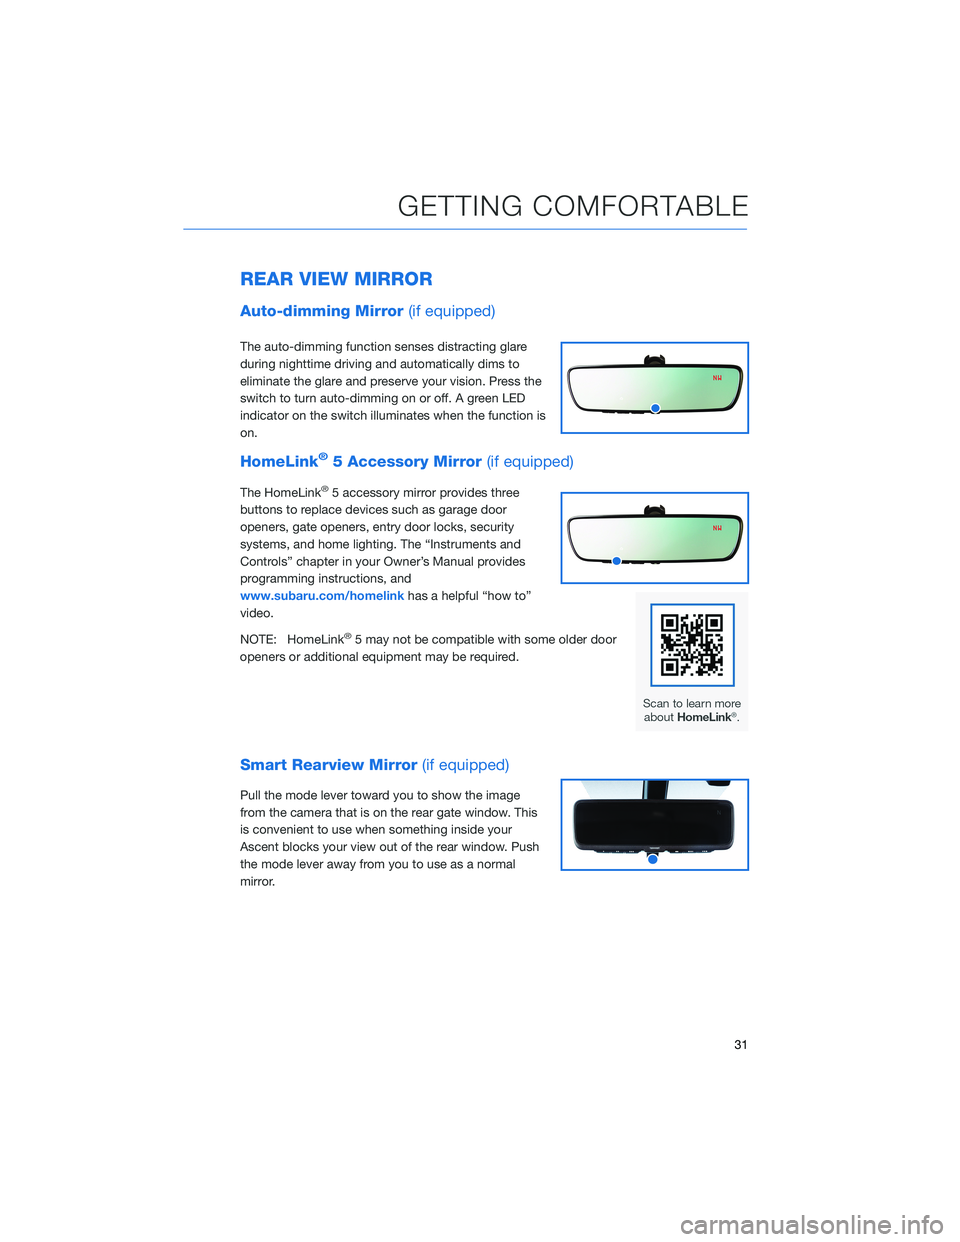
Auto-dimming Mirror(if equipped)
The auto-dimming function senses distracting glare
during nighttime driving and automatically dims to
eliminate the glare and preserve your vision. Press the
switch to turn auto-dimming on or off. A green LED
indicator on the switch illuminates when the function is
on.
HomeLink®5 Accessory Mirror(if equipped)
The HomeLink®5 accessory mirror provides three
buttons to replace devices such as garage door
openers, gate openers, entry door locks, security
systems, and home lighting. The “Instruments and
Controls” chapter in your Owner’s Manual provides
programming instructions, and
www.subaru.com/homelinkhas a helpful “how to”
video.
NOTE: HomeLink
®5 may not be compatible with some older door
openers or additional equipment may be required.
Smart Rearview Mirror(if equipped)
Pull the mode lever toward you to show the image
from the camera that is on the rear gate window. This
is convenient to use when something inside your
Ascent blocks your view out of the rear window. Push
the mode lever away from you to use as a normal
mirror.
GETTING COMFORTABLE
31
Page 54 of 148

Passenger Occupant Detection and Seatbelt Reminders
To help keep your passengers
safe, your Subaru has a
passenger occupant detection
and seatbelt reminder system for
each seat, including the second
and third rows.
If passengers in the second or
third row do not fasten their
seatbelts while the ignition is in
the "ON" position, the seatbelt
warning lights illuminate or blink
for the specific seat, and a
warning chime may sound.
For more information, please refer to “Instruments and Controls” in your Owner’s
Manual.
CARGO COVER(if equipped)
Use the detachable cargo cover to protect
contents in the cargo area from direct sunlight.
Pull the cover toward the rear of your Subaru
and insert both ends of the cover into the
catches.
Store the cover under the floor of the cargo
area when not in use. Instructions for
operation are included on the cargo cover
housing.
Cargo Area and Cover
PASSENGER/CARGO AREAS
52
Page 105 of 148

HIGH BEAM ASSIST (HBA)
This function uses the EyeSight®cameras to automatically switch the
headlights between high and low beam settings, enhancing safety for
both you and other drivers on the road. To activate High Beam Assist,
set the headlight control switch to the “AUTO” position and push the
headlight lever forward to the high beam position. The green HBA
indicator illuminates on the Combination Meter.
HBA automatically activates the high beams when the forward area is dark, there are no
preceding/oncoming vehicles or sharp curves in the road, and your speed is approximately
20 mph or greater. When a preceding/oncoming vehicle is detected, the forward area is
bright, your speed decreases to 10 mph or less, or the EyeSight
®system is malfunctioning
or is temporarily stopped, HBA automatically switches to low beams.
STEERING RESPONSIVE HEADLIGHTS (SRH)
The Steering Responsive Headlights (SRH) system aims the headlight beams in the
direction you are steering, improving visibility at corners and intersections when driving at
night. You can turn the SRH system on or off using the steering wheel mounted “i/SET”
switches to access the settings menu on the Combination Meter Display (CMD).
For more information, please refer to “Instruments and Controls” in your Owner’s
Manual.
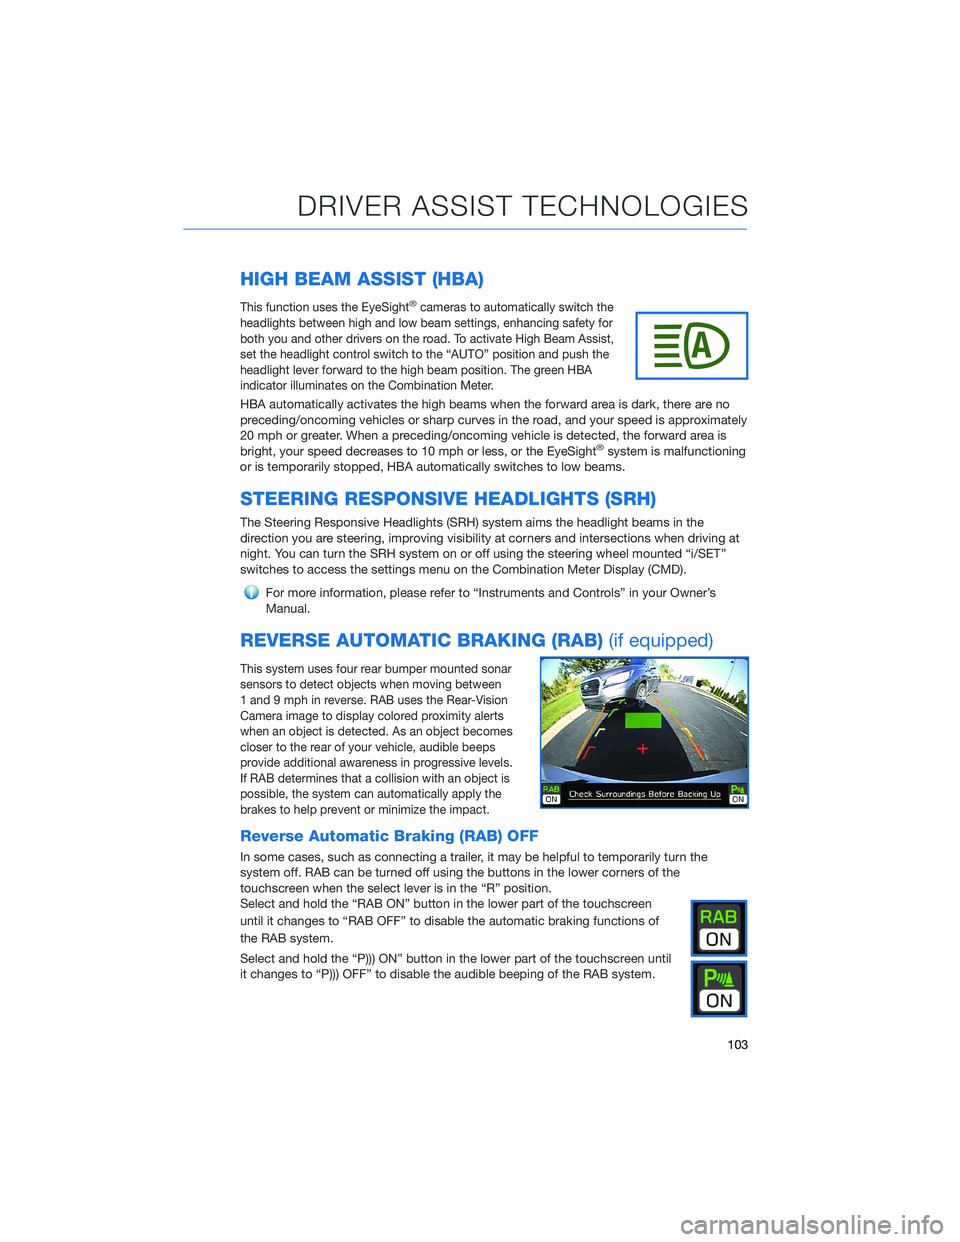
REVERSE AUTOMATIC BRAKING (RAB)(if equipped)
This system uses four rear bumper mounted sonar
sensors to detect objects when moving between
1 and 9 mph in reverse. RAB uses the Rear-Vision
Camera image to display colored proximity alerts
when an object is detected. As an object becomes
closer to the rear of your vehicle, audible beeps
provide additional awareness in progressive levels.
If RAB determines that a collision with an object is
possible, the system can automatically apply the
brakes to help prevent or minimize the impact.
Reverse Automatic Braking (RAB) OFF
In some cases, such as connecting a trailer, it may be helpful to temporarily turn the
system off. RAB can be turned off using the buttons in the lower corners of the
touchscreen when the select lever is in the “R” position.
Select and hold the “RAB ON” button in the lower part of the touchscreen
until it changes to “RAB OFF” to disable the automatic braking functions of
the RAB system.
Select and hold the “P))) ON” button in the lower part of the touchscreen until
it changes to “P))) OFF” to disable the audible beeping of the RAB system.
DRIVER ASSIST TECHNOLOGIES
103