Page 80 of 148
SUBARU STARLINK®MOBILE APP
The STARLINK®app gives you access to a suite of convenient cloud-based applications,
such as iHeartRadio®, Yelp®, Magellan NAVI®, eBird, and more via your in-vehicle
multimedia touchscreen, helping you and your family stay safe, entertained, and
connected. App availability will vary by vehicle and trim level. To get started, first download
and log in to the SUBARU STARLINK
®app on your phone.
To download the SUBARU STARLINK
®app, go to the Apple App Store or the Google Play
Store and search for SUBARU STARLINK®in the menu.
For more information and a list of available apps for your vehicle, please visit:
https://www.subaru.com/engineering/starlink/multimedia.html
APPS
78
Page 81 of 148

MYSUBARU
Whether you’re on the road or planning adventures, the MySubaru app makes loving every
part of owning your Subaru easy. Although the mobile app is great when you are on the go,
you can also visitwww.MySubaru.comfrom your computer to access the same functions
and to aid in planning your trip before you leave.
You can download the MySubaru app from the Google Play Store or
the Apple App Store on your phone by searching MySubaru.
By creating an account, you can:
• Schedule service with a preferred Subaru retailer
• Get vehicle service reminders, recall alerts, and exclusive
coupons
• Track and record your service history
• Access resources like your owner’s manuals, how to videos and
more
• Access SUBARU STARLINK
®Safety and Security features (must have an active
SUBARU STARLINK®subscription)
• Get help from 24-hour roadside assistance (24-hour roadside is included in standard
3-year warranty, and after 3 years with a Concierge package)
Service Appointment Scheduler
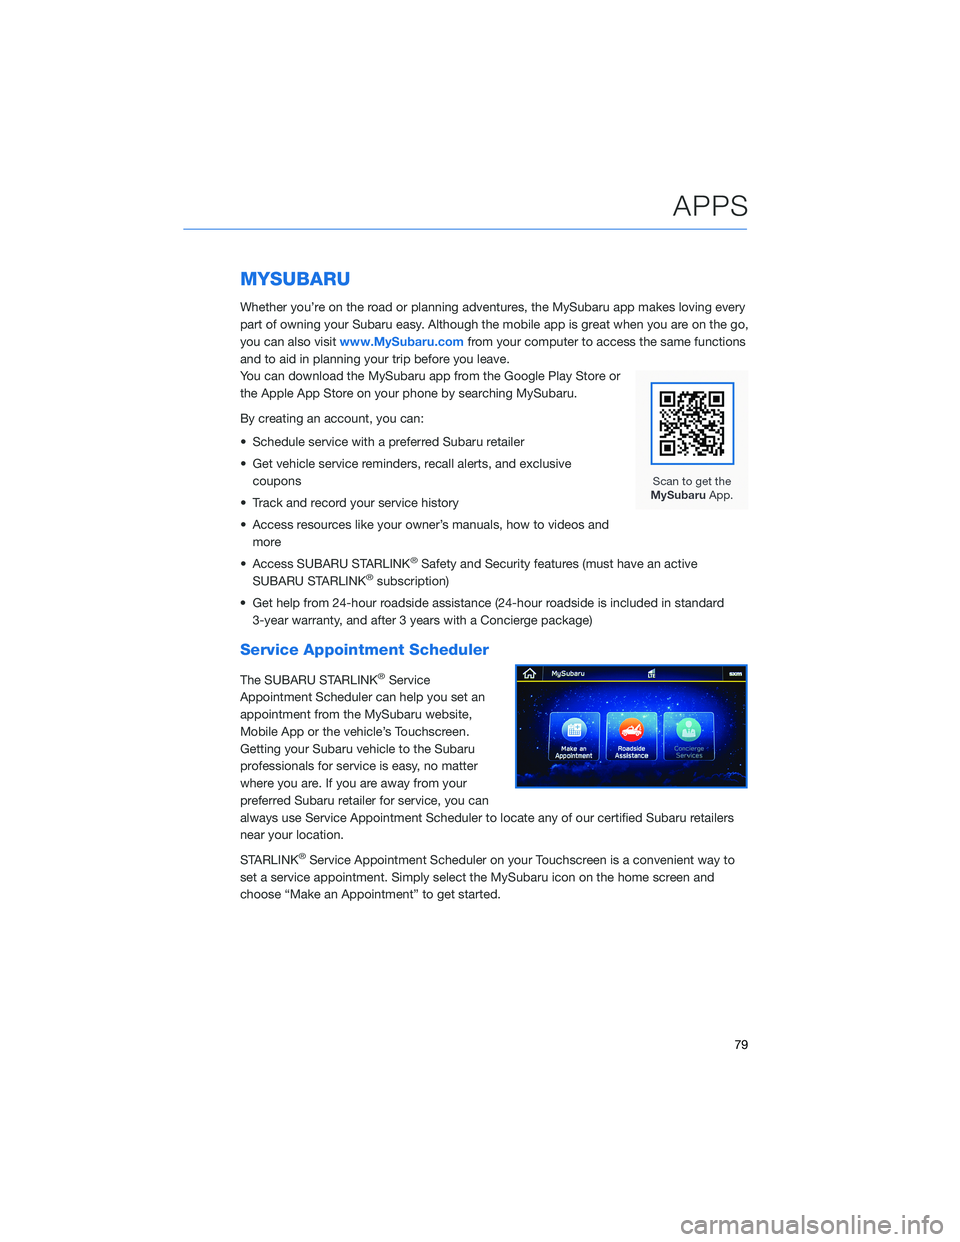
The SUBARU STARLINK®Service
Appointment Scheduler can help you set an
appointment from the MySubaru website,
Mobile App or the vehicle’s Touchscreen.
Getting your Subaru vehicle to the Subaru
professionals for service is easy, no matter
where you are. If you are away from your
preferred Subaru retailer for service, you can
always use Service Appointment Scheduler to locate any of our certified Subaru retailers
near your location.
STARLINK
®Service Appointment Scheduler on your Touchscreen is a convenient way to
set a service appointment. Simply select the MySubaru icon on the home screen and
choose “Make an Appointment” to get started.
APPS
79
Page 86 of 148

SETTINGS AND UPDATES OVERVIEW
Many settings can be customized for different features in your Subaru. In this section you
will find examples and instructions for some of the settings you can tailor to fit your
preferences, as well as ways to keep your system updated.
Connect to Home Wi-Fi
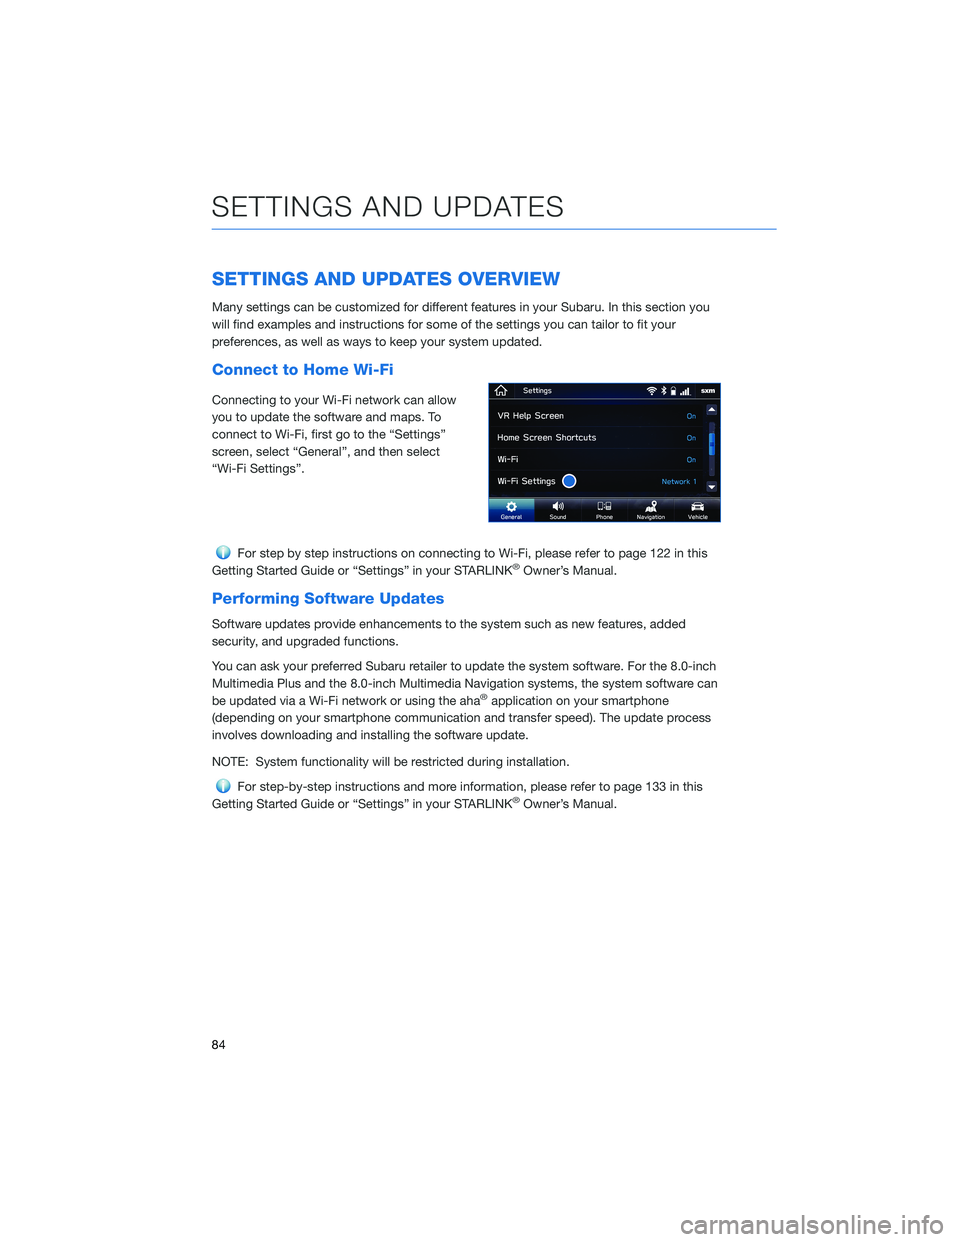
Connecting to your Wi-Fi network can allow
you to update the software and maps. To
connect to Wi-Fi, first go to the “Settings”
screen, select “General”, and then select
“Wi-Fi Settings”.
For step by step instructions on connecting to Wi-Fi, please refer to page 122 in this
Getting Started Guide or “Settings” in your STARLINK®Owner’s Manual.
Performing Software Updates
Software updates provide enhancements to the system such as new features, added
security, and upgraded functions.
You can ask your preferred Subaru retailer to update the system software. For the 8.0-inch
Multimedia Plus and the 8.0-inch Multimedia Navigation systems, the system software can
be updated via a Wi-Fi network or using the aha
®application on your smartphone
(depending on your smartphone communication and transfer speed). The update process
involves downloading and installing the software update.
NOTE: System functionality will be restricted during installation.
For step-by-step instructions and more information, please refer to page 133 in this
Getting Started Guide or “Settings” in your STARLINK®Owner’s Manual.
SETTINGS AND UPDATES
84
Page 87 of 148

SOUND
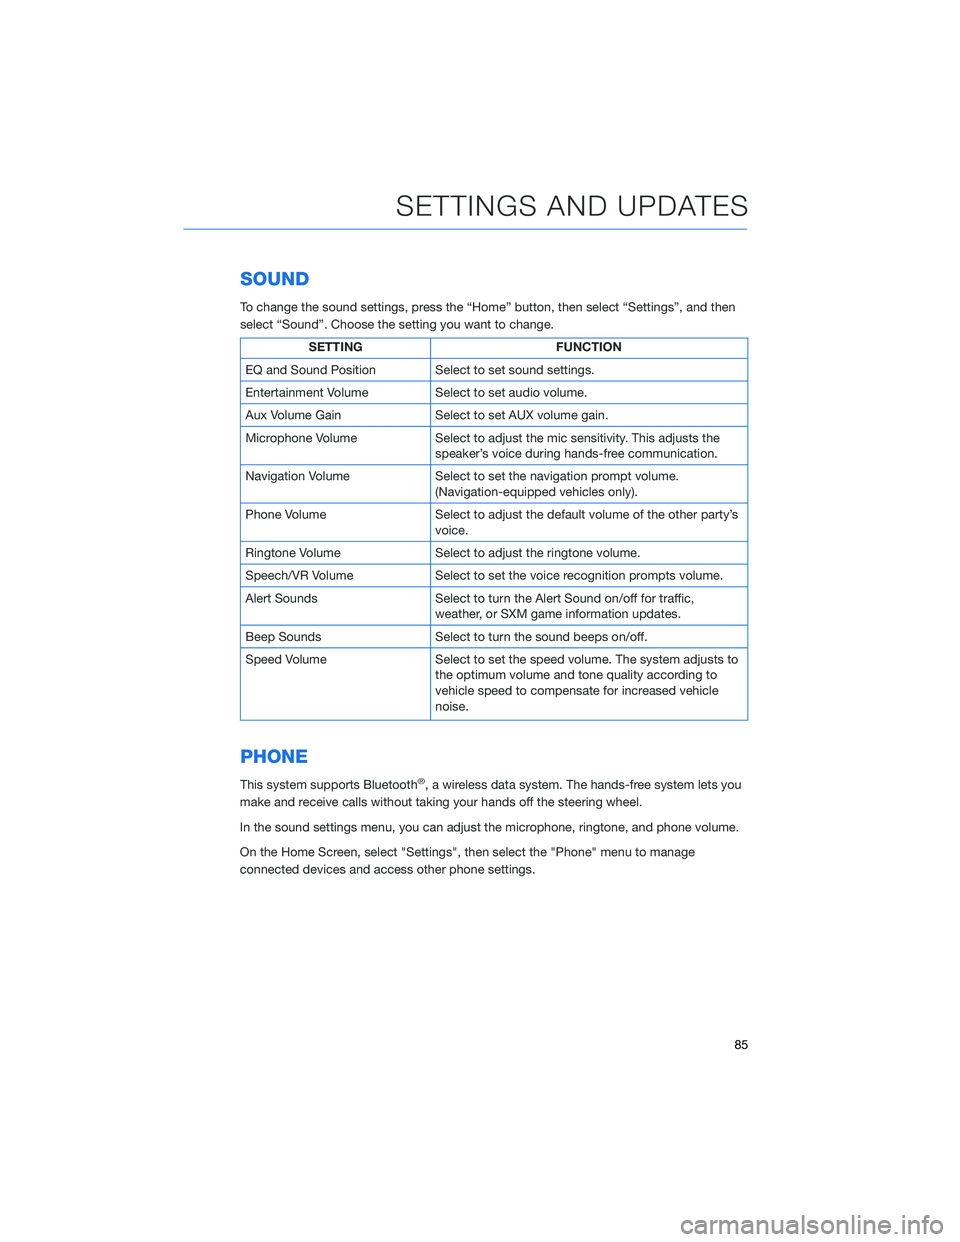
To change the sound settings, press the “Home” button, then select “Settings”, and then
select “Sound”. Choose the setting you want to change.
SETTING FUNCTION
EQ and Sound Position Select to set sound settings.
Entertainment Volume Select to set audio volume.
Aux Volume Gain Select to set AUX volume gain.
Microphone Volume Select to adjust the mic sensitivity. This adjusts the
speaker’s voice during hands-free communication.
Navigation Volume Select to set the navigation prompt volume.
(Navigation-equipped vehicles only).
Phone Volume Select to adjust the default volume of the other party’s
voice.
Ringtone Volume Select to adjust the ringtone volume.
Speech/VR Volume Select to set the voice recognition prompts volume.
Alert Sounds Select to turn the Alert Sound on/off for traffic,
weather, or SXM game information updates.
Beep Sounds Select to turn the sound beeps on/off.
Speed Volume Select to set the speed volume. The system adjusts to
the optimum volume and tone quality according to
vehicle speed to compensate for increased vehicle
noise.
PHONE
This system supports Bluetooth®, a wireless data system. The hands-free system lets you
make and receive calls without taking your hands off the steering wheel.
In the sound settings menu, you can adjust the microphone, ringtone, and phone volume.
On the Home Screen, select "Settings", then select the "Phone" menu to manage
connected devices and access other phone settings.
SETTINGS AND UPDATES
85
Page 89 of 148
Updating Maps Using Your PC/MAC
Maps can also be updated using a USB memory device, which will
allow the entire map program to be updated at one time. This is a
great option if you are going to take a cross-country trip and your
maps have not been updated in a while.
To update the map using a USB memory device, start by going to
www.subaru-maps.com.
CLOCK
You can adjust the clock manually or set the clock to update
automatically. When set to “Auto,” the clock automatically adjusts
when a Bluetooth
®connected phone is paired (vehicles without
navigation), or through the GPS signal (vehicles with navigation
system).
The following sections contain step-by-step instructions for setting
the clock, and you can scan the QR codes for a helpful “how to”
video. Choose the appropriate QR code based on your
Multi-Function Display (Color LCD or Black and White LCD).
SETTINGS AND UPDATES
87
Page 91 of 148
Automatically
To set the clock automatically, the “Auto” mode must be selected in the clock adjustment
setting. To set the clock:
1Press the “Home” button.
2Select “Settings”.
3Select “Vehicle”.
4Select “Time/Date”.
5Select “Mode”.
6Select “Auto”. Press the “Home” button when
finished.
The clock automatically adjusts as follows:
• Systems with Navigation: Automatically adjusts the
clock when a GPS signal is available.
• Systems without Navigation: Automatically adjusts
the clock when a phone is paired and connected via
Bluetooth
®. “Phonebook Download” must be enabled in the Phone Settings.
For step-by-step procedures to pair a phone to the SUBARU STARLINK®
Touchscreen, see page 111 for Android devices or page 115 for Apple devices.
SETTINGS AND UPDATES
89
Page 113 of 148
BLUETOOTH®PAIRING
Pairing an Android Device
1. Start by selecting “Settings” on the Home
screen.
2. Select the Phone menu, then select “Add
Device”.
3. This screen will be displayed when pairing
mode is in progress. The device name will
most likely be Subaru BT, but be sure to
make note of what name it is, so you can
find it on your phone.
HOW TO APPENDIX
111
Page 115 of 148
6. Now select "OK" to pair with Subaru BT and select
“Confirm” on the Touchscreen if the PIN matches
the phone.
7. Make sure to allow access to your contacts
and call history and select “Download” to
download the phonebook contacts.
8. If your phonebook or messages are not
appearing, press the “Phone” icon on the
home screen and then select “Change
Device” in the Overview menu.
HOW TO APPENDIX
113