2022 SUBARU ASCENT Eco
[x] Cancel search: EcoPage 75 of 148
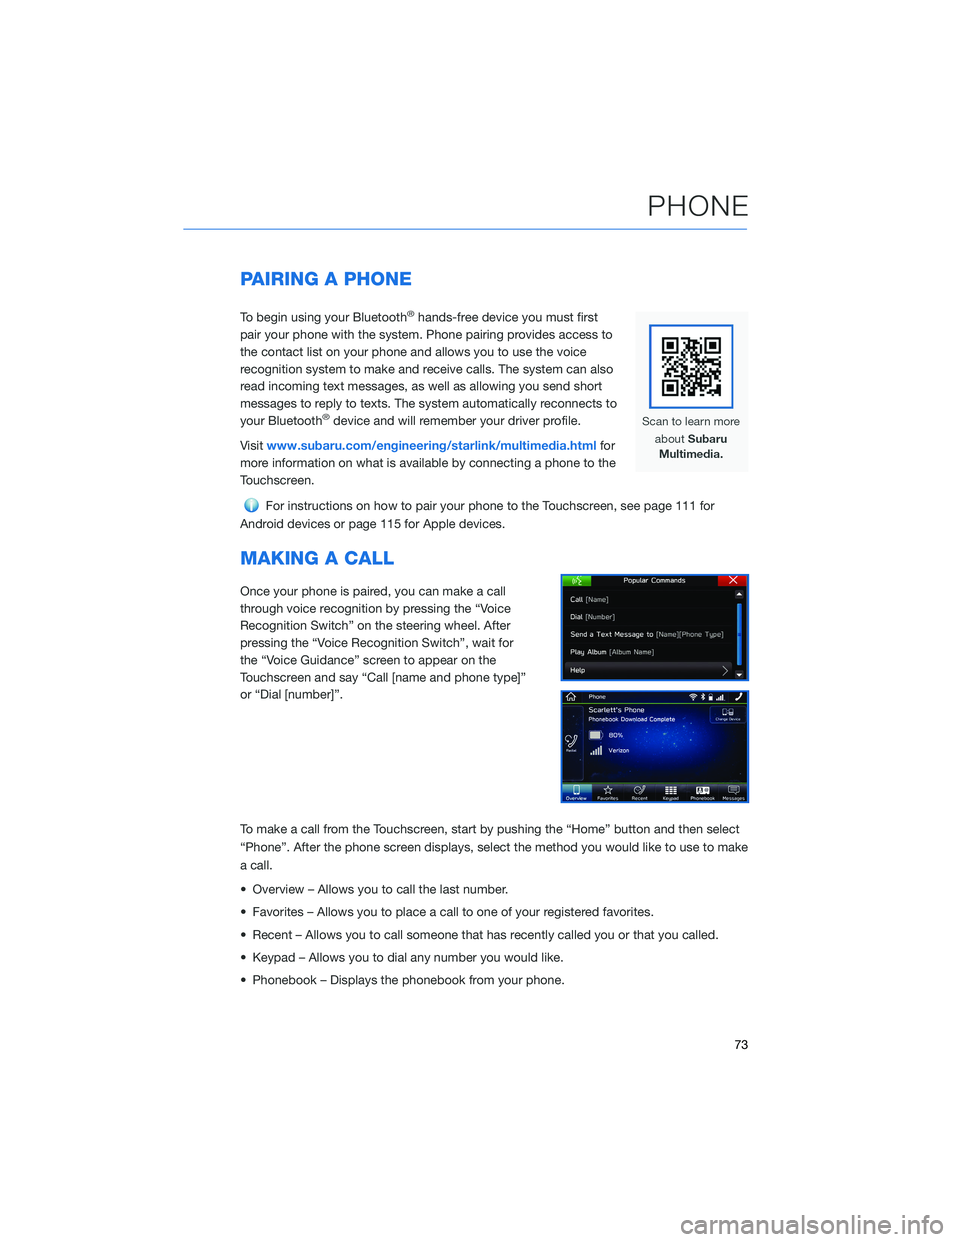
PAIRING A PHONE
To begin using your Bluetooth®hands-free device you must first
pair your phone with the system. Phone pairing provides access to
the contact list on your phone and allows you to use the voice
recognition system to make and receive calls. The system can also
read incoming text messages, as well as allowing you send short
messages to reply to texts. The system automatically reconnects to
your Bluetooth
®device and will remember your driver profile.
Visitwww.subaru.com/engineering/starlink/multimedia.htmlfor
more information on what is available by connecting a phone to the
Touchscreen.
For instructions on how to pair your phone to the Touchscreen, see page 111 for
Android devices or page 115 for Apple devices.
MAKING A CALL
Once your phone is paired, you can make a call
through voice recognition by pressing the “Voice
Recognition Switch” on the steering wheel. After
pressing the “Voice Recognition Switch”, wait for
the “Voice Guidance” screen to appear on the
Touchscreen and say “Call [name and phone type]”
or “Dial [number]”.
To make a call from the Touchscreen, start by pushing the “Home” button and then select
“Phone”. After the phone screen displays, select the method you would like to use to make
a call.
• Overview – Allows you to call the last number.
• Favorites – Allows you to place a call to one of your registered favorites.
• Recent – Allows you to call someone that has recently called you or that you called.
• Keypad – Allows you to dial any number you would like.
• Phonebook – Displays the phonebook from your phone.
PHONE
73
Page 81 of 148
MYSUBARU
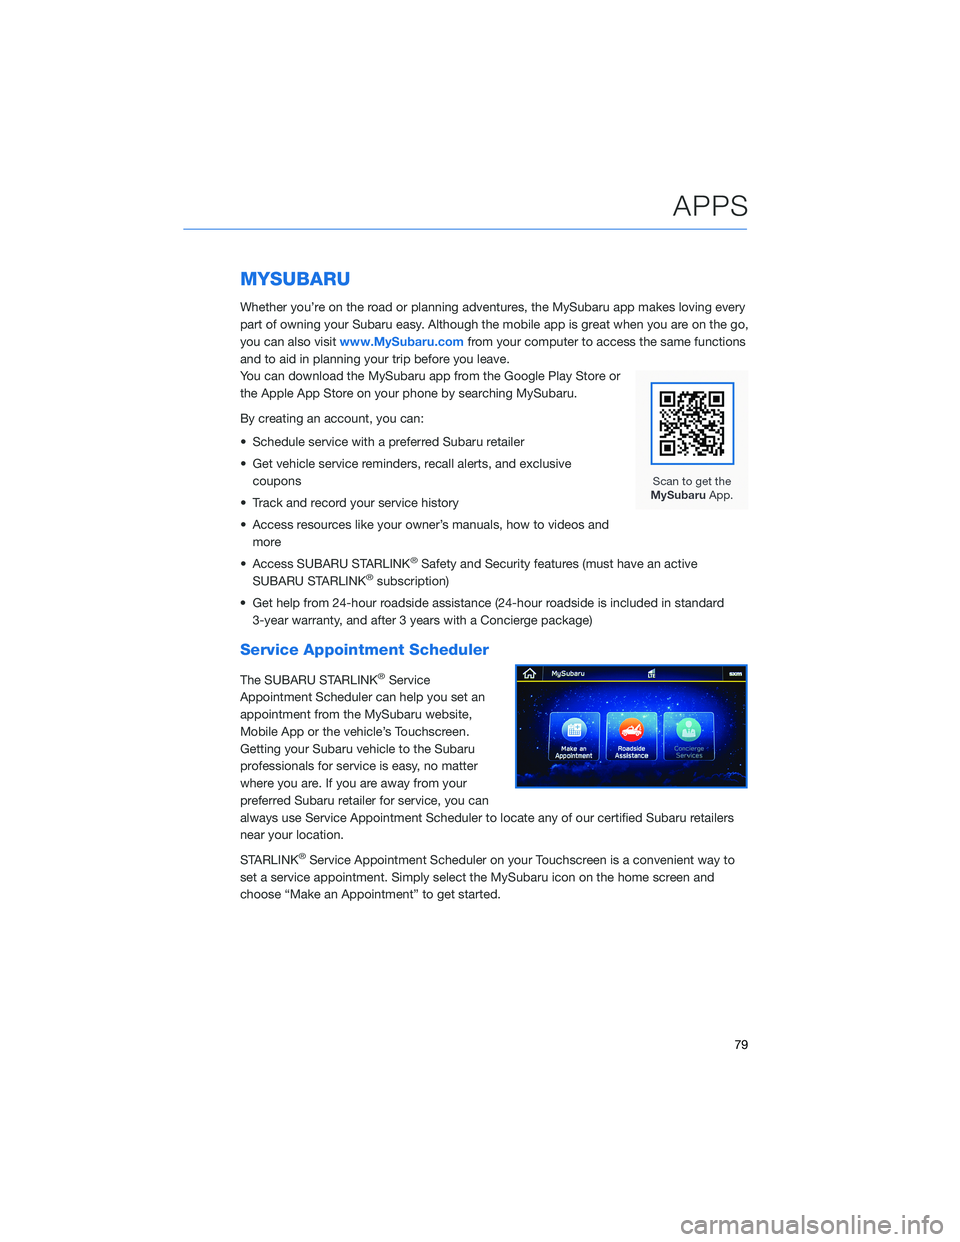
Whether you’re on the road or planning adventures, the MySubaru app makes loving every
part of owning your Subaru easy. Although the mobile app is great when you are on the go,
you can also visitwww.MySubaru.comfrom your computer to access the same functions
and to aid in planning your trip before you leave.
You can download the MySubaru app from the Google Play Store or
the Apple App Store on your phone by searching MySubaru.
By creating an account, you can:
• Schedule service with a preferred Subaru retailer
• Get vehicle service reminders, recall alerts, and exclusive
coupons
• Track and record your service history
• Access resources like your owner’s manuals, how to videos and
more
• Access SUBARU STARLINK
®Safety and Security features (must have an active
SUBARU STARLINK®subscription)
• Get help from 24-hour roadside assistance (24-hour roadside is included in standard
3-year warranty, and after 3 years with a Concierge package)
Service Appointment Scheduler
The SUBARU STARLINK®Service
Appointment Scheduler can help you set an
appointment from the MySubaru website,
Mobile App or the vehicle’s Touchscreen.
Getting your Subaru vehicle to the Subaru
professionals for service is easy, no matter
where you are. If you are away from your
preferred Subaru retailer for service, you can
always use Service Appointment Scheduler to locate any of our certified Subaru retailers
near your location.
STARLINK
®Service Appointment Scheduler on your Touchscreen is a convenient way to
set a service appointment. Simply select the MySubaru icon on the home screen and
choose “Make an Appointment” to get started.
APPS
79
Page 83 of 148
SAFETY AND SECURITY OVERVIEW
STARLINK®Safety and Security services* are designed to help in your time of need. These
include Advanced Automatic Collision Notification, SOS Emergency Assistance, Enhanced
Roadside Assistance, Stolen Vehicle Recovery, the added convenience of Remote Engine
Start with Climate Control, and so much more.
With the SUBARU STARLINK
®system integrated into your vehicle, advanced safety and
security technology is just a button press away. The SUBARU STARLINK®experience
includes in-vehicle call center support, maintenance and diagnostic alerts as well as
remote services that keep you connected to your Subaru vehicle.
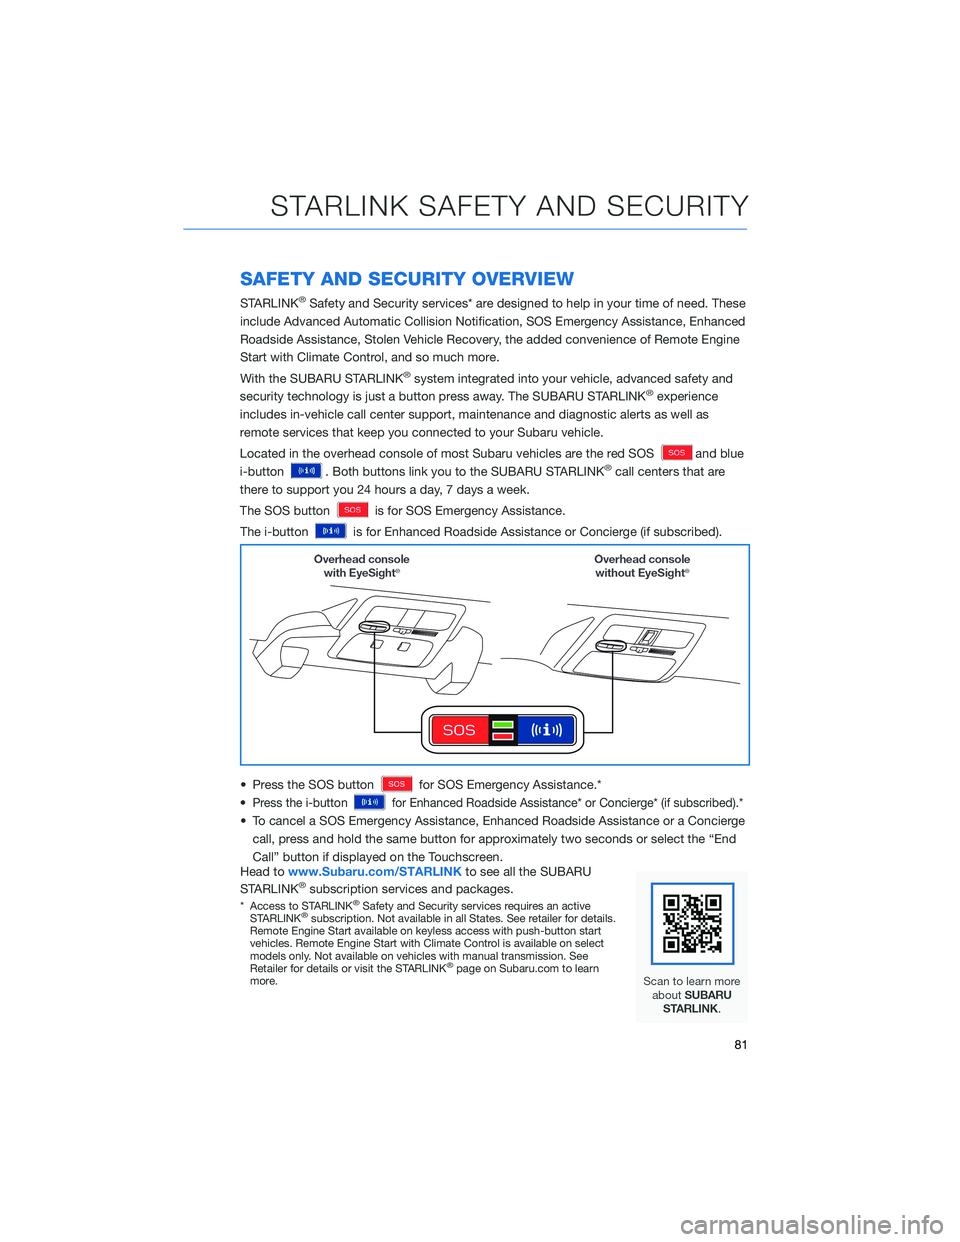
Located in the overhead console of most Subaru vehicles are the red SOS
and blue
i-button
. Both buttons link you to the SUBARU STARLINK®call centers that are
there to support you 24 hours a day, 7 days a week.
The SOS button
is for SOS Emergency Assistance.
The i-button
is for Enhanced Roadside Assistance or Concierge (if subscribed).
• Press the SOS button
for SOS Emergency Assistance.*
•
Press the i-buttonfor Enhanced Roadside Assistance* or Concierge* (if subscribed).*
• To cancel a SOS Emergency Assistance, Enhanced Roadside Assistance or a Concierge
call, press and hold the same button for approximately two seconds or select the “End
Call” button if displayed on the Touchscreen.
Head towww.Subaru.com/STARLINKto see all the SUBARU
STARLINK
®subscription services and packages.
* Access to STARLINK®Safety and Security services requires an active
STARLINK®subscription. Not available in all States. See retailer for details.
Remote Engine Start available on keyless access with push-button start
vehicles. Remote Engine Start with Climate Control is available on select
models only. Not available on vehicles with manual transmission. See
Retailer for details or visit the STARLINK
®page on Subaru.com to learn
more.
STARLINK SAFETY AND SECURITY
81
Page 87 of 148
SOUND
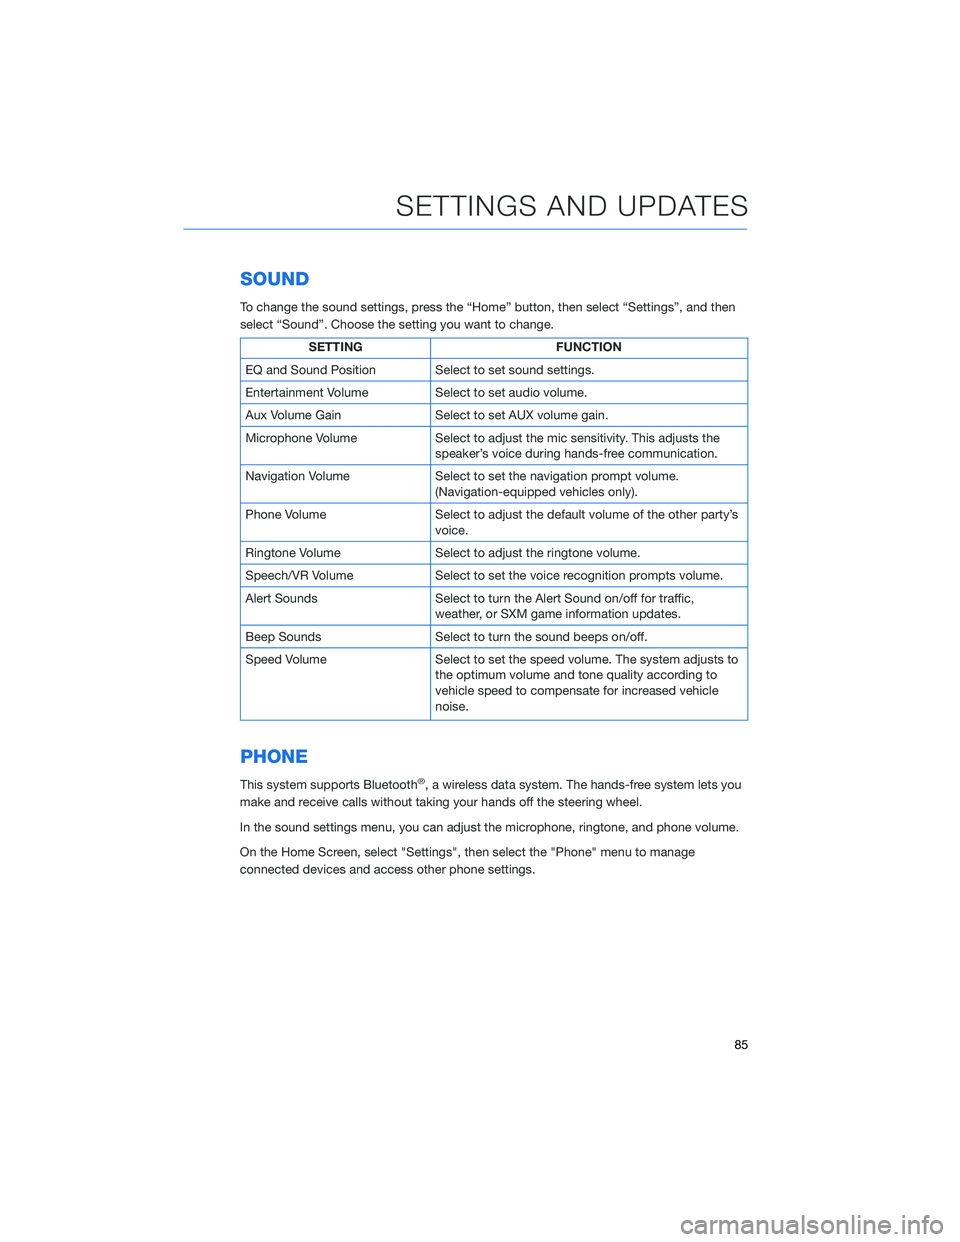
To change the sound settings, press the “Home” button, then select “Settings”, and then
select “Sound”. Choose the setting you want to change.
SETTING FUNCTION
EQ and Sound Position Select to set sound settings.
Entertainment Volume Select to set audio volume.
Aux Volume Gain Select to set AUX volume gain.
Microphone Volume Select to adjust the mic sensitivity. This adjusts the
speaker’s voice during hands-free communication.
Navigation Volume Select to set the navigation prompt volume.
(Navigation-equipped vehicles only).
Phone Volume Select to adjust the default volume of the other party’s
voice.
Ringtone Volume Select to adjust the ringtone volume.
Speech/VR Volume Select to set the voice recognition prompts volume.
Alert Sounds Select to turn the Alert Sound on/off for traffic,
weather, or SXM game information updates.
Beep Sounds Select to turn the sound beeps on/off.
Speed Volume Select to set the speed volume. The system adjusts to
the optimum volume and tone quality according to
vehicle speed to compensate for increased vehicle
noise.
PHONE
This system supports Bluetooth®, a wireless data system. The hands-free system lets you
make and receive calls without taking your hands off the steering wheel.
In the sound settings menu, you can adjust the microphone, ringtone, and phone volume.
On the Home Screen, select "Settings", then select the "Phone" menu to manage
connected devices and access other phone settings.
SETTINGS AND UPDATES
85
Page 88 of 148
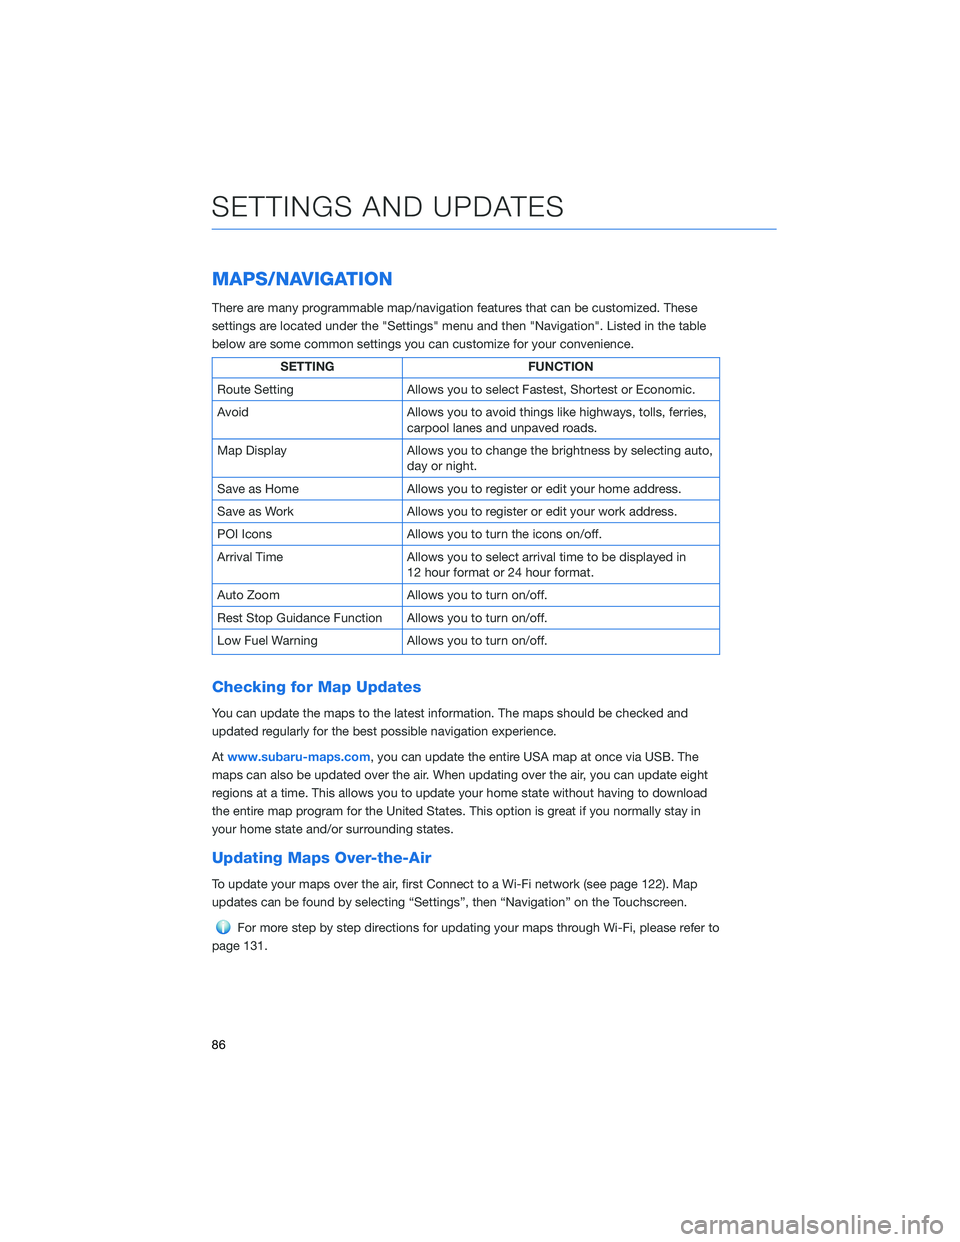
MAPS/NAVIGATION
There are many programmable map/navigation features that can be customized. These
settings are located under the "Settings" menu and then "Navigation". Listed in the table
below are some common settings you can customize for your convenience.
SETTING FUNCTION
Route Setting Allows you to select Fastest, Shortest or Economic.
Avoid Allows you to avoid things like highways, tolls, ferries,
carpool lanes and unpaved roads.
Map Display Allows you to change the brightness by selecting auto,
day or night.
Save as Home Allows you to register or edit your home address.
Save as Work Allows you to register or edit your work address.
POI Icons Allows you to turn the icons on/off.
Arrival Time Allows you to select arrival time to be displayed in
12 hour format or 24 hour format.
Auto Zoom Allows you to turn on/off.
Rest Stop Guidance Function Allows you to turn on/off.
Low Fuel Warning Allows you to turn on/off.
Checking for Map Updates
You can update the maps to the latest information. The maps should be checked and
updated regularly for the best possible navigation experience.
Atwww.subaru-maps.com, you can update the entire USA map at once via USB. The
maps can also be updated over the air. When updating over the air, you can update eight
regions at a time. This allows you to update your home state without having to download
the entire map program for the United States. This option is great if you normally stay in
your home state and/or surrounding states.
Updating Maps Over-the-Air
To update your maps over the air, first Connect to a Wi-Fi network (see page 122). Map
updates can be found by selecting “Settings”, then “Navigation” on the Touchscreen.
For more step by step directions for updating your maps through Wi-Fi, please refer to
page 131.
SETTINGS AND UPDATES
86
Page 98 of 148
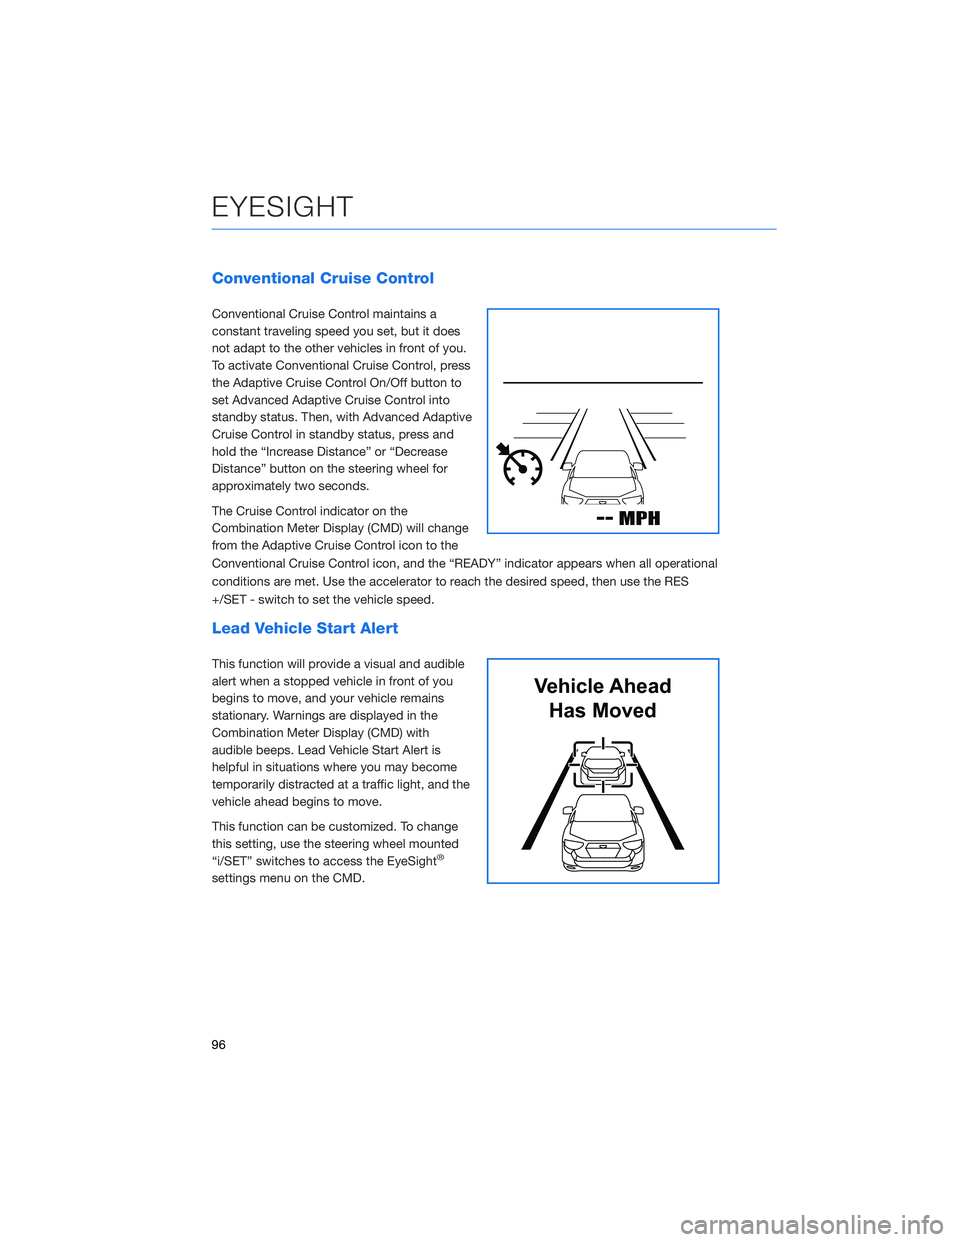
Conventional Cruise Control
Conventional Cruise Control maintains a
constant traveling speed you set, but it does
not adapt to the other vehicles in front of you.
To activate Conventional Cruise Control, press
the Adaptive Cruise Control On/Off button to
set Advanced Adaptive Cruise Control into
standby status. Then, with Advanced Adaptive
Cruise Control in standby status, press and
hold the “Increase Distance” or “Decrease
Distance” button on the steering wheel for
approximately two seconds.
The Cruise Control indicator on the
Combination Meter Display (CMD) will change
from the Adaptive Cruise Control icon to the
Conventional Cruise Control icon, and the “READY” indicator appears when all operational
conditions are met. Use the accelerator to reach the desired speed, then use the RES
+/SET - switch to set the vehicle speed.
Lead Vehicle Start Alert
This function will provide a visual and audible
alert when a stopped vehicle in front of you
begins to move, and your vehicle remains
stationary. Warnings are displayed in the
Combination Meter Display (CMD) with
audible beeps. Lead Vehicle Start Alert is
helpful in situations where you may become
temporarily distracted at a traffic light, and the
vehicle ahead begins to move.
This function can be customized. To change
this setting, use the steering wheel mounted
“i/SET” switches to access the EyeSight
®
settings menu on the CMD.
Vehicle Ahead
Has Moved
EYESIGHT
96
Page 99 of 148
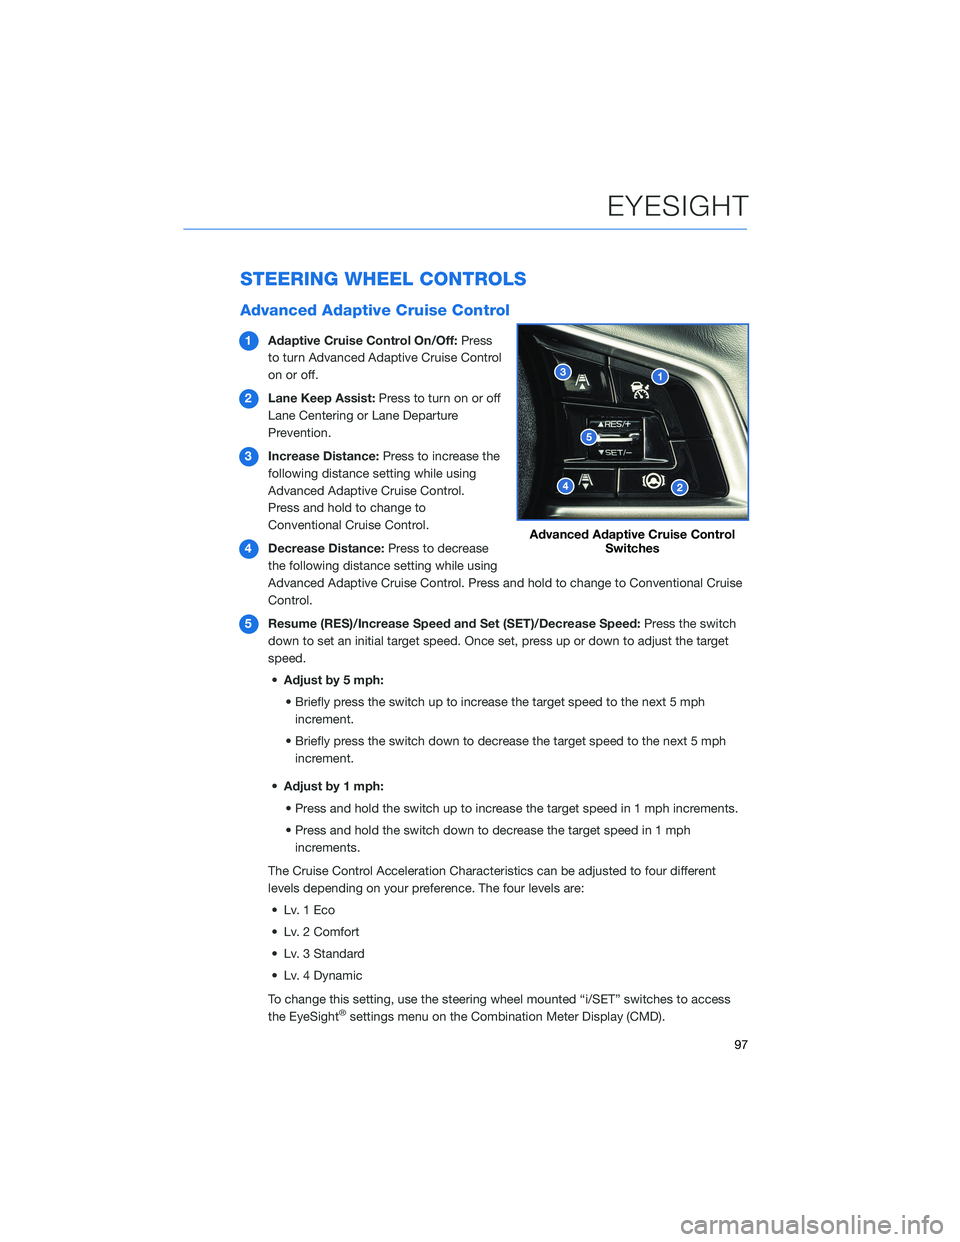
STEERING WHEEL CONTROLS
Advanced Adaptive Cruise Control
1Adaptive Cruise Control On/Off:Press
to turn Advanced Adaptive Cruise Control
on or off.
2Lane Keep Assist:Press to turn on or off
Lane Centering or Lane Departure
Prevention.
3Increase Distance:Press to increase the
following distance setting while using
Advanced Adaptive Cruise Control.
Press and hold to change to
Conventional Cruise Control.
4Decrease Distance:Press to decrease
the following distance setting while using
Advanced Adaptive Cruise Control. Press and hold to change to Conventional Cruise
Control.
5Resume (RES)/Increase Speed and Set (SET)/Decrease Speed:Press the switch
down to set an initial target speed. Once set, press up or down to adjust the target
speed.
•Adjust by 5 mph:
• Briefly press the switch up to increase the target speed to the next 5 mph
increment.
• Briefly press the switch down to decrease the target speed to the next 5 mph
increment.
•Adjust by 1 mph:
• Press and hold the switch up to increase the target speed in 1 mph increments.
• Press and hold the switch down to decrease the target speed in 1 mph
increments.
The Cruise Control Acceleration Characteristics can be adjusted to four different
levels depending on your preference. The four levels are:
• Lv. 1 Eco
• Lv. 2 Comfort
• Lv. 3 Standard
• Lv. 4 Dynamic
To change this setting, use the steering wheel mounted “i/SET” switches to access
the EyeSight
®settings menu on the Combination Meter Display (CMD).
Advanced Adaptive Cruise Control
Switches
EYESIGHT
97
Page 100 of 148

Customizing EyeSight®Settings
The EyeSight®system features customization
of certain preferences and warnings. Use the
steering wheel mounted “i/Set” and arrow
switches to navigate through the Combination
Meter Display (CMD) to adjust settings such as:
• Lead Vehicle Acquisition Sound: On/Off
• Cruise Control Acceleration Characteristics:
Eco/Comfort/Standard/Dynamic
i/Set and Arrow Switches
EYESIGHT
98