2022 PEUGEOT LANDTREK towing
[x] Cancel search: towingPage 4 of 164

2
Contents
■
Overview
■
Eco-driving
1InstrumentsInstrument panels 7
Warning and indicator lamps 8
Total distance recorder 12
Lighting dimmer 12
Trip computer 12
Monochrome screen 13
Touch screen 14
2AccessElectronic key with remote control function and
built-in key, 16
Keyless Entry and Starting 18
Central locking 19
Back-up procedures 20
Doors 22
Tailgate 22
Alarm 23
Electric windows 24
3Ease of use and comfortFront seats 26
2-seat front bench seat 27
Steering wheel adjustment 28
Mirrors 29
Rear bench seat 30
Heating and Ventilation 32
Heating 33
Manual air conditioning 33
Dual-zone automatic air conditioning 34
Front demisting - defrosting 36
Rear screen demisting/defrosting 36
Front fittings 36
Courtesy lamps 38
Rear fittings 39
Tipper body fittings 40
4Lighting and visibilityLighting control stalk 43
Cornering lighting 44
Direction indicators 45
Headlamp beam height adjustment 45
Automatic illumination of headlamps 45
Guide-me-home and welcome lighting 46
Wiper control stalk 46
Changing a wiper blade 47
Automatic wipers 48
5SafetyGeneral safety recommendations 49
Hazard warning lamps 49
Horn 50
Electronic stability control (ESC) 50
Hill Assist Descent Control 52
Seat belts 53
Airbags 55
Child seats 58
Deactivating the front passenger airbag 59
ISOFIX child seats 60
Child lock 61
6DrivingDriving recommendations 62
Starting / Switching off the engine with the key 64
Starting/Switching off the engine with
Keyless Entry and Starting
66
Manual parking brake 68
Locking the rear differential 68
4-wheel drive transmission selector 69
6-speed manual gearbox 70
6-speed automatic gearbox 71
Driving mode 73
Hill start assist 73
Gear shift indicator 74
Tyre under-inflation detection 74
Driving and manoeuvring aids - General
recommendations
76
Speed limiter 77
Overspeed alert at 75 mph (120
km/h) 78
Cruise control - Specific recommendations 78
Cruise control 78
Lane departure warning system 79
Parking sensors 81
Reversing camera 83
"Off Road" camera 83
360° camera 84
7Practical informationRecommended fuel 89
Refuelling 89
Towing device 90
Snow chains 90
Roof bars 91
Bonnet 91
Engine compartment 92
Checking levels 93
Page 5 of 164
3
Contents
Checks 95
Maintenance 97
Free-wheeling 103
Advice on care and maintenance 103
8In the event of a breakdownWarning triangle 106
Fire extinguisher 106
Running out of fuel (Diesel) 107
Tool kit 107
Spare wheel 108
Changing a bulb 11 2
Fuses 11 6
12
V battery 11 6
Towing the vehicle 11 9
9Technical dataEngine technical data and towed loads 122
Petrol engines 123
Diesel engines 124
Dimensions 125
Identification markings 125
10Bluetooth® audio systemMenus 127
Steering mounted controls 128
Radio 128
Media 129
Telephone 129
11Peugeot Connect 10" TouchscreenFirst steps 131
Steering mounted controls 131
Menus 132
Navigation 133
Radio 133
Music player 133
Telephone 134
Applications 135
Settings 136
12Event data recorders
■
Alphabetical index
Page 32 of 164
30
Ease of use and comfort
► Pull the lever to change to the anti-dazzle
"night" position.
►
Push the lever to change to the normal "day"
position.
Adjustment
►
Adjust the mirror to the normal "day" position.
Rear bench seat
Bench seat with folding cushions (giving access
to storage compartments) and split folding
backrests (2/3-1/3).
Rear head restraints
High position (use):
► Pull the head restraint fully up.
Low position (stowing; when the seats are not
in use):
►
Press the lug
A to release the head restraint
and push it down.
The rear head restraints can be removed.
Removing a head restraint
► Pull the head restraint fully up.
► Press the lug A to release the head restraint
and remove it completely.
►
Store the head restraint.
Refitting a head restraint
► Insert the head restraint rods into the guides
in the corresponding seat backrest.
►
Push the head restraint down as far as it will
go.
►
Press the lug
A to release the head restraint
and push it fully down.
Never drive with passengers seated at
the rear when the head restraints are
removed; the head restraints should be in
place and in the high position.
The head restraint for the centre seat
and those for the outer seats are not
interchangeable.
Folding the backrests
Manoeuvring the backrests should only
be done when the vehicle is stationary.
First steps:
► Lower the head restraints.
►
If necessary
, move the front seats forward.
►
Check
that no person or object might interfere
with the folding of the backrests (e.g.
clothing,
luggage).
►
Check that the seat belts are free, not
engaged in the buckles. Release them so that
the backrest can be moved.
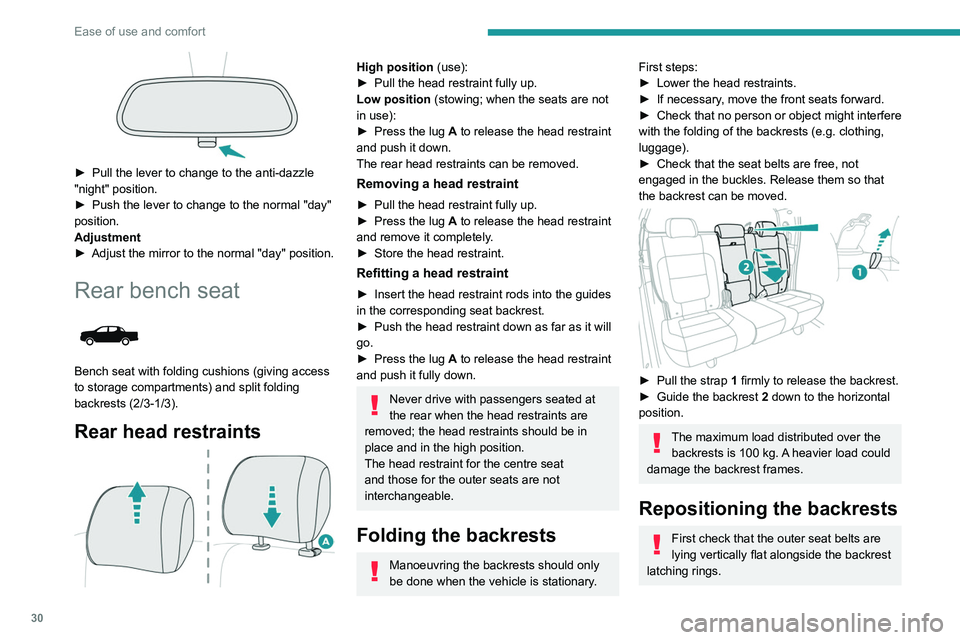
► Pull the strap 1 firmly to release the backrest.
► Guide the backrest 2 down to the horizontal
position.
The maximum load distributed over the backrests is 100 kg. A heavier load could
damage the backrest frames.
Repositioning the backrests
First check that the outer seat belts are
lying vertically flat alongside the backrest
latching rings.
► Put the backrest 2 in the upright position and
push it firmly to latch it home.
► Check that the release strap 1 has correctly
returned to its position.
► Ensure that the outer seat belts were not
trapped during the operation.
Please note: an incorrectly latched
backrest compromises the safety of
passengers in the event of sudden braking or
an accident.
Tilting the seat cushions
Manoeuvring the seat cushions must
only be done with the vehicle stationary.
First steps:
► If necessary, move the front seats forward.
Page 34 of 164
32
Ease of use and comfort
For more information on the Tool kit,
refer to the corresponding section.
Repositioning the seat
cushions
Before lowering the seat cushion to the
normal position, make sure that you take
the seat belt buckle and hold it during the
operation.
► Remove hook 3 from the head restraint rod.
► Guide seat cushion 2
to the horizontal
position and push it firmly to lock it.
►
Check that the release strap 1
has correctly
returned to its position, then store it in its case.
►
Check that the seat belt buckles did not slip
under the seat cushions during the manoeuvre.
Heating and Ventilation
Air intake
The air circulating in the passenger compartment
is filtered and originates either from the
exterior, via the grille located at the base of the
windscreen, or from the inside in air recirculation
mode.
Controls
The controls are grouped together on the centre
console panel.
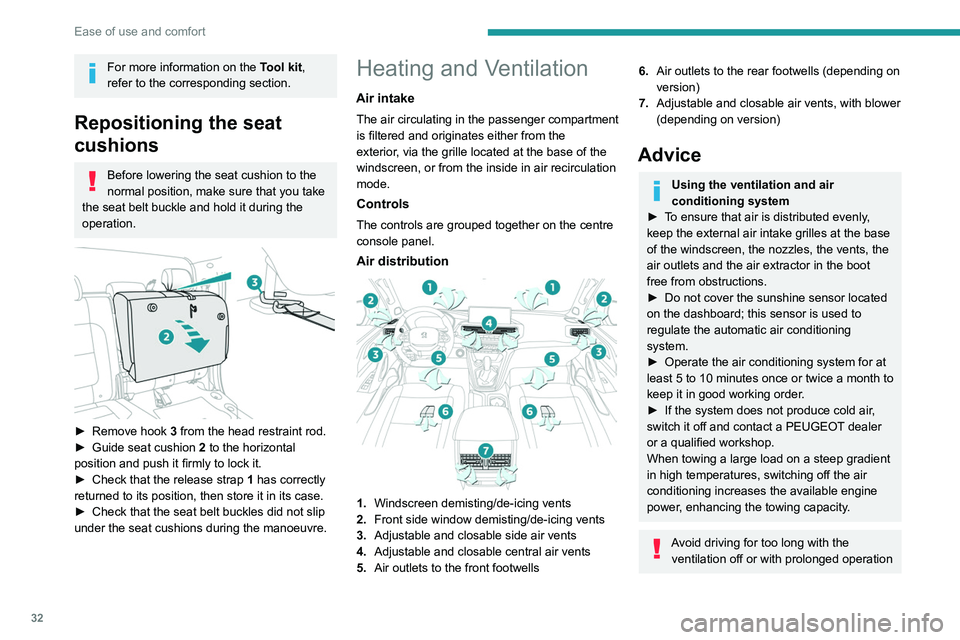
Air distribution
1. Windscreen demisting/de-icing vents
2. Front side window demisting/de-icing vents
3. Adjustable and closable side air vents
4. Adjustable and closable central air vents
5. Air outlets to the front footwells
6.Air outlets to the rear footwells (depending on
version)
7. Adjustable and closable air vents, with blower
(depending on version)
Advice
Using the ventilation and air
conditioning system
►
T
o ensure that air is distributed evenly,
keep the external air intake grilles at the base
of the windscreen, the nozzles, the vents, the
air outlets and the air extractor in the boot
free from obstructions.
►
Do not cover the sunshine sensor located
on the dashboard; this sensor is used to
regulate the automatic air conditioning
system.
►
Operate the air conditioning system for at
least 5 to 10 minutes once or twice a month to
keep it in good working order
.
►
If the system does not produce cold air
,
switch it off and contact a PEUGEOT dealer
or a qualified workshop.
When towing a large load on a steep gradient
in high temperatures, switching off the air
conditioning increases the available engine
power, enhancing the towing capacity.
Avoid driving for too long with the ventilation off or with prolonged operation
Page 42 of 164
40
Ease of use and comfort
Installed on the back of each front seat, they are
used to hang shopping bags.
Take care to only hang lightweight bags under 4 kg.
Storage boxes
Storage boxes are provided in the floor, under
the cushions of the rear bench seat.
They may contain the vehicle’s tools.
►
T
o open them, raise the corresponding
seat cushion and lift the carpet (depending on
version).
For more information on the Rear bench seat,
and especially on tilting the seat cushions, refer
to the corresponding section.
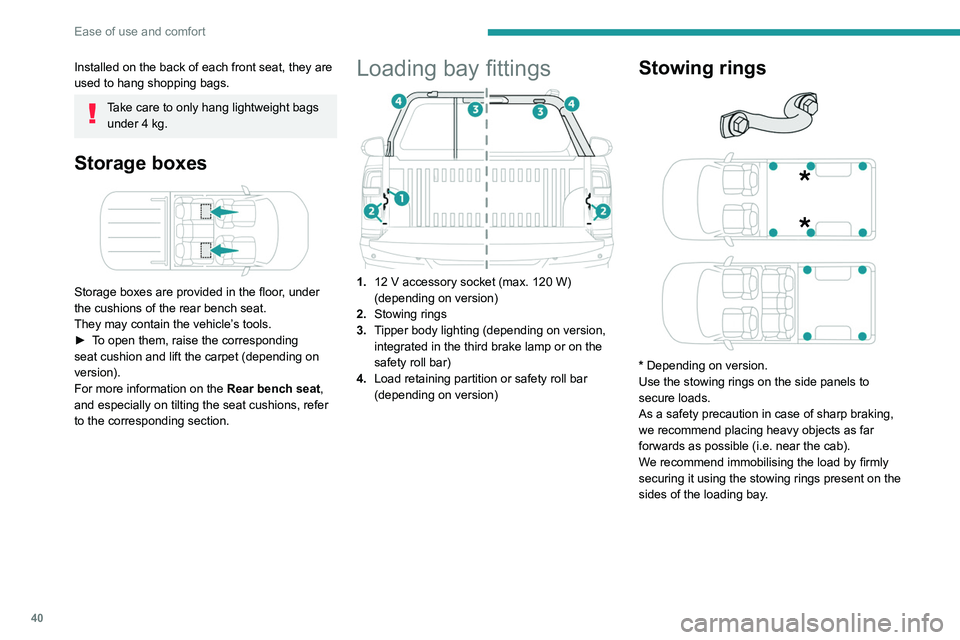
Loading bay fittings
1. 12 V accessory socket (max. 120 W)
(depending on version)
2. Stowing rings
3. Tipper body lighting (depending on version,
integrated in the third brake lamp or on the
safety roll bar)
4. Load retaining partition or safety roll bar
(depending on version)
Stowing rings
* Depending on version.
Use the stowing rings on the side panels to
secure loads.
As a safety precaution in case of sharp braking,
we recommend placing heavy objects as far
forwards as possible (i.e. near the cab).
We recommend immobilising the load by firmly
securing it using the stowing rings present on the
sides of the loading bay.
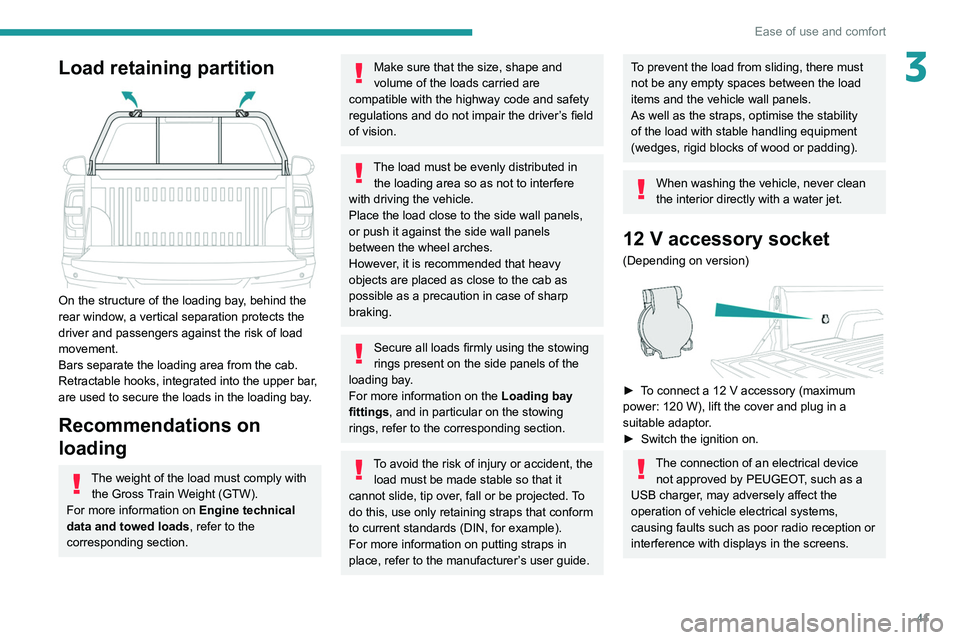
Load retaining partition
On the structure of the loading bay, behind the
rear window, a vertical separation protects the
driver and passengers against the risk of load
movement.
Bars separate the loading area from the cab.
Retractable hooks, integrated into the upper bar,
are used to secure the loads in the loading bay.
Recommendations on
loading
The weight of the load must comply with
the Gross Train Weight (GTW).
For more information on Engine technical
data and towed loads , refer to the
corresponding section.
Page 43 of 164
41
Ease of use and comfort
3Load retaining partition
On the structure of the loading bay, behind the
rear window, a vertical separation protects the
driver and passengers against the risk of load
movement.
Bars separate the loading area from the cab.
Retractable hooks, integrated into the upper bar,
are used to secure the loads in the loading bay.
Recommendations on
loading
The weight of the load must comply with the Gross Train Weight (GTW).
For more information on Engine technical
data and towed loads , refer to the
corresponding section.
Make sure that the size, shape and
volume of the loads carried are
compatible with the highway code and safety
regulations and do not impair the driver’s field
of vision.
The load must be evenly distributed in the loading area so as not to interfere
with driving the vehicle.
Place the load close to the side wall panels,
or push it against the side wall panels
between the wheel arches.
However, it is recommended that heavy
objects are placed as close to the cab as
possible as a precaution in case of sharp
braking.
Secure all loads firmly using the stowing
rings present on the side panels of the
loading bay.
For more information on the Loading bay
fittings, and in particular on the stowing
rings, refer to the corresponding section.
To avoid the risk of injury or accident, the load must be made stable so that it
cannot slide, tip over, fall or be projected. To
do this, use only retaining straps that conform
to current standards (DIN, for example).
For more information on putting straps in
place, refer to the manufacturer’s user guide.
To prevent the load from sliding, there must
not be any empty spaces between the load
items and the vehicle wall panels.
As well as the straps, optimise the stability
of the load with stable handling equipment
(wedges, rigid blocks of wood or padding).
When washing the vehicle, never clean
the interior directly with a water jet.
12 V accessory socket
(Depending on version)
► To connect a 12 V accessory (maximum
power: 120 W), lift the cover and plug in a
suitable adaptor.
►
Switch the ignition on.
The connection of an electrical device not approved by PEUGEOT, such as a
USB charger, may adversely affect the
operation of vehicle electrical systems,
causing faults such as poor radio reception or
interference with displays in the screens.
Page 53 of 164
51
Safety
5or more wheels spinning. It also enhances the
vehicle's directional stability.
In the event that a wheel has poor grip, anti-slip
regulation brakes the spinning wheel and returns
the engine torque to the wheel that has the best
grip in order to prevent being bogged down.
If there is a difference between the vehicle’s
trajectory and the path desired by the driver, the
dynamic stability control system automatically
uses engine braking and the brakes on one or
more wheels to return the vehicle to the desired
path, within the limits of the laws of physics.
These systems are activated automatically every
time the vehicle is started.
These systems are activated in the event of a problem with grip or trajectory
(confirmed by this warning lamp flashing on the
instrument panel).
Deactivation/Reactivation
In exceptional conditions (e.g. starting a vehicle
which is bogged down, stuck in snow, on soft
ground, etc.), it may be advisable to deactivate
the ASR and DSC systems, so that the wheels
can turn freely and regain grip.
Reactivate the systems as soon as the level of
grip permits.
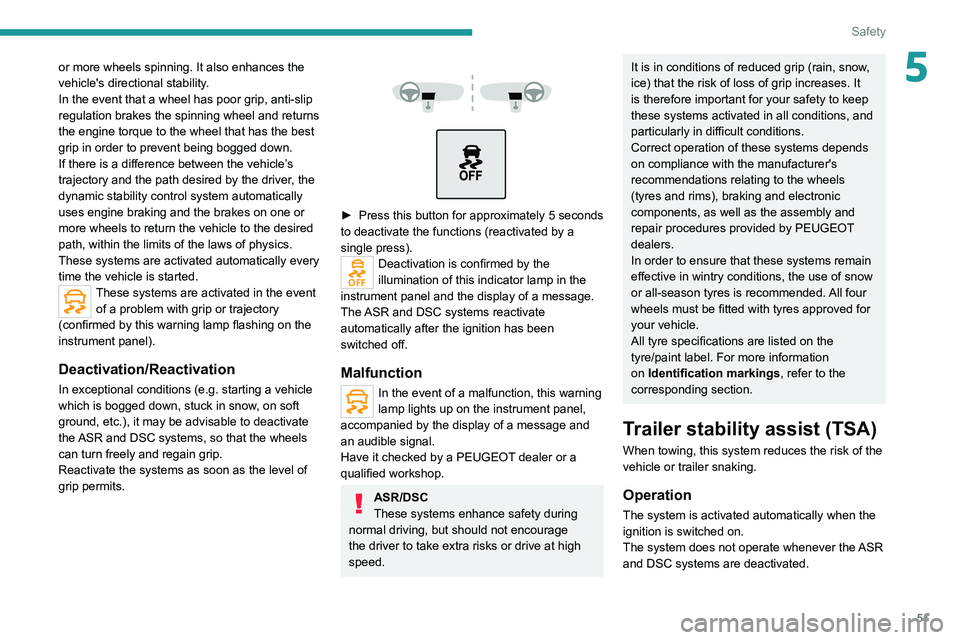
► Press this button for approximately 5 seconds
to deactivate the functions (reactivated by a
single press).
Deactivation is confirmed by the
illumination of this indicator lamp in the
instrument panel and the display of a message.
The ASR and DSC systems reactivate
automatically after the ignition has been
switched off.
Malfunction
In the event of a malfunction, this warning
lamp lights up on the instrument panel,
accompanied by the display of a message and
an audible signal.
Have it checked by a PEUGEOT dealer or a
qualified workshop.
ASR/DSC
These systems enhance safety during
normal driving, but should not encourage
the driver to take extra risks or drive at high
speed.
It is in conditions of reduced grip (rain, snow,
ice) that the risk of loss of grip increases. It
is therefore important for your safety to keep
these systems activated in all conditions, and
particularly in difficult conditions.
Correct operation of these systems depends
on compliance with the manufacturer's
recommendations relating to the wheels
(tyres and rims), braking and electronic
components, as well as the assembly and
repair procedures provided by PEUGEOT
dealers.
In order to ensure that these systems remain
effective in wintry conditions, the use of snow
or all-season tyres is recommended. All four
wheels must be fitted with tyres approved for
your vehicle.
All tyre specifications are listed on the
tyre/paint label. For more information
on Identification markings , refer to the
corresponding section.
Trailer stability assist (TSA)
When towing, this system reduces the risk of the
vehicle or trailer snaking.
Operation
The system is activated automatically when the
ignition is switched on.
The system does not operate whenever the ASR
and DSC systems are deactivated.
Page 54 of 164
52
Safety
– If the gearbox is in neutral or if the clutch
pedal is depressed, the speed decreases and
the indicator lamp flashes slowly; in this case,
the maintained descent speed is lower.
Activation of the system may cause noise in the transmission. This is perfectly
normal and has no consequence on the
behaviour of the vehicle.
On a descent, with the vehicle stationary, if the
driver releases the accelerator and brake pedals,
the system will release the brakes to set the
vehicle gradually in motion.
The brake lamps light up automatically when the
system is regulating.
If the speed exceeds 22 mph (35 km/h),
regulation is paused automatically, but the
indicator lamp in the instrument panel remains
on.
Regulation resumes automatically when the
speed falls below 22 mph (35 km/h) again, if the
slope and pedal release conditions are met.
Depress the accelerator or brake pedal again to
pause the cruise control.
Switching off
► Press the button until the indicator lamp on
the instrument panel goes off.
At a speed of approximately 50 mph (80 km/h),
the system is automatically deactivated and the
indicator lamp on the instrument panel goes off.
The electronic stability control system (ESC)
must not have any faultsK
The vehicle speed must be less than
approximately 53 mph (85
km/h).
If the system detects that the trailer is
snaking, it applies the brakes to stabilise
the trailer and reduces engine power, if
necessary, to slow the vehicle (indicated by the
flashing of this warning lamp on the instrument
panel and the brake lamps coming on).
For information on weights and towed loads,
refer to the Engine technical data and towed
loads section or your vehicle’s registration
certificate.
To ensure safe driving with a Towing device,
refer to the corresponding section.
Malfunction
If a fault occurs, this warning lamp lights
up on the instrument panel, accompanied
by a message and an audible signal.
To continue towing a trailer, reduce speed and
drive carefully!
Have it checked by a PEUGEOT dealer or a
qualified workshop.
The trailer stability control system provides an extra safety feature under
normal driving conditions, when following the
recommendations for use of trailers and
current legislation in force in your country. It
must not encourage the driver to take extra
risks, such as using a trailer in unsuitable
conditions of operation (e.g. excessive load,
exceeded nose weight, worn or under-inflated
tyres, faulty braking system) or driving at
excessive speed.
In certain cases, the system may not detect
trailer snaking, particularly with a light trailer
.
When driving on slippery or poor surfaces, the
system may not be able to prevent sudden
trailer snaking.
Hill Assist Descent
Control
Hill Assist Descent Control system for steep
slopes and on road surfaces with poor grip
(e.g.
gravel, mud).
This system reduces the risk of loss of control
or slipping of the vehicle when descending in
forward gear.
During a descent, the system assists the driver
in maintaining a constant speed, depending on
the gear engaged, while progressively releasing
the brakes.
For the system to activate, the gradient
must be greater than 5%.
The system can be used with the gearbox in
neutral.
Otherwise, engage a gear corresponding to
the speed to prevent the engine stalling.
With an automatic gearbox, the system can
be used with the selector at
N
or D.
The system is no longer available and no longer active if the speed of the vehicle is
above 22 mph (35
km/h).
Switching on
By default, the system is not selected.
The state of the function is not saved when the
ignition is switched off.
The driver can select the system when the
engine is running, when the vehicle is stationary
or when moving at speeds up to approximately
31 mph (50
km/h).
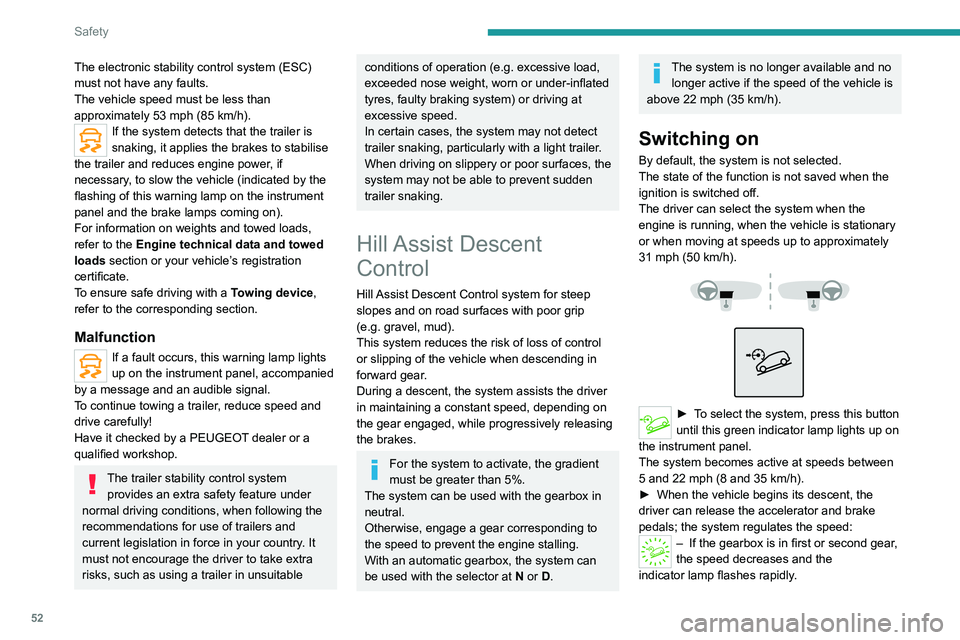
► To select the system, press this button
until this green indicator lamp lights up on
the instrument panel.
The system becomes active at speeds between
5 and 22 mph
(8 and 35 km/h).
►
When the vehicle begins its descent, the
driver can release the accelerator and brake
pedals; the system regulates the speed:
– If the gearbox is in first or second gear ,
the speed decreases and the
indicator
lamp flashes rapidly.