2022 PEUGEOT 308 wipers
[x] Cancel search: wipersPage 4 of 260

2
Contents
■
Overview
■
Eco-driving
1InstrumentsDriver information 10
Matrix instrument panel 10
Digital instrument panels 10
Warning and indicator lamps 12
Indicators 18
Manual test 21
Total distance recorder 22
Trip computer 22
10-inch touch screen 23
i-Toggles 25
Remotely operable additional functions
(Rechargeable hybrid)
25
2AccessRemote control / Key 27
Proximity Keyless Entry and Start 29
Central locking 31
Back-up procedures 32
Doors 34
Boot 34
Motorised tailgate (SW) 35
Alarm 38
Electric windows 40
Sunroof 41
3Ease of use and comfortDriving position 43
Front seats 44
Steering wheel adjustment 48
Heated steering wheel 48
Mirrors 48
Rear bench seat 50
Heating and Ventilation 52
Dual-zone automatic air conditioning 53
Front demisting - defrosting 56
Rear screen demisting/defrosting 56
Heated windscreen 56
Temperature pre-conditioning
(Rechargeable hybrid)
57
Front fittings 58
Courtesy lamps 61
Interior ambient lighting 62
Rear fittings 62
Boot fittings 63
4Lighting and visibilityExterior lighting control stalk 67
Direction indicators 68
Headlamp beam height adjustment 68
Automatic illumination of headlamps 69
Guide-me-home and welcome lighting 69
Automatic lighting systems - General
recommendations
70
Automatic headlamp dipping 70
Peugeot Matrix LED Technology 2.0 71
Wiper control stalk 73
Intermittent wipers 75
Automatic wipers 75
Changing a wiper blade 76
5SafetyGeneral safety recommendations 78
Hazard warning lamps 78
Horn 79
Pedestrian horn (Rechargeable hybrid) 79
Emergency or assistance 79
Electronic stability control (ESC) 81
Seat belts 84
Airbags 86
Child seats 88
Deactivating the front passenger airbag 90
ISOFIX child seats 91
i-Size child seats 93
Installing child seats 93
Child lock 96
6DrivingDriving recommendations 97
Starting / Switching off the engine
with the key
99
Starting/Switching off the engine with
Keyless Entry and Start
100
Starting rechargeable hybrid vehicles 101
Electric parking brake 102
Manual gearbox 104
Automatic gearbox 105
Driving modes 107
Hill start assist 109
Gear shift indicator 11 0
Stop & Start 11 0
Tyre under-inflation detection 111
Driving and manoeuvring aids - General
recommendations
11 3
Steering wheel with hands-on detection 11 4
Shortcuts for driving aids 11 5
Page 71 of 260

69
Lighting and visibility
40 (Initial setting)Driver only or driver + front passenger
1 5 people
2 5 people + load in the boot
3 Driver only + load in the boot
4 5 6 Not used
Automatic Peugeot Matrix
LED Technology 2.0
headlamp adjustment
This system automatically adjusts the height of
the headlamp beams according to the load in the
vehicle.
In the event of a malfunction, this warning
lamp lights up on the instrument panel,
accompanied by the display of a message and
an audible signal.
The system places the headlamp beams in the
lowest position.
Have it checked by a PEUGEOT dealer or a
qualified workshop.
Do not touch the Peugeot Matrix LED
Technology 2.0 headlamps - risk of
electrocution!
Automatic illumination of lamps
With the lighting control stalk in the “ AUTO”
position and if a low level of exterior brightness
is detected by the rain/sunshine sensor, the
sidelamps and dipped beam headlamps are
switched on automatically, without any action on
the part of the driver. They may also come on if
rain is detected, at the same time as automatic
operation of the windscreen wipers.
As soon as the brightness returns to a sufficient
level or after the windscreen wipers are switched
off, the lamps are switched off automatically.
Malfunction
In the event of a malfunction of the rain/
sunshine sensor, the vehicle’s lamps
come on and this warning lamp is displayed on
the instrument panel, accompanied by an
audible signal and/or the display of a message.
Have it checked by a PEUGEOT dealer or a
qualified workshop.
Do not cover the rain/sunshine sensor
located at the top centre of the
windscreen behind the interior rear view
mirror; the associated functions would no
longer be controlled.
In fog or snow, the rain/sunshine sensor
may detect sufficient light. For this
reason, the lighting will not come on
automatically.
The inner surface of the windscreen may become misted up and affect the proper
operation of the rain/sunshine sensor.
In humid and cold weather, demist the
windscreen regularly.
Guide-me-home and
welcome lighting
Guide-me-home lighting
Automatic
With the ring of the lighting control stalk in the
"AUTO” position and when the light is poor, the
dipped beam headlamps come on automatically
when the ignition is switched off.
You can activate/deactivate and adjust the duration of the guide-me-home
lighting in the Settings
> Vehicle touch screen
application.
Manual
Page 75 of 260

73
Lighting and visibility
4inside of the vehicle to switch to the dipped
beams.
Exiting an illuminated area
The lamp segments gradually light up from the
inside to the outside of the vehicle to restore the
main beams.
Pause
If the situation requires a change of headlamp
beam, the driver can take over at any time.
►
Switch the dipped/main beam headlamps
manually to pause the function.
The lighting system changes to "Automatic
illumination of lamps" mode.
►
T
o reactivate the function, manually switch
the dipped/main beam headlamps again.
Malfunction
If a malfunction occurs with the adaptive
headlamp lighting or the camera, this
warning lamp is displayed on the instrument
panel, accompanied by an audible signal and a
message.
Have it checked by a PEUGEOT dealer or a
qualified workshop.
Do not cover the rain/sunshine sensor
located at the top centre of the
windscreen behind the interior rear view
mirror; the associated functions would no
longer be controlled.
Wiper control stalk
Before operating the wipers in wintry
conditions, clear any snow, ice or frost
from the windscreen and around the wiper
arms and blades.
Do not operate the wipers on a dry
windscreen. In extremely hot or cold
weather, check that the wiper blades are not
stuck to the windscreen before operating the
wipers.
After using an automatic car wash, you may temporarily notice abnormal noises
and poorer wiping performance.
You do not
need to replace the wiper blades.
With intermittent wipers
With AUTO wiping
Windscreen wipers
► To select the wiping speed: raise or lower the
stalk to the desired position.
Fast wiping (heavy rain)
Normal wiping (moderate rain)
Intermittent wipers
or
Automatic wipers
Switching off
Manual
After the ignition has been switched off,
the wipers may move slightly at the foot
of the windscreen.
Page 76 of 260

74
Lighting and visibility
In position 1 or 2, the wiping frequency is
automatically reduced when the speed of
the vehicle drops below 3
mph (5 km/h).
When the speed is above 6
mph (10 km/h)
again, the wiping frequency returns to the
original frequency (fast or normal).
Single wipe
If the wiper control stalk is:
► In the INT or AUTO position, pull the stalk
briefly towards you then release it.
►
In the
0 position, press briefly on the stalk
then release it.
Pressing and holding triggers continuous wiping
at the normal wiping speed.
Windscreen wash
► Pull the wiper control stalk towards you and
hold.
A
final wiping cycle is performed when
screenwashing ends.
The windscreen wash jets are incorporated into the tip of each wiper
arm.
An additional jet is installed below the
midpoint of the arm on the driver's side.
Screenwash fluid is sprayed along the length
of the wiper blade. This improves visibility and
reduces screenwash fluid consumption.
With automatic air conditioning, any
action on the screenwash control results
in temporary closure of the air intake to
protect the passenger compartment from any
odour.
To avoid damaging the wiper blades, do not operate the screenwash if the
screenwash reservoir is empty.
Only operate the screenwash if there is no
risk of the fluid freezing on the windscreen
and hindering visibility. During the winter
period, use "very cold climate" rated products.
Never top up with water.
Rear wiper
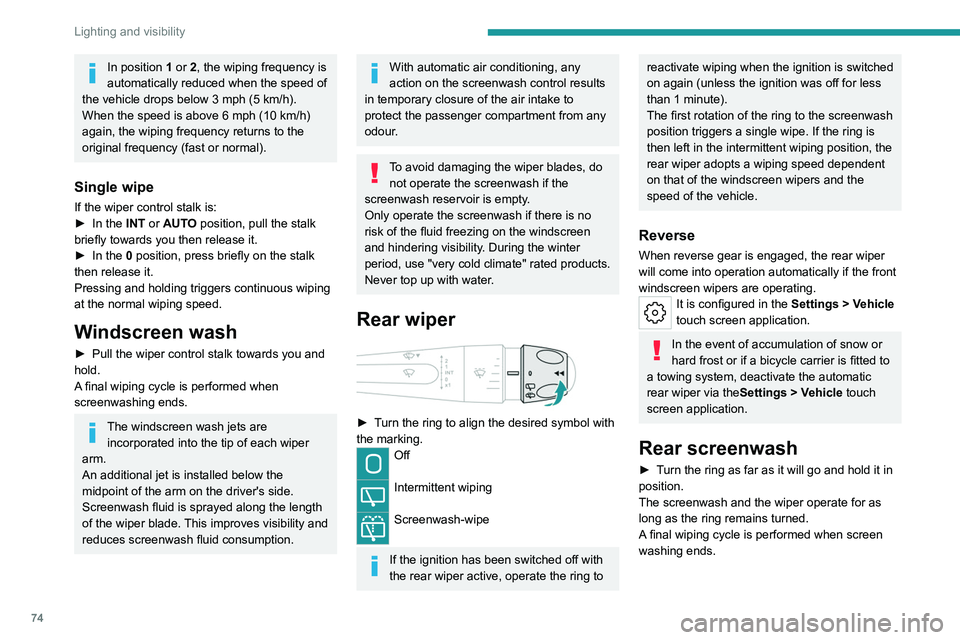
► Turn the ring to align the desired symbol with
the marking.
Off
Intermittent wiping
Screenwash-wipe
If the ignition has been switched off with
the rear wiper active, operate the ring to
reactivate wiping when the ignition is switched
on again (unless the ignition was off for less
than 1 minute).
The first rotation of the ring to the screenwash
position triggers a single wipe. If the ring is
then left in the intermittent wiping position, the
rear wiper adopts a wiping speed dependent
on that of the windscreen wipers and the
speed of the vehicle.
Reverse
When reverse gear is engaged, the rear wiper
will come into operation automatically if the front
windscreen wipers are operating.
It is configured in the Settings > Vehicle
touch screen application.
In the event of accumulation of snow or
hard frost or if a bicycle carrier is fitted to
a towing system, deactivate the automatic
rear wiper via the Settings
> Vehicle touch
screen application.
Rear screenwash
► Turn the ring as far as it will go and hold it in
position.
The screenwash and the wiper operate for as
long as the ring remains turned.
A final wiping cycle is performed when screen
washing ends.
Page 77 of 260

75
Lighting and visibility
4An additional jet is fitted above the number plate to clean the reversing camera (depending on
version).
►
The washing of the reversing camera is
triggered by operating the rear screenwash.
Front intermittent wiping
In Intermittent mode, the driver can adjust the
wiping frequency by turning the ring to one of the
5 available positions.
The first (upper) position corresponds to the
longest time interval between 2 wipes for light
rain.
The last (lower) position corresponds to the
shortest time interval between 2 wipes
for heavy
rain.
A rotation of the ring from a higher position to a
lower position triggers a confirmation wiping.
After the ignition has been switched off for more than 1 minute with the wiper
control stalk in the INT, 1 or 2
position, when
the ignition is switched on again:
–
the system works as soon as the vehicle
exceeds 6 mph (10 km/h), if the outside
temperature is below +3°C.
–
the system works immediately
, if the
outside temperature is above +3°C.
Automatic windscreen wipers
In AUTO mode, the front wipers work
automatically and adapt to the intensity of
precipitation depending on the sensitivity of the
sensor selected.
The rainfall detection function uses a rain/
sunshine sensor located at the top centre of the
windscreen, behind the rear view mirror.
In certain weather conditions (e.g. fog,
frost, snow , projections on salty roads),
the driver may have to return to manual
wiping.
Switching on/off
To switch on:
► Put the wiper control stalk in the AUT
O
position.
►
T
urn the ring to adjust the sensitivity of the
sensor.
A wiping cycle, accompanied by the display of
a message, confirms that the request has been
taken into account.
►
T
o switch off, put the wiper control stalk in
another position or in the 0 position.
Adjusting the sensitivity
The first position (upper) corresponds to the
lowest sensitivity of the sensor.
The last position (lower) corresponds to the
highest sensitivity of the sensor.
The higher the sensitivity, the faster the system
reacts and increases the wiping frequency.
A rotation of the ring from a higher position to a
lower position triggers a confirmation wiping.
After the ignition has been switched off
for more than 1 minute with the wiper
control stalk in the AUTO position, when the
ignition is switched on again:
–
the system works, depending on the
volume of rain detected, as soon as the
vehicle exceeds 6 mph (10 km/h), if the
outside temperature is below +3°C.
–
the system works immediately
, depending
on the volume of rain detected, if the outside
temperature is above +3°C.
Do not cover the rain/sunshine sensor.
When using an automatic car wash,
switch off the automatic wipers and the
ignition.
Page 78 of 260

76
Lighting and visibility
In winter, wait until the windscreen is
completely clear of ice before activating the
automatic wipers.
Malfunction
If a fault occurs with the automatic wipers, the
wipers operate in intermittent mode.
Have it checked by a PEUGEOT dealer or a
qualified workshop.
Special position of the
windscreen wipers
This maintenance position is used while cleaning
or replacing the wiper blades. It can also be
useful, in wintry weather (ice, snow), to release
the wiper blades from the windscreen.
To maintain the effectiveness of the flat wiper blades, it is advisable to:
–
handle them with care.
–
clean them regularly using soapy water
.
–
avoid using them to hold cardboard on the
windscreen.
–
replace them at the first signs of wear
.
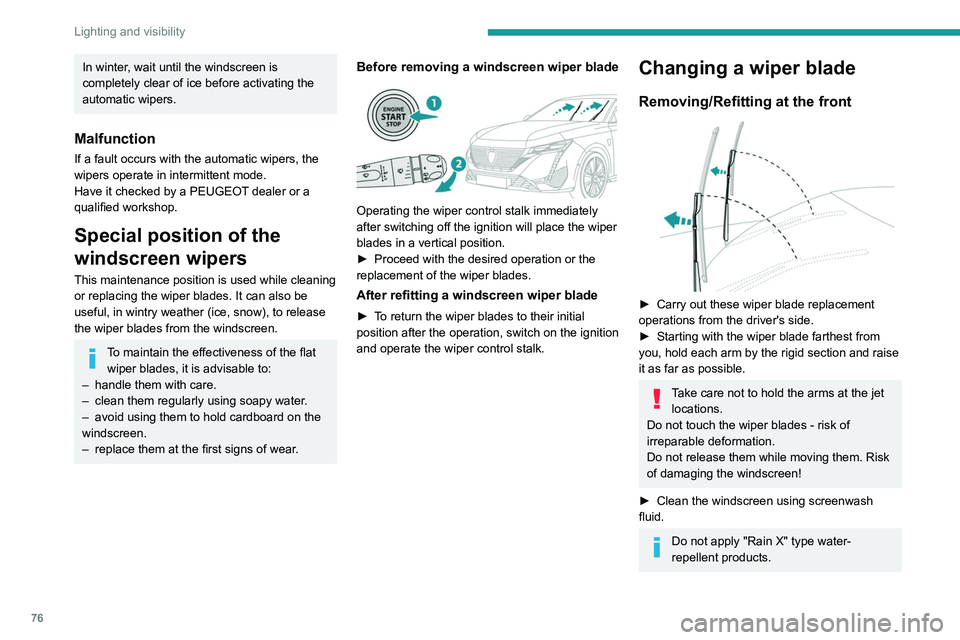
Before removing a windscreen wiper blade
Operating the wiper control stalk immediately
after switching off the ignition will place the wiper
blades in a vertical position.
►
Proceed with the desired operation or the
replacement of the wiper blades.
After refitting a windscreen wiper blade
► To return the wiper blades to their initial
position after the operation, switch on the ignition
and operate the wiper control stalk.
Changing a wiper blade
Removing/Refitting at the front
► Carry out these wiper blade replacement
operations from the driver's side.
►
Starting with the wiper blade farthest from
you, hold each arm by the rigid section and raise
it as far as possible.
Take care not to hold the arms at the jet locations.
Do not touch the wiper blades - risk of
irreparable deformation.
Do not release them while moving them. Risk
of damaging the windscreen!
►
Clean the windscreen using screenwash
fluid.
Do not apply "Rain X" type water-
repellent products.
Page 170 of 260

168
Practical information
system, the wipers and the dipped beam
headlamps or courtesy lamps, for a combined
duration of approximately 40 minutes.
Selecting the mode
A confirmation message is displayed when
energy economy mode is entered, and the active
functions are placed on standby.
If a telephone call is in progress at the
time, it will be maintained for around 10
minutes via the audio system’s hands-free
system.
Exiting the mode
These functions are automatically reactivated the
next time the vehicle is used.
To restore the use of these functions
immediately, start the engine and let it run:
–
For less than 10 minutes, to use the
equipment for approximately 5 minutes.
–
For more than 10 minutes, to use the
equipment for approximately 30 minutes.
Let the engine run for the specified duration to
ensure that the battery charge is sufficient.
T
o recharge the battery, avoid repeatedly or
continuously restarting the engine.
A flat battery prevents the engine from starting.
For more information on the 12
V battery,
refer to the corresponding section.
Load reduction mode
This system manages the use of certain
functions according to the level of charge
remaining in the battery.
When the vehicle is being driven, the load
reduction function temporarily deactivates certain
functions, such as the air conditioning and the
heated rear screen.
The deactivated functions are reactivated
automatically as soon as conditions permit.
Bonnet
Stop & Start
Before doing anything under the bonnet,
you must switch off the ignition to avoid any
risk of the engine restarting automatically.
Take care with objects or clothing that could
be caught in the blades of the cooling fan
or in certain moving components - risk of
strangulation and serious injury!
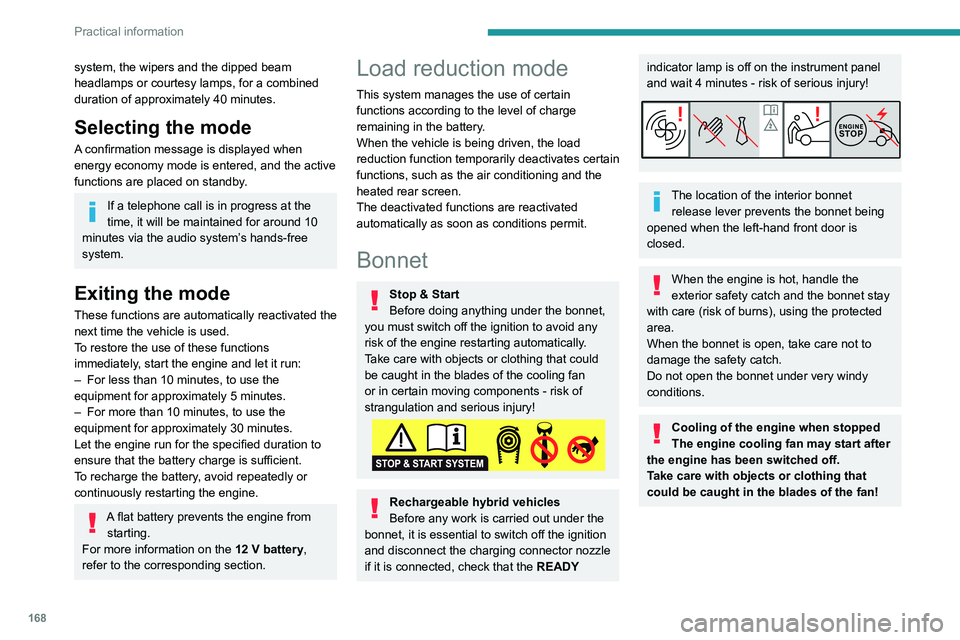
Rechargeable hybrid vehicles
Before any work is carried out under the
bonnet, it is essential to switch off the ignition
and disconnect the charging connector nozzle
if it is connected, check that the READY
indicator lamp is off on the instrument panel
and wait 4 minutes - risk of serious injury!
The location of the interior bonnet release lever prevents the bonnet being
opened when the left-hand front door is
closed.
When the engine is hot, handle the
exterior safety catch and the bonnet stay
with care (risk of burns), using the protected
area.
When the bonnet is open, take care not to
damage the safety catch.
Do not open the bonnet under very windy
conditions.
Cooling of the engine when stopped
The engine cooling fan may start after
the engine has been switched off.
Take care with objects or clothing that
could be caught in the blades of the fan!
Page 192 of 260

190
In the event of a breakdown
Keep the vehicle's battery out of the reach
of children.
The vehicle's battery contains sulphuric acid which can make you go blind or
cause severe burns.
For more information, refer to the
handbook.
Explosive gases can be present close to
the battery.
With petrol/Diesel engines
Procedure for starting the engine using another
battery or for charging a discharged battery.
Accessing the battery
The battery is located under the bonnet.
For access to the (+) terminal:
► Release the bonnet by pulling the internal
release lever
, then the external safety catch.
►
Raise the bonnet.
(+)
Positive terminal with a quick-release
terminal.
(-) Negative terminal.
As the battery's negative terminal is not
accessible, a remote earth point is located near
the battery.
Starting using another battery
If the vehicle's battery is flat, the engine can be
started using a backup battery (either external or
from another vehicle) and jump leads or using a
battery booster.
Never start the engine by connecting a
battery charger.
Never use a 24
V or higher battery booster.
Check beforehand that the backup battery
has a nominal voltage of 12
V and a capacity
at least equal to that of the discharged
battery.
The two vehicles must not be in contact with
each other.
Switch off all electricity-consuming equipment
on both vehicles (audio system, wipers,
lighting, etc.).
Make sure that the jump leads are well away
from the engine’s moving parts (fan, belt,
etc.).
Do not disconnect the (+) terminal while the
engine is running.
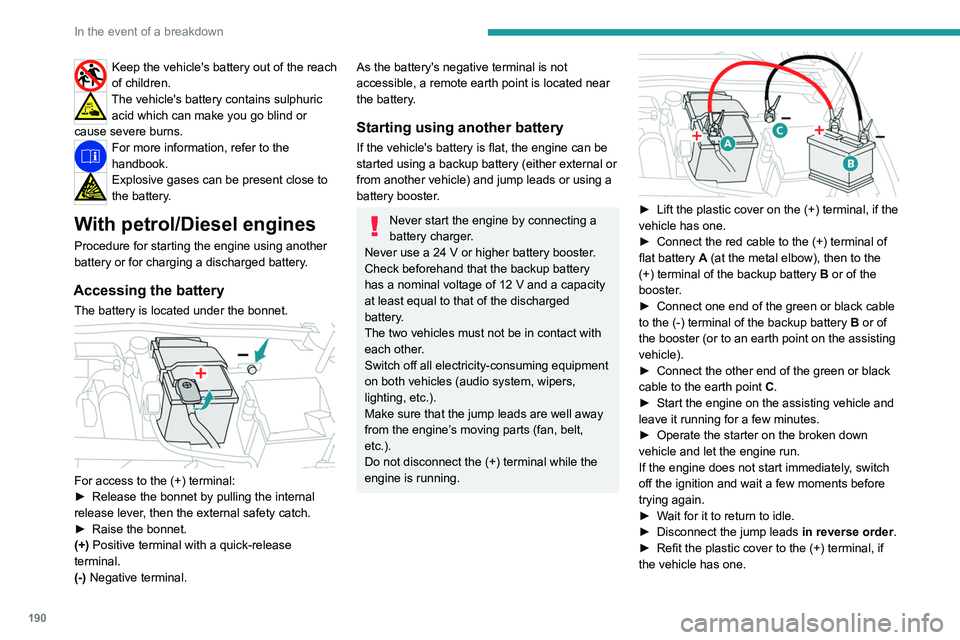
► Lift the plastic cover on the (+) terminal, if the
vehicle has one.
►
Connect the red cable to the (+) terminal of
flat battery
A (at the metal elbow), then to the
(+) terminal of the backup battery
B or of the
booster.
►
Connect one end of the green or black cable
to the (-) terminal of the backup battery
B or of
the booster (or to an earth point on the assisting
vehicle).
►
Connect the other end of the green or black
cable to the earth point
C
.
►
Start the engine on the assisting vehicle and
leave it running for a few minutes.
►
Operate the starter on the broken down
vehicle and let the engine run.
If the engine does not start immediately
, switch
off the ignition and wait a few moments before
trying again.
►
W
ait for it to return to idle.
►
Disconnect the jump leads in reverse order.
►
Refit the plastic cover to the (+) terminal, if
the vehicle has one.