2022 PEUGEOT 308 mirror controls
[x] Cancel search: mirror controlsPage 5 of 260

3
Contents
Road signs recognition 11 5
Speed limiter 11 9
Cruise control - Specific recommendations 120
Cruise control 121
Drive Assist Plus 122
Drive Assist 2.0 123
Adaptive cruise control 123
Lane positioning assist 127
Speed adjustment during cornering 131
Semi-automatic lane changing 131
Active Safety Brake with Collision Risk Alert
and Intelligent emergency braking assistance
135
Distraction detection 138
Active lane departure warning system 139
Long-distance blind spot monitoring 142
Parking sensors 143
Visiopark 1 145
Visiopark 2 146
Rear traffic alert 148
7Practical informationCompatibility of fuels 151
Refuelling 151
Misfuel prevention (Diesel) 152
Rechargeable hybrid system 152
Charging the traction battery
(Rechargeable hybrid engine)
159
Towing device 161
Towing device with quickly detachable towball 162
Roof bars 165
Very cold climate screens 166
Snow chains 167
Energy economy mode 167
Bonnet 168
Engine compartment 169
Checking levels 169
Checks 171
AdBlue® (BlueHDi) 173
Free-wheeling 175
Advice on care and maintenance 176
8In the event of a breakdownWarning triangle 179
Running out of fuel (Diesel) 179
Tool kit 179
Temporary puncture repair kit 181
Spare wheel 184
Changing a bulb 187
Fuses 189
12
V battery/Accessory batteries 189
Towing the vehicle 194
9Technical dataEngine technical data and towed loads 197
Petrol engines 198
Diesel engines 200
Rechargeable hybrid engines 201
Dimensions 202
Identification markings 202
10 PEUGEOT i-Connect Advanced -PEUGEOT i-Connect
First steps 204
Customisation 207
Steering mounted controls 208
Applications 209
Voice commands 209
Navigation 210
Connectivity 2 11
Mirror Screen 213
Media 214
Phone 216
Settings 217
Help 218
11Event data recorders
■
Alphabetical index
bit.ly/helpPSA
Access to additional videos
Page 6 of 260
4
Overview
Presentation
These illustrations and descriptions are provided
for information. The presence and location of
some elements vary depending on the version
or trim level.
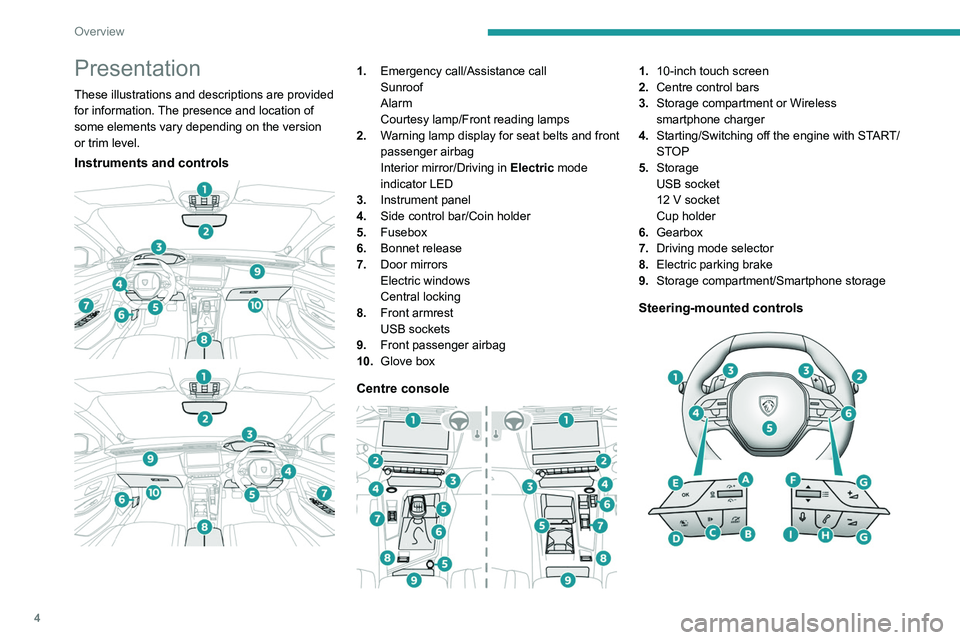
Instruments and controls
1. Emergency call/Assistance call
Sunroof
Alarm
Courtesy lamp/Front reading lamps
2. Warning lamp display for seat belts and front
passenger airbag
Interior mirror/Driving in Electric mode
indicator LED
3. Instrument panel
4. Side control bar/Coin holder
5. Fusebox
6. Bonnet release
7. Door mirrors
Electric windows
Central locking
8. Front armrest
USB sockets
9. Front passenger airbag
10. Glove box
Centre console
1.10-inch touch screen
2. Centre control bars
3. Storage compartment or Wireless
smartphone charger
4. Starting/Switching off the engine with START/
STOP
5. Storage
USB socket
12
V socket
Cup holder
6. Gearbox
7. Driving mode selector
8. Electric parking brake
9. Storage compartment/Smartphone storage
Steering-mounted controls
Page 30 of 260
28
Access
The charging nozzle can be unplugged on the
second press.
Complete or selective unlocking, and alarm
deactivation (depending on version), is confirmed
by the flashing of the direction indicators and the
lighting of the daytime running lamps.
Depending on version, the door mirrors unfold.
Opening the windows
►
T
o open the windows, press the unlocking
button for more than 3 seconds (depending on
version).
►
Press again to stop the windows opening.
Selective unlocking and opening of
the tailgate
By default, selective unlocking of the tailgate
is deactivated and its motorised operation is
activated.
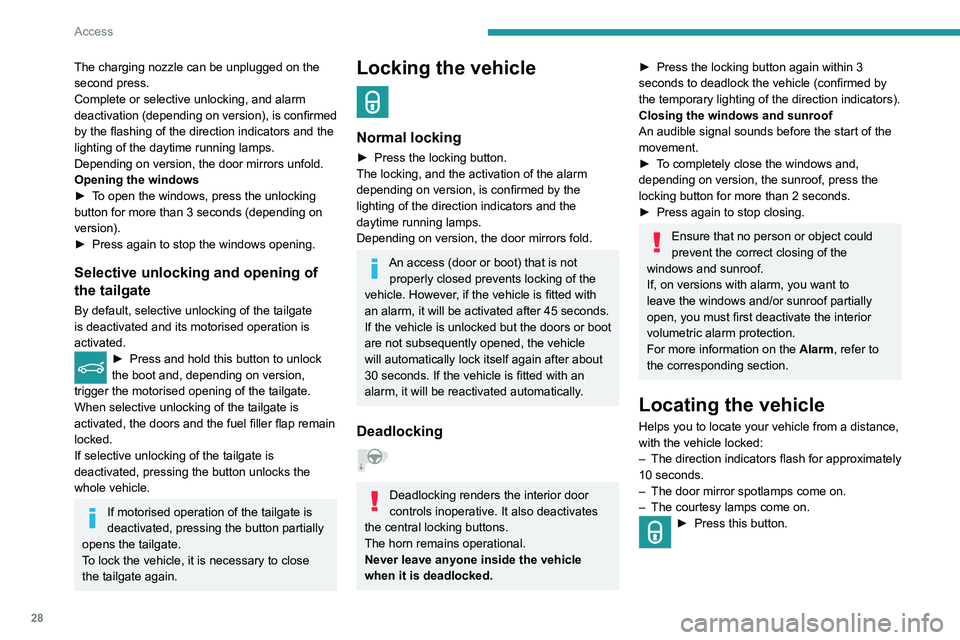
► Press and hold this button to unlock
the boot and, depending on version,
trigger the motorised opening of the tailgate.
When selective unlocking of the tailgate is
activated, the doors and the fuel filler flap remain
locked.
If selective unlocking of the tailgate is
deactivated, pressing the button unlocks the
whole vehicle.
If motorised operation of the tailgate is
deactivated, pressing the button partially
opens the tailgate.
To lock the vehicle, it is necessary to close
the tailgate again.
Locking the vehicle
Normal locking
► Press the locking button.
The locking, and the activation of the alarm
depending on version,
is confirmed by the
lighting of the direction indicators and the
daytime running lamps.
Depending on version, the door mirrors fold.
An access (door or boot) that is not properly closed prevents locking of the
vehicle. However, if the vehicle is fitted with
an alarm, it will be activated after 45
seconds.
If the vehicle is unlocked but the doors or boot
are not subsequently opened,
the vehicle
will automatically lock itself again after about
30
seconds. If the vehicle is fitted with an
alarm, it will be reactivated automatically.
Deadlocking
Deadlocking renders the interior door
controls inoperative. It also deactivates
the central locking buttons.
The horn remains operational.
Never leave anyone inside the vehicle
when it is deadlocked.
► Press the locking button again within 3
seconds to deadlock the vehicle (confirmed by
the temporary lighting of the direction indicators).
Closing the windows and sunroof
An audible signal sounds before the start of the
movement.
►
T
o completely close the windows and,
depending on version, the sunroof, press the
locking button for more than 2 seconds.
►
Press again to stop closing.
Ensure that no person or object could
prevent the correct closing of the
windows and sunroof.
If, on versions with alarm, you want to
leave the windows and/or sunroof partially
open, you must first deactivate the interior
volumetric alarm protection.
For more information on the Alarm, refer to
the corresponding section.
Locating the vehicle
Helps you to locate your vehicle from a distance,
with the vehicle locked:
–
The direction indicators flash for approximately
10 seconds.
–
The door mirror spotlamps come on.
–
The courtesy lamps come on.
► Press this button.
Page 32 of 260
30
Access
Unlocking the vehicle
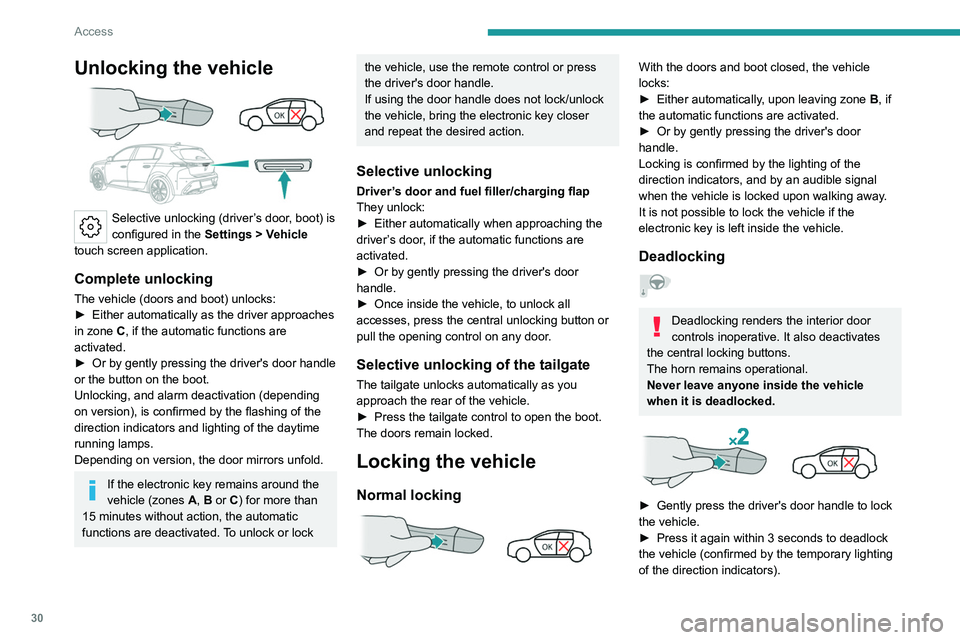
Selective unlocking (driver’s door, boot) is
configured in the Settings
> Vehicle
touch screen application.
Complete unlocking
The vehicle (doors and boot) unlocks:
► Either automatically as the driver approaches
in zone
C, if the automatic functions are
activated.
►
Or by gently pressing the driver's door handle
or the button on the boot.
Unlocking, and alarm deactivation (depending
on version), is confirmed by the flashing of the
direction indicators and lighting of the daytime
running lamps.
Depending on version, the door mirrors unfold.
If the electronic key remains around the
vehicle (zones A, B or C) for more than
15 minutes without action, the automatic
functions are deactivated. To unlock or lock
the vehicle, use the remote control or press
the driver's door handle.
If using the door handle does not lock/unlock
the vehicle, bring the electronic key closer
and repeat the desired action.
Selective unlocking
Driver’s door and fuel filler/charging flap
They unlock:
►
Either automatically when approaching the
driver
’s door, if the automatic functions are
activated.
►
Or by gently pressing the driver's door
handle.
►
Once inside the vehicle, to unlock all
accesses, press the central unlocking button or
pull the opening control on any door
.
Selective unlocking of the tailgate
The tailgate unlocks automatically as you
approach the rear of the vehicle.
►
Press the tailgate control to open the boot.
The doors remain locked.
Locking the vehicle
Normal locking
With the doors and boot closed, the vehicle
locks:
►
Either automatically
, upon leaving zone B, if
the automatic functions are activated.
►
Or by gently pressing the driver's door
handle.
Locking is confirmed by the lighting of the
direction indicators, and by an audible signal
when the vehicle is locked upon walking away
.
It is not possible to lock the vehicle if the
electronic key is left inside the vehicle.
Deadlocking
Deadlocking renders the interior door
controls inoperative. It also deactivates
the central locking buttons.
The horn remains operational.
Never leave anyone inside the vehicle
when it is deadlocked.
► Gently press the driver's door handle to lock
the vehicle.
►
Press it again within 3
seconds to deadlock
the vehicle (confirmed by the temporary lighting
of the direction indicators).
Page 33 of 260
31
Access
2If one of the doors or the boot is still open
or if the electronic key for the Keyless
Entry and Start
system has been left inside
the vehicle, central locking will not take place.
If the vehicle is unlocked but the doors or
tailgate are not subsequently opened, the
vehicle will automatically lock itself again after
about 30
seconds. If fitted to the vehicle, the
alarm is automatically reactivated (if
previously activated).
Automatic folding/unfolding of the door mirrors is configured in the Settings
>
Vehicle touch screen application.
As a safety measure, never leave the vehicle, even for a short time, without
taking the Keyless Entry and Start system’s
electronic key with you.
Be aware of the risk of theft of the vehicle if
the key is present in one of the defined areas
while the vehicle is unlocked.
In order to preserve the battery in the
electronic key and the vehicle's battery:
–
The unlocking
on approach function
(zone
C) automatically switches to hibernation
mode after several days (approximately one
week) without being used. To unlock the
vehicle, use the remote control or press on
the driver’s door handle. The next time the
vehicle is started, the automatic unlocking
and locking functions will be reactivated.
–
If the welcome lighting is triggered
several times in succession without the
vehicle subsequently being started, it will be
deactivated.
–
All "hands-free" functions switch to
hibernation mode after 21 days without being
used.
To restore these functions, unlock the
vehicle using the remote control and start the
engine.
Electrical interference
The electronic key may not work if it is
close to an electronic device (e.g.
mobile
telephone (switched on or on standby), laptop
computer, strong magnetic fields). If this
occurs, move the electronic key away from
the electronic device.
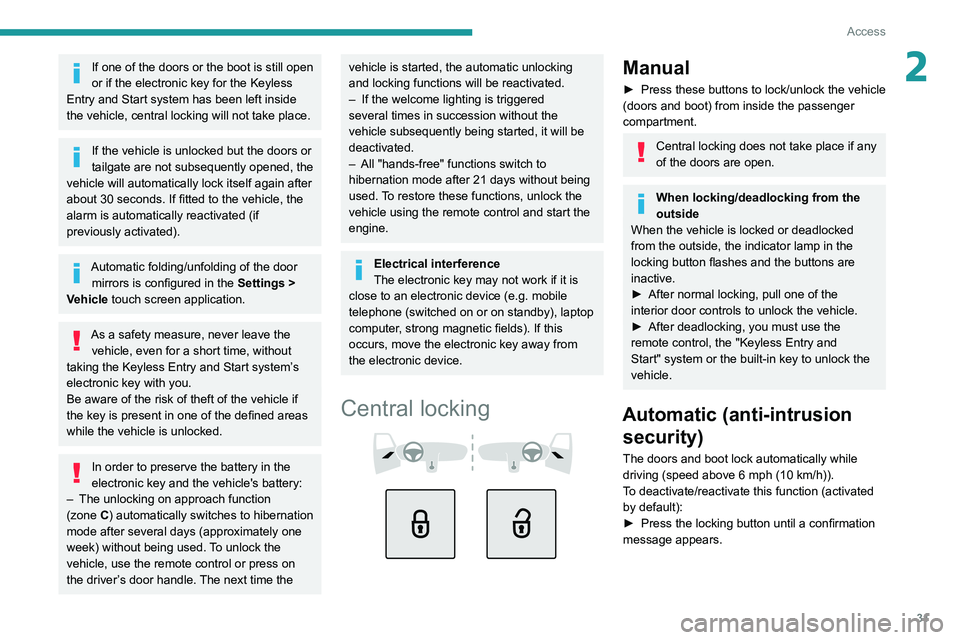
Central locking
Manual
► Press these buttons to lock/unlock the vehicle
(doors and boot) from inside the passenger
compartment.
Central locking does not take place if any
of the doors are open.
When locking/deadlocking from the
outside
When the vehicle is locked or deadlocked
from the outside, the indicator lamp in the
locking button
flashes and the buttons are
inactive.
►
After normal locking, pull one of the
interior door controls to unlock the vehicle.
►
After deadlocking, you must use the
remote control, the "Keyless Entry and
Start" system or the built-in key to unlock the
vehicle.
Automatic (anti-intrusion security)
The doors and boot lock automatically while
driving (speed above 6 mph (10
km/h)).
To deactivate/reactivate this function (activated
by default):
►
Press the locking button until a confirmation
message appears.
Page 45 of 260
43
Ease of use and comfort
3Driving position
Correct seating position
Adopting a good driving position contributes to
improving driver comfort and protection.
It also optimises interior and exterior visibility as
well as access to controls.
Certain seat adjustments described in this
section depend on the trim level and the country
in which the vehicle is sold.
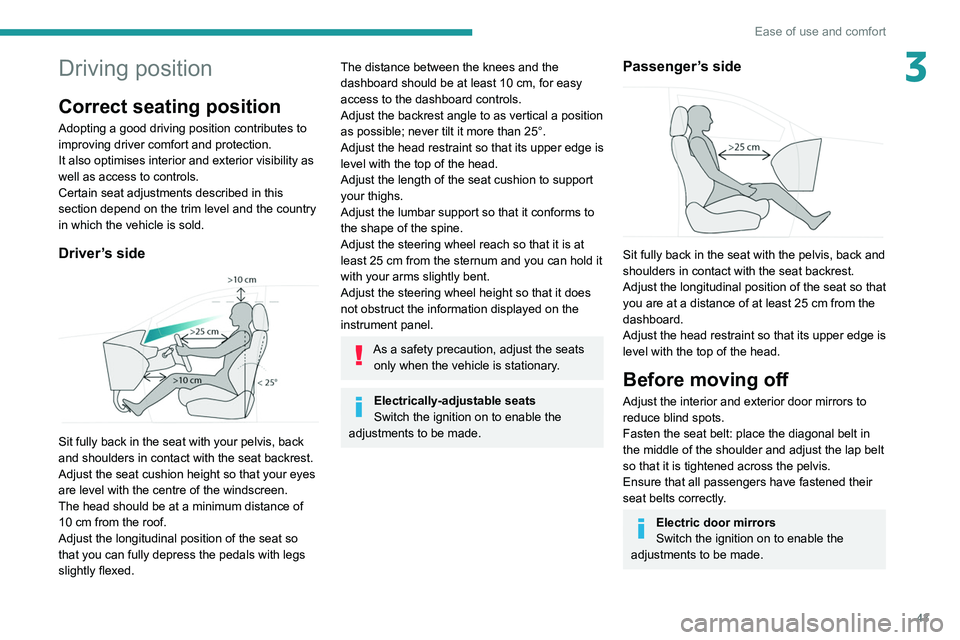
Driver’s side
Sit fully back in the seat with your pelvis, back
and shoulders in contact with the seat backrest.
Adjust the seat cushion height so that your eyes
are level with the centre of the windscreen.
The head should be at a minimum distance of
10 cm from the roof.
Adjust the longitudinal position of the seat so
that you can fully depress the pedals with legs
slightly flexed.
The distance between the knees and the
dashboard should be at least 10 cm, for easy
access to the dashboard controls.
Adjust the backrest angle to as vertical a position
as possible; never tilt it more than 25°.
Adjust the head restraint so that its upper edge is
level with the top of the head.
Adjust the length of the seat cushion to support
your thighs.
Adjust the lumbar support so that it conforms to
the shape of the spine.
Adjust the steering wheel reach so that it is at
least 25
cm from the sternum and you can hold it
with your arms slightly bent.
Adjust the steering wheel height so that it does
not obstruct the information displayed on the
instrument panel.
As a safety precaution, adjust the seats only when the vehicle is stationary.
Electrically-adjustable seats
Switch the ignition on to enable the
adjustments to be made.
Passenger’s side
Sit fully back in the seat with the pelvis, back and
shoulders in contact with the seat backrest.
Adjust the longitudinal position of the seat so that
you are at a distance of at least 25
cm from the
dashboard.
Adjust the head restraint so that its upper edge is
level with the top of the head.
Before moving off
Adjust the interior and exterior door mirrors to
reduce blind spots.
Fasten the seat belt: place the diagonal belt in
the middle of the shoulder and adjust the lap belt
so that it is tightened across the pelvis.
Ensure that all passengers have fastened their
seat belts correctly.
Electric door mirrors
Switch the ignition on to enable the
adjustments to be made.
Page 48 of 260
46
Ease of use and comfort
Lumbar
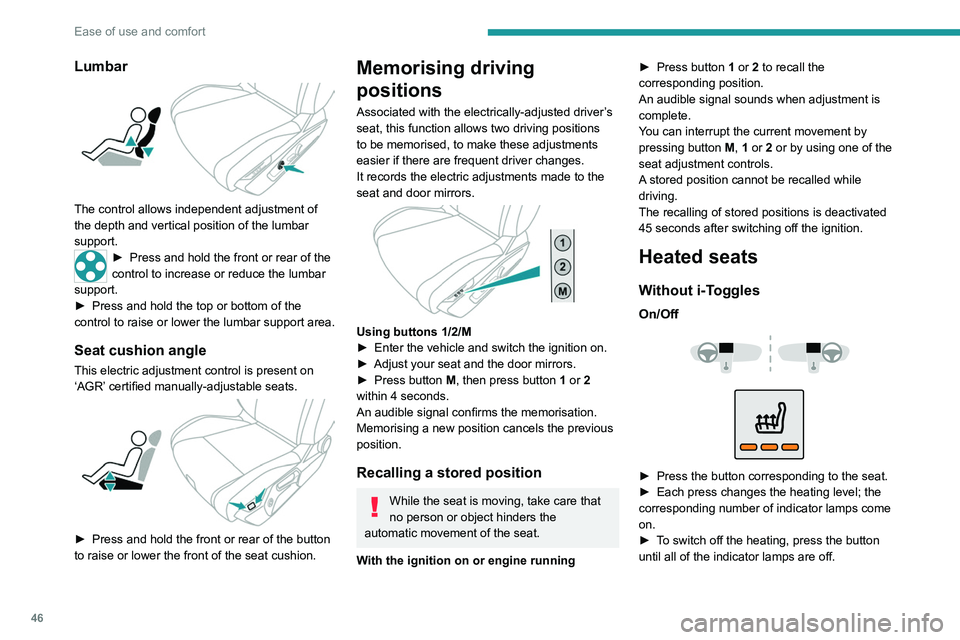
The control allows independent adjustment of
the depth and vertical position of the lumbar
support.
► Press and hold the front or rear of the
control to increase or reduce the lumbar
support.
►
Press and hold the top or bottom of the
control to raise or lower the lumbar support area.
Seat cushion angle
This electric adjustment control is present on
‘AGR’ certified manually-adjustable seats.
► Press and hold the front or rear of the button
to raise or lower the front of the seat cushion.
Memorising driving
positions
Associated with the electrically-adjusted driver’s
seat, this function allows two driving positions
to be memorised, to make these adjustments
easier if there are frequent driver changes.
It records the electric adjustments made to the
seat and door mirrors.
Using buttons 1/2/M
► Enter the vehicle and switch the ignition on.
►
Adjust your seat and the door mirrors.
►
Press button
M, then press button 1 or 2
within 4 seconds.
An audible signal confirms the memorisation.
Memorising a new position cancels the previous
position.
Recalling a stored position
While the seat is moving, take care that
no person or object hinders the
automatic movement of the seat.
With the ignition on or engine running ►
Press button
1 or 2 to recall the
corresponding position.
An audible signal sounds when adjustment is
complete.
You can interrupt the current movement by
pressing button M, 1 or 2 or by using one of the
seat adjustment controls.
A stored position cannot be recalled while
driving.
The recalling of stored positions is deactivated
45 seconds after switching off the ignition.
Heated seats
Without i-Toggles
On/Off
► Press the button corresponding to the seat.
► Each press changes the heating level; the
corresponding number of indicator lamps come
on.
►
T
o switch off the heating, press the button
until all of the indicator lamps are off.
Page 52 of 260

50
Ease of use and comfort
Automatic "electrochrome" model
The electrochrome system uses a sensor that
detects the level of exterior brightness and that
coming from the rear of the vehicle, in order to
automatically and gradually switch between day
and night usage.
To ensure optimum visibility while manoeuvring, the mirror automatically
brightens when reverse gear is engaged.
The system is deactivated if the load in the
boot exceeds the height of the load space
cover or if the load space cover has items
placed on it.
Rechargeable hybrid vehicles
An LED, located below the interior rear
view mirror and visible from outside the
vehicle, lights up blue to indicate that the
vehicle is being driven in Electric mode
(depending on country of sale).
Rear bench seat
Rear head restraints
They have two positions:
– A high position , for when the seat is in use:
►
Pull the head restraint fully up.
–
A low position , for stowing, when the seat is
not in use: ►
Press the lug
A to release the head
restraint and push it down.
The rear head restraints can be removed.
Removing a head restraint
► Release the backrest using control 1 .
► T ilt the backrest slightly forwards.
►
Pull the head restraint fully up.
►
Press the lug
A to release the head restraint
and remove it completely.
Refitting a head restraint
► Insert the head restraint rods into the guides
in the corresponding backrest.
►
Push the head restraint fully down.
►
Press the lug
A to release the head restraint
and push it down.
Never drive with passengers seated at
the rear when the head restraints are
removed; the head restraints should be in
place and in the high position.
The head restraint for the centre seat
and those for the outer seats are not
interchangeable.
Folding the backrests
Each section of the backrest has one or two
release controls:
–
A
grip 1 on the outer edge of the backrest.
–
A
lever 2 on the boot side trim (SW).