2022 PEUGEOT 308 spare wheel
[x] Cancel search: spare wheelPage 182 of 260
180
In the event of a breakdown
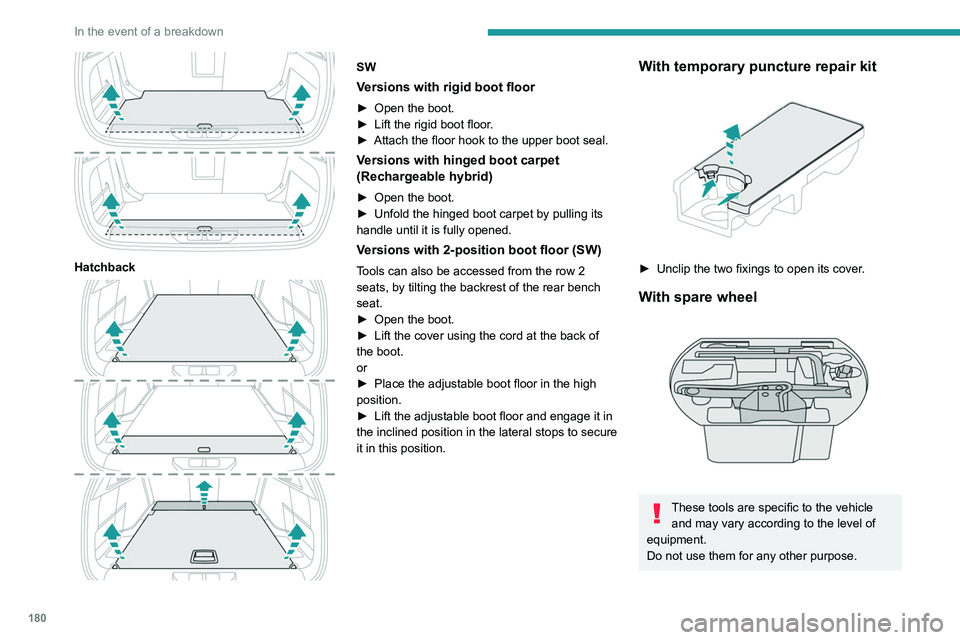
Hatchback
SW
Versions with rigid boot floor
► Open the boot.
► Lift the rigid boot floor .
►
Attach the floor hook to the upper boot seal.
Versions with hinged boot carpet
(Rechargeable hybrid)
► Open the boot.
► Unfold the hinged boot carpet by pulling its
handle until it is fully opened.
Versions with 2-position boot floor (SW)
Tools can also be accessed from the row 2
seats, by tilting the backrest of the rear bench
seat.
►
Open the boot.
►
Lift the cover using the cord at the back of
the boot.
or
►
Place the adjustable boot floor in the high
position.
►
Lift the adjustable boot floor and engage it in
the inclined position in the lateral stops to secure
it in this position.
With temporary puncture repair kit
► Unclip the two fixings to open its cover .
With spare wheel
These tools are specific to the vehicle
and may vary according to the level of
equipment.
Do not use them for any other purpose.
Page 183 of 260

181
In the event of a breakdown
8The jack must only be used to change a wheel with a damaged or punctured tyre.
Do not use any jack other than the one
supplied with the vehicle.
If the vehicle does not have its original jack,
contact a PEUGEOT dealer or a qualified
workshop to obtain the one that was intended
by the manufacturer.
The jack meets European standards, as
defined in the Machinery Directive 2006/42/
CE.
The jack does not require any maintenance.
List of tools
1. Chock to immobilise the vehicle (depending
on equipment)
2. Socket for the security bolts (located in the
glove box) (depending on equipment)
To adapt the wheelbrace to the special
‘security’ bolts.
3. Removable towing eye For more information on
Towing the vehicle
and using the removable towing eye, refer to the
corresponding section.
With temporary puncture repair kit
4. 12 V compressor with cartridge of sealant
and speed limit sticker
For temporary repair of a tyre and to adjust
the tyre pressure.
For more information about the Temporary
puncture repair kit, refer to the corresponding
section.
With spare wheel
5. Wheelbrace
For removing the wheel bolts.
6. Jack with integrated handle
To raise the vehicle.
7. Wheel bolt cap removal tool (depending on
equipment)
For removing the wheel trim from steel
wheels or the central bolt cover from alloy
wheels.
For more information on the Spare wheel, refer
to the corresponding section.
Temporary puncture repair kit
Scan the QR Code on page 3 to view
explanatory videos.
Made up of a compressor and a sealant
cartridge,
it allows you to carry out a temporary
repair of the tyre so that you can drive to the
nearest garage.
It is designed to repair most punctures located
on the tyre tread.
The vehicle's electric system allows the connection of the compressor to the 12 V
power supply for long enough to repair a tyre
after a puncture.
Page 186 of 260
184
In the event of a breakdown
Spare wheel
Scan the QR Code on page 3 to view
explanatory videos.
For more information on the Tool kit,
refer to the corresponding section.
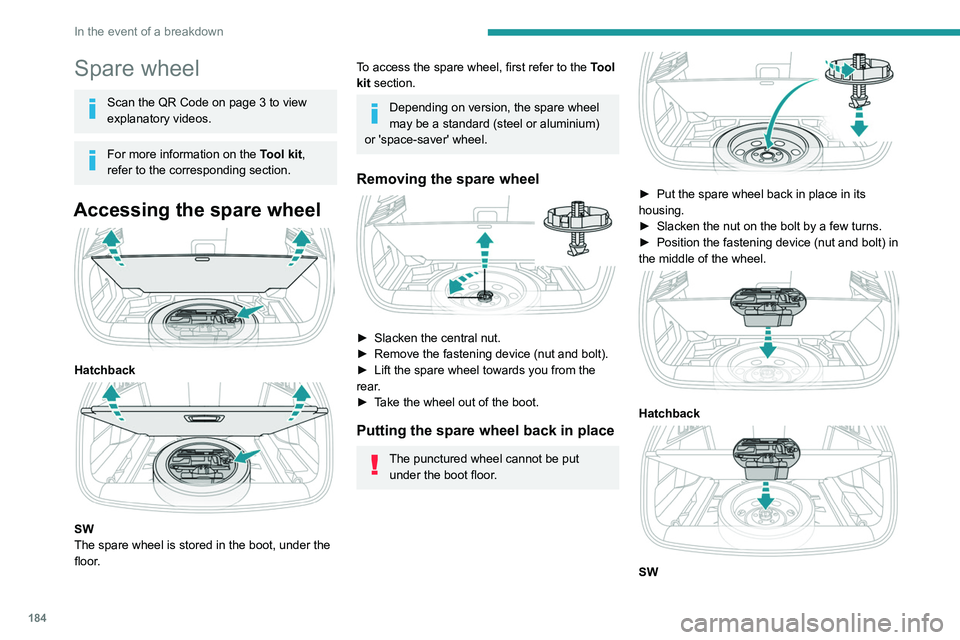
Accessing the spare wheel
Hatchback
SW
The spare wheel is stored in the boot, under the
floor.
To access the spare wheel, first refer to the Tool
kit section.
Depending on version, the spare wheel
may be a standard (steel or aluminium)
or 'space-saver' wheel.
Removing the spare wheel
► Slacken the central nut.
► Remove the fastening device (nut and bolt).
►
Lift the spare wheel towards you from the
rear
.
►
T
ake the wheel out of the boot.
Putting the spare wheel back in place
The punctured wheel cannot be put under the boot floor.
► Put the spare wheel back in place in its
housing.
►
Slacken the nut on the bolt by a few turns.
►
Position the fastening device (nut and bolt) in
the middle of the wheel.
Hatchback
SW
Page 187 of 260

185
In the event of a breakdown
8► Tighten the central nut sufficiently to retain
the wheel correctly.
►
Put the tool box back in place in the middle of
the wheel and clip it in place.
Removing a wheel
Parking the vehicle
Immobilise the vehicle where it does
not obstruct traffic: the ground must be level,
stable and non-slippery.
With a manual gearbox, engage first gear
to lock the wheels, apply the parking brake,
unless it is set to automatic mode, and switch
off the ignition.
With an automatic gearbox, select mode
P
to lock the wheels, apply the parking brake,
unless it is set to automatic mode, and switch
off the ignition.
Check that the parking brake indicator lamps
on the instrument panel are on fixed.
The occupants must get out of the vehicle
and wait where they are safe.
If necessary, place a chock under the wheel
diagonally opposite the wheel to be changed.
Never go underneath a vehicle raised using a
jack; use an axle stand.
Wheel with wheel trim
When removing the wheel , first remove
the wheel trim by pulling at the valve aperture
using the wheelbrace.
When refitting the wheel , refit the wheel
trim, starting by placing its aperture in line
with the valve and then pushing it into place
all round its edge with the palm of your hand.
– If the vehicle has steel wheels, remove the
wheel trim.
–
If the vehicle has alloy wheels, remove the
central bolt cover using tool 7
.
–
If the vehicle is so equipped, fit security bolt
socket
2 to wheelbrace 5 to slacken the security
bolt.
–
Slacken the other bolts using the
wheelbrace
5
only.
► Place the foot of jack 6 on the ground and
ensure that it is directly below the front A or
rear
B jacking point on the underbody, whichever
is closest to the wheel to be changed.
► Extend jack 6 until its head comes into
contact with jacking point A or B; contact area A
or B on the vehicle must be properly inserted
into the central part of the head of the jack.
►
Raise the vehicle until there is sufficient
space between the wheel and the ground to
easily admit the spare (not punctured) wheel.
Ensure that the jack is stable. If the
ground is slippery or loose, the jack may
slip or collapse - risk of injury!
Take care to position the jack strictly at
one of the jacking points
A
or B under the
vehicle, ensuring that the head of the jack is
centred under the contact area on the vehicle.
Otherwise, there is a risk of damage to the
vehicle and/or of the jack collapsing - risk of
injury!
Page 188 of 260
186
In the event of a breakdown
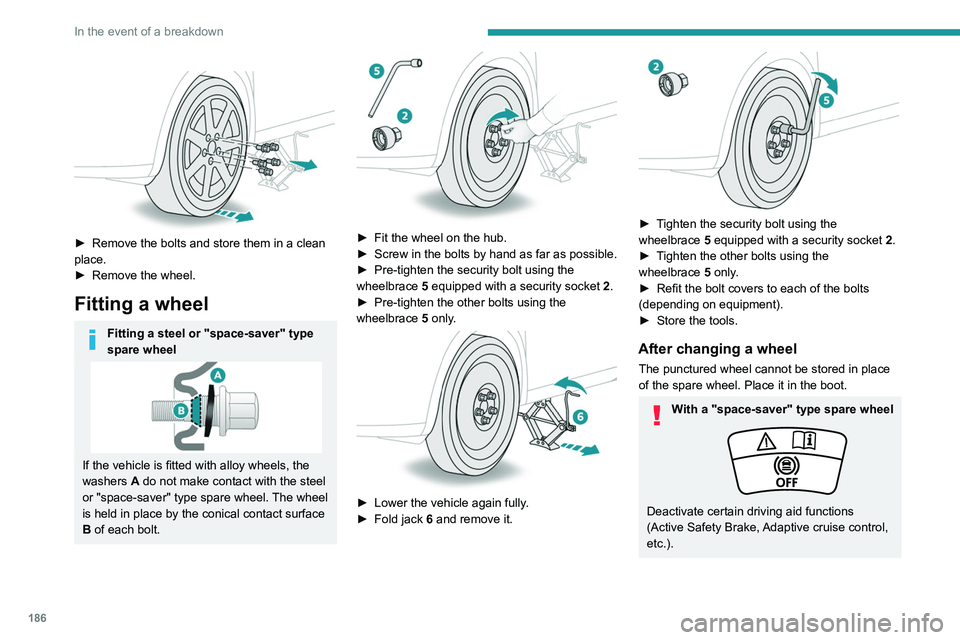
► Remove the bolts and store them in a clean
place.
►
Remove the wheel.
Fitting a wheel
Fitting a steel or "space-saver" type
spare wheel
If the vehicle is fitted with alloy wheels, the
washers A do not make contact with the steel
or "space-saver" type spare wheel. The wheel
is held in place by the conical contact surface
B of each bolt.
► Fit the wheel on the hub.
► Screw in the bolts by hand as far as possible.
►
Pre-tighten the security bolt using the
wheelbrace
5
equipped with a security socket
2
.
►
Pre-tighten the other bolts using the
wheelbrace
5
only.
► Lower the vehicle again fully .
► Fold jack 6 and remove it.
► Tighten the security bolt using the
wheelbrace 5 equipped with a security socket 2 .
►
T
ighten the other bolts using the
wheelbrace
5
only.
►
Refit the bolt covers to each of the bolts
(depending on equipment).
►
Store the tools.
After changing a wheel
The punctured wheel cannot be stored in place
of the spare wheel. Place it in the boot.
With a "space-saver" type spare wheel
Deactivate certain driving aid functions
(Active Safety Brake, Adaptive cruise control,
etc.).
Page 189 of 260
187
In the event of a breakdown
8Do not exceed the maximum authorised
speed of 50 mph (80 km/h) or the maximum
distance of 50 miles (80 km).
Driving with more than one "space-saver"
type spare wheel is prohibited.
Go to a PEUGEOT dealer or a qualified
workshop.
Have the tightening of the spare wheel's bolts
and its tyre pressure checked.
Have the punctured tyre examined. After
inspection, the technician will advise you on
whether the tyre can be repaired or if it must
be replaced.
Changing a bulb
In some weather conditions (e.g. low
temperature or humidity), misting on the
internal surface of the glass of the headlamps
and rear lamps is normal, and will disappear
after the lamps have been on for a few
minutes.
Never look too closely at the light beam
of LED technology lamps - risk of serious
eye injury!
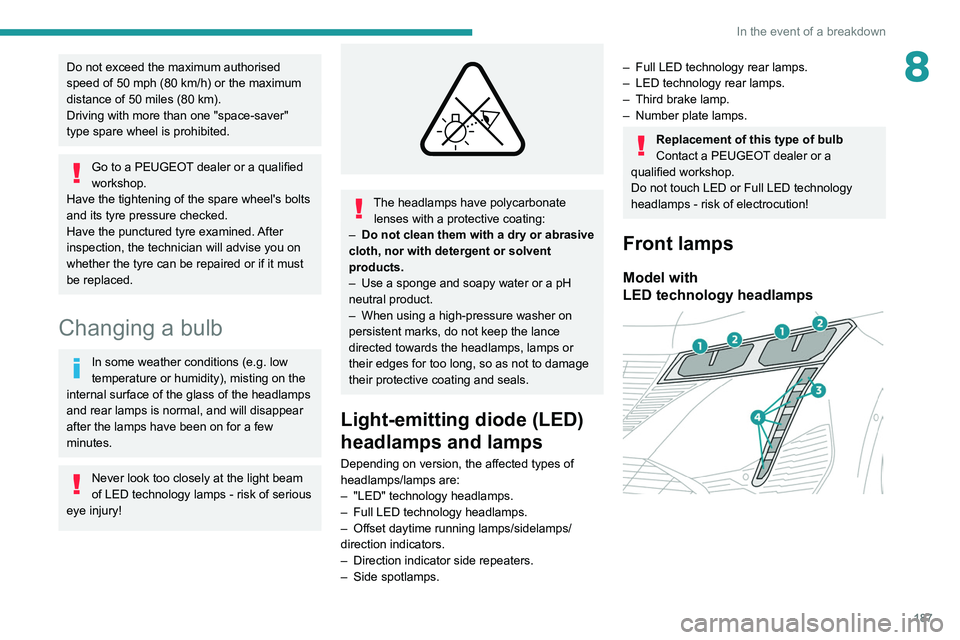
The headlamps have polycarbonate lenses with a protective coating:
–
Do not clean them with a dry or abrasive
cloth, nor with detergent or solvent
products.
–
Use a sponge and soapy water or a pH
neutral product.
–
When using a high-pressure washer on
persistent marks, do not keep the lance
directed towards the headlamps, lamps or
their edges for too long, so as not to damage
their protective coating and seals.
Light-emitting diode (LED)
headlamps and lamps
Depending on version, the affected types of
headlamps/lamps are:
–
"LED" technology headlamps.
–
Full LED technology headlamps.
–
Offset daytime running lamps/sidelamps/
direction indicators.
–
Direction indicator side repeaters.
–
Side spotlamps.
– Full LED technology rear lamps.
– LED technology rear lamps.
–
Third brake lamp.
–
Number plate lamps.
Replacement of this type of bulb
Contact a PEUGEOT dealer or a
qualified workshop.
Do not touch LED or Full LED
technology
headlamps - risk of electrocution!
Front lamps
Model with
LED technology headlamps
Page 231 of 260
229
Alphabetical index
W
Wallbox (Rechargeable hybrid) 154–155, 111
Warning and indicator lamps
11
Warning lamp, driver's seat belt
not fastened
36
Warning lamps
11
Warning lamp, seat belts
36
Warnings and indicators
11
Washing
65
Washing (advice)
104, 176–177
Weights
148
Welcome lighting
16, 27
Wheel, spare
124, 180–181, 135
Window controls
27
Windscreen, heated
56–57
Windscreen wipers
30, 32
Wiper blades (changing)
33
Wiper, rear
31
Wipers
30
Wipers, automatic rain sensitive
32