2022 PEUGEOT 308 remote control
[x] Cancel search: remote controlPage 72 of 260
70
Lighting and visibility
► With the ignition off, pull the lighting control
stalk toward you ("headlamp flash") to activate/
deactivate the function.
Manual guide-me-home lighting goes off
automatically after a period of time.
Welcome lighting
When the vehicle is unlocked in low light
conditions and the "Automatic illumination of
headlamps" function is activated, this system
automatically switches on:
–
On the outside, sidelamps, dipped beam
headlamps and door mirror spotlamps.
–
Inside, courtesy lamps and footwell lighting.
Door mirror spotlamps
These spotlamps facilitate access to the vehicle
by lighting the ground near the front doors.
The spotlamps come on automatically:
–
when the vehicle is unlocked.
–
when a door is opened.
–
when a request to locate the vehicle is
received from the remote control.
They also come on with the welcome lighting
and guide-me-home lighting functions.
They go off automatically after 30 seconds.
Automatic lighting systems - General
recommendations
The automatic lighting systems use a detection
camera, located at the top of the windscreen.
Operating limits
The system may be disrupted or not work
correctly:
–
When visibility conditions are poor
(e.g.
snowfall, heavy rain).
–
If the windscreen is dirty
, misted-up or
masked (e.g.
sticker) in front of the camera.
–
If the vehicle is facing highly reflective signs
or safety barrier reflectors.
The system is not able to detect:
–
Road users that do not have their own
lighting, such as pedestrians.
–
V
ehicles with hidden lighting (e.g. travelling
behind a safety barrier on the motorway).
–
V
ehicles at the top or bottom of a steep
slope, on winding roads, on crossroads.
Maintenance
Clean the windscreen regularly,
particularly the area in front of the camera.
The internal surface of the windscreen can
also become misted around the camera.
In humid and cold weather, demist the
windscreen regularly.
Do not allow snow to accumulate on the
bonnet or roof of the vehicle as this could
obstruct the camera.
Automatic headlamp dipping
For more information, refer to the
General recommendations for
automatic lighting systems.
With the ring of the lighting control stalk
in the
"AUTO" position and the function activated on
the touch screen, this system automatically
switches between dipped and main beam
headlamps, according to lighting and traffic
conditions, using a camera located at the top of
the windscreen.
Page 101 of 260
99
Driving
6Starting / Switching off the
engine with the key
Key ignition switch
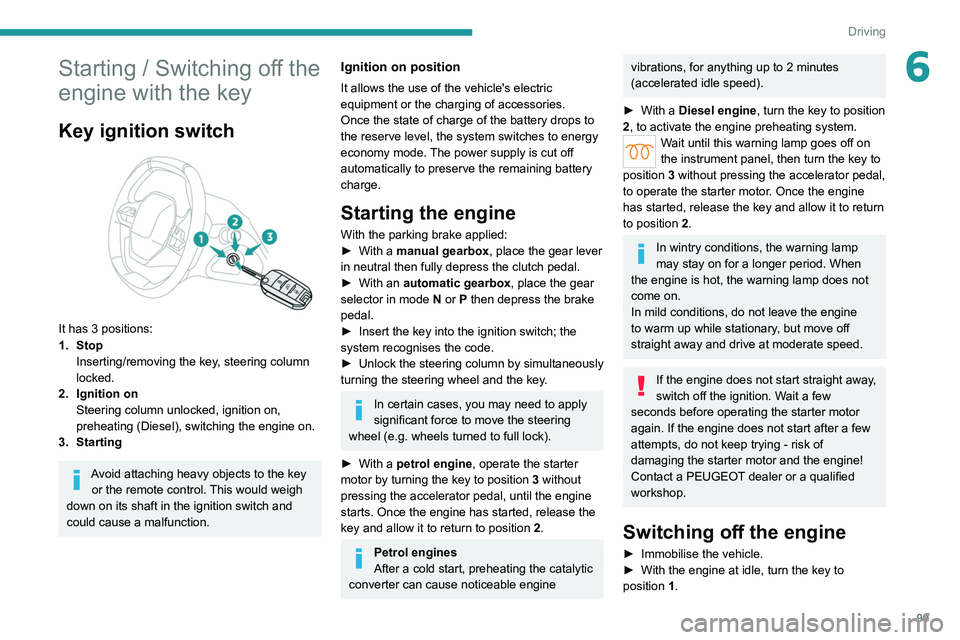
It has 3 positions:
1. StopInserting/removing the key, steering column
locked.
2. Ignition on Steering column unlocked, ignition on,
preheating (Diesel), switching the engine on.
3. Starting
Avoid attaching heavy objects to the key or the remote control. This would weigh
down on its shaft in the ignition switch and
could cause a malfunction.
Ignition on position
It allows the use of the vehicle's electric
equipment or the charging of accessories.
Once the state of charge of the battery drops to
the reserve level, the system switches to energy
economy mode. The power supply is cut off
automatically to preserve the remaining battery
charge.
Starting the engine
With the parking brake applied:
► With a manual gearbox, place the gear lever
in neutral then fully depress the clutch pedal.
►
With an
automatic gearbox, place the gear
selector in mode N or P then depress the brake
pedal.
►
Insert the key into the ignition switch; the
system recognises the code.
►
Unlock
the steering column by simultaneously
turning the steering wheel and the key.
In certain cases, you may need to apply
significant force to move the steering
wheel (e.g.
wheels turned to full lock).
►
With a
petrol engine , operate the starter
motor by turning the key to position 3 without
pressing the accelerator pedal, until the engine
starts. Once the engine has started, release the
key and allow it to return to position 2.
Petrol engines
After a cold start, preheating the catalytic
converter can cause noticeable engine
vibrations, for anything up to 2 minutes
(accelerated idle speed).
►
With a
Diesel engine, turn the key to position
2, to
activate the engine preheating system.
Wait until this warning lamp goes off on
the instrument panel, then turn the key to
position 3 without pressing the accelerator pedal,
to operate the starter motor. Once the engine
has started, release the key and allow it to return
to position 2.
In wintry conditions, the warning lamp
may stay on for a longer period. When
the engine is hot, the warning lamp does not
come on.
In mild conditions, do not leave the engine
to warm up while stationary, but move off
straight away and drive at moderate speed.
If the engine does not start straight away,
switch off the ignition. Wait a few
seconds before operating the starter motor
again. If the engine does not start after a few
attempts, do not keep trying - risk of
damaging the starter motor and the engine!
Contact a PEUGEOT dealer or a qualified
workshop.
Switching off the engine
► Immobilise the vehicle.
► With the engine at idle, turn the key to
position 1
.
Page 104 of 260
102
Driving
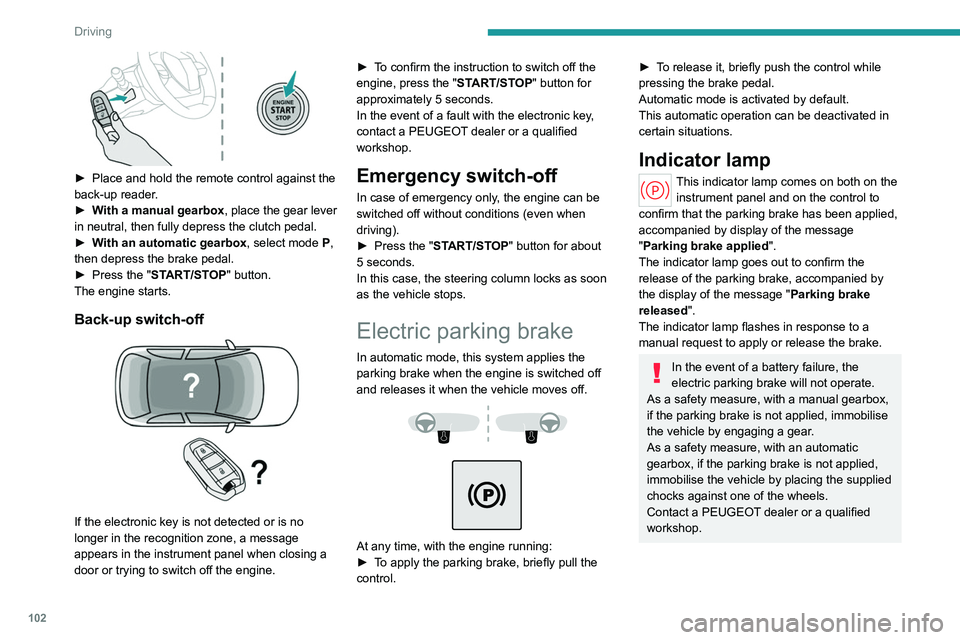
► Place and hold the remote control against the
back-up reader .
►
W
ith a manual gearbox, place the gear lever
in neutral, then fully depress the clutch pedal.
►
W
ith an automatic gearbox, select mode P,
then depress the brake pedal.
►
Press the "
START/STOP" button.
The engine starts.
Back-up switch-off
If the electronic key is not detected or is no
longer in the recognition zone, a message
appears in the instrument panel when closing a
door or trying to switch off the engine. ►
T
o confirm the instruction to switch off the
engine, press the " START/STOP" button for
approximately 5 seconds.
In the event of a fault with the electronic key,
contact a PEUGEOT dealer or a qualified
workshop.
Emergency switch-off
In case of emergency only, the engine can be
switched off without conditions (even when
driving).
►
Press the "
START/STOP" button for about
5
seconds.
In this case, the steering column locks as soon
as the vehicle stops.
Electric parking brake
In automatic mode, this system applies the
parking brake when the engine is switched off
and releases it when the vehicle moves off.
At any time, with the engine running:
► T o apply the parking brake, briefly pull the
control.
► To release it, briefly push the control while
pressing the brake pedal.
Automatic mode is activated by default.
This automatic operation can be deactivated in
certain situations.
Indicator lamp
This indicator lamp comes on both on the instrument panel and on the control to
confirm that the parking brake has been applied,
accompanied by display of the message
"Parking brake applied".
The indicator lamp goes out to confirm the
release of the parking brake, accompanied by
the display of the message " Parking brake
released ".
The indicator lamp flashes in response to a
manual request to apply or release the brake.
In the event of a battery failure, the
electric parking brake will not operate.
As a safety measure, with a manual gearbox,
if the parking brake is not applied, immobilise
the vehicle by engaging a gear.
As a safety measure, with an automatic
gearbox, if the parking brake is not applied,
immobilise the vehicle by placing the supplied
chocks against one of the wheels.
Contact a PEUGEOT dealer or a qualified
workshop.
Page 159 of 260
157
Practical information
7POWER
Green: electrical connection established;
charging can begin.
CHARGE
Flashing green: charging in progress or
temperature pre-conditioning activated.
Fixed green: charging complete.
FAULT
Red: fault; charging not permitted or must
be stopped immediately. Check that everything
is connected correctly and that the electrical
system is not faulty.
If the indicator lamp does not go off, contact a
PEUGEOT dealer or a qualified workshop.
Upon plugging the charging cable into a
domestic socket, all of the indicator lamps come
on briefly.
If no indicator lamps come on, check the
domestic socket's circuit-breaker:
–
If the circuit-breaker has tripped, contact a
professional to check that the electrical system
is compatible and/or carry out any necessary
repairs.
–
If the circuit-breaker has not tripped, stop
using the charging cable and contact a
PEUGEOT
dealer or a qualified workshop.
Control unit label - Recommendations
Refer to the handbook before use.
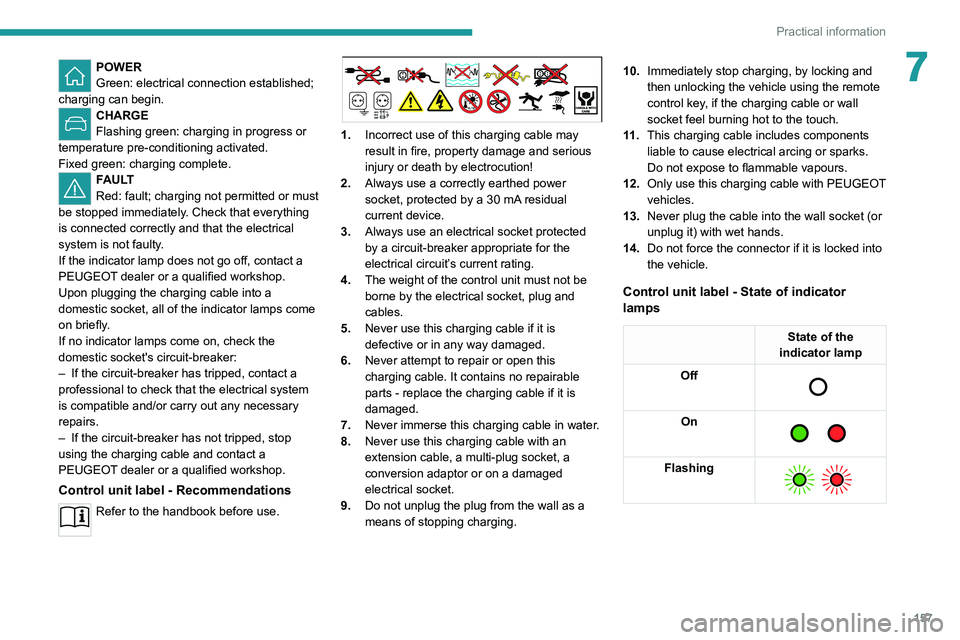
1. Incorrect use of this charging cable may
result in fire, property damage and serious
injury or death by electrocution!
2. Always use a correctly earthed power
socket, protected by a 30
mA residual
current device.
3. Always use an electrical socket protected
by a circuit-breaker appropriate for the
electrical circuit’s current rating.
4. The weight of the control unit must not be
borne by the electrical socket, plug and
cables.
5. Never use this charging cable if it is
defective or in any way damaged.
6. Never attempt to repair or open this
charging cable. It contains no repairable
parts - replace the charging cable if it is
damaged.
7. Never immerse this charging cable in water.
8. Never use this charging cable with an
extension cable, a multi-plug socket, a
conversion adaptor or on a damaged
electrical socket.
9. Do not unplug the plug from the wall as a
means of stopping charging. 10.
Immediately stop charging, by locking and
then unlocking the vehicle using the remote
control key, if the charging cable or wall
socket feel burning hot to the touch.
11 . This charging cable includes components
liable to cause electrical arcing or sparks.
Do not expose to flammable vapours.
12. Only use this charging cable with PEUGEOT
vehicles.
13. Never plug the cable into the wall socket (or
unplug it) with wet hands.
14. Do not force the connector if it is locked into
the vehicle.
Control unit label - State of indicator
lamps
State of the
indicator lamp
Off
On
Flashing
Page 161 of 260
159
Practical information
7Manual reset procedure
The control unit can be reset by simultaneously disconnecting the chargi\
ng connector and the wall socket.
Then, reconnect the wall socket first. For more information, refer to the handbook.
Charging the traction
battery (Rechargeable
hybrid)
For a full charge, follow the charging procedure
without interrupting it, until it stops automatically.
Charging may be performed either immediately
(by default) or deferred.
Deferred charging is set via the touch
screen or the MYPEUGEOT APP
application.
When the vehicle is connected, the following
information is displayed on the instrument panel:
–
T
raction battery charge status (%).
–
Remaining range (miles or km).
–
Estimated charging time (calculation may take
a few seconds).
–
Charging speed (miles or km gained per hour).
After the instrument panel has been put into
standby mode, this information can be displayed
again by unlocking the vehicle or opening a door
.
It is also possible to monitor the charging
progress using the MYPEUGEOT APP
application.
For more information on Remote functions,
refer to the corresponding section.
Lounge mode
When the vehicle is connected, it is
possible to switch on the ignition and use
certain functions such as the audio and
telematics system and the air conditioning
system for several hours.
Vehicle immobilised for 1 to 12
months
Discharge the traction battery down to 2 or
3 bars on the charge level indicator on the
instrument panel.
Do not connect the charging cable.
Always park the vehicle in a place with
temperatures between -10°C and 30°C
(parking in a place with extreme temperatures
can damage the traction battery).
Refer to the Accessory battery
(Rechargeable hybrid) section for the
battery disconnection procedure.
Precautions
Rechargeable hybrid vehicles have
been developed in accordance with the
recommendations for maximum electromagnetic
field limits established by the ICNIRP
(International Commission on Non-Ionizing
Radiation Protection - 1998 Guidelines).
Wearers of pacemakers or equivalent
devices should consult a doctor to
enquire about any applicable precautionary
measures, or contact the manufacturer of their
implanted electronic medical device to check that
it is guaranteed to operate in an environment
compliant with the ICNIRP guidelines.
If in doubt , during charging, do not remain
inside or near the vehicle, near the charging
cable or the charging unit, even for a short time.
Before charging
Depending on the context:
►
Have a professional check that the
electrical system to be used complies with
applicable standards and is compatible with
the vehicle.
►
Have a professional electrician install
a dedicated domestic power socket or
accelerated charging unit (W
allbox)
compatible with the vehicle.
Use the charging cable supplied with the
vehicle.
For more information, contact a PEUGEOT
dealer or a qualified workshop.
(During charging)
As a safety measure, the engine will
not start if the charging cable is plugged into
Page 163 of 260
161
Practical information
7► If the vehicle is unlocked, lock it and then
unlock it .
If selective unlocking of the doors is
activated, press the unlocking button on
the remote control twice to disconnect the
nozzle.
The red indicator lamp in the flap goes out to
confirm that the nozzle is unlocked.
►
Within
30 seconds, remove the charging
nozzle.
Domestic charging (mode 2)
The end of charging is confirmed when the
green CHARGE indicator lamp on the control
unit comes on fixed and the green light guides in
the flap come on fixed.
►
After disconnection, replace the protective
cover over the nozzle and close the charging
flap.
►
Disconnect the control unit's charging cable
from the domestic socket.
Accelerated charging (mode 3)
The end of charging is confirmed by the
accelerated charging unit (Wallbox) and when
the green light guides in the flap come on fixed.
►
After disconnection, replace the nozzle on to
the charging unit and close the charging flap.
Deferred charging
Settings
► In the Energy touch screen
application, select the Charging tab.
►
Set the charging start time.
►
Press
OK.
The setting is saved in the system.
You can also programme the deferred charging function using a smartphone, via
the MYPEUGEOT APP application.
For more information on Remote functions,
refer to the corresponding section.
Activation
► Connect the vehicle to the desired charging
equipment.
► Press this button in the flap within one
minute to activate deferred charging
(confirmed by the light guides coming on in
blue).
Towing device
Load distribution
► Distribute the load in the trailer so that the
heaviest items are as close as possible to the
axle, and the nose weight approaches the
maximum permitted without exceeding it.
Air density decreases with altitude, thus reducing
engine performance.
The maximum towable load
must be reduced by 10% per 1,000
metres of
altitude.
Use genuine towing devices and wiring
harnesses approved by PEUGEOT. We
recommend having them fitted by a
PEUGEOT dealer or a qualified workshop.
If not fitted by a PEUGEOT dealer, they must
still be fitted in accordance with the vehicle
manufacturer's instructions.
Important: if the vehicle has a motorised
tailgate and Hands-Free Tailgate Access
function, and a towing device has been fitted
outside the PEUGEOT dealer network, it
is essential to visit a PEUGEOT dealer or
a qualified workshop to have the detection
system recalibrated
- risk of malfunction of the
Hands-Free Tailgate Access function.
Certain driving or manoeuvring aid functions
are automatically deactivated while an
approved towing system is in use.
For more information about driving with a
towing device fitted to a trailer and associated
with the Trailer stability assist, refer to the
corresponding section.
Comply with the maximum authorised
towable weight, as indicated on your
vehicle's registration certificate, on the
manufacturer's label and in the Technical
data section of this guide.
Page 191 of 260
189
In the event of a breakdown
8► Remove the fixing screw(s) from the access
flap located under the bumper using a Torx
screwdriver.
►
Unclip the access flap.
►
T
urn the bulb holder a quarter turn and
remove it.
►
For the foglamp: turn the bulb a quarter turn
and replace it.
►
For the reversing lamp: pull out the bulb and
replace it.
When changing the bulb within a few
minutes of switching off the ignition, take
care not to touch the exhaust - risk of burns!
Fuses
Changing a fuse
All work must be carried out only by a
PEUGEOT dealer or a qualified workshop
The replacement of a fuse by a third party
could cause a serious malfunction of the
vehicle.
Installing electrical accessories
The vehicle's electrical system is
designed to operate with standard or optional
equipment.
Before fitting other electrical equipment
or accessories to your vehicle, contact a
PEUGEOT dealer or a qualified workshop.
PEUGEOT accepts no responsibility for
the cost incurred in repairing the vehicle
or for rectifying malfunctions resulting from
the installation of accessories not supplied or
not recommended by PEUGEOT and not
installed in accordance with its
recommendations, in particular when the
combined power consumption of all of the
additional equipment connected exceeds 10
milliamperes.
12 V battery/Accessory
batteries
Lead-acid starter batteries
These batteries contain harmful
substances (sulphuric acid and lead).
They must be disposed of in accordance
with regulations and must never under any
circumstances be discarded with household
waste.
Dispose of used batteries at a designated
collection point.
Protect your eyes and face before
handling the battery.
All operations on the battery must be carried
out in a well ventilated area and away from
naked flames and sources of sparks, to avoid
any risk of explosion or fire.
Wash your hands afterwards.
Electronic control units/LED
technology headlamps
Never connect the negative jump lead to the
metal part of the electronic control units
or at
the back of the headlamps.
Risk of destroying the electronic control
units
and/or headlamps!
Connect to the remote earth point provided
for this purpose.
Frozen battery
Never try to charge a frozen battery - risk
of explosion!
If the battery has frozen, have it checked by a
PEUGEOT dealer or by a qualified workshop,
who will verify that the internal components
have not been damaged and that the case
has not cracked, which could lead to a risk of
leakage of toxic and corrosive acid.
Automatic gearbox
Never try to start the engine by pushing
the vehicle.
Symbols
No sparks or naked flames, no smoking.
Always protect your eyes. Explosive gases can cause blindness and injury.
Page 196 of 260
194
In the event of a breakdown
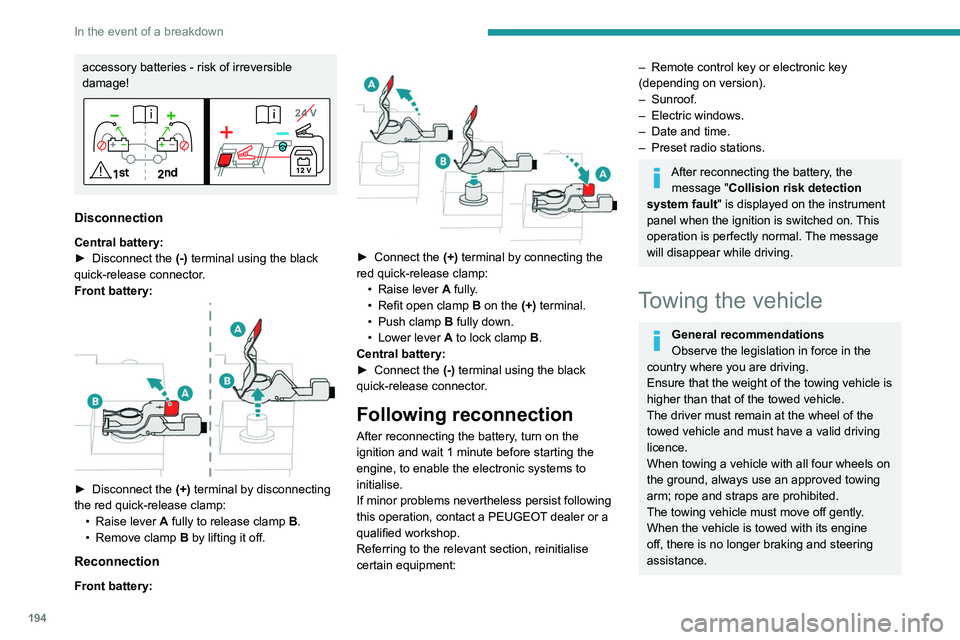
accessory batteries - risk of irreversible
damage!
Disconnection
Central battery:
► Disconnect the (-)
terminal using the black
quick-release connector.
Front battery:
► Disconnect the (+) terminal by disconnecting
the red quick-release clamp: •
Raise lever
A
fully to release clamp
B
.
•
Remove clamp
B
by lifting it off.
Reconnection
Front battery:
► Connect the (+) terminal by connecting the
red quick-release clamp: •
Raise lever
A
fully.
•
Refit open clamp
B
on the (+) terminal.
•
Push clamp
B fully down.
•
Lower lever
A
to lock clamp B.
Central battery:
►
Connect the
(-) terminal using the black
quick-release connector.
Following reconnection
After reconnecting the battery, turn on the
ignition and wait 1 minute before starting the
engine, to enable the electronic systems to
initialise.
If minor problems nevertheless persist following
this operation, contact a PEUGEOT dealer or a
qualified workshop.
Referring to the relevant section, reinitialise
certain equipment:
– Remote control key or electronic key
(depending on version).
–
Sunroof.
–
Electric windows.
–
Date and time.
–
Preset radio stations.
After reconnecting the battery, the message "Collision risk detection
system fault" is displayed on the instrument
panel when the ignition is switched on. This
operation is perfectly normal. The message
will disappear while driving.
Towing the vehicle
General recommendations
Observe the legislation in force in the
country where you are driving.
Ensure that the weight of the towing vehicle is
higher than that of the towed vehicle.
The driver must remain at the wheel of the
towed vehicle and must have a valid driving
licence.
When towing a vehicle with all four wheels on
the ground, always use an approved towing
arm; rope and straps are prohibited.
The towing vehicle must move off gently.
When the vehicle is towed with its engine
off, there is no longer braking and steering
assistance.