2022 PEUGEOT 308 remove seats
[x] Cancel search: remove seatsPage 91 of 260

89
Safety
5It is recommended that children travel
on the rear seats of the vehicle:
–
"rearward facing" up to the age of 3,
–
"forward facing" over the age of 3.
Make sure that the seat belt is correctly
positioned and tightened.
For child seats with a support leg, ensure that
the support leg is in firm and steady contact
with the floor.
An incorrectly installed child seat in a vehicle compromises the child's safety in
the event of an accident.
Ensure that there is no seat belt or seat belt
buckle under the child seat, as this could
destabilise it.
Remember to fasten the seat belts or the
child seat harness keeping the slack relative
to the child's body to a minimum, even for
short journeys.
When installing a child seat using the seat
belt, ensure that the seat belt is tightened
correctly on the child seat and that it secures
the child seat firmly on the vehicle seat. If
the passenger seat is adjustable, move it
forwards if necessary.
Remove the head restraint before
installing a child seat with a backrest on a
passenger seat.
Ensure that the head restraint is stored or
attached securely to prevent it from being
thrown around the vehicle in the event of
sharp braking. Refit the head restraint once
the child seat has been removed.
Installing a booster seat
The chest part of the seat belt must be
positioned on the child's shoulder without
touching the neck.
Ensure that the lap part of the seat belt
passes correctly over the child's thighs.
Use a booster seat with a backrest, equipped
with a belt guide at shoulder level.
Additional protections
To prevent accidental opening of the
doors and rear windows, use the "Child lock".
Take care not to open the rear windows by
more than one third.
To protect young children from the sun's rays,
fit side blinds on the rear windows.
As a safety measure, do not leave:
–
A
child alone and unsupervised inside a
vehicle.
–
A
child or an animal in a vehicle which is
exposed to the sun, with the windows closed.
–
The keys within reach of children inside the
vehicle.
Child seat at the rear
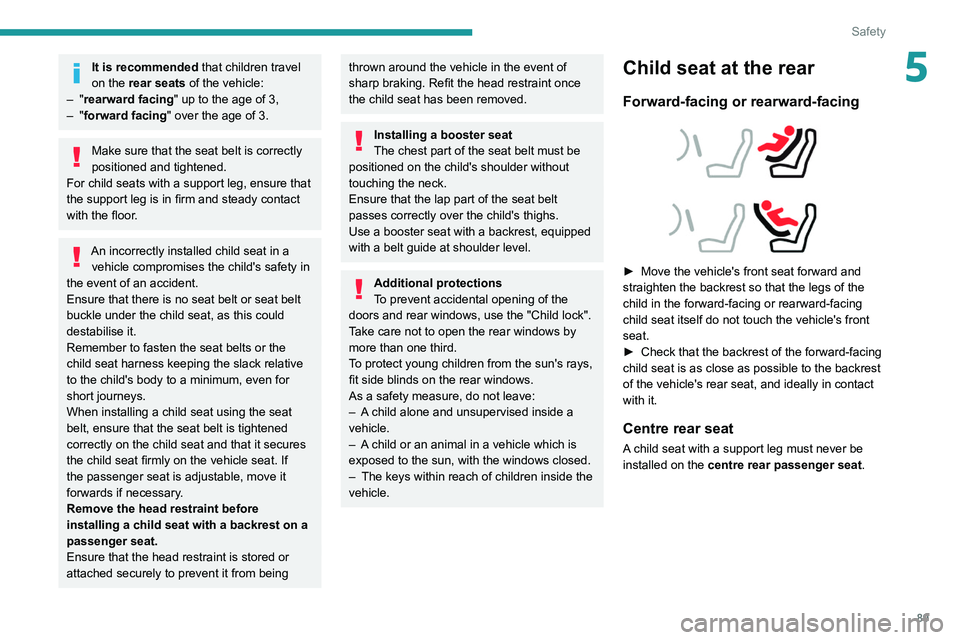
Forward-facing or rearward-facing
► Move the vehicle's front seat forward and
straighten the backrest so that the legs of the
child in the forward-facing or rearward-facing
child seat itself do not touch the vehicle's front
seat.
►
Check that the backrest of the forward-facing
child seat is as close as possible to the backrest
of the vehicle's rear seat, and ideally in contact
with it.
Centre rear seat
A child seat with a support leg must never be
installed on the centre rear passenger seat .
Page 93 of 260

91
Safety
5
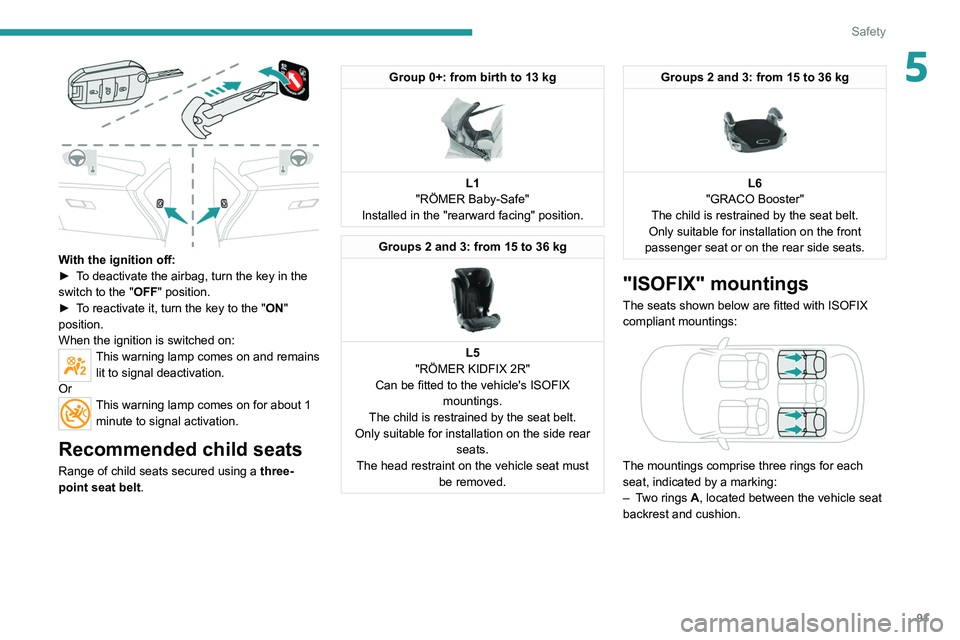
With the ignition off:
► T o deactivate the airbag, turn the key in the
switch to the "OFF " position.
►
T
o reactivate it, turn the key to the "ON"
position.
When the ignition is switched on:
This warning lamp comes on and remains lit to signal deactivation.
Or
This warning lamp comes on for about 1 minute to signal activation.
Recommended child seats
Range of child seats secured using a three-
point seat belt .
Group 0+: from birth to 13 kg
L1
"RÖMER Baby-Safe"
Installed in the "rearward facing" position.
Groups 2 and 3: from 15 to 36 kg
L5
"RÖMER KIDFIX 2R"
Can be fitted to the vehicle's ISOFIX mountings.
The child is restrained by the seat belt.
Only suitable for installation on the side rear seats.
The head restraint on the vehicle seat must be removed.
Groups 2 and 3: from 15 to 36 kg
L6
"GRACO Booster"
The child is restrained by the seat belt.
Only suitable for installation on the front
passenger seat or on the rear side seats.
"ISOFIX" mountings
The seats shown below are fitted with ISOFIX
compliant mountings:
The mountings comprise three rings for each
seat, indicated by a marking:
–
T
wo rings A, located between the vehicle seat
backrest and cushion.
Page 94 of 260

92
Safety
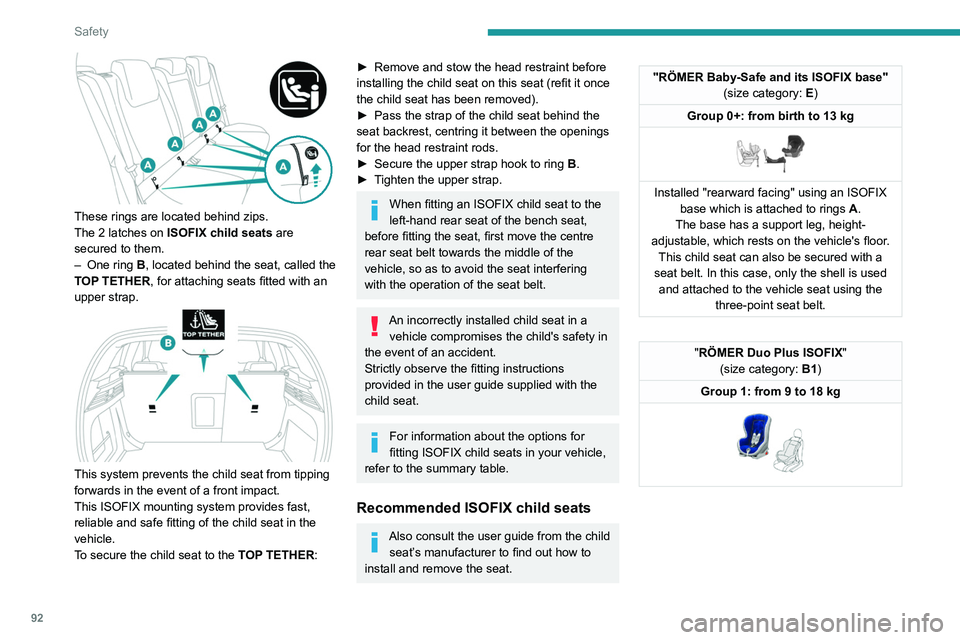
These rings are located behind zips.
The 2 latches on ISOFIX child seats are
secured to them.
–
One ring
B, located behind the seat, called the
TOP TETHER, for attaching seats fitted with an
upper strap.
This system prevents the child seat from tipping
forwards in the event of a front impact.
This ISOFIX mounting system provides fast,
reliable and safe fitting of the child seat in the
vehicle.
To secure the child seat to the TOP TETHER:
► Remove and stow the head restraint before
installing the child seat on this seat (refit it once
the child seat has been removed).
►
Pass the strap of the child seat behind the
seat backrest, centring it between the openings
for the head restraint rods.
►
Secure the upper strap hook to ring
B
.
►
T
ighten the upper strap.
When fitting an ISOFIX child seat to the
left-hand rear seat of the bench seat,
before fitting the seat, first move the centre
rear seat belt towards the middle of the
vehicle, so as to avoid the seat interfering
with the operation of the seat belt.
An incorrectly installed child seat in a vehicle compromises the child's safety in
the event of an accident.
Strictly observe the fitting instructions
provided in the user guide supplied with the
child seat.
For information about the options for
fitting ISOFIX child seats in your vehicle,
refer to the summary table.
Recommended ISOFIX child seats
Also consult the user guide from the child seat’s manufacturer to find out how to
install and remove the seat.
"RÖMER Baby-Safe and its ISOFIX base" (size category: E)
Group 0+: from birth to 13 kg
Installed "rearward facing" using an ISOFIX base which is attached to rings A .
The base has a support leg, height-
adjustable, which rests on the vehicle's floor. This child seat can also be secured with a
seat belt. In this case, only the shell is used and attached to the vehicle seat using the three-point seat belt.
"RÖMER Duo Plus ISOFIX "
(size category: B1)
Group 1: from 9 to 18 kg
Page 179 of 260

177
Practical information
7Bodywork
High-gloss paint
Do not use abrasive products, solvents,
petrol or oil to clean the bodywork.
Never use an abrasive sponge to clean
stubborn stains - risk of scratching the
paintwork!
Do not apply polish in strong sunshine, or to
plastic or rubber parts.
Use a soft cloth and soapy water or a pH
neutral product.
Gently wipe the bodywork with a clean
microfibre cloth.
Apply polish with the vehicle clean and dry.
Comply with the instructions for use stated on
the product.
Decals
(Depending on version)
Do not use a high-pressure washer to
clean the vehicle - risk of damaging or
detaching the decals!
Use a high-flow hose (temperature
between 25°C and 40°C).
Place the jet of water perpendicular to the
surface to be cleaned.
Rinse the vehicle with demineralised water.
Textile
The dashboard, door panels and seats may
contain parts made of textile material.
Maintenance
Do not use aggressive cleaning products
(e.g. alcohol, solvent or ammonia).
Do not use steam-cleaning systems - risk of
affecting the adhesion of the fabrics!
Remove dust from the textile parts
regularly with a dry cloth, soft brush or
vacuum cleaner
.
Rub down the
textile parts once per year with
a clean, damp cloth. After leaving overnight to
dry, brush with a soft-bristled brush.
Stain removal
Do not rub the stain or it may spread or
you may cause the substance to
penetrate the surface.
Act quickly by reducing the stain from its edges inwards.
Remove as much substance or solids as
possible using a spoon or spatula, and
remove
as much liquid as possible using
absorbent paper.
Product/Procedure to use depending
on the type of stain:
–
Grease, oil and ink: clean with a pH-neutral
detergent.
–
V
omit: clean with sparkling mineral water.
–
Blood: spread flour over the stain and allow
to dry; remove with a slightly damp cloth.
–
Mud: allow to dry and then remove with a
slightly damp cloth.
–
Cake, chocolate, ice cream: clean with
lukewarm water
.
–
Sugary and/or alcoholic drinks: clean with
lukewarm water
, or lemon juice if the stain is
persistent.
–
Hair gel, coffee, tomato sauce, vinegar:
clean with lukewarm water and lemon juice.
For solid substances, then use a soft brush or
vacuum cleaner
.
For liquid substances, then use a damp
microfibre cloth and then dry with another
cloth.
Alcantara®
Alcantara® is an elegant and practical material
which is very resistant and easy to maintain.
Do not use printed cloths or
printed absorbent paper.
Do not use steam-cleaning systems.