2022 PEUGEOT 301 rear view mirror
[x] Cancel search: rear view mirrorPage 4 of 148

2
Contents
■
Overview
■
Eco-driving
1Dashboard instrumentsInstrument panel 7
Warning and indicator lamps 7
Indicators 10
Distance recorders 11
Setting the date and time 12
Trip computer 12
2AccessRemote control / Key 15
Central locking 16
Back-up procedures 17
Doors 18
Boot 18
Alarm 19
Electric windows 20
3Ease of use and comfortFront seats 21
Rear bench seat 22
Steering wheel adjustment 23
Mirrors 23
Heating and Ventilation 24
Air conditioning, manual (without
display screen)
25
Electronic air conditioning (with
display screen)
26
Front demisting - defrosting 27
Demisting/de-icing the rear screen and/or
the door mirrors 28
Interior fittings 28
Courtesy lamps 30
4Lighting and visibilityExterior lighting control stalk 31
Direction indicators 32
Headlamp beam height adjustment 33
Wiper control stalk 33
Changing a wiper blade 34
5SafetyGeneral safety recommendations 35
Hazard warning lamps 35
Horn 36
Electronic stability control (ESC) 36
Seat belts 37
Airbags 39
Child seats 41
Deactivating the front passenger airbag 43
ISOFIX child seats 45
Child lock 48
6DrivingDriving recommendations 49
Starting-switching off the engine 51
Parking brake 52
Hill start assist 52
5-speed manual gearbox 53
6-speed manual gearbox 53
6-speed automatic gearbox 54
Gear shift indicator 56
Stop & Start 56
Tyre under-inflation detection 58
Driving and manoeuvring aids - General
recommendations
60
Speed limiter 61
Cruise control - Specific recommendations 62
Cruise control 63
Rear parking sensors 64
Reversing Camera 65
7Practical informationCompatibility of fuels 67
Refuelling 67
Misfuel prevention (Diesel) 68
Snow chains 68
Energy economy mode 69
Towing device 69
Very cold climate screen 70
Roof bars 70
Bonnet 71
Engine compartment 72
Checking levels 73
Checks 74
Free-wheeling 76
Advice on care and maintenance 76
8In the event of a breakdownWarning triangle 79
Running out of fuel (Diesel) 79
Tool kit 79
Spare wheel 80
Changing a bulb 83
Fuses 87
12 V battery 88
Page 6 of 148

4
Overview
Presentation
These illustrations and descriptions are intended
as a guide. The presence and location of some
components varies according to the version, trim
level and country of sale.
Instruments and controls
1.Bonnet release
2. Dashboard fuses
3. Horn
4. Instrument panel
5. Audio and telematics systems
6. Warning lamp display for seat belts and front
passenger airbag
Courtesy lamps
Rear view mirror 7.
Emergency warning lamps
Locking/unlocking from the inside
8. Adjusting the date/time
9. Heating, ventilation
Manual air conditioning (without display
screen)
Electronic air conditioning (with display
screen)
Front demisting/defrosting
Rear screen demisting/defrosting
Heated windscreen
10. Manual gearbox
Automatic gearbox (EAT6)
Gear shift indicator
11 . USB socket
12 V accessory socket / Cigar lighter
12. Parking brake
13. Electric windows deactivation
Steering-mounted controls
1.External lighting/direction indicators control
stalk
Voice recognition activation button 2.
Speed Limiter/Cruise Control
3. Audio system setting controls
4. Wiper/screenwash/trip computer control stalk
Side control bar
1.Manual headlamp beam height adjustment
2. DSC/ASR systems
3. Stop & Start
4. Boot lid opening
5. Alarm
6. Door mirrors adjustment
Labels
"Lighting and visibility - Exterior lighting
control stalk" and "In the event of a
breakdown - Changing a bulb" sections:
"Safety - Child seats - Deactivating the front
passenger airbag" section:
Page 23 of 148
21
Ease of use and comfort
3Correct driving position
For safety reasons, adjustments must
only be made when the vehicle is
stationary.
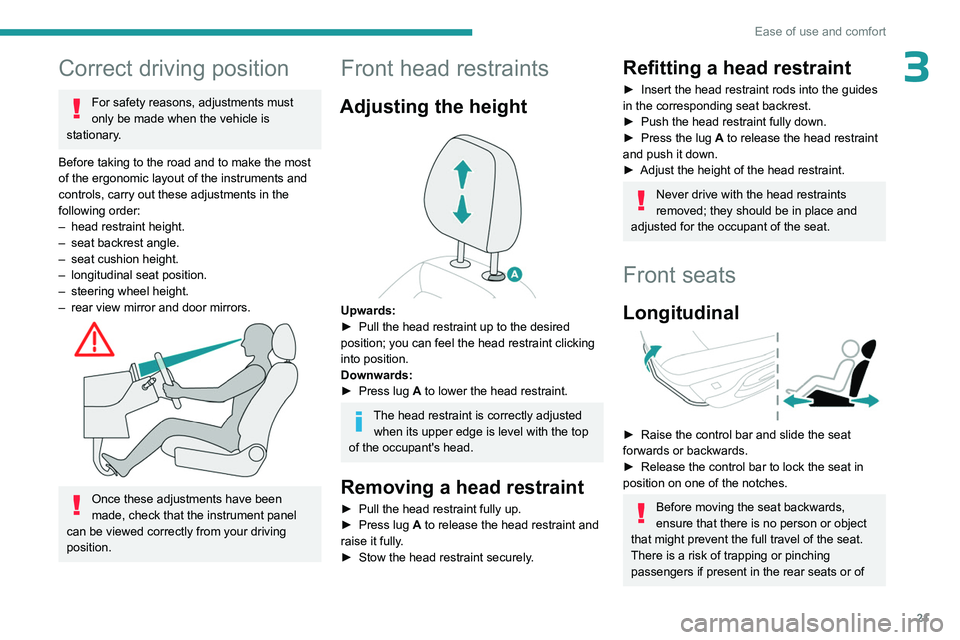
Before taking to the road and to make the most
of the ergonomic layout of the instruments and
controls, carry out these adjustments in the
following order:
–
head restraint height.
–
seat backrest angle.
–
seat cushion height.
–
longitudinal seat position.
–
steering wheel height.
–
rear view mirror and door mirrors.
Once these adjustments have been
made, check that the instrument panel
can be viewed correctly from your driving
position.
Front head restraints
Adjusting the height
Upwards:
► Pull the head restraint up to the desired
position; you can feel the head restraint clicking
into position.
Downwards:
►
Press lug
A to lower the head restraint.
The head restraint is correctly adjusted when its upper edge is level with the top
of the occupant's head.
Removing a head restraint
► Pull the head restraint fully up.
► Press lug A to release the head restraint and
raise it fully.
►
Stow the head restraint securely
.
Refitting a head restraint
► Insert the head restraint rods into the guides
in the corresponding seat backrest.
►
Push the head restraint fully down.
►
Press the lug
A to release the head restraint
and push it down.
►
Adjust the height of the head restraint.
Never drive with the head restraints
removed; they should be in place and
adjusted for the occupant of the seat.
Front seats
Longitudinal
► Raise the control bar and slide the seat
forwards or backwards.
►
Release the control bar to lock the seat in
position on one of the notches.
Before moving the seat backwards,
ensure that there is no person or object
that might prevent the full travel of the seat.
There is a risk of trapping or pinching
passengers if present in the rear seats or of
Page 26 of 148
24
Ease of use and comfort
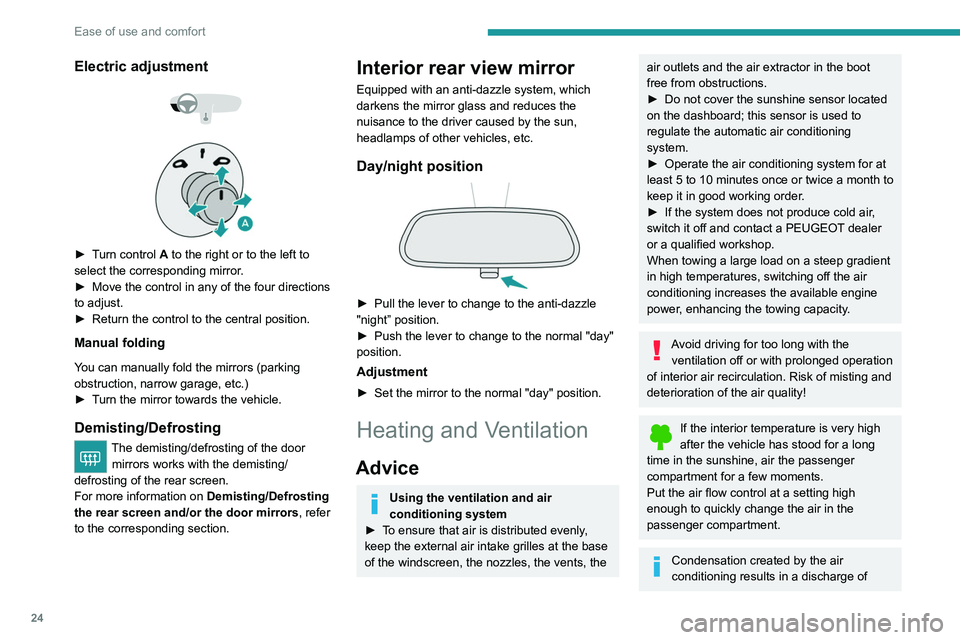
Electric adjustment
► Turn control A to the right or to the left to
select the corresponding mirror.
►
Move the control in any of the four directions
to adjust.
►
Return the control to the central position.
Manual folding
You can manually fold the mirrors (parking
obstruction, narrow garage, etc.)
►
T
urn the mirror towards the vehicle.
Demisting/Defrosting
The demisting/defrosting of the door mirrors works with the demisting/
defrosting of the rear screen.
For more information on Demisting/Defrosting
the rear screen and/or the door mirrors, refer
to the corresponding section.
Interior rear view mirror
Equipped with an anti-dazzle system, which
darkens the mirror glass and reduces the
nuisance to the driver caused by the sun,
headlamps of other vehicles, etc.
Day/night position
► Pull the lever to change to the anti-dazzle
"night” position.
►
Push the lever to change to the normal "day"
position.
Adjustment
► Set the mirror to the normal "day" position.
Heating and Ventilation
Advice
Using the ventilation and air
conditioning system
►
T
o ensure that air is distributed evenly,
keep the external air intake grilles at the base
of the windscreen, the nozzles, the vents, the
air outlets and the air extractor in the boot
free from obstructions.
►
Do not cover the sunshine sensor located
on the dashboard; this sensor is used to
regulate the automatic air conditioning
system.
►
Operate the air conditioning system for at
least 5 to 10 minutes once or twice a month to
keep it in good working order
.
►
If the system does not produce cold air
,
switch it off and contact a PEUGEOT dealer
or a qualified workshop.
When towing a large load on a steep gradient
in high temperatures, switching off the air
conditioning increases the available engine
power, enhancing the towing capacity.
Avoid driving for too long with the ventilation off or with prolonged operation
of interior air recirculation. Risk of misting and
deterioration of the air quality!
If the interior temperature is very high
after the vehicle has stood for a long
time in the sunshine, air the passenger
compartment for a few moments.
Put the air flow control at a setting high
enough to quickly change the air in the
passenger compartment.
Condensation created by the air
conditioning results in a discharge of
Page 128 of 148
126
Alphabetical index
ISOFIX mountings 45, 47
J
Jack 79–80
Jump starting
89
K
Key 15–17
Key, electronic
15
Key with remote control
15, 51
Kit, hands-free
102, 116
Kit, temporary puncture repair
79
Klaxon
36
L
Labels, identification 96
Leather (care)
78
LEDs - Light-emitting diodes
32, 84
Level, brake fluid
74
Level, Diesel additive
74–75
Level, engine coolant
74
Level, engine oil
73
Levels and checks
72–74
Level, screenwash fluid
33, 74
Light-emitting diodes - LEDs
32, 84
Lighting, exterior
31
Lighting, guide-me home 32
Lighting, interior
30
Loading
70–71
Load reduction mode
69
Locating your vehicle
16
Locking
16
Locking from the inside
16
Locking the doors
16–17
M
Maintenance (advice) 76
Maintenance, routine
61, 74
Manoeuvring aids (recommendations)
60
Map reading lamps
30
Markings, identification
96
Mat
61
Menu
11 5
Menu, main
99
Menus (audio)
11 0 – 111
Mirror, rear view
24
Mirrors, door
23–24, 28
Misfuel prevention
68
Mountings, ISOFIX
45, 47
MP3 CD
100
N
Number plate lamps 87
O
Obstacle detection 64
Oil change
73
Oil consumption
73
Oil, engine
73
On-board tools
79
Opening the bonnet
71–72
Opening the boot
15, 18–19
Opening the doors
15, 18
P
Pads, brake 75
Paint
77, 96
Paint colour code
96
Parking brake
52, 75
Parking sensors, audible and visual
64
Plates, identification
96
Player, Apple®
11 4
Player, MP3 CD
100
Player, USB
100, 113
Port, USB
29, 100–101, 113, 115
Pressures, tyres
76, 97
Pre-tensioning (seat belts)
38
Priming pump
79
Priming the fuel system
79
Profiles
11 8
Protecting children
40–47
Puncture
80