2022 PEUGEOT 301 fold seats
[x] Cancel search: fold seatsPage 21 of 148

19
Access
2► Press the boot opening button located on the
left of the dashboard.
The boot lid is released and opens slightly
.
Opening the boot
► Raise the boot lid to its fully open position.
Closing
► Lower the boot lid using one of the interior
grab handles.
►
Then press the boot to close it.
In the event of a malfunction or if you
experience difficulty opening or closing
the tailgate, have it checked by a PEUGEOT
dealer or a qualified workshop without delay,
to avoid the issue deteriorating and prevent
any risk of the tailgate dropping, potentially
causing serious injury.
Back-up release
System for mechanically unlocking the boot in
the event of a battery or central locking fault.
Unlocking
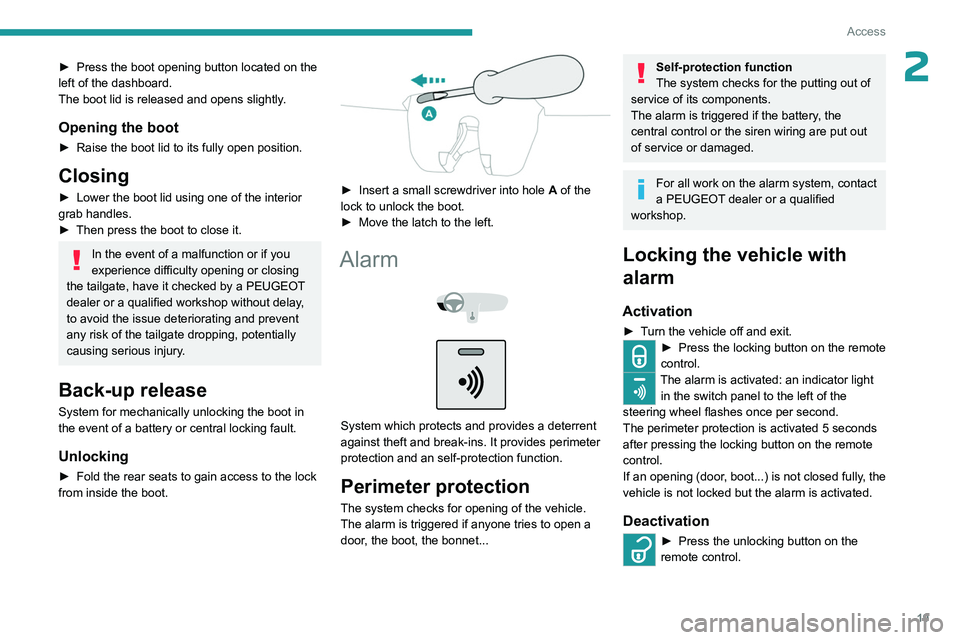
► Fold the rear seats to gain access to the lock
from inside the boot.
► Insert a small screwdriver into hole A of the
lock to unlock the boot.
►
Move the latch to the left.
Alarm
System which protects and provides a deterrent
against theft and break-ins. It provides perimeter
protection and an self-protection function.
Perimeter protection
The system checks for opening of the vehicle.
The alarm is triggered if anyone tries to open a
door, the boot, the bonnet...
Self-protection function
The system checks for the putting out of
service of its components.
The alarm is triggered if the battery, the
central control or the siren wiring are put out
of service or damaged.
For all work on the alarm system, contact
a PEUGEOT dealer or a qualified
workshop.
Locking the vehicle with
alarm
Activation
► Turn the vehicle off and exit.► Press the locking button on the remote
control.
The alarm is activated: an indicator light in the switch panel to the left of the
steering wheel flashes once per second.
The perimeter protection is activated 5 seconds
after pressing the locking button on the remote
control.
If an opening (door, boot...) is not closed fully, the
vehicle is not locked but the alarm is activated.
Deactivation
► Press the unlocking button on the
remote control.
Page 24 of 148

22
Ease of use and comfort
jamming the seat if large objects are placed
on the floor behind the seat.
Tilting the backrest
► Push the control backwards to adjust the
backrest.
Height
(driver only)
► Pull the control upwards to raise or push it
downwards to lower , until you obtain the position
required.
Rear bench seat
Bench seat with fixed one-piece cushion and
split folding backrest (2/3-1/3) with adjustable
head restraints.
The rear seat cushion remains fixed. To increase the boot loading volume, tilt the
bench seat backrest.
Folding the backrests
Manoeuvring the backrests should only
be done when the vehicle is stationary.
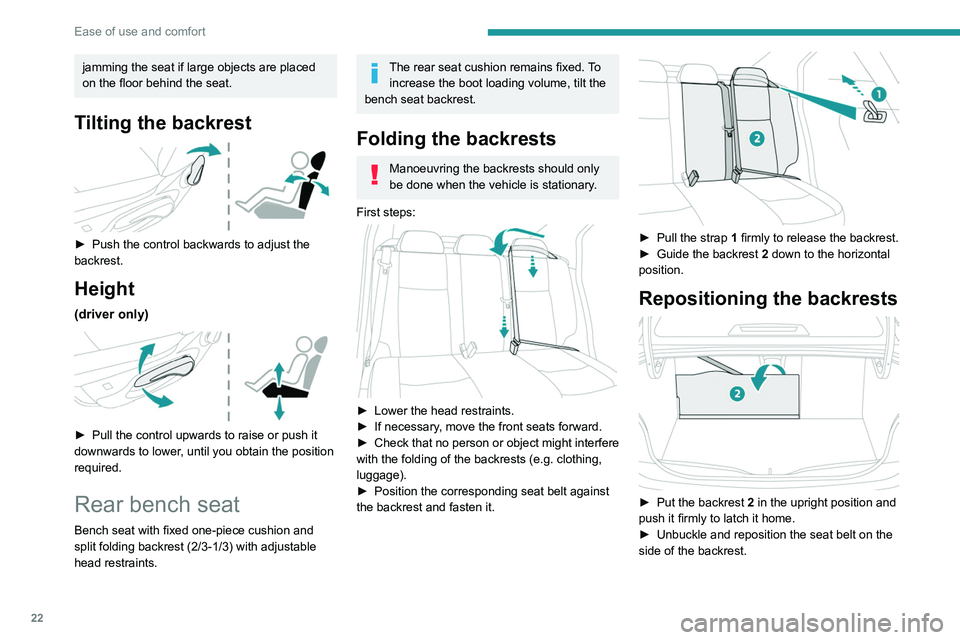
First steps:
► Lower the head restraints.
► If necessary , move the front seats forward.
►
Check
that no person or object might interfere
with the folding of the backrests (e.g.
clothing,
luggage).
►
Position the corresponding seat belt against
the backrest and fasten it.
► Pull the strap 1 firmly to release the backrest.
► Guide the backrest 2 down to the horizontal
position.
Repositioning the backrests
► Put the backrest 2 in the upright position and
push it firmly to latch it home.
►
Unbuckle and reposition the seat belt on the
side of the backrest.
Page 41 of 148

39
Safety
5Before and after use, ensure that the seat belt
is reeled in correctly.
After folding or moving a seat or rear bench
seat, ensure that the seat belt is positioned
and reeled in correctly.
Installation
The lower part of the strap must be
positioned as low as possible over the pelvis.
The upper part must be positioned in the
hollow of the shoulder.
At the front, adjusting the position of the
seat belt may require the seat height to be
adjusted.
In order to be effective, a seat belt must:
–
be tightened as close to the body as
possible.
–
be pulled in front of you with a smooth
movement, checking that it is not twisted.
–
must only be used to secure one person.
–
not show signs of tearing or fraying.
–
not be changed or modified, in order to
avoid affecting its performance.
Recommendations for children
Use a suitable child seat if the passenger
is less than 12 years old or shorter than 1.5
metres.
Never use the same seat belt to secure more
than one child.
Never carry a child on your lap.
For more information on Child seats, refer to
the corresponding section.
Maintenance
In accordance with current safety
regulations, for all work on your vehicle's
seat belts, contact a qualified workshop with
the skills and equipment needed, which a
PEUGEOT
dealer is able to provide.
Have the seat belts checked regularly by a
PEUGEOT dealer or a qualified workshop,
particularly if the straps show signs of
damage.
Clean the seat belt straps with soapy water or
a textile cleaning product, sold by PEUGEOT
dealers.
Airbags
General information
This system is designed to improve the safety
of the occupants of the front seats and the rear
outer seats in the event of a violent collision. The
airbags supplement the action of the seat belts
equipped with a force limiting system.
Electronic detectors record and analyse the
front and side impacts sustained in the impact
detection zones:
–
In the event of violent impact, the airbags
deploy instantly and help better protect the
occupants of the vehicle; immediately after the
impact, the airbags deflate rapidly in order not
to hinder the visibility or the possible exit of the
occupants.
–
In the event of a slight impact, a rear impact
and under certain rollover conditions, the airbags
may not deploy; only the seat belt helps to
protect you in these situations.
The seriousness of the impact depends on the
nature of the obstacle and the speed of the
vehicle at the moment of collision.
The airbags do not operate when the
ignition is switched off.
This equipment will only deploy once. If a
second impact occurs (during the same or a
subsequent accident), the airbag will not be
deployed again.
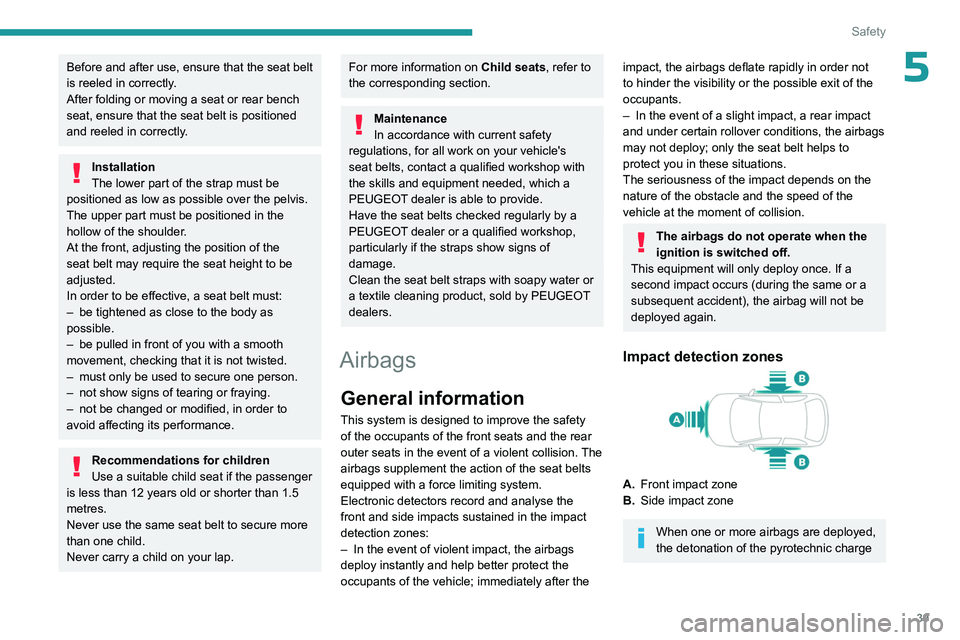
Impact detection zones
A. Front impact zone
B. Side impact zone
When one or more airbags are deployed,
the detonation of the pyrotechnic charge
Page 127 of 148

125
Alphabetical index
Daytime running lamps 32, 84
Deactivating the passenger airbag
40, 43
Defrosting
24–25, 27
Defrosting, front
27
Defrosting, lower windscreen
27
Defrosting, rear screen
27–28
Demisting
24–25
Demisting, front
27
Demisting, rear
28
Dimensions
96
Dipstick
73
Direction indicators (turn signals)
32, 84, 86
Doors
18
Driving
49–50
Driving aids (recommendations)
60
Driving economically
6
Dynamic stability control (DSC)
36–37
E
EBFD 36
Eco-driving (advice)
6
Electric windows
20
Electronic brake force distribution (EBFD)
36
Emergency braking assistance (EBA)
36
Emergency warning lamps
35, 79
Energy economy (mode)
69
Energy economy mode
69
Engine compartment
72
Engine, Diesel
67, 72, 79, 95
Engine, petrol
72, 94
Engines 93–95
Environment
6, 17
ESC (electronic stability control)
36
F
Filling the fuel tank 67–68
Filter, air
75
Filter, oil
75
Filter, particle
74–75
Filter, passenger compartment
24, 75
Fitting a wheel
81–82
Fitting roof bars
70–71
Fittings, interior
28
Flap, fuel filler
67–68
Flashing indicators
32, 84
Fluid, brake
74
Fluid, engine coolant
74
Foglamp, rear
31, 86
Foglamps, front
31, 86
Folding the rear seats
22
Fuel
6, 67
Fuel consumption
6
Fuel level, low
67
Fuel (tank)
67–68
Fuses
87
G
Gauge, fuel 67
Gearbox, automatic 53–55, 75, 88
Gearbox, manual
53, 75
Gear lever, automatic gearbox
55
Gear lever, manual gearbox
53
Gear shift indicator
56
Glove box
28
H
Hazard warning lamps 35, 79
Headlamps (adjustment)
33
Headlamps, dipped beam
84–85
Headlamps, halogen
84
Headlamps, main beam
84–85
Head restraints, front
21
Head restraints, rear
22–23
Heating
24–27
Hill start assist
52–53
Horn
36
I
Immobiliser, electronic 50
Indicators, direction
32, 84
Indicator, service
10
Inflating tyres
76, 97
Information, vehicle
121
Infrared camera
60
Input, auxiliary
101
Instrument panel
7, 61