2022 PEUGEOT 301 Bonnet release
[x] Cancel search: Bonnet releasePage 6 of 148

4
Overview
Presentation
These illustrations and descriptions are intended
as a guide. The presence and location of some
components varies according to the version, trim
level and country of sale.
Instruments and controls
1.Bonnet release
2. Dashboard fuses
3. Horn
4. Instrument panel
5. Audio and telematics systems
6. Warning lamp display for seat belts and front
passenger airbag
Courtesy lamps
Rear view mirror 7.
Emergency warning lamps
Locking/unlocking from the inside
8. Adjusting the date/time
9. Heating, ventilation
Manual air conditioning (without display
screen)
Electronic air conditioning (with display
screen)
Front demisting/defrosting
Rear screen demisting/defrosting
Heated windscreen
10. Manual gearbox
Automatic gearbox (EAT6)
Gear shift indicator
11 . USB socket
12 V accessory socket / Cigar lighter
12. Parking brake
13. Electric windows deactivation
Steering-mounted controls
1.External lighting/direction indicators control
stalk
Voice recognition activation button 2.
Speed Limiter/Cruise Control
3. Audio system setting controls
4. Wiper/screenwash/trip computer control stalk
Side control bar
1.Manual headlamp beam height adjustment
2. DSC/ASR systems
3. Stop & Start
4. Boot lid opening
5. Alarm
6. Door mirrors adjustment
Labels
"Lighting and visibility - Exterior lighting
control stalk" and "In the event of a
breakdown - Changing a bulb" sections:
"Safety - Child seats - Deactivating the front
passenger airbag" section:
Page 21 of 148
19
Access
2► Press the boot opening button located on the
left of the dashboard.
The boot lid is released and opens slightly
.
Opening the boot
► Raise the boot lid to its fully open position.
Closing
► Lower the boot lid using one of the interior
grab handles.
►
Then press the boot to close it.
In the event of a malfunction or if you
experience difficulty opening or closing
the tailgate, have it checked by a PEUGEOT
dealer or a qualified workshop without delay,
to avoid the issue deteriorating and prevent
any risk of the tailgate dropping, potentially
causing serious injury.
Back-up release
System for mechanically unlocking the boot in
the event of a battery or central locking fault.
Unlocking
► Fold the rear seats to gain access to the lock
from inside the boot.
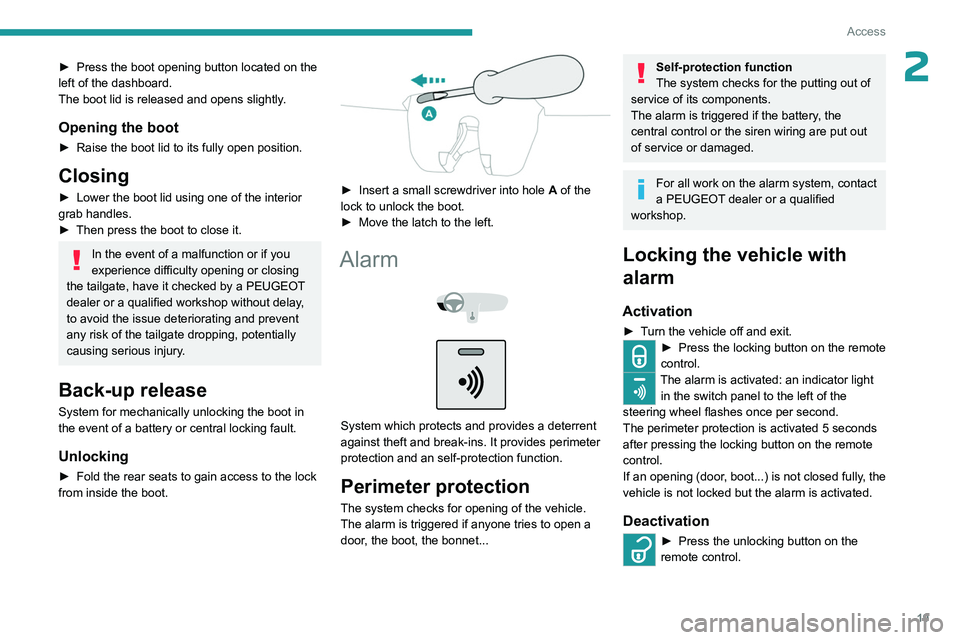
► Insert a small screwdriver into hole A of the
lock to unlock the boot.
►
Move the latch to the left.
Alarm
System which protects and provides a deterrent
against theft and break-ins. It provides perimeter
protection and an self-protection function.
Perimeter protection
The system checks for opening of the vehicle.
The alarm is triggered if anyone tries to open a
door, the boot, the bonnet...
Self-protection function
The system checks for the putting out of
service of its components.
The alarm is triggered if the battery, the
central control or the siren wiring are put out
of service or damaged.
For all work on the alarm system, contact
a PEUGEOT dealer or a qualified
workshop.
Locking the vehicle with
alarm
Activation
► Turn the vehicle off and exit.► Press the locking button on the remote
control.
The alarm is activated: an indicator light in the switch panel to the left of the
steering wheel flashes once per second.
The perimeter protection is activated 5 seconds
after pressing the locking button on the remote
control.
If an opening (door, boot...) is not closed fully, the
vehicle is not locked but the alarm is activated.
Deactivation
► Press the unlocking button on the
remote control.
Page 59 of 148
57
Driving
6Deactivation/Reactivation
The function is activated by default when the
ignition is switched on.
To deactivate/reactivate the function:
With the dashboard button
► Press the button.
A message on the instrument panel confirms the
change of status.
When the function is deactivated, the orange
indicator lamp is lit; if the engine was in standby,
it restarts immediately.
With the touch screen button
The settings are changed via the Driving/Vehicle touch screen
menu.
A message on the instrument panel confirms the
change of status.
When the function is deactivated, if the engine
was in standby, it restarts immediately.
Associated indicator lamp
Function activated: engine on standby
(STOP mode).
Opening the bonnet
Before doing anything under the bonnet,
deactivate the Stop & Start system to avoid
any risk of injury caused by the engine
restarting automatically.
Driving on flooded roads
Before entering into a flooded area, it is
strongly recommended that you deactivate
the Stop & Start system.
For more information on Driving
recommendations, particularly on flooded
roads, refer to the corresponding section.
Operation
Main conditions for operation
– The driver ’s door must be closed.
– The driver's seat belt must be fastened.
–
The level of charge in the battery must be
sufficient.
–
The temperature of the engine must be within
its nominal operating range.
–
The outside temperature must be between
0°C and 35°C.
Putting the engine into standby
(STOP mode)
The engine automatically enters standby mode
as soon as the driver indicates their intention to
stop:
With a manual gearbox: at speeds below 12
mph (20
km/h) or with the vehicle stationary
(depending on engine), with the gear lever in
neutral and the clutch pedal released.
With an automatic gearbox: with the brake
pedal depressed or the gear selector in
position
N
, with the vehicle stationary.
Time counter
A time counter adds up the time spent in standby
during the journey. It is reset to zero every time
the ignition is switched on.
Special cases
The engine will not go into standby if the
conditions for operation are not met and in the
following cases:
–
V
ehicle has not exceeded 6 mph (10 km/h)
since the last engine start.
–
Needed
to maintain a comfortable temperature
in the passenger compartment.
–
Demisting active.
–
Braking assistance being used.
In these cases, this indicator lamp flashes
for a few seconds, then goes off.
Page 73 of 148
71
Practical information
7Maximum load distributed over the
transverse roof bars, for a loading height
not exceeding 40 cm (except bicycle carrier):
75
kg.
As this value may change, please verify the
maximum load quoted in the guide supplied
with the roof bars.
If the height exceeds 40 cm, adapt the speed
of the vehicle to the profile of the road to
avoid damaging the roof bars and the fixings
on the vehicle.
Be sure to refer to national legislation in order
to comply with the regulations for transporting
objects that are longer than the vehicle.
Recommendations
Distribute the load uniformly, taking care
to avoid overloading one of the sides.
Arrange the heaviest part of the load as close
as possible to the roof.
Secure the load firmly.
Drive gently: the vehicle will be more
susceptible to the effects of side winds and its
stability may be affected.
Regularly check the security and tight
fastening of the roof bars, at least before each
trip.
Remove the roof bars once they are no longer
needed.
Direct fitting on roof
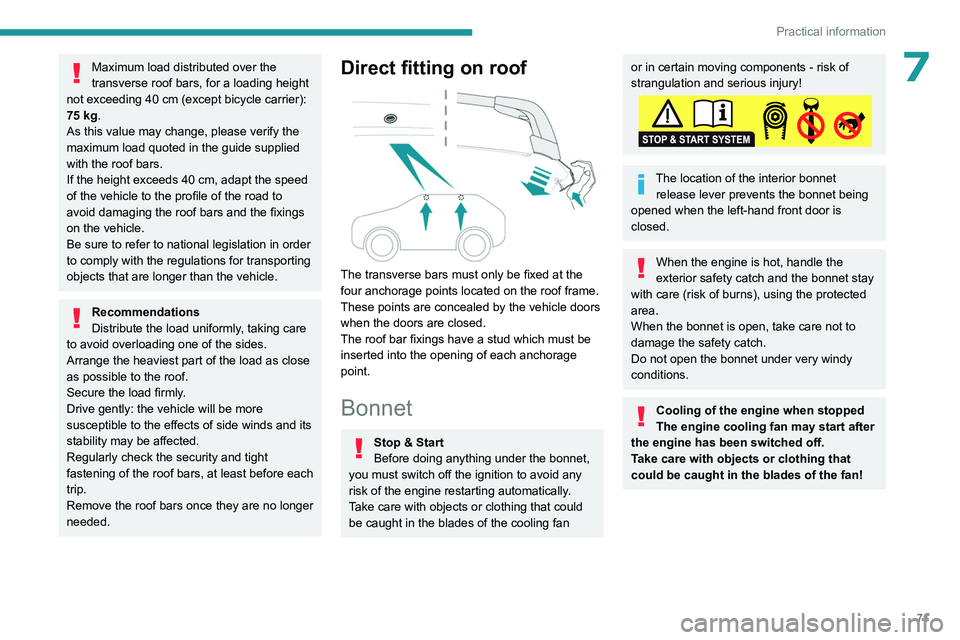
The transverse bars must only be fixed at the
four anchorage points located on the roof frame.
These points are concealed by the vehicle doors
when the doors are closed.
The roof bar fixings have a stud which must be
inserted into the opening of each anchorage
point.
Bonnet
Stop & Start
Before doing anything under the bonnet,
you must switch off the ignition to avoid any
risk of the engine restarting automatically.
Take care with objects or clothing that could
be caught in the blades of the cooling fan
or in certain moving components - risk of
strangulation and serious injury!
The location of the interior bonnet release lever prevents the bonnet being
opened when the left-hand front door is
closed.
When the engine is hot, handle the
exterior safety catch and the bonnet stay
with care (risk of burns), using the protected
area.
When the bonnet is open, take care not to
damage the safety catch.
Do not open the bonnet under very windy
conditions.
Cooling of the engine when stopped
The engine cooling fan may start after
the engine has been switched off.
Take care with objects or clothing that
could be caught in the blades of the fan!
Page 74 of 148
72
Practical information
Opening
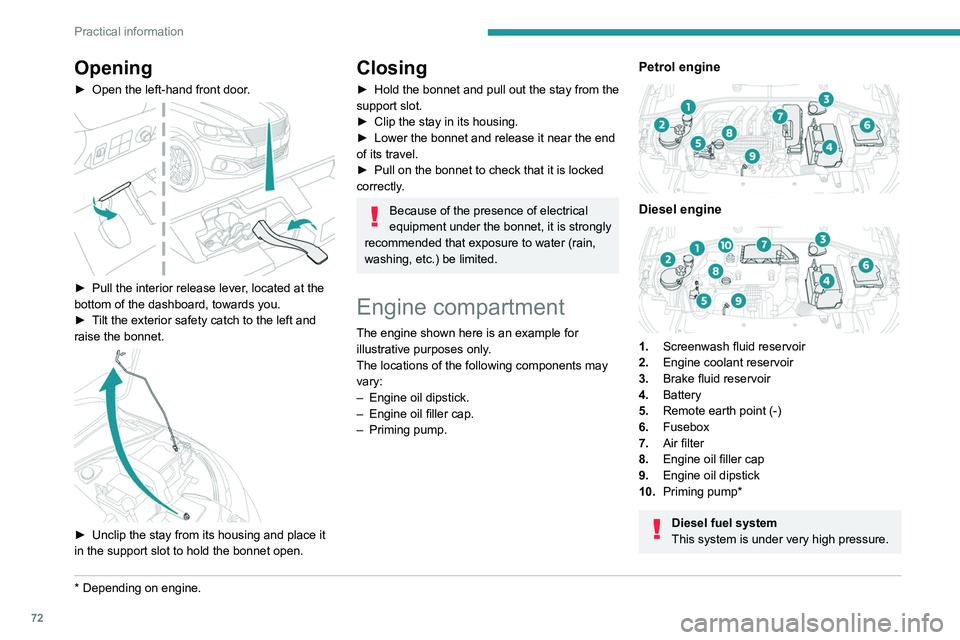
► Open the left-hand front door.
► Pull the interior release lever, located at the
bottom of the dashboard, towards you.
►
T
ilt the exterior safety catch to the left and
raise the bonnet.
► Unclip the stay from its housing and place it
in the support slot to hold the bonnet open.
* Depending on engine.
Closing
► Hold the bonnet and pull out the stay from the
support slot.
►
Clip the stay in its housing.
►
Lower the bonnet and release it near the end
of its travel.
►
Pull on the bonnet to check that it is locked
correctly
.
Because of the presence of electrical
equipment under the bonnet, it is strongly
recommended that exposure to water (rain,
washing, etc.) be limited.
Engine compartment
The engine shown here is an example for
illustrative purposes only.
The locations of the following components may
vary:
–
Engine oil dipstick.
–
Engine oil filler cap.
–
Priming pump.
Petrol engine
Diesel engine
1. Screenwash fluid reservoir
2. Engine coolant reservoir
3. Brake fluid reservoir
4. Battery
5. Remote earth point (-)
6. Fusebox
7. Air filter
8. Engine oil filler cap
9. Engine oil dipstick
10. Priming pump*
Diesel fuel system
This system is under very high pressure.
Page 91 of 148

89
In the event of a breakdown
8
For access to the (+) terminal:
► Release the bonnet by pulling the internal
release lever
, then the external safety catch.
►
Raise the bonnet.
(+)
Positive terminal with a quick-release
terminal.
(-) Negative terminal.
As the battery's negative terminal is not
accessible, a remote earth point is located on
the engine.
Starting using another battery
If the vehicle's battery is flat, the engine can be
started using a backup battery (either external or
from another vehicle) and jump leads or using a
battery booster.
Never start the engine by connecting a
battery charger.
Never use a 24
V or higher battery booster.
Check beforehand that the backup battery
has a nominal voltage of 12
V and a capacity
at least equal to that of the discharged
battery.
The two vehicles must not be in contact with
each other.
Switch off all electricity-consuming equipment
on both vehicles (audio system, wipers,
lighting, etc.).
Make sure that the jump leads are well away
from the engine’s moving parts (fan, belt,
etc.).
Do not disconnect the (+) terminal while the
engine is running.
► Lift the plastic cover on the (+) terminal, if the
vehicle has one.
►
Connect the red cable to the (+) terminal of
flat battery
A (at the metal elbow), then to the
(+) terminal of the backup battery
B or of the
booster.
►
Connect one end of the green or black cable
to the (-) terminal of the backup battery
B or of
the booster (or to an earth point on the assisting
vehicle).
►
Connect the other end of the green or black
cable to the earth point
C
.
►
Start the engine on the assisting vehicle and
leave it running for a few minutes.
►
Operate the starter on the broken down
vehicle and let the engine run.
If the engine does not start immediately
, switch
off the ignition and wait a few moments before
trying again.
►
W
ait for it to return to idle.
►
Disconnect the jump leads in reverse order.
►
Refit the plastic cover to the (+) terminal, if
the vehicle has one.
►
Allow the engine to run for at least
30
minutes, with the vehicle stationary, so that
the battery reaches an adequate state of charge.
Driving immediately without having
reached a sufficient level of charge may
affect some of the vehicle's functions (e.g.
Stop & Start).
Charging the battery using a battery
charger
For optimum service life of the battery, it is
essential to maintain an adequate state of
charge.
In some circumstances, it may be necessary to
charge the battery:
–
When using the vehicle mainly for short
journeys.
Page 126 of 148
124
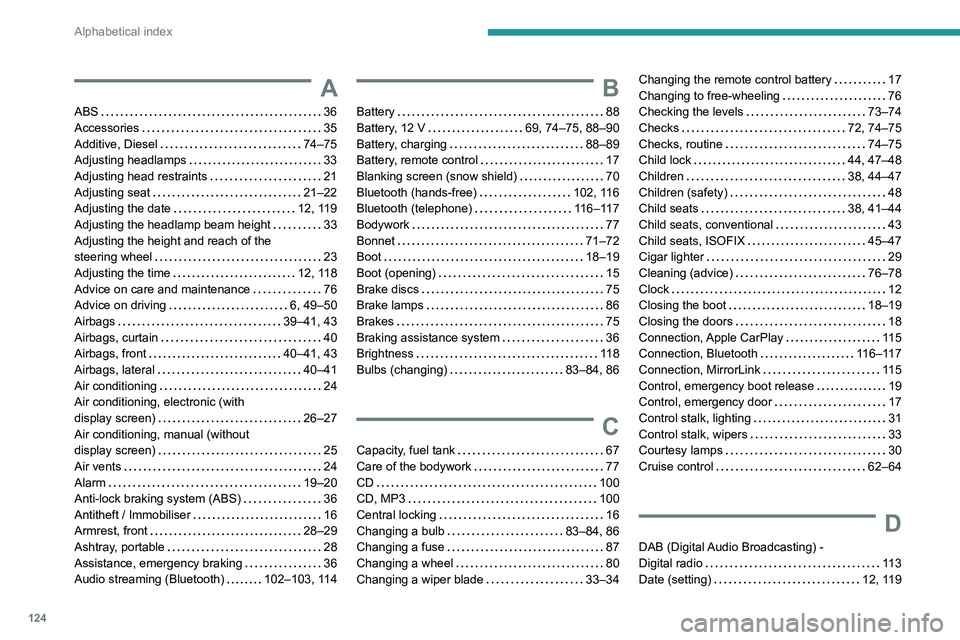
Alphabetical index
A
ABS 36
Accessories
35
Additive, Diesel
74–75
Adjusting headlamps
33
Adjusting head restraints
21
Adjusting seat
21–22
Adjusting the date
12, 119
Adjusting the headlamp beam height
33
Adjusting the height and reach of the
steering wheel
23
Adjusting the time
12, 118
Advice on care and maintenance
76
Advice on driving
6, 49–50
Airbags
39–41, 43
Airbags, curtain
40
Airbags, front
40–41, 43
Airbags, lateral
40–41
Air conditioning
24
Air conditioning, electronic (with
display screen)
26–27
Air conditioning, manual (without
display screen)
25
Air vents
24
Alarm
19–20
Anti-lock braking system (ABS)
36
Antitheft / Immobiliser
16
Armrest, front
28–29
Ashtray, portable
28
Assistance, emergency braking
36
Audio streaming (Bluetooth)
102–103, 114
B
Battery 88
Battery, 12 V
69, 74–75, 88–90
Battery, charging
88–89
Battery, remote control
17
Blanking screen (snow shield)
70
Bluetooth (hands-free)
102, 116
Bluetooth (telephone)
116–117
Bodywork
77
Bonnet
71–72
Boot
18–19
Boot (opening)
15
Brake discs
75
Brake lamps
86
Brakes
75
Braking assistance system
36
Brightness
11 8
Bulbs (changing)
83–84, 86
C
Capacity, fuel tank 67
Care of the bodywork
77
CD
100
CD, MP3
100
Central locking
16
Changing a bulb
83–84, 86
Changing a fuse
87
Changing a wheel
80
Changing a wiper blade
33–34
Changing the remote control battery 17
Changing to free-wheeling
76
Checking the levels
73–74
Checks
72, 74–75
Checks, routine
74–75
Child lock
44, 47–48
Children
38, 44–47
Children (safety)
48
Child seats
38, 41–44
Child seats, conventional
43
Child seats, ISOFIX
45–47
Cigar lighter
29
Cleaning (advice)
76–78
Clock
12
Closing the boot
18–19
Closing the doors
18
Connection, Apple CarPlay
11 5
Connection, Bluetooth
116–117
Connection, MirrorLink
11 5
Control, emergency boot release
19
Control, emergency door
17
Control stalk, lighting
31
Control stalk, wipers
33
Courtesy lamps
30
Cruise control
62–64
D
DAB (Digital Audio Broadcasting) -
Digital radio
11 3
Date (setting)
12, 119