2022 NISSAN TITAN mirror controls
[x] Cancel search: mirror controlsPage 107 of 635

2 Instruments and controls
Instrument panel................................2-4
Meters and gauges .............................2-6
Speedometer and odometer .................2-6
Tachometer ..................................2-8
Engine coolant temperature gauge ..........2-8
Fuel gauge ...................................2-9
Distance To Empty (DTE) .....................2-9
Auxiliary gauges (if so equipped) ............2-10
Off-road and 4–Wheel Drive (4WD)
monitor (if so equipped) ......................2-11
Warning lights, indicator lights and audible
reminders ...................................... 2-12
Checking lights .............................. 2-13
Warning/Indicator lights (red) ...............2-13
Warning/Indicator lights (yellow) ............2-17
Warning/Indicator lights (other) .............2-22
Audible reminders ........................... 2-22
Vehicle information display .....................2-23
How to use the vehicle information
display ...................................... 2-23
Startup display .............................. 2-24
Settings ..................................... 2-24
Vehicle information display warnings
and indicators ............................... 2-32
Security systems ............................... 2-39Vehicle security system
.....................2-39
NISSAN Vehicle Immobilizer System .........2-40
Wiper and washer switch .......................2-41
Switch operation ............................ 2-41
Rain-sensing auto wiper system
(if so equipped) .............................. 2-43
Rear window and/or outside mirror defroster
switch (if so equipped) ......................... 2-44
Headlight switch ............................... 2-45
Headlight control switch ....................2-45
LED Daytime Running Lights (DRL)
system (if so equipped) ......................2-50
Instrument brightness control ..............2-51
Turn signal switch ........................... 2-51
Fog light switch (if so equipped) ................2-52
Horn ........................................... 2-52
Cargo lamp switch ............................. 2-53
Climate controlled seat switches
(if so equipped) ................................. 2-53
He
ated seat switches (if so equipped) ..........2-54
Heated rear seat switches (if so equipped) .....2-55
Heated steering wheel switch (if so equipped) . . 2-57
Warning systems switch .......................2-57
Vehicle Dynamic Control (VDC) OFF switch .....2-58
Page 134 of 635

Menu itemExplanation
Wipers Displays available wiper options.
Speed Dependent Allows user to turn the speed dependent feature on or off. For additional information, see “Wiper and washer
switch” (P. 2-41).
Rain Sensor Allows user to turn the rain sensor feature on or off. For additional information, see “Wiper and washer
switch” (P. 2-41).
Headlamp On Displays available headlamp on options.
Off Headlights do not activate automatically when the wipers are activated.
Wiper Low & High Headlights activate when the wiper stalk is set to either low or high mode.
Wiper INT, Low & High Headlights activate when the wiper stalk is set to intermittent, low, or high mode.
Memory Seat (ADP) Displays available memory seat options.
Exit Seat Slide Allows the user to turn the exit seat slide on or off. When turned on, this feature will move the driver’s seat
backward for an easy exit when the ignition is turned off and the driver’s door is opened. Af ter getting into
the vehicle and placing the ignition switch in the ACC position, the driver’s seat will move to the previous set
position. For additional information, see “Memory Seat” (P. 3-38).
Exit Steering Up Allows the user to turn the exit steering up feature on or off. When turned on, this feature will move the
steering wheel upward for an easy exit when the ignition is turned off and the driver’s door is opened.
Af ter getting into the vehicle and placing the ignition switch in the ACC position, the steering wheel moves to
the previous position. For additional information, see “Memory Seat” (P. 3-38).
Reverse Tilt Mirror Displays reverse tilt mirror information.
2-28Instruments and controls
Page 150 of 635

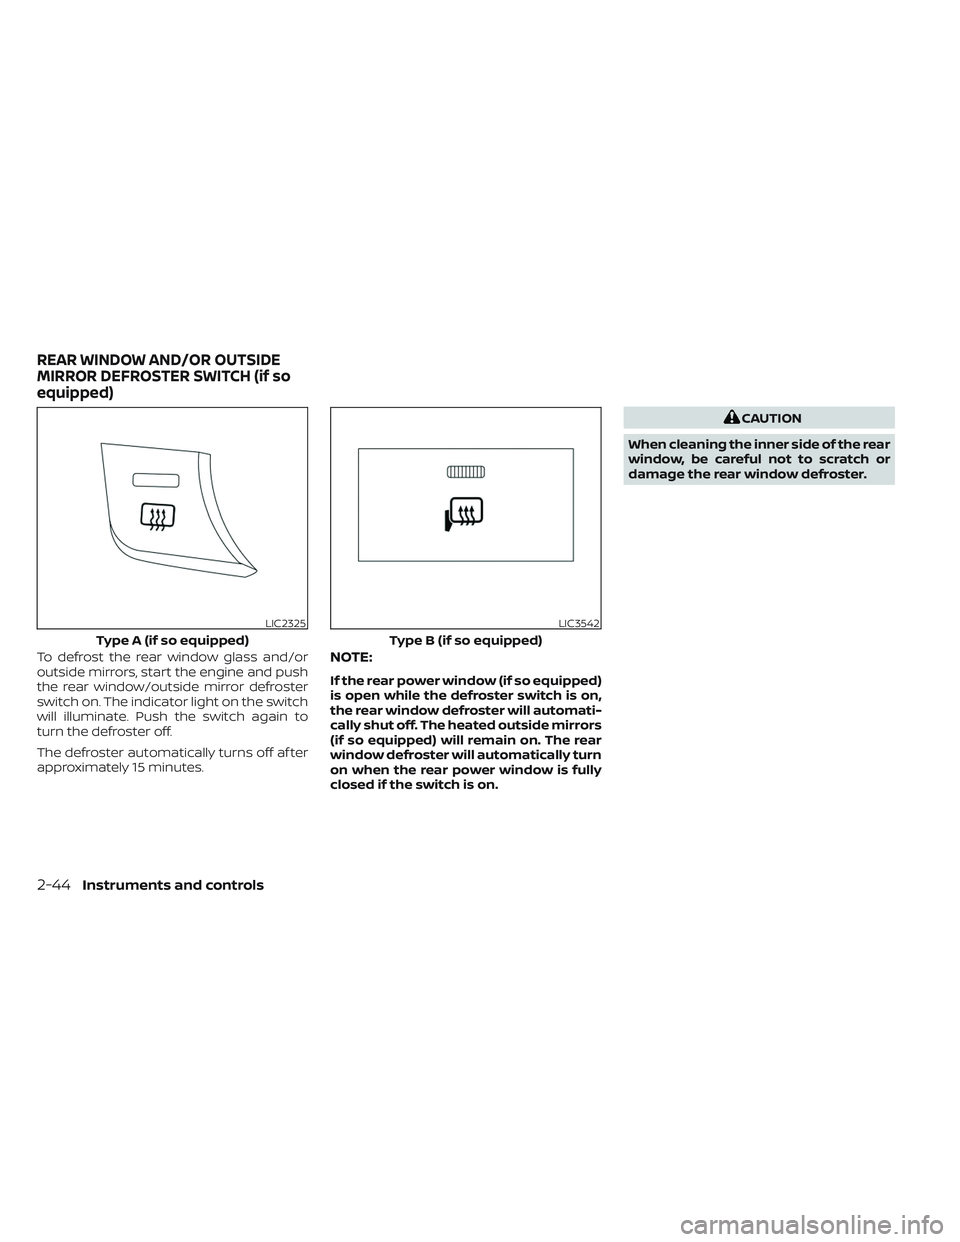
To defrost the rear window glass and/or
outside mirrors, start the engine and push
the rear window/outside mirror defroster
switch on. The indicator light on the switch
will illuminate. Push the switch again to
turn the defroster off.
The defroster automatically turns off af ter
approximately 15 minutes.NOTE:
If the rear power window (if so equipped)
is open while the defroster switch is on,
the rear window defroster will automati-
cally shut off. The heated outside mirrors
(if so equipped) will remain on. The rear
window defroster will automatically turn
on when the rear power window is fully
closed if the switch is on.
CAUTION
When cleaning the inner side of the rear
window, be careful not to scratch or
damage the rear window defroster.
LIC2325
Type A (if so equipped)
LIC3542
Type B (if so equipped)
REAR WINDOW AND/OR OUTSIDE
MIRROR DEFROSTER SWITCH (if so
equipped)
2-44Instruments and controls
Page 154 of 635

–When the headlights of the on-
coming vehicle or the leading ve-
hicle are turned off, when the color
of the light is affected due to for-
eign materials on the lights, or
when the light beam is out of
position.
– When there is a sudden, continu-
ous change in brightness.
– When driving on a road that
passes over rolling hills, or a road
that has level differences.
– When driving on a road with many
curves.
– When a sign or mirror-like surface
is reflecting intense light towards
the front of the vehicle.
– When the container, etc. being
towed by a leading vehicle is re-
flecting intense light.
– When a headlight on your vehicle
is damaged or dirty.
– When the vehicle is leaning at an
angle due to a punctured tire, be-
ing towed, etc. •
The timing of switching the low
beam and high beam may change
under the following situations.
– The brightness of the headlights
of the oncoming vehicle or leading
vehicle.
– The movement and direction of
the oncoming vehicle and the
leading vehicle.
– When only one light on the on-
coming vehicle or the leading ve-
hicle is illuminated.
– When the oncoming vehicle or the
leading vehicle is a two-wheeled
vehicle.
– Road conditions (incline, curve,
the road surface, etc.).
– The number of passengers and
the amount of luggage.
High Beam Assist operation
To activate the High Beam Assist system,
turn the headlight switch to the AUTO po-
sition
O1and then push the wiper and
washer switch forward
O2(high beam po-
sition). The High Beam Assist indicator light
in the meter will illuminate while the head-
lights are turned on.
If the High Beam Assist indicator light does
not illuminate in the above condition, it may
indicate that the system is not functioning
properly. Have the system checked, it is
recommended that you visit a NISSAN
dealer for this service.
LIC4324
2-48Instruments and controls
Page 155 of 635

When the vehicle speed lowers to less than
approximately 16 mph (25 km/h), the head-
light uses the low beam.
To turn off the High Beam Assist system,
turn the headlight switch to the
posi-
tion or select the low beam position by
placing the lever in the neutral position.
Ambient image sensor maintenance
The ambient image sensorO1for the High
Beam Assist system is located in front of
the inside mirror. To maintain the proper
operation of the high beam assist system
and prevent a system malfunction, be sure
to observe the following:
• Always keep the windshield clean.
• Do not attach a sticker (including trans- parent material) or install an accessory
near the ambient image sensor.
• Do not strike or damage the areas around the ambient image sensor. Do
not touch the sensor lens that is located
on the ambient image sensor. If the ambient image sensor is damaged
due to an accident, it is recommended that
you visit a NISSAN dealer.
Battery saver system
If the ignition switch is placed in the OFF
position while the headlight switch is in the
orposition, the headlights will
turn off af ter a period of time.
Af ter the headlights automatically turn off
with the headlight switch in the
orposition, the headlights will illuminate
again if the headlight switch is moved to
the OFF position and then turned to the
orposition.
CAUTION
Even though the battery saver feature
automatically turns off the headlights
af ter a period of time, you should turn
the headlight switch to the OFF posi-
tion when the engine is not running to
avoid discharging the vehicle battery.
LIC4333LSD2712
Instruments and controls2-49
Page 156 of 635

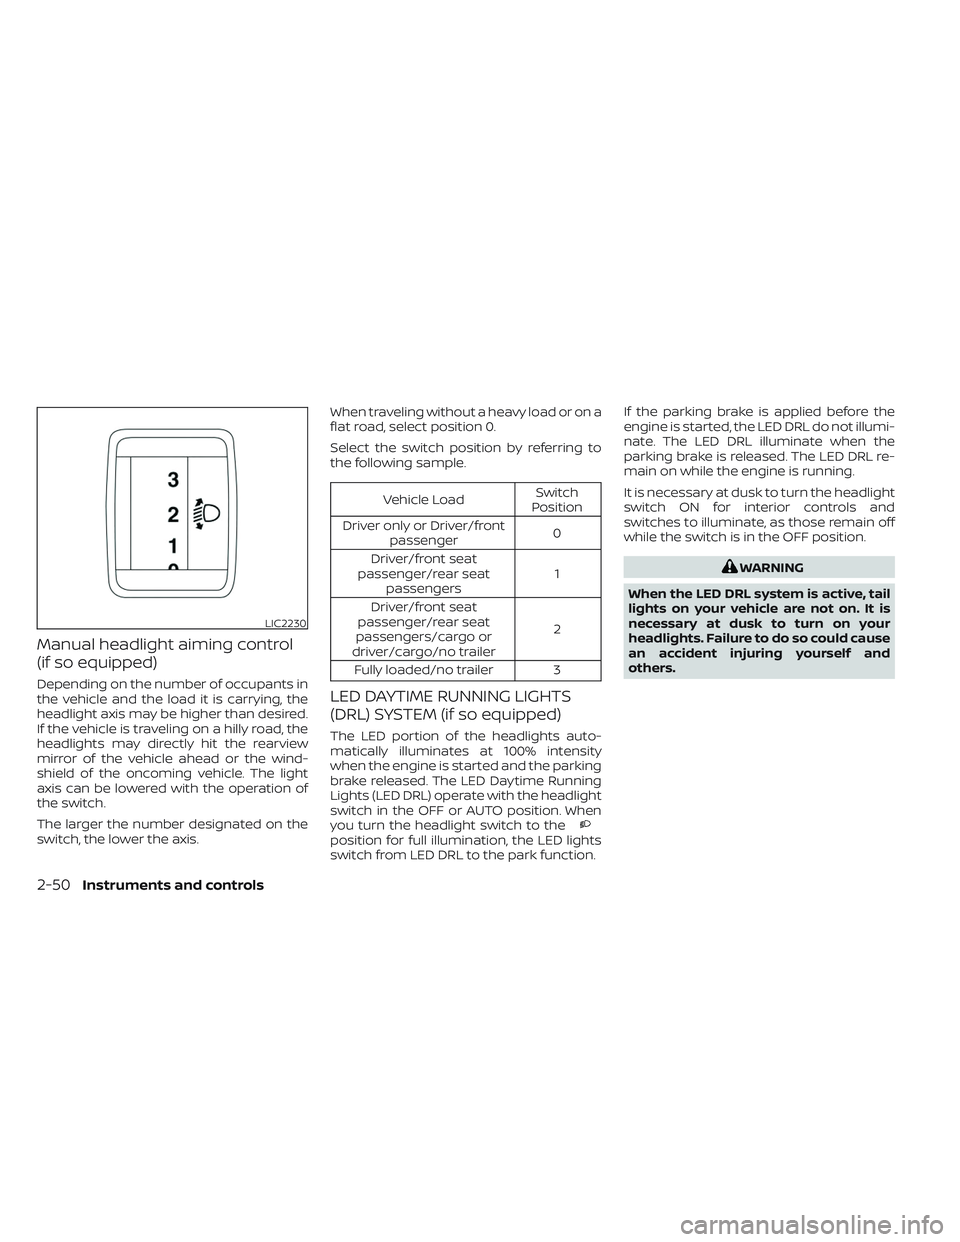
Manual headlight aiming control
(if so equipped)
Depending on the number of occupants in
the vehicle and the load it is carrying, the
headlight axis may be higher than desired.
If the vehicle is traveling on a hilly road, the
headlights may directly hit the rearview
mirror of the vehicle ahead or the wind-
shield of the oncoming vehicle. The light
axis can be lowered with the operation of
the switch.
The larger the number designated on the
switch, the lower the axis.When traveling without a heavy load or on a
flat road, select position 0.
Select the switch position by referring to
the following sample.
Vehicle Load
Switch
Position
Driver only or Driver/front passenger 0
Driver/front seat
passenger/rear seat passengers 1
Driver/front seat
passenger/rear seat
passengers/cargo or
driver/cargo/no trailer 2
Fully loaded/no trailer 3
LED DAYTIME RUNNING LIGHTS
(DRL) SYSTEM (if so equipped)
The LED portion of the headlights auto-
matically illuminates at 100% intensity
when the engine is started and the parking
brake released. The LED Daytime Running
Lights (LED DRL) operate with the headlight
switch in the OFF or AUTO position. When
you turn the headlight switch to the
position for full illumination, the LED lights
switch from LED DRL to the park function. If the parking brake is applied before the
engine is started, the LED DRL do not illumi-
nate. The LED DRL illuminate when the
parking brake is released. The LED DRL re-
main on while the engine is running.
It is necessary at dusk to turn the headlight
switch ON for interior controls and
switches to illuminate, as those remain off
while the switch is in the OFF position.
WARNING
When the LED DRL system is active, tail
lights on your vehicle are not on. It is
necessary at dusk to turn on your
headlights. Failure to do so could cause
an accident injuring yourself and
others.
LIC2230
2-50Instruments and controls
Page 164 of 635

The BSW system will turn on the side indi-
cator lights, located by the outside mirrors,
if the radar sensors detect a vehicle in the
detection zone. If the turn signal is acti-
vated in the direction of the detected ve-
hicle, a chime sounds twice and the side
indicator light will flash.
The LDW system will sound a warning; the
steering wheel will vibrate; and the LDW
indicator (orange) will blink to alert the
driver of the vehicle is traveling close to
either the lef t or the right of a traveling lane
with detectable lane markers.
For additional information, see “Blind Spot
Warning (BSW)” (P. 5-32) and “Lane Depar-
ture Warning (LDW)” (P. 5-27).The vehicle should be driven with the VDC
system on for most driving conditions.
If the vehicle is stuck in mud or snow, the
VDC system reduces the engine output to
reduce wheel spin. The engine speed will
be reduced even if the accelerator is de-
pressed to the floor. If maximum engine
power is needed to free a stuck vehicle,
turn the VDC system off.
To turn off the VDC system, push the VDC
OFF switch. The
indicator light will
come on. Push the VDC OFF switch again or restart
the engine to turn on the system. For addi-
tional information, see “Vehicle Dynamic
Control (VDC) system” (P. 5-120).
LIC3344
VEHICLE DYNAMIC CONTROL (VDC)
OFF SWITCH
2-58Instruments and controls
Page 191 of 635

•Do not place objects through the
opened rear window. Do not use the
rear window as a cargo area pass-
through. This may result in damage
to the rear window system, or per-
sonal injury.
WARNING
• To help avoid risk of injury or death
through unintended operation of the
vehicle and or its systems, including
entrapment in windows or inadver-
tent door lock activation, do not
leave children, people who require
the assistance of others or pets unat-
tended in your vehicle. Additionally,
the temperature inside a closed ve-
hicle on a warm day can quickly be-
come high enough to cause a signifi-
cant risk of injury or death to people
and pets.
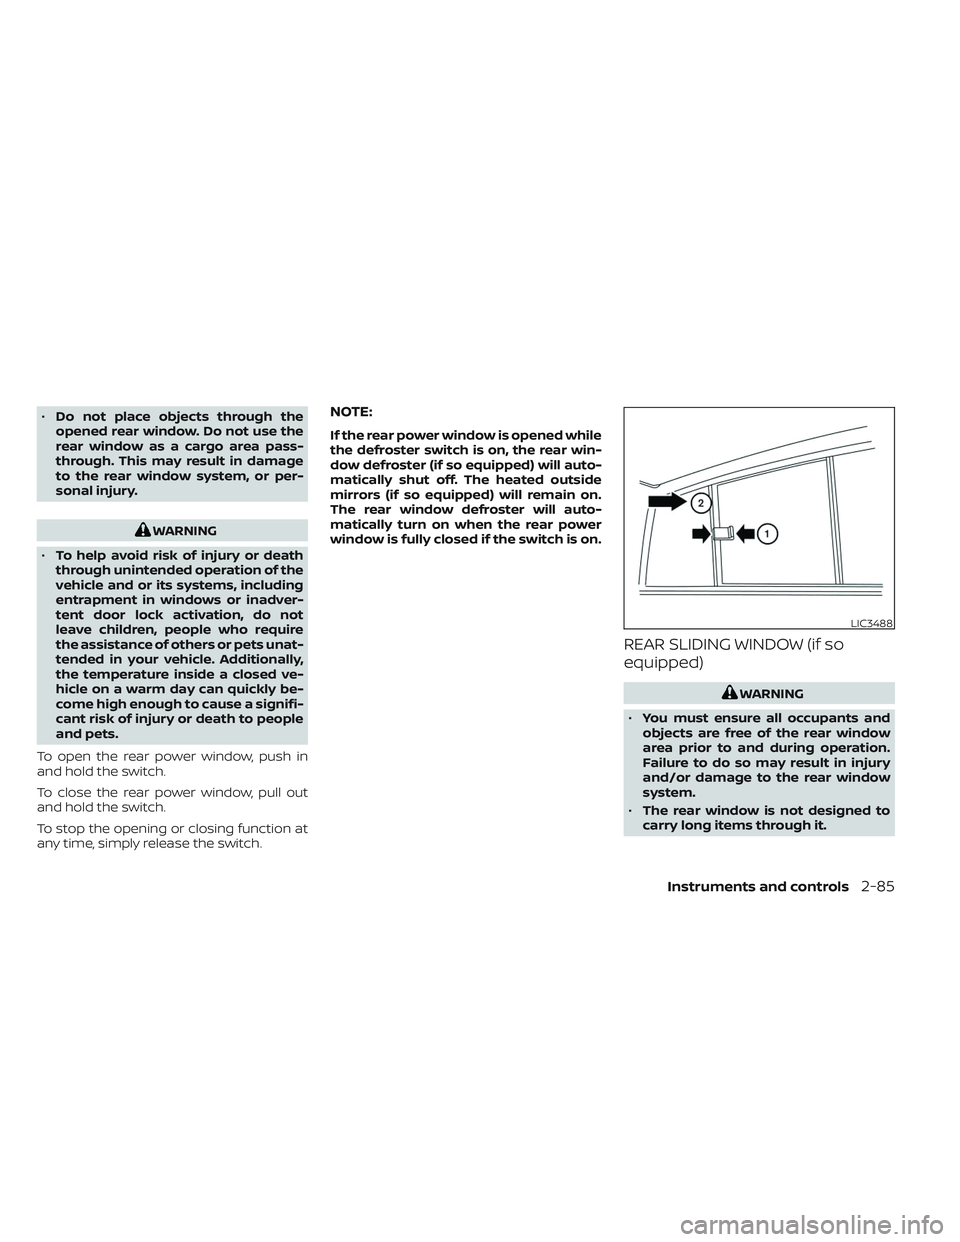
To open the rear power window, push in
and hold the switch.
To close the rear power window, pull out
and hold the switch.
To stop the opening or closing function at
any time, simply release the switch.
NOTE:
If the rear power window is opened while
the defroster switch is on, the rear win-
dow defroster (if so equipped) will auto-
matically shut off. The heated outside
mirrors (if so equipped) will remain on.
The rear window defroster will auto-
matically turn on when the rear power
window is fully closed if the switch is on.
REAR SLIDING WINDOW (if so
equipped)
WARNING
• You must ensure all occupants and
objects are free of the rear window
area prior to and during operation.
Failure to do so may result in injury
and/or damage to the rear window
system.
• The rear window is not designed to
carry long items through it.
LIC3488
Instruments and controls2-85