2022 NISSAN TITAN brakes
[x] Cancel search: brakesPage 601 of 635
NOTE:
A weight-distributing hitch system may
affect the operation of trailer surge
brakes. If you are considering use of a
weight-distributing hitch system with a
surge brake-equipped trailer, check with
the surge brake, hitch or trailer manufac-
turer to determine if and how this can be
done.
Follow the instructions provided by the
manufacturer for installing and using the
weight-distributing hitch system.
General set-up instructions are as follows:
1. Park unloaded vehicle on a level surface.With the ignition switch in the ON posi-
tion and the doors closed, allow the ve-
hicle to stand for several minutes so that
it can level.
2. Measure the height of a reference point on the front and rear bumpers at the
center of the vehicle.
3. Attach the trailer to the vehicle and ad- just the hitch equalizers so that the front
bumper height is within0-.5inches (0 –
13 mm) of the reference height mea-
sured in step 2. The rear bumper should
be no higher than the reference height
measured in step 2.
WARNING
Properly adjust the weight distributing
hitch so the rear of the bumper is no
higher than the measured reference
height when the trailer is attached. If
the rear bumper is higher than the
measured reference height when
loaded, the vehicle may handle unpre-
dictably which could cause a loss of ve-
hicle control and cause serious per-
sonal injury or property damage.
Sway control device
Sudden maneuvers, wind gusts, and buf-
feting caused by other vehicles can affect
trailer handling. Sway control devices may
be used to help control these affects. If you
choose to use one, contact a reputable
trailer hitch supplier to make sure the sway
control device will work with the vehicle,
hitch, trailer and the trailer's brake system.
Follow the instructions provided by the
manufacturer for installing and using the
sway control device.
Class I hitch
Class I trailer hitch equipment (receiver, ball
mount and hitch ball) can be used to tow
trailers of a maximum weight of 2,000 lbs.
(907 kg).
Class II hitch
Class II trailer hitch equipment (receiver,
ball mount and hitch ball) can be used to
tow trailers of a maximum weight of 3,500
lbs. (1,587 kg).
Class III hitch
Class III trailer hitch equipment (receiver,
ball mount and hitch ball) can be used to
tow trailers of a maximum weight of 5,000
lbs. (2,268 kg).
Class IV hitch
Class IV hitches are weight carrying (WC)
and weight distributing (WD) hitches de-
pending on the vehicle and hitch specifica-
tions. Not all Class IV hitches are rated to be
both. See the specific hitch for that infor-
mation. Class IV trailer hitch equipment (re-
ceiver, ball mount and hitch ball) used as
weight carrying are rated up to 10,000 lbs.
(4,535 kg) gross trailer weight (GTW) with a
maximum trailer tongue weight (TW) of
Technical and consumer information10-39
Page 606 of 635
Tire pressures
• When towing a trailer, inflate thevehicle tires to the recommended
cold tire pressure indicated on the
Tire and Loading Information label.
• Trailer tire condition, size, load rat- ing and proper inflation pressure
should be in accordance with the
trailer and tire manufacturer's
specifications.
Safety chains
Always use suitable safety chains between
your vehicle and the trailer. The safety
chains should be crossed and should be
attached to the hitch, not to the vehicle
bumper or axle. The safety chains can be
attached to the bumper if the hitch ball is
mounted to the bumper. Be sure to leave
enough slack in the chains to permit turn-
ing corners.
Trailer lights
CAUTION
When splicing into the vehicle electrical
system, a commercially available
power-type module/converter must
be used to provide power for all trailer
lighting. This unit uses the vehicle bat-
tery as a direct power source for all
trailer lights while using the vehicle tail
light, stop light and turn signal circuits
as a signal source. The module/
converter must draw no more than 15
milliamps from the stop and tail lamp
circuits. Using a module/converter that
exceeds these power requirements
may damage the vehicle's electrical
system. See a reputable trailer retailer
to obtain the proper equipment and to
have it installed.
Trailer lights should comply with federal
and/or local regulations. For assistance in
hooking up trailer lights, it is recommended
that you contact a NISSAN dealer or repu-
table trailer retailer. Vehicles equipped with
the optional trailer tow package are
equipped with a 7-pin trailer harness con-
nector. If your trailer is equipped with a flat
4-pin connector, an adapter will be needed
to connect the trailer lights to the vehicle. Adapters are available at auto parts stores
and hitch retailers.Trailer brakes (if so equipped)
If your trailer is equipped with a braking
system, make sure it conforms to federal
and/or local regulations and that it is prop-
erly installed.
Vehicles equipped with a 7–pin trailer har-
ness connector are pre-wired for a trailer
brake controller. It is recommended that
you visit a NISSAN dealer for a trailer brake
adapter harness.
When towing a trailer load of 3,500 lbs.
(1587 kg) or more, trailers with a brake
system MUST be used.
However, most
states require a separate braking system
on trailers with a loaded weight above a
specific amount. Make sure the trailer
meets the local regulations and the regu-
lations where you plan to tow.
WARNING
The Gross Combined Weight Rating
(GCWR) must never exceed the vehicle
manufacturers recommendation.
Several types of braking systems are
available.
10-44Technical and consumer information
Page 607 of 635
Surge Brakes -The surge brake actuator is
mounted on the trailer tongue with a hy-
draulic line running to each trailer wheel.
Surge brakes are activated by the trailer
pushing against the hitch ball when the
tow vehicle is braking. Hydraulic surge
brakes are common on rental trailers and
some boat trailers. In this type of system,
there is no hydraulic or electric connection
for brake operation between the tow ve-
hicle and the trailer.
CAUTION
Your factory trailer brake control unit
will not activate surge-style trailer
brakes
Electric Trailer Brakes - Electric braking
systems are activated by an electronic sig-
nal sent from a trailer brake controller (spe-
cial brake-sensing module). If electric trailer
brakes are used, see “Electric trailer brake
controller" (P. 10-48).
Have a professional supplier of towing
equipment make sure the trailer brakes are
properly installed and demonstrate proper
brake function testing.
WARNING
The NISSAN trailer brake controller has
been verified to be compatible with
trailers having electric actuated drum
brakes (one to four axles) and electric-
over-hydraulic brakes. It will not acti-
vate hydraulic surge-style trailer
brakes
WARNING
Never connect a trailer brake system
directly to the vehicle brake system.
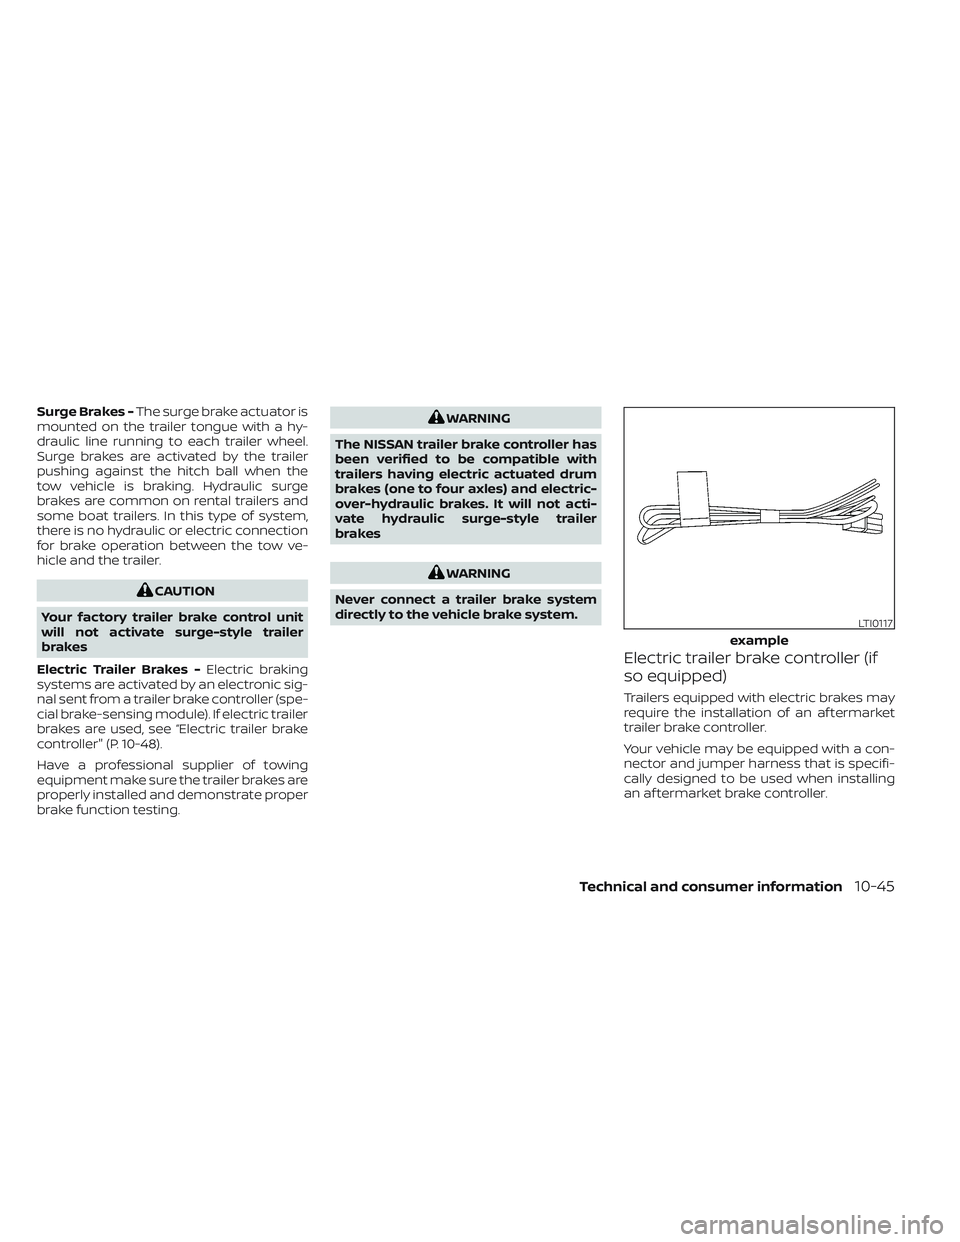
Electric trailer brake controller (if
so equipped)
Trailers equipped with electric brakes may
require the installation of an af termarket
trailer brake controller.
Your vehicle may be equipped with a con-
nector and jumper harness that is specifi-
cally designed to be used when installing
an af termarket brake controller.
LTI0117
example
Technical and consumer information10-45
Page 610 of 635
Trailer brake controller unit (if so
equipped)
The Trailer Brake Controller Unit (TBCU), lo-
cated on the lower instrument panel, is a
device that assists the vehicle in having
effective and smooth braking while towing
a trailer.
Operating modes:
•Automatic mode: This is the normal op-
eration of the TBCU depending on the
gain and boost settings adjusted by the
customer. This mode will activate when
vehicle brake pedal is pressed.
• Manual mode: This mode is initiated by
adjusting the manual control lever from
resting position. This mode will provide
output power to trailer brakes without
applying the vehicle brake pedal. To determine the output operation of the
system:
•
Gain + and Gain - : Used to increase or
decrease the braking force supplied to
the trailer brakes. To adjust the gain, press
Gain + or Gain - to the desired point (0-10).
For example: gain setting 6.0 is a typical
starting point for heavy loads.
• Boost: Used to adjust the feel of the au-
tomatic brake event that occurs when
the vehicle brake pedal is applied. To set
up boost, press Boost button once to dis-
play for current boost setting (display for
3 seconds). Keep pressing to increase
boost level until the desired level (0-3) is
achieved.
• Manual Control Lever: Provides brake
output power to trailer brakes without
applying the vehicle brake pedal. The
amount of brake output supplied corre-
sponds to the amount of pinch pressure
applied to the manual control lever.
10-48Technical and consumer information
Page 614 of 635

• While going downhill, the weight of thetrailer pushing on the tow vehicle may
decrease overall stability. Therefore, to
maintain adequate control, reduce your
speed and shif t to a lower gear. Avoid
long or repeated use of the brakes when
descending a hill, as this reduces their
effectiveness and could cause overheat-
ing. Shif ting to a lower gear instead pro-
vides “engine braking” and reduces the
need to brake as frequently.
• If the engine coolant temperature rises to a high temperature, see “If your vehicle
overheats” (P. 6-12).
• Trailer towing requires more fuel than normal circumstances.
• Avoid towing a trailer for your vehicle's first 500 miles (805 km).
• For the first 500 miles (805 km) that you do tow, do not drive over 50 mph (80
km/h).
• Have your vehicle serviced more of ten than at intervals specified. For additional
information, see the “Maintenance and
schedules” section of this manual.
• When making a turn, your trailer wheels will be closer to the inside of the turn than
your vehicle wheels. To compensate for
this, make a larger than normal turning
radius during the turn. • Crosswinds and rough roads will ad-
versely affect vehicle/trailer handling,
possibly causing vehicle sway. When be-
ing passed by larger vehicles, be pre-
pared for possible changes in crosswinds
that could affect vehicle handling.
Trailer Sway Assist :
To minimize trailer sway, your vehicle may
apply braking to individual wheels based
on input from your vehicle sensors and ve-
hicle speed. Trailer sway control is a func-
tion of the Vehicle Dynamic Control (VDC)
system and is active when the VDC func-
tion is enabled.
CAUTION
If the VDC-OFF switch is on (meaning
VDC system OFF), the Trailer Sway As-
sist is also disabled
When Trailer Sway Assist is in operation, the
VDC warning light blinks. When vehicle con-
trol is regained, VDC warning light will turn
OFF.
For additional information about the VDC
system, see “Vehicle Dynamic Control (VDC)
OFF switch” (P. 2-58) and “Vehicle Dynamic
Control (VDC) system” (P. 5-120). If Trailer Sway Assist activates, do the
following:
1. Take your foot off the accelerator pedal
to allow the vehicle to coast and steer as
straight ahead as the road conditions
allow. This combination will help stabilize
the vehicle
CAUTION
Do not try to correct trailer sway by
steering or applying the brakes.
2. When the trailer sway stops, gently apply the brakes and pull to the side of the
road in a safe area.
3. Try to rearrange the trailer load so it is balanced. For additional information,
see “Pre-towing tips” (P. 10-50).
NOTE:
Trailer Sway Assist cannot reduce trailer
sway in all situations.
• Be careful when passing other vehicles.Passing while towing a trailer requires
considerably more distance than normal
passing. Remember, the length of the
trailer must also pass the other vehicle
before you can safely change lanes.
10-52Technical and consumer information
Page 615 of 635
• Use the Tow Mode or downshif t thetransmission to a lower gear for engine
braking when driving down steep or long
hills. This will help slow the vehicle without
applying the brakes.
• Avoid holding the brake pedal down too long or too frequently. This could cause
the brakes to overheat, resulting in re-
duced braking efficiency.
• Increase your following distance to allow for greater stopping distances while tow-
ing a trailer. Anticipate stops and brake
gradually.
• NISSAN recommends that the cruise control (if so equipped) not be used while
towing a trailer.
• While towing a trailer, do not use the fol- lowing systems (if so equipped):–– the Lane Departure Warning (LDW) system
–– the Blind Spot Warning (BSW) system
– – the Intelligent Cruise Control (ICC)
system
– – the Automatic Emergency Braking
(AEB) system
– – the Intelligent Forward Collision
Warning (I-FCW) system
– – the Rear Automatic Braking (RAB)
system –
– the Moving Object Detection (MOD)
system
– – the Cross Traffic Alert system
–– the Rear Sonar system
• Some states or provinces have specific regulations and speed limits for vehicles
that are towing trailers. Obey the local
speed limits.
• Check your hitch, trailer wiring harness connections, and trailer wheel lug nuts
af ter 50 miles (80 km) of travel and at
every break.
• When launching a boat, don't allow the water level to go over the exhaust tail
pipe or rear bumper.
• Make sure you disconnect the trailer lights before backing the trailer into the
water or the trailer lights may burn out.
When towing a trailer, final drive gear oil
should be replaced and transmission oil/
fluid should be changed more fre-
quently. For additional information, see
the “Do-it-yourself ” section of this
manual.Tow mode
Using tow mode is recommended when
pulling a heavy trailer or hauling a heavy
load. Press the TOW MODE switch to acti-
vate tow mode. The indicator light on the
TOW MODE switch illuminates when tow
mode is selected. Press the TOW MODE
switch again to turn tow mode off. Tow
mode is automatically canceled when the
ignition switch is turned off.
Tow mode includes the following features:
• Grade logic — Adjusts transmission shif ts when pulling a trailer or hauling a load up
a grade.
• Downhill Speed Control (DSC) — auto- matically downshif ts when driving down
a grade with a trailer or heavy load to help
control vehicle speed.
Driving the vehicle in the tow mode with no
trailer/load or light trailer/light load will not
cause any damage. However, fuel
economy may be reduced and the
transmission/engine driving characteris-
tics may feel unusual.
Technical and consumer information10-53
Page 623 of 635
11 Index
A
Active Brake Limited Slip (ABLS)
system....................5-119Aiming control, headlights.........2-50Air bag (See supplemental restraint
system).....................1-53Air bag system
Front (See supplemental front impact
air bag system)
...........1-60, 1-76Air bag warning labels............1-83Air bag warning light.........1-83, 2-16Air bag warning light,
supplemental..............1-83, 2-16Air cleaner...................8-21Air cleaner housing filter..........8-21Air conditionerAir conditioner operation. . . .4-32, 4-38Air conditioner specification label. .10-18Air conditioner system refrigerant
recommendations............10-8Air conditioner system refrigerant
and oil recommendations.......10-8Heater and air conditioner (automatic)
(if so equipped)..............4-37Heater and air conditioner
controls.................. .4-38Servicing air conditioner........4-42Air flow charts................4-33Alarm system (See vehicle security
system)................... .2-39
Anchor point locations...........1-32Antenna....................4-42Anti-lock Braking System (ABS)......5-117Antifreeze...................5-129Autolight switch...............2-45Automatic
Automatic power window switch. . .2-84Driving with automatic
transmission................5-19Automatic anti-glare inside mirror. . . .3-29Automatic door locks.............3-8Automatic Emergency Braking (AEB)
with Pedestrian Detection.........5-80Automatic transmission fluid temperature
gauge......................2-10
B
Battery.................5- 129, 8-16Charge warning light...........2-15Battery replacement............8-27Key fob...................8-27NISSAN Intelligent Key®.........8-27Before starting the engine.........5-16Belt (See drive belt).............8-20Blind Spot Warning (BSW)..........5-32Booster seats.................1-49Brake
Anti-lock Braking System (ABS). . . .5-117Brake fluid.................8-14
Brake light (See stop light).......8-30Brake system...............5-117Brake warning light............2-14Brake wear indicators.......2-22,8-23Parking brake operation.........5-23Self-adjusting brakes..........8-23Brake Assist.................5-118Brake fluid...................8-14Brake system.................5-117Brakes.....................8-23Break-in schedule.............5-105Brightness controlInstrument panel.............2-51Bulb check/instrument panel.......2-13Bulb replacement..............8-30
C
Capacities and recommended
fuel/lubricants................10-2Car phone or CB radio...........4-82Cargo (See vehicle loading
information)................ .10-20Cargo light switch..............2-53Check tire pressure..........2-33, 2-35Child restraints......1-25,1-26,1-28,1-30LATCH (Lower Anchors and Tethers
for CHildren) System...........1-30Precautions on child
restraints........1-34, 1-40, 1-44, 1-49
Page 628 of 635

Child seat
belts........1-28,1-34, 1-40, 1-44, 1-49Reporting safety defects
(US only)................. .10-57Seat
Memory seat............3-38, 3-40Seat adjustmentFront manual seat adjustment......1-4Front power seat adjustment.......1-6Seat beltChild safety.................1-25Infants and small children........1-26Injured person................1-19Larger children...............1-26Precautions on seat belt usage.....1-16Pregnant women..............1-19Rear center seat belt...........1-23Seat belt extenders............1-24Seat belt maintenance..........1-24Seat belts................1-16,7-7Shoulder belt height adjustment. . . .1-24Three-point type with retractor.....1-19Seat belt extenders..............1-24Seat belt warning light............2-16Seatback pockets...............2-71SeatsAdjustment..................1-2Front seats..................1-2Heated seats................2-54Manual front seat adjustment......1-4Rear seat.................. .1-4Security indicator light............2-16Security system (NISSAN Vehicle Immobilizer
System), engine start.........2-40, 5-16
Security systems
Vehicle security system.........2-39Self-adjusting brakes.............8-23Service manual order form........10-59Servicing air conditioner...........4-42Shif tingAutomatic transmission.........5-20Shoulder belt height adjustment......1-24Side air bag system (See supplemental side
air bag, curtain and rollover air bag
systems)
.....................1-79Snow plow................. .10-55Spark plug replacement...........8-20Spark plugs...................8-20Specifications.................10-9Speedometer..................2-7Speedometer and odometer........2-6SRS warning label...............1-83Stability control................5-120Standard maintenance............9-8Starting
Before starting the engine........5-16Jump starting............6-10,8-19Precautions when starting
and driving...............5-4, 5-11Push starting................6-12Starting the engine............5-17Starting the engine..............5-17SteeringPower steering fluid............8-13Power steering system.........5-116Steering wheel.................3-26Stop light................... .8-30Storage.....................2-70
Storage tray..................2-74Sun visors....................3-28Sunglasses case................2-76Sunglasses holder..............2-76Sunroof..................2-86, 7-5Supplemental air bag warning
labels...................... .1-83Supplemental air bag warning
light....................1-83, 2-16Supplemental front impact air bag
system..................1-60, 1-76Supplemental restraint system
Information and warning labels.....1-83Precautions on supplemental
restraint system...........1-53, 1-68Supplemental restraint system
(Supplemental air bag system).......1-53SwitchAutolight switch..............2-45Automatic power window switch. . .2-84Electronic locking rear differential
(E-Lock) system switch..........2-60Fog light switch..............2-52Hazard warning flasher switch......6-2Headlight aiming control.........2-50Headlight and turn signal switch. . . .2-45Headlight control switch.........2-45Hill descent control switch........2-59Instrument brightness control.....2-51Power door lock switch..........3-6Power inverter switch...........2-61Rear sonar system OFF switch.....2-62Tow mode switch.............2-63Turn signal switch.............2-51
11-6