2022 NISSAN TITAN remote control
[x] Cancel search: remote controlPage 297 of 635
HDMI/MHL CONNECTION
HDMI connection
Display content from an external source
connected to the system using the HDMI
port located on the front of monitor A. A
standard HDMI cable is required (sold
separately).
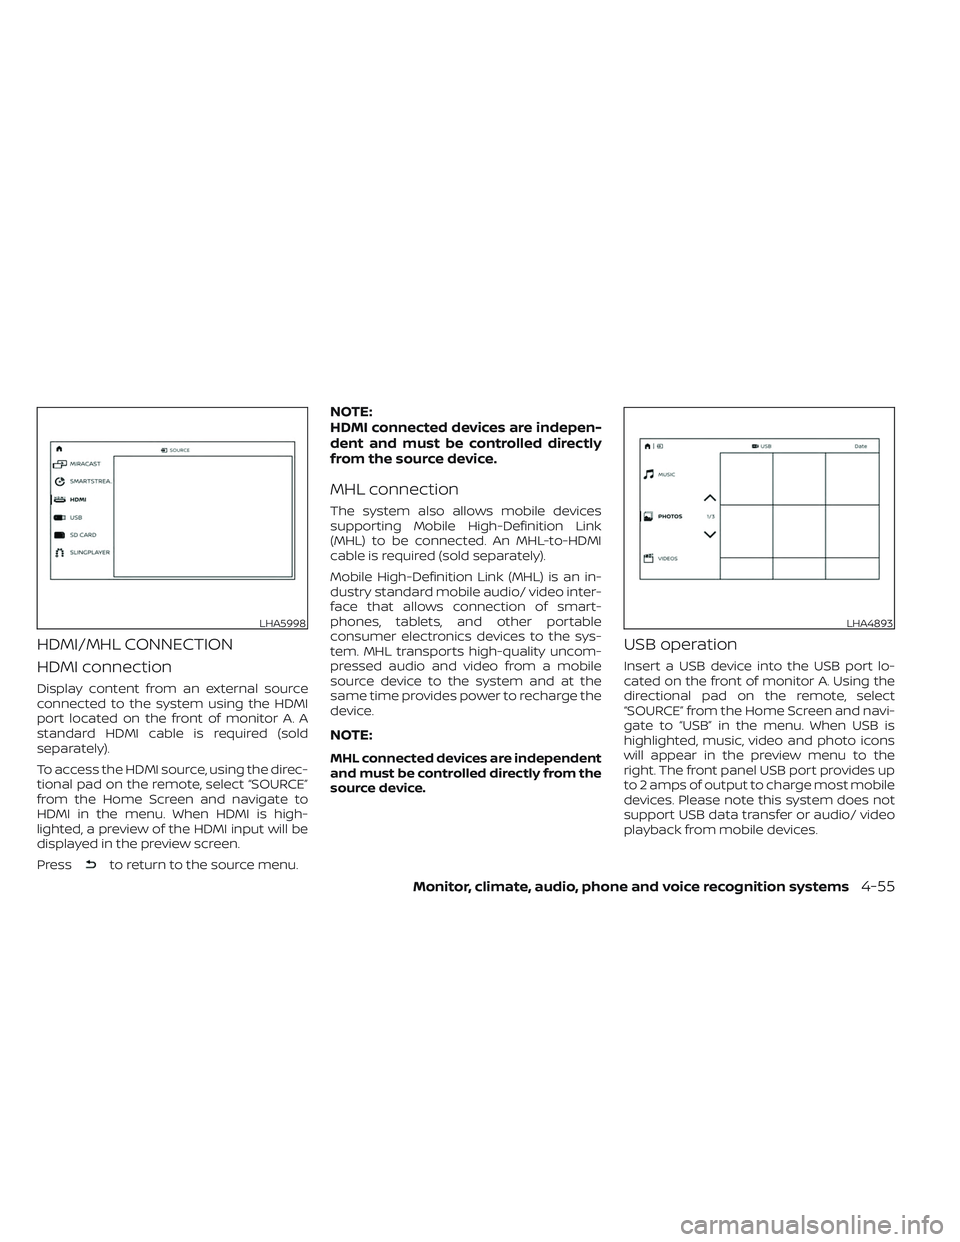
To access the HDMI source, using the direc-
tional pad on the remote, select “SOURCE”
from the Home Screen and navigate to
HDMI in the menu. When HDMI is high-
lighted, a preview of the HDMI input will be
displayed in the preview screen.
Press
to return to the source menu.
NOTE:
HDMI connected devices are indepen-
dent and must be controlled directly
from the source device.
MHL connection
The system also allows mobile devices
supporting Mobile High-Definition Link
(MHL) to be connected. An MHL-to-HDMI
cable is required (sold separately).
Mobile High-Definition Link (MHL) is an in-
dustry standard mobile audio/ video inter-
face that allows connection of smart-
phones, tablets, and other portable
consumer electronics devices to the sys-
tem. MHL transports high-quality uncom-
pressed audio and video from a mobile
source device to the system and at the
same time provides power to recharge the
device.
NOTE:
MHL connected devices are independent
and must be controlled directly from the
source device.
USB operation
Insert a USB device into the USB port lo-
cated on the front of monitor A. Using the
directional pad on the remote, select
“SOURCE” from the Home Screen and navi-
gate to “USB” in the menu. When USB is
highlighted, music, video and photo icons
will appear in the preview menu to the
right. The front panel USB port provides up
to 2 amps of output to charge most mobile
devices. Please note this system does not
support USB data transfer or audio/ video
playback from mobile devices.
LHA5998LHA4893
Monitor, climate, audio, phone and voice recognition systems4-55
Page 301 of 635
USB/SD card video playback
controls
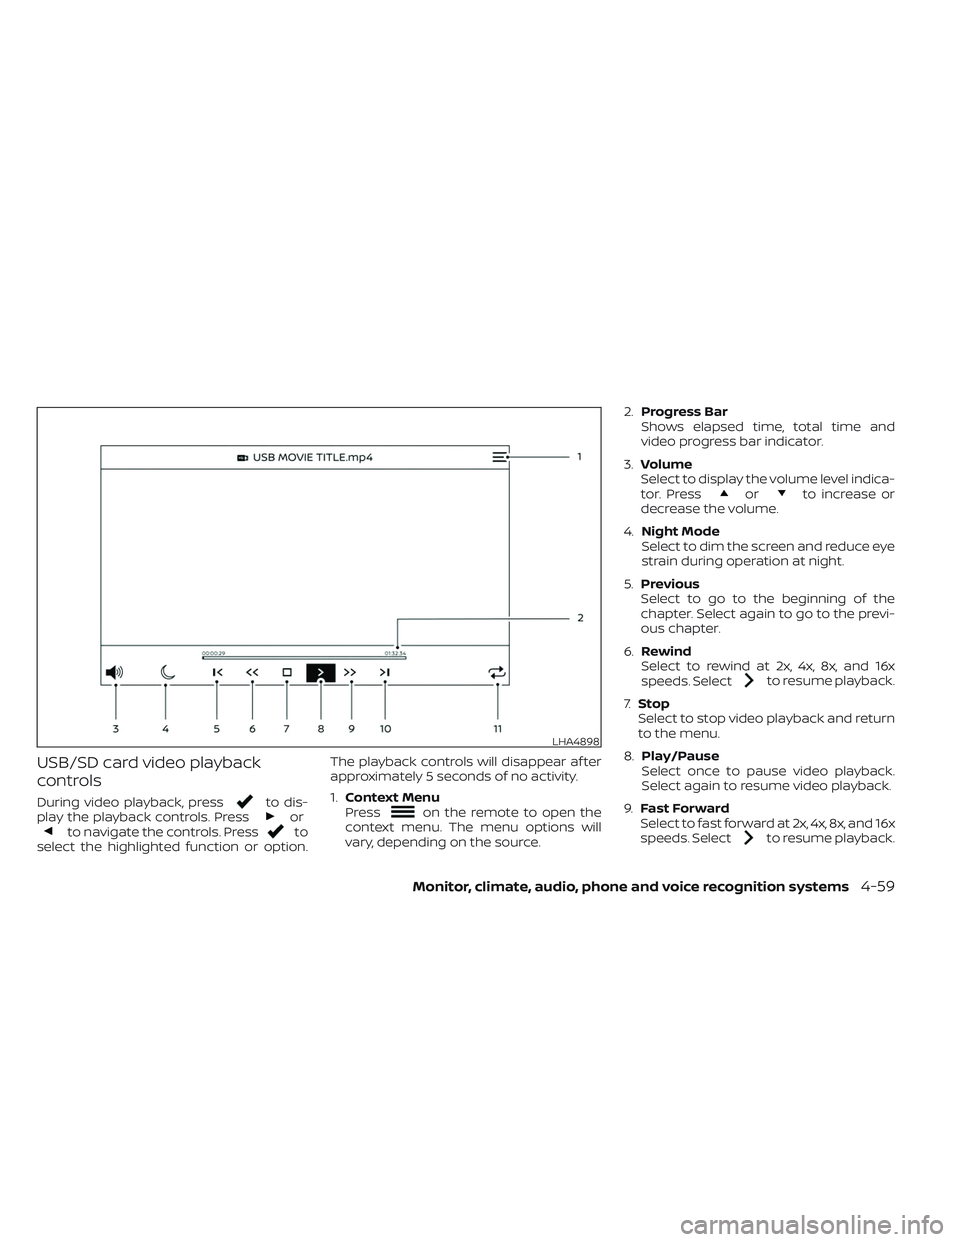
During video playback, pressto dis-
play the playback controls. Pressorto navigate the controls. Pressto
select the highlighted function or option. The playback controls will disappear af ter
approximately 5 seconds of no activity.
1.
Context Menu
Press
on the remote to open the
context menu. The menu options will
vary, depending on the source. 2.
Progress Bar
Shows elapsed time, total time and
video progress bar indicator.
3. Volume
Select to display the volume level indica-
tor. Press
orto increase or
decrease the volume.
4. Night Mode
Select to dim the screen and reduce eye
strain during operation at night.
5. Previous
Select to go to the beginning of the
chapter. Select again to go to the previ-
ous chapter.
6. Rewind
Select to rewind at 2x, 4x, 8x, and 16x
speeds. Select
to resume playback.
7. Stop
Select to stop video playback and return
to the menu.
8. Play/Pause
Select once to pause video playback.
Select again to resume video playback.
9. Fast Forward
Select to fast forward at 2x, 4x, 8x, and 16x
speeds. Select
to resume playback.
LHA4898
Monitor, climate, audio, phone and voice recognition systems4-59
Page 304 of 635
Navigating photos
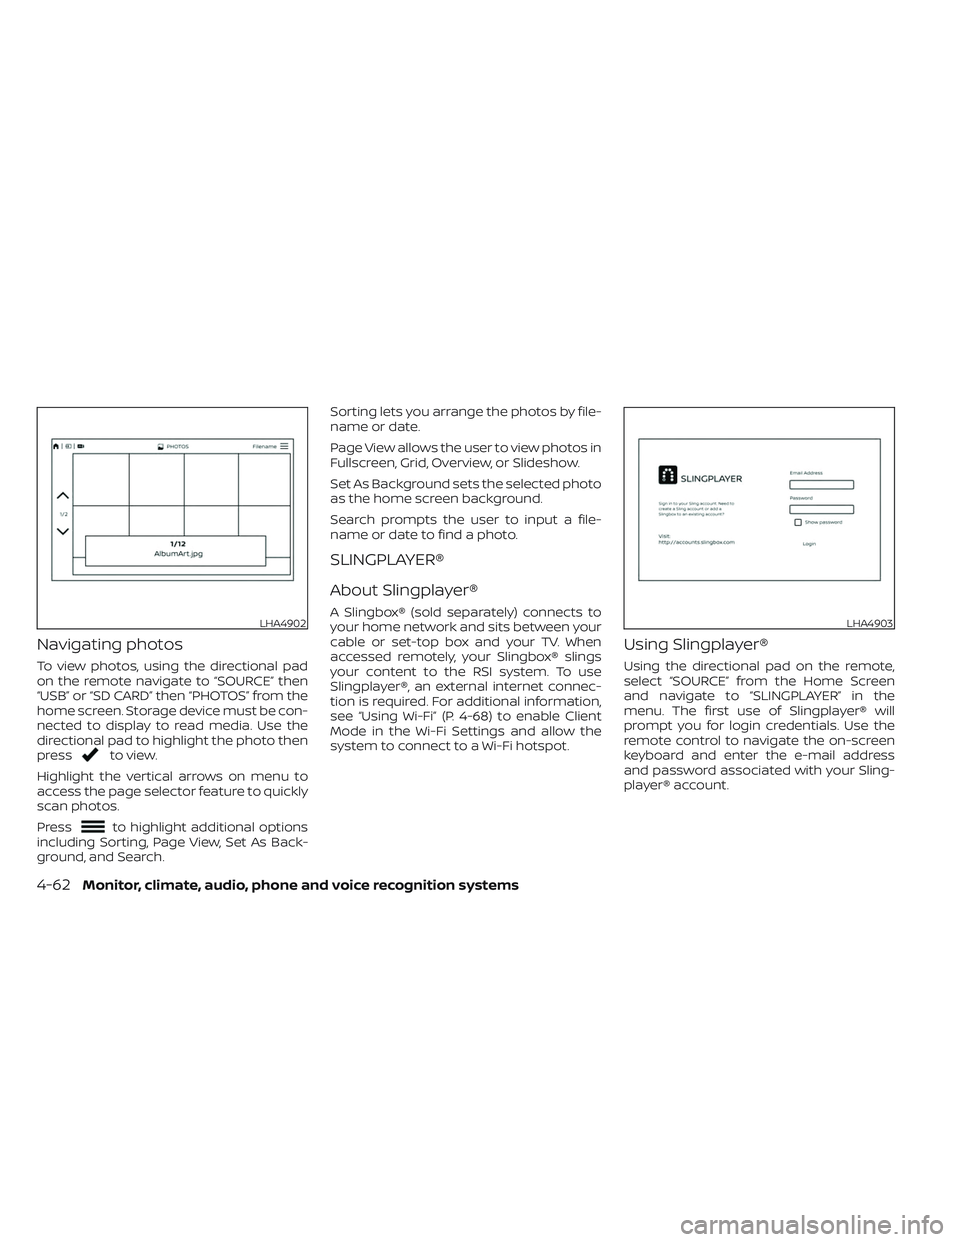
To view photos, using the directional pad
on the remote navigate to “SOURCE” then
“USB” or “SD CARD” then “PHOTOS” from the
home screen. Storage device must be con-
nected to display to read media. Use the
directional pad to highlight the photo then
press
to view.
Highlight the vertical arrows on menu to
access the page selector feature to quickly
scan photos.
Press
to highlight additional options
including Sorting, Page View, Set As Back-
ground, and Search. Sorting lets you arrange the photos by file-
name or date.
Page View allows the user to view photos in
Fullscreen, Grid, Overview, or Slideshow.
Set As Background sets the selected photo
as the home screen background.
Search prompts the user to input a file-
name or date to find a photo.
SLINGPLAYER®
About Slingplayer®
A Slingbox® (sold separately) connects to
your home network and sits between your
cable or set-top box and your TV. When
accessed remotely, your Slingbox® slings
your content to the RSI system. To use
Slingplayer®, an external internet connec-
tion is required. For additional information,
see “Using Wi-Fi” (P. 4-68) to enable Client
Mode in the Wi-Fi Settings and allow the
system to connect to a Wi-Fi hotspot.
Using Slingplayer®
Using the directional pad on the remote,
select “SOURCE” from the Home Screen
and navigate to “SLINGPLAYER” in the
menu. The first use of Slingplayer® will
prompt you for login credentials. Use the
remote control to navigate the on-screen
keyboard and enter the e-mail address
and password associated with your Sling-
player® account.
LHA4902LHA4903
4-62Monitor, climate, audio, phone and voice recognition systems
Page 318 of 635

TROUBLESHOOTING
SymptomRemedy
Monitor does not power on Verif y the vehicle is in the ON or ACC position.
Verif y the battery is installed correctly in the remote control.
Verif y the in-line fuse protection is good. Refer to the RSI system installation instructions for vehicle-specific fuse location.
Monitor front panel controls
flash red For further diagnosis, it is recommended that you visit a NISSAN dealer.
System frozen - will not
respond Sof t reset the system by pressing and holding the power button on the top of the driver side monitor for 5 seconds.
Hard reset the system by turning the ignition off, then back on.
No picture Check that the signal source is connected.
Check the menu source setting. Match your monitor mode with the source correctly.
No sound or distorted sound Make sure that the external media device is connected properly, and all cables are securely inserted into the appropriate jacks.
Verif y that the batteries in the headphones are fresh.
If you are using the wireless headphones, make sure you turn on the power and select the correct monitor (A or B).
Verif y the volume is turned up on headphones and the system.
Verif y nothing is blocking the path between the monitor IR sensor and headphones.
When placing the headphones on your head, make sure to observe the Lef t and Right orientation.
The headphones must be oriented correctly (facing forward) to receive the audio signal.
Monitor feels warm When the monitor is in use for a long period of time, the surface will be warm. This is normal.
A Parental Setting message
is displayed, prohibiting
movie playback Enter the 4-digit Parental Password using the remote and then press
.
For additional information, see “Changing parental lock” (P. 4-75).
Cannot connect mobile
device to the internal RSI
Wi-Fi network Check to make sure Wi-Fi is enabled on the mobile device.
Check to make sure RSI is set to Access Point mode.
Check to make sure the correct password is used. For additional information, see “Using Wi-Fi” (P. 4-68).
Cannot connect RSI system
to an external Wi-Fi network Check to make sure RSI is set to Client Mode. Check to make sure the correct password is used.
For additional information, see “Using Wi-Fi” (P. 4-68).
4-76Monitor, climate, audio, phone and voice recognition systems
Page 344 of 635
REMOTE ENGINE START (if so
equipped)
Vehicles started with the Remote Engine
Start require the ignition switch to be
placed in the ON position before the shif t
lever can be moved from the P (Park) posi-
tion. To place the ignition switch in the ON
position, follow these steps:
1. Make sure that the Intelligent Key is onyou.
2. Apply the brake.
3. Push the ignition switch once to the ON position.
For additional information, see “NISSAN In-
telligent Key®” (P. 3-2).
ENGINE PROTECTION MODE
The engine has an engine protection mode
to reduce the chance of damage if the
coolant temperature becomes too high
(for example, when climbing steep grades
in high temperatures with heavy loads,
such as when towing a trailer). When the
engine temperature reaches a certain
level:
• The engine coolant temperature gauge will move toward the H position.
• Engine power may be reduced.
• The air conditioning cooling function may be automatically turned off for a short
time (the blower will continue to operate).
Engine power and, under some conditions,
vehicle speed will decrease. Vehicle speed
can be controlled with the accelerator
pedal, but the vehicle may not accelerate at
the desired speed. The transmission will
downshif t or upshif t as it reaches pre-
scribed shif t points. You can also shif t
manually.
As driving conditions change and engine
coolant temperature is reduced, vehicle
speed can be increased using the accel-
erator pedal, and the air conditioning cool-
ing function will automatically be turned
back on. The Malfunction Indicator Light (MIL) may
also come on if the engine coolant tem-
perature is not reduced or the air condi-
tioning cooling function does not turn back
on. If
only it remains on, you do not need to
have your vehicle towed, but have it in-
spected soon. It is recommended that you
visit a NISSAN dealer for this service. For
additional information, see “Malfunction In-
dicator Light (MIL)” (P. 2-20).
WARNING
Overheating can result in reduced en-
gine power and vehicle speed. The re-
duced speed may be lower than other
traffic, which could increase the chance
of a collision. Be especially careful
when driving. If the vehicle cannot
maintain a safe driving speed, pull to
the side of the road in a safe area. Allow
the engine to cool and return to normal
operation. For additional information,
see “If your vehicle overheats” (P. 6-12).
DRIVING THE VEHICLE
5-18Starting and driving
Page 625 of 635
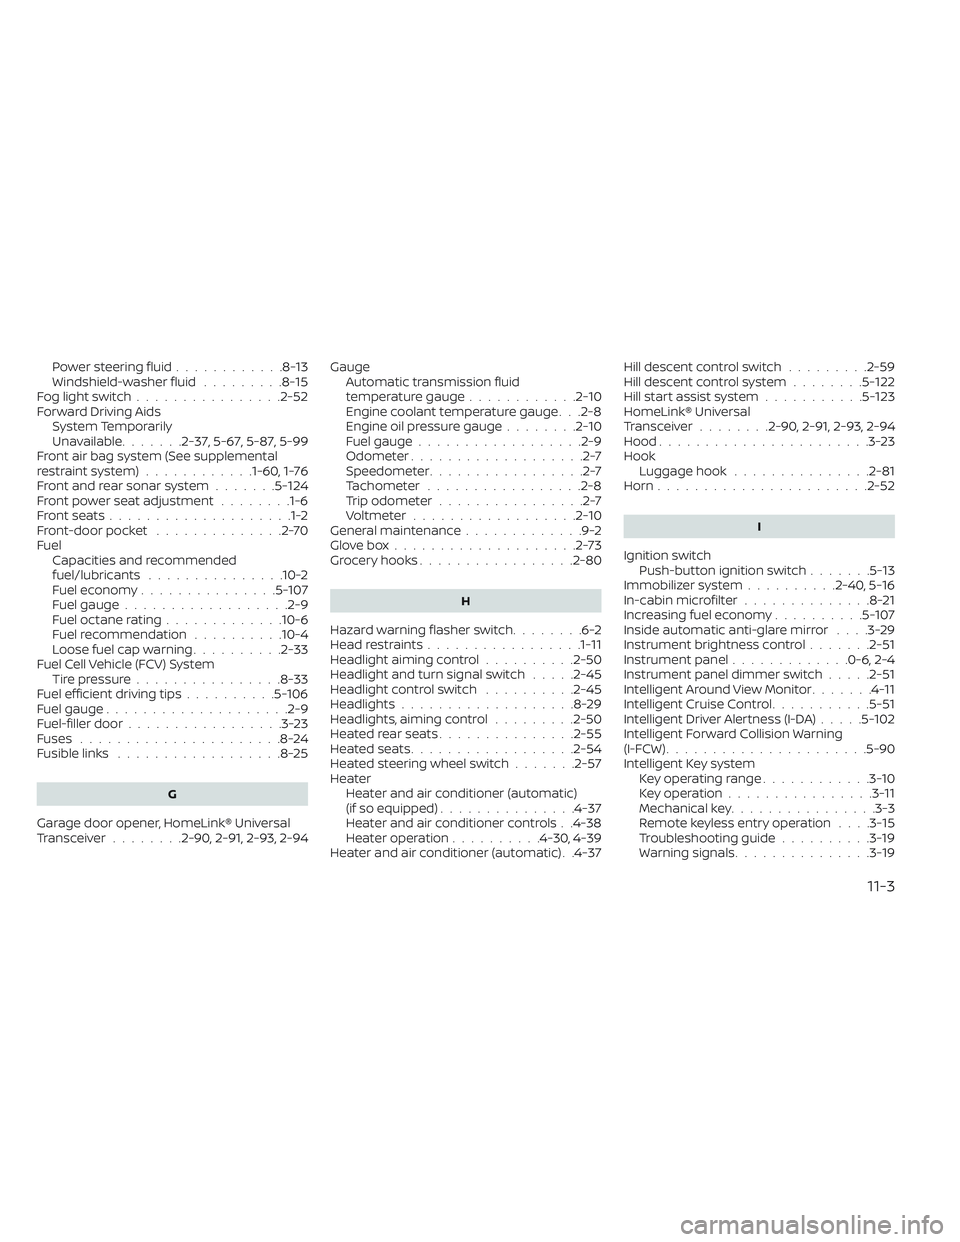
Power steering fluid............8-13Windshield-washer fluid.........8-15Fog light switch................2-52Forward Driving AidsSystem Temporarily
Unavailable
.......2-37, 5-67, 5-87, 5-99Front air bag system (See supplemental
restraint system)............1-60, 1-76Front and rear sonar system.......5-124Front power seat adjustment........1-6Front seats....................1-2Front-door pocket..............2-70FuelCapacities and recommended
fuel/lubricants
...............10-2Fuel economy...............5-107Fuel gauge................. .2-9Fuel octane rating.............10-6Fuel recommendation..........10-4Loose fuel cap warning..........2-33Fuel Cell Vehicle (FCV) System
Tire pressure................8-33Fuel efficient driving tips..........5-106Fuel gauge................... .2-9Fuel-filler door.................3-23Fuses......................8-24Fusible links..................8-25
G
Garage door opener, HomeLink® Universal
Transceiver........2-90, 2-91, 2-93, 2-94
Gauge
Automatic transmission fluid
temperature gauge
............2-10Engine coolant temperature gauge. . .2-8Engine oil pressure gauge........2-10Fuel gauge................. .2-9Odometer...................2-7Speedometer.................2-7Tachometer.................2-8Trip odometer................2-7Voltmeter..................2-10General maintenance.............9-2Glove box....................2-73Grocery hooks.................2-80
H
Hazard warning flasher switch........6-2Head restraints.................1-11Headlight aiming control..........2-50Headlight and turn signal switch.....2-45Headlight control switch..........2-45Headlights...................8-29Headlights, aiming control.........2-50Heated rear seats...............2-55Heated seats................. .2-54Heated steering wheel switch.......2-57Heater
Heater and air conditioner (automatic)
(if so equipped)
...............4-37Heater and air conditioner controls. .4-38Heater operation..........4-30, 4-39Heater and air conditioner (automatic). .4-37
Hill descent control switch.........2-59Hill descent control system........5-122Hill start assist system...........5-123HomeLink® Universal
Transceiver........2-90, 2-91, 2-93, 2-94Hood.......................3-23HookLuggage hook...............2-81Horn...................... .2-52
I
Ignition switch
Push-button ignition switch.......5-13Immobilizer system..........2-40, 5-16In-cabin microfilter..............8-21Increasing fuel economy..........5-107Inside automatic anti-glare mirror. . . .3-29Instrument brightness control.......2-51Instrument panel.............0-6, 2-4Instrument panel dimmer switch.....2-51Intelligent Around View Monitor.......4-11Intelligent Cruise Control...........5-51Intelligent Driver Alertness (I-DA).....5-102Intelligent Forward Collision Warning
(I-FCW)..................... .5-90Intelligent Key system
Key operating range............3-10Key operation................3-11Mechanical key................3-3Remote keyless entry operation. . . .3-15Troubleshooting guide..........3-19Warning signals...............3-19
11-3