2022 NISSAN TITAN change time
[x] Cancel search: change timePage 344 of 635
REMOTE ENGINE START (if so
equipped)
Vehicles started with the Remote Engine
Start require the ignition switch to be
placed in the ON position before the shif t
lever can be moved from the P (Park) posi-
tion. To place the ignition switch in the ON
position, follow these steps:
1. Make sure that the Intelligent Key is onyou.
2. Apply the brake.
3. Push the ignition switch once to the ON position.
For additional information, see “NISSAN In-
telligent Key®” (P. 3-2).
ENGINE PROTECTION MODE
The engine has an engine protection mode
to reduce the chance of damage if the
coolant temperature becomes too high
(for example, when climbing steep grades
in high temperatures with heavy loads,
such as when towing a trailer). When the
engine temperature reaches a certain
level:
• The engine coolant temperature gauge will move toward the H position.
• Engine power may be reduced.
• The air conditioning cooling function may be automatically turned off for a short
time (the blower will continue to operate).
Engine power and, under some conditions,
vehicle speed will decrease. Vehicle speed
can be controlled with the accelerator
pedal, but the vehicle may not accelerate at
the desired speed. The transmission will
downshif t or upshif t as it reaches pre-
scribed shif t points. You can also shif t
manually.
As driving conditions change and engine
coolant temperature is reduced, vehicle
speed can be increased using the accel-
erator pedal, and the air conditioning cool-
ing function will automatically be turned
back on. The Malfunction Indicator Light (MIL) may
also come on if the engine coolant tem-
perature is not reduced or the air condi-
tioning cooling function does not turn back
on. If
only it remains on, you do not need to
have your vehicle towed, but have it in-
spected soon. It is recommended that you
visit a NISSAN dealer for this service. For
additional information, see “Malfunction In-
dicator Light (MIL)” (P. 2-20).
WARNING
Overheating can result in reduced en-
gine power and vehicle speed. The re-
duced speed may be lower than other
traffic, which could increase the chance
of a collision. Be especially careful
when driving. If the vehicle cannot
maintain a safe driving speed, pull to
the side of the road in a safe area. Allow
the engine to cool and return to normal
operation. For additional information,
see “If your vehicle overheats” (P. 6-12).
DRIVING THE VEHICLE
5-18Starting and driving
Page 386 of 635
If a vehicle ahead appears during accelera-
tion to the set vehicle speed or any time the
ICC system is in operation, the system con-
trols the distance to that vehicle.
When a vehicle is no longer detected under
approximately 15 mph (24 km/h), the sys-
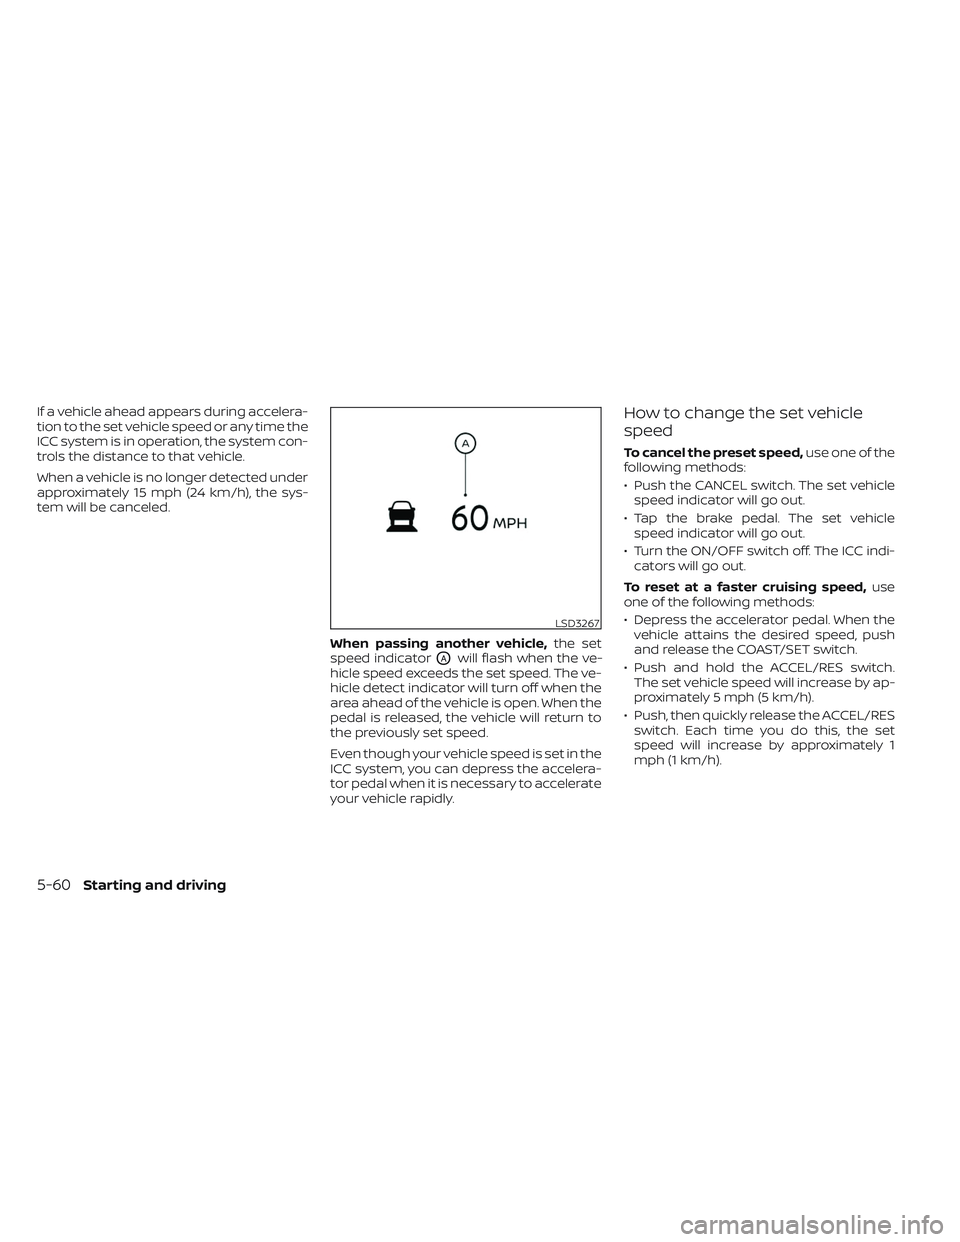
tem will be canceled.When passing another vehicle,the set
speed indicator
OAwill flash when the ve-
hicle speed exceeds the set speed. The ve-
hicle detect indicator will turn off when the
area ahead of the vehicle is open. When the
pedal is released, the vehicle will return to
the previously set speed.
Even though your vehicle speed is set in the
ICC system, you can depress the accelera-
tor pedal when it is necessary to accelerate
your vehicle rapidly.
How to change the set vehicle
speed
To cancel the preset speed, use one of the
following methods:
• Push the CANCEL switch. The set vehicle speed indicator will go out.
• Tap the brake pedal. The set vehicle speed indicator will go out.
• Turn the ON/OFF switch off. The ICC indi- cators will go out.
To reset at a faster cruising speed, use
one of the following methods:
• Depress the accelerator pedal. When the vehicle attains the desired speed, push
and release the COAST/SET switch.
• Push and hold the ACCEL/RES switch. The set vehicle speed will increase by ap-
proximately 5 mph (5 km/h).
• Push, then quickly release the ACCEL/RES switch. Each time you do this, the set
speed will increase by approximately 1
mph (1 km/h).
LSD3267
5-60Starting and driving
Page 387 of 635

To reset at a slower cruising speed,use
one of the following methods:
• Lightly tap the brake pedal. When the ve- hicle attains the desired speed, push the
COAST/SET switch and release it.
• Push and hold the COAST/SET switch. The set vehicle speed will decrease by
approximately 5 mph (5 km/h).
• Push, then quickly release the COAST/SET switch. Each time you do this, the set
speed will decrease by approximately 1
mph (1 km/h).
To resume the preset speed, push and
release the ACCEL/RES switch. The vehicle
will resume the last set cruising speed
when the vehicle speed is over 20 mph (32
km/h).
How to change the set distance
to the vehicle ahead
The distance to the vehicle ahead can be
selected at any time depending on the traf-
fic conditions.
Each time the distance
switchOAis
pushed, the set distance will change to
long, middle, short and back to long again,
in that sequence. Distance Approximate distance at
60 mph (100 km/h) [f t (m)]
1. Long 200 (60)
2. Middle 150 (45)
3. Short 90 (30)
• The distance to the vehicle ahead will change according to the vehicle speed.
The higher the vehicle speed, the longer
the distance.
• The distance setting will remain at the current setting even if the engine is
restarted.
LSD3714LSD2752
Starting and driving5-61
Page 405 of 635

•Once the automatic brake control
operates, it does not operate again if
the vehicle approaches the same
obstacle.
• The automatic brake control can only
operate for a short period of time.
Therefore, the driver must depress
the brake pedal.
• In the following situations, the RAB
system may not operate properly or
may not function sufficiently:
– The vehicle is driven in bad
weather (rain, fog, snow, etc.).
– The vehicle is driven on a steep
hill.
– The vehicle’s posture is changed
(e.g., when driving over a bump).
– The vehicle is driven on a slippery
road.
– The vehicle is turned sharply by
turning the steering wheel fully.
– Snow chains are used.
– Wheels or tires other than NISSAN
recommended are used.
– The brakes are cold at low ambi-
ent temperatures or immediately
af ter driving has started. –
The braking force becomes poor
due to wet brakes af ter driving
through a puddle or washing the
vehicle.
• Turn the RAB system off in the follow-
ing conditions to prevent the occur-
rence of an unexpected accident re-
sulting from sudden system
operation:
– The vehicle is towed.
– The vehicle is carried on a flatbed
truck.
– The vehicle is on the chassis
dynamometer.
– The vehicle drives on an uneven
road surface.
– The vehicle is towing an object (if
so equipped).
– Suspension parts other than
those designated as Genuine
NISSAN parts are used. (If the ve-
hicle height or the vehicle body in-
clination is changed, the system
may not detect an obstacle
correctly.)
– If the vehicle is using an accessory
like a bike rack, or cargo carrier
that blocks the sensors. •
Excessive noise (e.g., audio system
volume, an open vehicle window) will
interfere with the chime sound, and it
may not be heard.
SYSTEM MALFUNCTION
If the RAB system malfunctions, it will be
turned off automatically, and the RAB sys-
tem warning light will illuminate and the
warning message “System fault See Own-
er’s Manual” in the vehicle information
display.
Action to take
If the warning light illuminates, park the ve-
hicle in a safe location, turn the engine off,
and restart the engine. If the warning light
continues to illuminate, have the RAB sys-
tem checked. It is recommended that you
visit a NISSAN dealer for this service.
NOTE:
If the RAB system cannot be operated
temporarily, the RAB system warning
light blinks.
Starting and driving5-79
Page 416 of 635

• Do not cover or attach stickers, or installany accessory near the sensors. This
could block sensor signals and/or cause
failure or malfunction.
• Do not attach metallic objects near the radar sensor (brush guard, etc.). This
could cause failure or malfunction.
• Do not place reflective materials, such as white paper or a mirror, on the instru-
ment panel. The reflection of sunlight
may adversely affect the camera unit's
detection capability.
• Do not alter, remove or paint the front bumper. Before customizing or restoring
the front bumper, it is recommended that
you visit a NISSAN dealer.
Radio frequency statement
FCC Notice
USA
FCC ID: OAYARS4B
This device complies with Part 15 of the
FCC Rules with Industry Canada Licence-
exempt RSS standard(s). Operation is subject to the following two
conditions:
1.
This device may not cause harmful in-
terference, and
2. This device must accept any interfer-
ence received, including interference
that may cause undesired operation.
Radio frequency radiation exposure
Information:
This equipment complies with FCC and IC
radiation exposure limits set forth for an
uncontrolled environment.
This equipment should be installed and
operated with minimum distance of 30
cm between the radiator and your body.
This transmitter must not be co-located
or operating in conjunction with any
other antenna or transmitter.
FCC Notice
Changes or modifications not expressly
approved by the party responsible for
compliance could void the user’s author-
ity to operate the equipment.
WARNING
Failure to follow the warnings and in-
structions for proper use of the I-FCW
system could result in serious injury or
death.
• The I-FCW system can help warn the
driver before a collision occurs but
will not avoid a collision. It is the driv-
er’s responsibility to stay alert, drive
safely and be in control of the vehicle
at all times.
The I-FCW system can help alert the driver
when there is a sudden braking of a second
vehicle traveling in front of the vehicle
ahead in the same lane.
INTELLIGENT FORWARD COLLISION
WARNING (I-FCW)
5-90Starting and driving
Page 428 of 635
This equipment should be installed and
operated with minimum distance of 30
cm between the radiator and your body.
This transmitter must not be co-located
or operating in conjunction with any
other antenna or transmitter.
FCC Notice
Changes or modifications not expressly
approved by the party responsible for
compliance could void the user’s author-
ity to operate the equipment.WARNING
Failure to follow the warnings and in-
structions for proper use of the I-DA
system could result in serious injury or
death.
• The I–DA system is only a warning to
inform the driver of a potential lack
of driver attention or drowsiness. It
will not steer the vehicle or prevent
loss of control.
• The I–DA system does not detect and
provide an alert of the driver’s lack of
attention or fatigue in every
situation.
• It is the driver’s responsibility to:
– stay alert,
– drive safely,
– keep the vehicle in the traveling lane,
– be in control of the vehicle at all times,
– avoid driving when tired,
– avoid distractions (texting, etc.). The I–DA system helps alert the driver if the
system detects a lack of attention or driv-
ing fatigue.
The system monitors driving style and
steering behavior over a period of time,
and it detects changes from the normal
pattern. If the system detects that driver
attention is decreasing over a period of
time, the system uses audible and visual
warnings to suggest that the driver take a
break.
INTELLIGENT DRIVER ALERTNESS
(I-DA)
5-102Starting and driving
Page 432 of 635
Follow these easy-to-use Fuel Efficient
Driving Tips to help you achieve the most
fuel economy from your vehicle.
1.Use Smooth Accelerator and Brake
Pedal Application
• Avoid rapid starts and stops.
• Use smooth, gentle accelerator and brake application whenever possible.
• Maintain constant speed while com- muting and coast whenever possible.
2. Maintain Constant Speed
• Look ahead to try and anticipate and minimize stops.
• Synchronizing your speed with traffic lights allows you to reduce your num-
ber of stops.
• Maintaining a steady speed can mini- mize red light stops and improve fuel
efficiency.
3. Use Air Conditioning (A/C) at Higher
Vehicle Speeds
• Below 40 mph (64 km/h), it is more efficient to open windows to cool the
vehicle due to reduced engine load.
• Above 40 mph (64 km/h), it is more efficient to use A/C to cool the vehicle
due to increased aerodynamic drag. • Recirculating the cool air in the cabin
when the A/C is on reduces cooling
load.
4. Drive at Economical Speeds and
Distances
• Observing the speed limit and not ex- ceeding 60 mph (97 km/h) (where le-
gally allowed) can improve fuel effi-
ciency due to reduced aerodynamic
drag.
• Maintaining a safe following distance behind other vehicles reduces unnec-
essary braking.
• Safely monitoring traffic to anticipate changes in speed permits reduced
braking and smooth acceleration
changes.
• Select a gear range suitable to road conditions.
5. Use Cruise Control
• Using cruise control during highway driving helps maintain a steady speed.
• Cruise control is particularly effective in providing fuel savings when driving
on flat terrains.
6. Plan for the Shortest Route
• Utilize a map or navigation system to determine the best route to save time. 7.
Avoid Idling
• Shutting off your engine when safe for stops exceeding 30–60 seconds saves
fuel and reduces emissions.
8. Buy an Automated Pass for Toll Roads
• Automated passes permit drivers to use special lanes to maintain cruising
speed through the toll and avoid stop-
ping and starting.
9. Winter Warm Up
• Limit idling time to minimize impact to fuel economy.
• Vehicles typically need no more than 30 seconds of idling at start-up to ef-
fectively circulate the engine oil before
driving.
• Your vehicle will reach its ideal operat- ing temperature more quickly while
driving versus idling.
10. Keeping your Vehicle Cool
• Park your vehicle in a covered parking area or in the shade whenever
possible.
• When entering a hot vehicle, opening the windows will help to reduce the
inside temperature faster, resulting in
reduced demand on your A/C system.
FUEL EFFICIENT DRIVING TIPS
5-106Starting and driving
Page 532 of 635
Brakes:Check that the brakes do not pull
the vehicle to one side when applied.
Parking brake: Check the parking brake
operation regularly. The vehicle should be
securely held on a fairly steep hill with only
the parking brake applied. If the parking
brake needs adjustment, it is recom-
mended that you visit a NISSAN dealer for
this service.
Seats: Check seat position controls such
as seat adjusters, seatback recliner, etc., to
ensure they operate smoothly and all
latches lock securely in every position.
Check that the head restraints/headrests
move up and down smoothly and the locks
(if so equipped) hold securely in all latched
positions.
Seat belts: Check that all parts of the seat
belt system (for example, buckles, anchors,
adjusters and retractors) operate properly
and smoothly, and are installed securely.
Check the belt webbing for cuts, fraying,
wear or damage.
Steering wheel: Check for changes in the
steering system, such as excessive free-
play, hard steering or strange noises.
Warning lights and chimes: Make sure all
warning lights and chimes are operating
properly. Windshield wiper and washer*:
Check
that the wipers and washer operate prop-
erly and that the wipers do not streak.
Windshield defroster: Check that the air
comes out of the defroster outlets properly
and in sufficient quantity when operating
the heater or air conditioner.
Under the hood and vehicle
The maintenance items listed here should
be checked periodically (for example, each
time you check the engine oil or refuel).
Battery* (for maintenance free batter-
ies): For vehicles equipped with a sealed
maintenance free battery. It is recom-
mended that you visit a NISSAN dealer for
service.
Battery* (for serviceable batteries):
Check the fluid level in each cell. The fluid
should be at the bottom of the filler open-
ing. Vehicles operated in high tempera-
tures or under severe conditions require
frequent checks of the battery fluid level.
NOTE:
Care should be taken to avoid situations
that can lead to potential battery dis-
charge and potential no-start conditions
such as:
1. Installation or extended use of elec- tronic accessories that consume bat-
tery power when the engine is not
running (Phone chargers, GPS, DVD
players, etc.).
2. Vehicle is not driven regularly and/or only driven short distances.
In these cases, the battery may need to
be charged to maintain battery health.
Brake fluid level*: Make sure that the brake
fluid level is between the MIN and MAX lines
on the reservoir.
Engine coolant level*: Check the coolant
level when the engine is cold.
Engine drive belts*: Make sure the drive
belts are not frayed, worn, cracked or oily.
Engine oil level*: Check the level af ter
parking the vehicle on a level surface with
the engine off. Wait more than 10 minutes
for the oil to drain back into the oil pan.
9-4Maintenance and schedules