2022 NISSAN TITAN parking brake
[x] Cancel search: parking brakePage 131 of 635

Driver Assistance
The driver assistance menu allows the user to change the various driving and parking aids.
Some menu items shown below may not be equipped on your vehicle.
Menu itemExplanation
Lane Displays available lane options.
Warning (LDW) Allows user to turn the Lane Departure Warning (LDW) system on or off. For additional information, see “Lane Departure
Warning (LDW)” (P. 5-27).
Blind Spot Displays available blind spot options.
Warning (BSW) Allows user to turn the Blind Spot Warning (BSW) system on or off. For additional information, see “Blind Spot Warning (BSW)”
(P. 5-32).
Emergency Brake Displays available emergency brake options.
Front Allows user to turn the front emergency braking system on or off. For additional information, see “Automatic Emergency
Braking (AEB) with Pedestrian Detection” (P. 5-80) and “Intelligent Forward Collision Warning (I-FCW)” (P. 5-90).
Rear Allows user to turn the rear emergency braking system on or off. For additional information, see “Rear Automatic Braking
(RAB)” (P. 5-75).
Traffic Sign Allows use to turn the Speed Limit Sign recognition on or off. For additional information, see “Traffic Sign Recognition (TSR)”
(P. 5-24).
Driver Attention Allows user to turn the Intelligent Driver Alertness system on or off. For additional information, see “Intelligent Driver Alertne ss
(I-DA)” (P. 5-102).
Parking Aids Displays available parking aids.
Moving Object Allows user to turn the Moving Object Detection (MOD) on or off. For additional information, see “Moving Object Detection
(MOD)” (P. 4-23).
CTA Allows user to turn the Rear Cross Traffic Alert (RCTA) system on or off. For additional information, see “Rear Cross Traffic Alert
(RCTA)” (P. 5-42).
Sensor Allows the user to enable and disable the front and rear sensors.
Display Allows user to turn the display on or off in the vehicle information display.
Volume Allows user to adjust the volume of warning chimes.
Range Allows user to set a specific range for the sensors to engage.
Instruments and controls2-25
Page 141 of 635

Release Parking Brake
This warning appears in the message area
of the vehicle information display when the
parking brake is set and the vehicle is
driven. Press the brake pedal to release the
parking brake.
Reminder: Turn OFF
Headlights
This warning appears when the headlights
are lef t in the ON position when exiting the
vehicle. Place the headlight switch in the
OFF or AUTO position. For additional infor-
mation, see “Headlight control switch”
(P. 2-45).
Remote Engine Start Mode
This warning appears in the vehicle infor-
mation display when the vehicle has been
started using the remote start function. To
start the vehicle, apply the brake and place
the ignition switch in the ON position.
Shif t to Park
This warning appears when the ignition
switch is in the ACC or OFF position and the
shif t lever is not in the P (Park) position. Also,
a chime sounds when the ignition switch is
in the ACC or OFF position.If this warning appears, move the shif t lever
to the P (Park) position and start the engine.
Shipping Mode On Push Storage Fuse
This warning may appear if the extended
storage switch is not pushed in. When this
warning appears, push in the extended
storage switch to turn off the warning. For
additional information, see “Extended stor-
age switch” (P. 2-69).
Tire Pressure Low - Add Air
This warning appears when the low tire
pressure warning light in the meter illumi-
nates and low tire pressure is detected. The
warning appears each time the ignition
switch is placed in the ON position as long
as the low tire pressure warning light re-
mains illuminated. If this warning appears,
stop the vehicle and adjust the tire pres-
sures of all four tires to the recommended
COLD tire pressure shown on the Tire and
Loading Information label. For additional
information, see “Low tire pressure warning
light” (P. 2-18) and “Tire Pressure Monitoring
System (TPMS)” (P. 5-5).
TPMS Error: See Owner’s Manual
This warning appears when there is an er-
ror with your TPMS. If this warning appears,
have the system checked. It is recom-
mended that you visit a NISSAN dealer for
this service.
When parked apply parking
brake
This message appears when a malfunc-
tion occurs in the electric shif t control sys-
tem below 3 mph (5 km/h).
Have the system checked. It is recom-
mended that you visit a NISSAN dealer for
this service.
4WD Error: See Owner’s
Manual
This warning appears when the 4-wheel
drive system is not functioning properly
while the engine is running.
Tire Size Incorrect: See
Owner’s Manual
This warning appears when the 4-wheel
drive system is not functioning properly
while the engine is running.
Instruments and controls2-35
Page 156 of 635

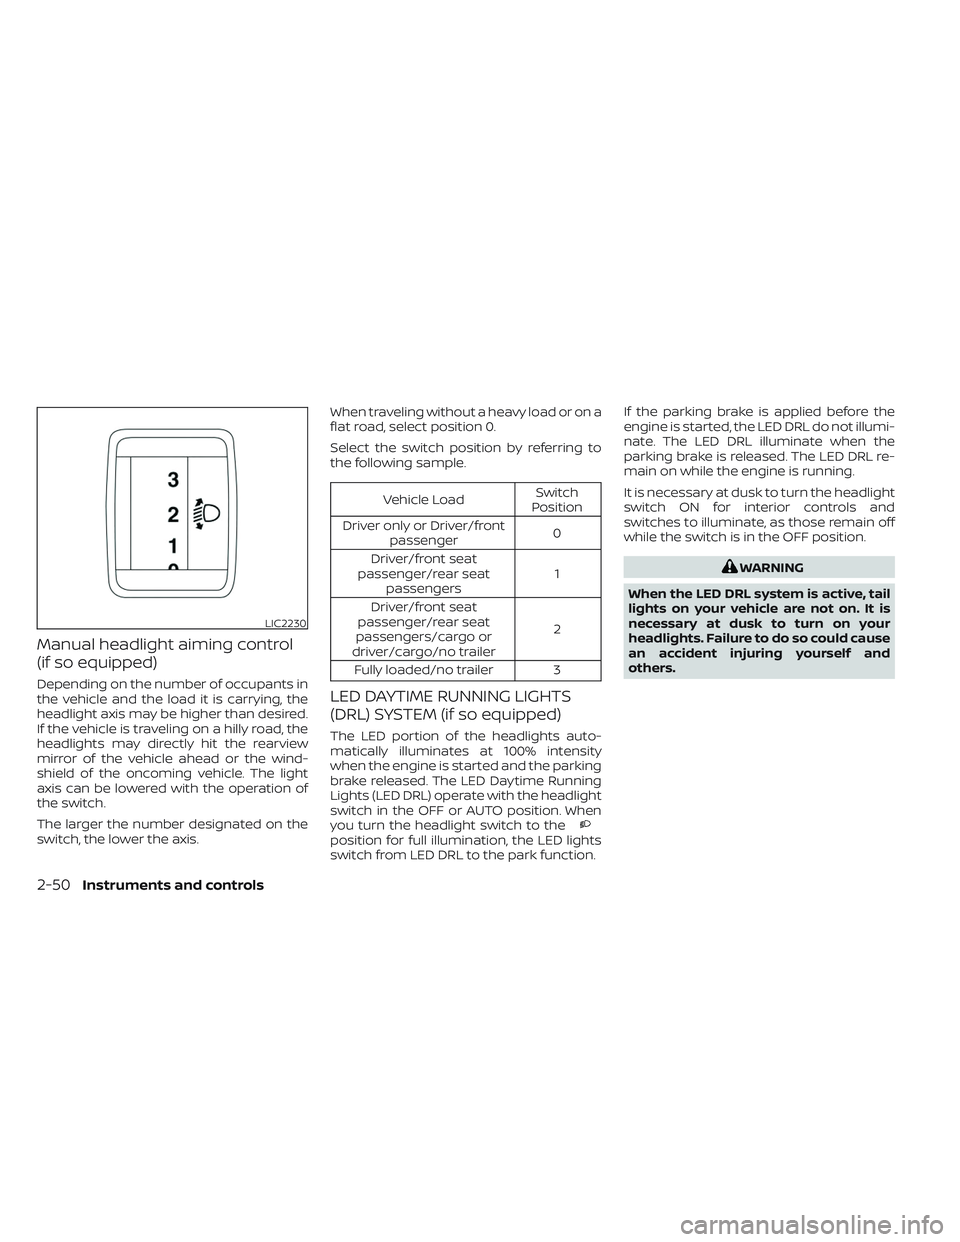
Manual headlight aiming control
(if so equipped)
Depending on the number of occupants in
the vehicle and the load it is carrying, the
headlight axis may be higher than desired.
If the vehicle is traveling on a hilly road, the
headlights may directly hit the rearview
mirror of the vehicle ahead or the wind-
shield of the oncoming vehicle. The light
axis can be lowered with the operation of
the switch.
The larger the number designated on the
switch, the lower the axis.When traveling without a heavy load or on a
flat road, select position 0.
Select the switch position by referring to
the following sample.
Vehicle Load
Switch
Position
Driver only or Driver/front passenger 0
Driver/front seat
passenger/rear seat passengers 1
Driver/front seat
passenger/rear seat
passengers/cargo or
driver/cargo/no trailer 2
Fully loaded/no trailer 3
LED DAYTIME RUNNING LIGHTS
(DRL) SYSTEM (if so equipped)
The LED portion of the headlights auto-
matically illuminates at 100% intensity
when the engine is started and the parking
brake released. The LED Daytime Running
Lights (LED DRL) operate with the headlight
switch in the OFF or AUTO position. When
you turn the headlight switch to the
position for full illumination, the LED lights
switch from LED DRL to the park function. If the parking brake is applied before the
engine is started, the LED DRL do not illumi-
nate. The LED DRL illuminate when the
parking brake is released. The LED DRL re-
main on while the engine is running.
It is necessary at dusk to turn the headlight
switch ON for interior controls and
switches to illuminate, as those remain off
while the switch is in the OFF position.
WARNING
When the LED DRL system is active, tail
lights on your vehicle are not on. It is
necessary at dusk to turn on your
headlights. Failure to do so could cause
an accident injuring yourself and
others.
LIC2230
2-50Instruments and controls
Page 221 of 635

CAUTION
When the Intelligent Key battery is dis-
charged or other strong radio wave
sources are present near the operating
location, the Intelligent Key operating
range becomes narrower, and the Intel-
ligent Key may not function properly.
The Remote Engine Start function can only
be used when the Intelligent Key is within
the specified operating range from the
vehicle.
The Remote Engine Start operating range
is approximately 197 f t (60 m) from the
vehicle.
REMOTE STARTING THE VEHICLE
To use the Remote Engine Start feature to
start the engine perform the following:
1. Aim the Intelligent Key at the vehicle.
2. Press the
button to lock all doors.
3. Within 5 seconds press and hold the
button until the turn signal lights
flash and the tail lamps turn on. If the
vehicle is not within view press and hold
the
button for at least 2 seconds. The following events will occur when the
engine starts:
• The parking lights will turn on and remain
on as long as the engine is running.
• The doors will be locked and the climate control system may come on.
• The engine will continue to run for 10 min- utes. Repeat the steps to extend the time
for an additional 10 minutes. For addi-
tional information, see “Extending engine
run time” (P. 3-21).
Press and hold the brake then push the
push-button ignition switch to the ON po-
sition before driving. For additional infor-
mation, see “Driving the vehicle” (P. 5-18)).
EXTENDING ENGINE RUN TIME
The Remote Engine Start feature can be
extended one time by performing the
steps listed in “Remote starting the vehicle”
in this section. Run time will be calculated
as follows:
• The first 10 minute run time will start when the Remote Engine Start function is
performed. • The second 10 minutes will start immedi-
ately when the Remote Engine Start
function is performed again. For example,
if the engine has been running for 5 min-
utes, and 10 minutes are added, the en-
gine will run for a total of 15 minutes.
• Extending engine run time will count to- wards the two Remote Engine Start limit.
A maximum of two Remote Engine Starts,
or a single Remote Engine Start with an
extension, are allowed between ignition
cycles. The ignition switch must be cycled
to the ON position and then back to the
OFF position before the Remote Engine
Start procedure can be used again.
CANCELING A REMOTE ENGINE
START
To cancel a Remote Engine Start, perform
one of the following:
• Aim the Intelligent Key at the vehicle and press
until the parking lights turn off.
• Turn on the hazard warning flashers.
• Cycle the ignition switch on and then off.
• The extended engine run time has expired.
• The first 10 minute timer has expired.
• The engine hood has been opened.
Pre-driving checks and adjustments3-21
Page 250 of 635

4. Maneuver the steering wheel to makethe vehicle width guide lines
ODparallel
to the parking space
OCwhile referring
to the predicted course lines.
5. When the vehicle is parked in the space completely, move the shif t lever to the P
(Park) position and apply the parking
brake.
ADJUSTING THE SCREEN
1. Press the CAMERA button.
2. Touch the “Display Settings” key.
3. Touch the “Brightness”, “Contrast”, Tint”,“Color”, or “Black Level” key.
4. Adjust the item by touching the “+” or “–” key on the touch-screen display.
NOTE:
Do not adjust any of the display settings
of the RearView Monitor while the ve-
hicle is moving.
HOW TO TURN ON AND OFF
PREDICTED COURSE LINES
To toggle ON and OFF the predicted course
lines while in the P (Park) position:
1. Press the CAMERA button.
2. Touch the “Predicted Course Lines” keyto turn the feature ON or OFF.
To toggle ON and OFF the predicted course
lines or center guide line while in the R (Re-
verse) position, press the CAMERA button.
REARVIEW MONITOR SYSTEM
LIMITATIONS
WARNING
Listed below are the system limitations
for RearView Monitor. Failure to oper-
ate the vehicle in accordance with
these system limitations could result in
serious injury or death.
• The system cannot completely elimi-
nate blind spots and may not show
every object.
LHA3522
4-8Monitor, climate, audio, phone and voice recognition systems
Page 261 of 635

4. Maneuver the steering wheel to makethe vehicle width guide lines
ODparallel
to the parking space
OCwhile referring
to the predicted course lines.
5. When the vehicle is parked in the space completely, move the shif t lever to the P
(Park) position and apply the parking
brake.
HOW TO SWITCH THE DISPLAY
With the ignition switch in the ON position,
press the CAMERA button or move the shif t
lever to the R (Reverse) position to operate
the Intelligent Around View® Monitor.
The Intelligent Around View® Monitor dis-
plays different split screen views depend-
ing on the position of the shif t lever. Press
the CAMERA button to switch between the
available views.
If the shif t lever is in the R (Reverse) position,
the available views are:
• Rear view/bird’s-eye view split screen
• Rear view/front-side view split screen If the shif t lever is in the P (Park) or D (Drive)
position, the available views are:
• Front view/bird’s-eye view split screen
• Front view/front-side view split screen
The display will switch from the Intelligent
Around View® Monitor screen when:
• The shif t lever is in the D (Drive) position
and the vehicle speed increases above
approximately 6 mph (10 km/h)
• A different screen is selected.
ADJUSTING THE SCREEN
1. Touch the “Settings” key.
2. Touch the “Camera” key.
3. Touch the “Display Settings” key.
4. Touch the “Brightness”, “Contrast”, Tint”, “Color”, or “Black Level” key.
5. Adjust the item by touching the “+” or “–” key on the touch-screen display.
LHA5379
Monitor, climate, audio, phone and voice recognition systems4-19
Page 262 of 635

NOTE:
Do not adjust any of the display settings
of the Intelligent Around View® Monitor
while the vehicle is moving. Make sure
the parking brake is firmly applied.
INTELLIGENT AROUND VIEW®
MONITOR SYSTEM LIMITATIONS
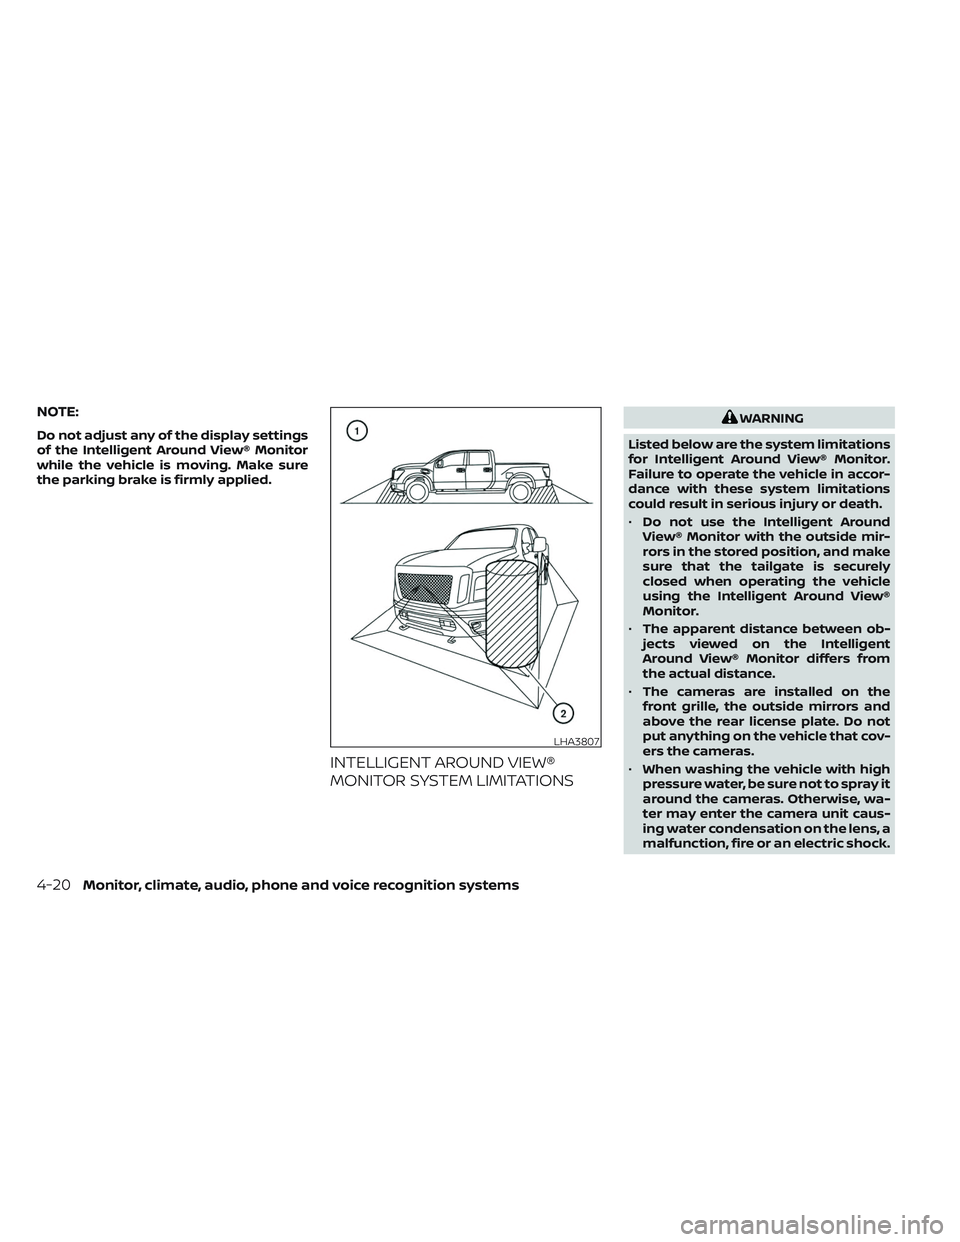
WARNING
Listed below are the system limitations
for Intelligent Around View® Monitor.
Failure to operate the vehicle in accor-
dance with these system limitations
could result in serious injury or death.
• Do not use the Intelligent Around
View® Monitor with the outside mir-
rors in the stored position, and make
sure that the tailgate is securely
closed when operating the vehicle
using the Intelligent Around View®
Monitor.
• The apparent distance between ob-
jects viewed on the Intelligent
Around View® Monitor differs from
the actual distance.
• The cameras are installed on the
front grille, the outside mirrors and
above the rear license plate. Do not
put anything on the vehicle that cov-
ers the cameras.
• When washing the vehicle with high
pressure water, be sure not to spray it
around the cameras. Otherwise, wa-
ter may enter the camera unit caus-
ing water condensation on the lens, a
malfunction, fire or an electric shock.
LHA3807
4-20Monitor, climate, audio, phone and voice recognition systems
Page 327 of 635

5 Starting and driving
Precautions when starting and driving..........5-4
Exhaust gas (carbon monoxide) ..............5-4
Three-way catalyst (if so equipped) ...........5-4
Tire Pressure Monitoring System
(TPMS) .......................................5-5
On-pavement and off-road driving
precautions ..................................5-8
Avoiding collision and rollover ................5-9
Off-roadrecovery ............................5-9
Rapid air pressure loss .......................5-9
Drinking alcohol/drugs and driving ..........5-10
Driving safety precautions ....................5-11
Push-button ignition switch ....................5-13
Operating range ............................ 5-14
Push-button ignition switch positions .......5-14
Emergency engine shut off ..................5-15
NISSAN Intelligent Key® battery
discharge ................................... 5-15
NISSAN Vehicle Immobilizer System .........5-16
Before starting the engine .....................5-16
Starting the engine ............................. 5-17
Remote Engine Start (if so equipped) ........5-18
Driving the vehicle .............................. 5-18
Engine protection mode ....................5-18
Automatic transmission (A/T) ...............5-19
Parking brake .................................. 5-23Traffic Sign Recognition (TSR) (if so equipped) . . . 5-24
System operation ........................... 5-25
Turning the Traffic Sign Recognition
(TSR) system on and off .....................5-26
System temporarily unavailable .............5-26
System malfunction ......................... 5-26
System maintenance .......................5-26
Lane Departure Warning (LDW) .................5-27
LDW system operation ......................5-28
How to enable/disable the LDW system .....5-29
LDW system limitations .....................5-30
System temporarily disabled ................5-31
System malfunction ......................... 5-31
System maintenance ....................... 5-31
Blind Spot Warning (BSW) .......................5-32
BSW system operation ......................5-34
How to enable/disable the BSW system .....5-34
BS
W system limitations .....................5-35
BSW driving situations .......................5-36
System temporarily disabled ................5-40
System maintenance ....................... 5-41
RearCrossTrafficAlert(RCTA) .................. 5-42
RCTA system operation .....................5-42
How to enable/disable the RCTA
system ...................................... 5-44
RCTA system limitations .....................5-45