Page 207 of 528
Menu ItemResult
Selecting the item Touch an item to select. To select the “Phone” key, touch the “Phone” key on the screen. Touch the “
”keyto
return to the previous screen.
Adjusting the item Touch the “+” key or the “−” key to adjust the settings of an item. Touch the up arrow to scroll up the page one
item at a time. Touch the down arrow to scroll down the page one item at a time.
Inputting characters Touch the number key. There are some options available when inputting characters.
123 Touch to manually enter numbers.
OK Completes the character input.
Touch-screen maintenance
If you clean the display screen, use a dry,
sof t cloth. If additional cleaning is neces-
sary, use a small amount of neutral deter-
gent with a sof t cloth. Never spray the
screen with water or detergent. Dampen
the cloth first and then wipe the screen.
Monitor, climate, audio, phone and voice recognition systems4-5
Page 208 of 528
HOW TO USE THEMENU
BUTTON
To select and/or adjust several functions,
features and modes that are available for
your vehicle:
1. Press the
MENU button.
2. Touch the “Settings” key.
3. Touch the desired item.
LHA5319LHA5318
4-6Monitor, climate, audio, phone and voice recognition systems
Page 209 of 528

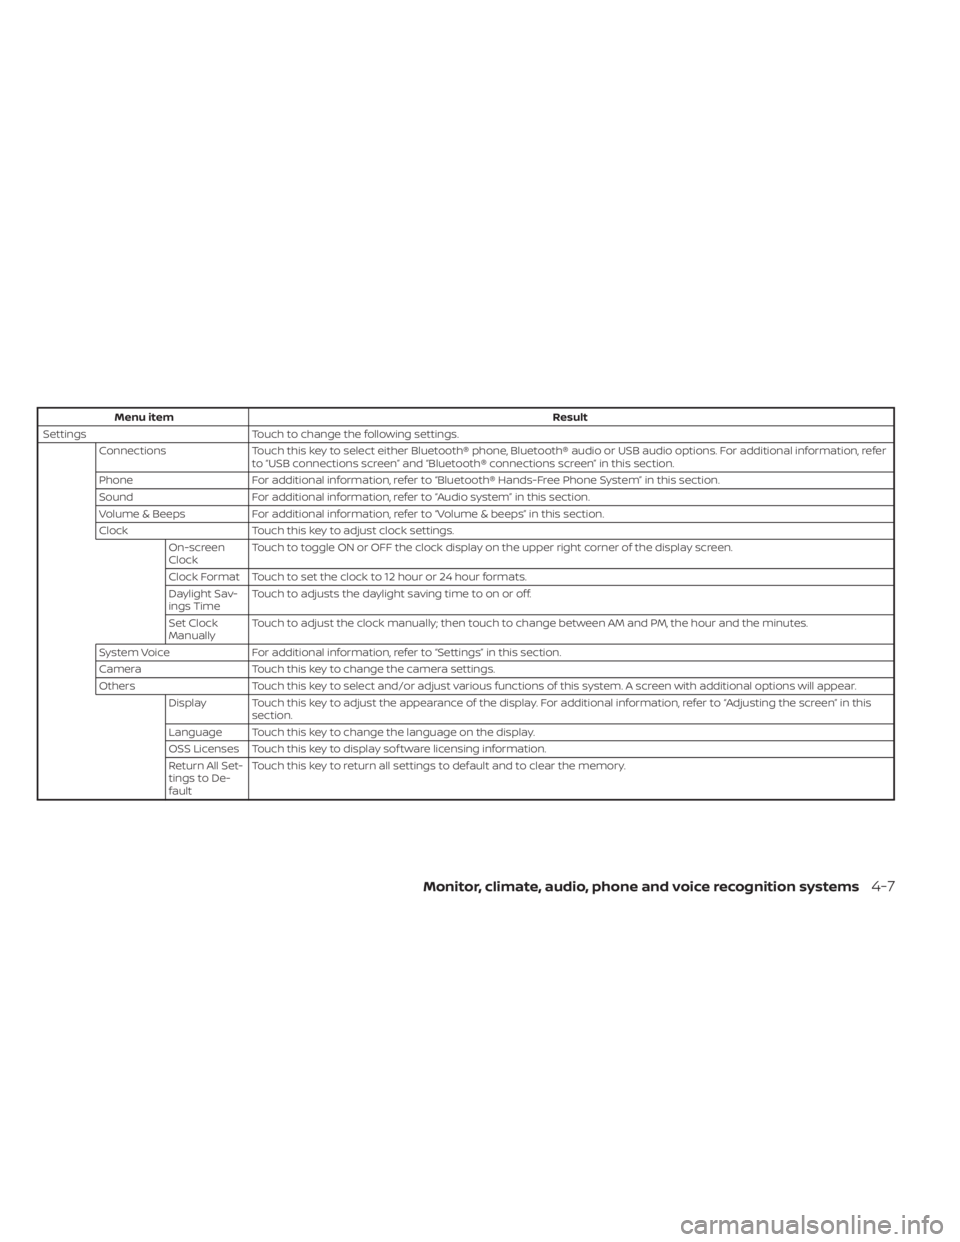
Menu itemResult
Settings Touch to change the following settings.
Connections Touch this key to select either Bluetooth® phone, Bluetooth® audio or USB audio options. For additional information, refer
to “USB connections screen” and “Bluetooth® connections screen” in this section.
Phone For additional information, refer to “Bluetooth® Hands-Free Phone System” in this section.
Sound For additional information, refer to “Audio system” in this section.
Volume & Beeps For additional information, refer to “Volume & beeps” in this section.
Clock Touch this key to adjust clock settings.
On-screen
Clock Touch to toggle ON or OFF the clock display on the upper right corner of the display screen.
Clock Format Touch to set the clock to 12 hour or 24 hour formats.
Daylight Sav-
ings Time Touch to adjusts the daylight saving time to on or off.
Set Clock
Manually Touch to adjust the clock manually; then touch to change between AM and PM, the hour and the minutes.
System Voice For additional information, refer to “Settings” in this section.
Camera Touch this key to change the camera settings.
Others Touch this key to select and/or adjust various functions of this system. A screen with additional options will appear.
Display Touch this key to adjust the appearance of the display. For additional information, refer to “Adjusting the screen” in this section.
Language Touch this key to change the language on the display.
OSS Licenses Touch this key to display sof tware licensing information.
Return All Set-
tings to De-
fault Touch this key to return all settings to default and to clear the memory.
Monitor, climate, audio, phone and voice recognition systems4-7
Page 210 of 528
(brightness control) BUTTON
To change the display brightness, press thebutton. Pressing the button again will
change the display to the day or the night
display.
Press and hold the
button for more
than 2 seconds to turn the display off. Press
and hold the button again to turn the dis-
play on.
HOW TO USE THE VOL (volume)
KNOB / PUSH
(power)
BUTTON
Press the PUSH(power) button to turn
audio function on and off. Turn the VOL
(volume) knob to adjust audio volume.
SELECTING MENU FROM LAUNCH
BAR
Various system functions can be accessed
by touching the items on the Launch Bar
O1which is displayed on most of the main
menu screens (the Launch Bar does not
appear on some screens such as settings
screens, camera screens, etc.)
Touch the keys on the Launch Bar to dis-
play the corresponding menu screens. The following menu items are available on
the Launch Bar:
•AM
•FM
• USB/iPod
• Bluetooth
•AUX
• Settings
LHA4707
4-8Monitor, climate, audio, phone and voice recognition systems
Page 216 of 528
ADJUSTING THE SCREEN
1. While on the main menu screen, touchthe “Settings” key.
2. Touch the “Camera” key.
3. Touch the “Brightness”, “Contrast”, Tint”, “Color”, or “Black Level” key.
4. Adjust the item by touching the “+” or “–” key on the touch-screen display.
NOTE:
Do not adjust any of the display settings
of the RearView Monitor while the ve-
hicle is moving.
HOW TO TURN ON AND OFF
PREDICTED COURSE LINES (if so
equipped)
To toggle ON and OFF the predicted course
lines while in the P (Park) position:
1. Touch the “Settings” key.
2. Touch the “Camera” key.
3. Touch the “Predicted Course Lines” keyto turn the feature ON or OFF.
REARVIEW MONITOR SYSTEM
LIMITATIONS
4-14Monitor, climate, audio, phone and voice recognition systems
Page 226 of 528

5. When the vehicle is parked in the spacecompletely, move the shif t lever to the P
(Park) position and apply the parking
brake.
HOW TO SWITCH THE DISPLAY
With the ignition switch in the ON position,
press the CAMERA button or move the shif t
lever to the R (Reverse) position to operate
the Intelligent Around View Monitor.
The Intelligent Around View Monitor dis-
plays different split screen views depend-
ing on the position of the shif t lever. Press
the CAMERA button to switch between the
available views.
If the shif t lever is in the R (Reverse) position,
the available views are:
• Rear view/bird’s-eye view split screen
• Rear view/front-side view split screen
• Full screen rear view
If the shif t lever is in the P (Park) or D (Drive)
position, the available views are:
• Front view/bird’s-eye view split screen
• Front view/front-side view split screen The display will switch from the Intelligent
Around View Monitor screen when:
• The shif t lever is in the D (Drive) position
and the vehicle speed increases above
approximately 6 mph (10 km/h)
• A different screen is selected.
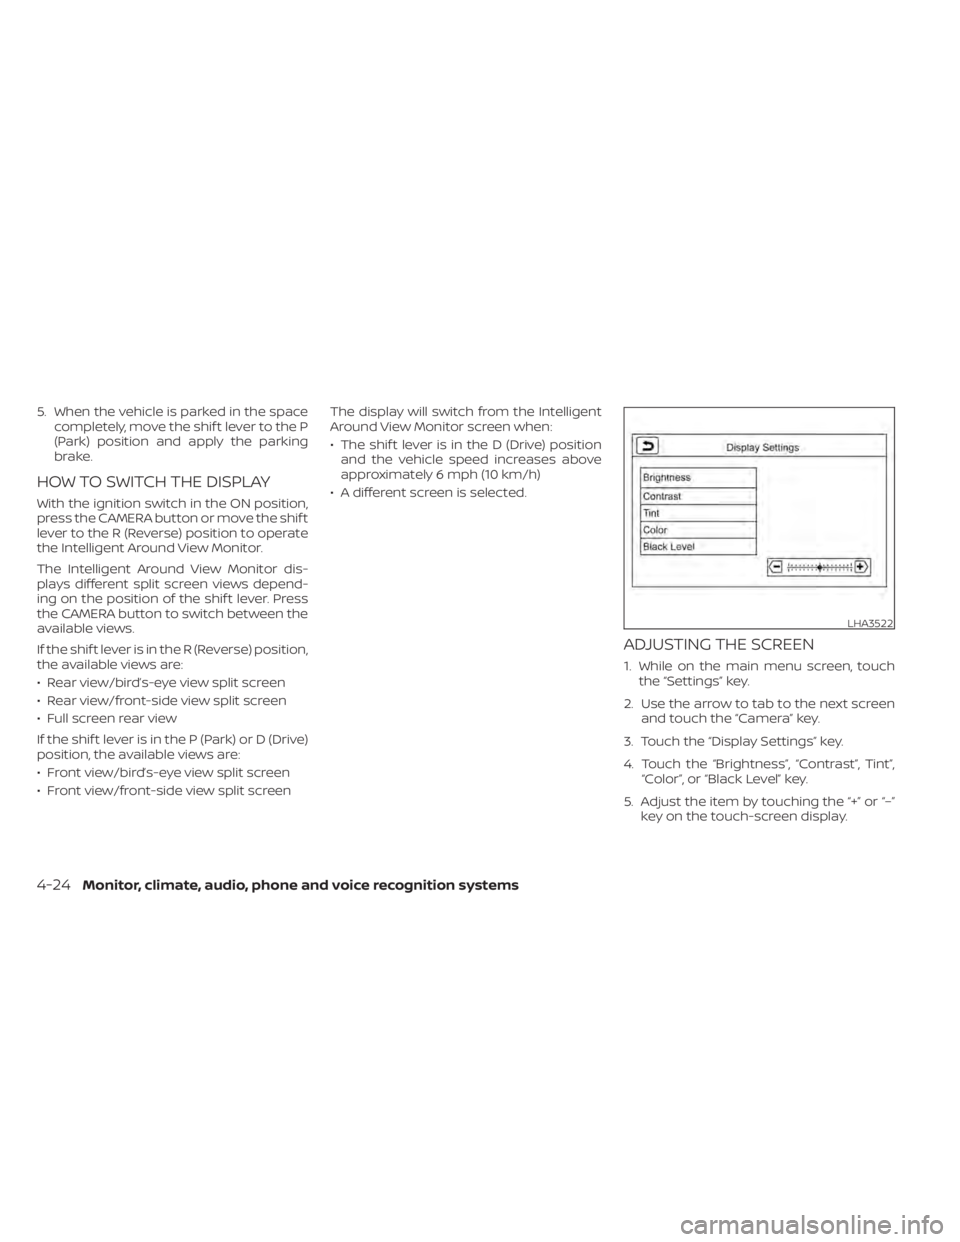
ADJUSTING THE SCREEN
1. While on the main menu screen, touch the “Settings” key.
2. Use the arrow to tab to the next screen and touch the “Camera” key.
3. Touch the “Display Settings” key.
4. Touch the “Brightness”, “Contrast”, Tint”, “Color”, or “Black Level” key.
5. Adjust the item by touching the “+” or “–” key on the touch-screen display.
LHA3522
4-24Monitor, climate, audio, phone and voice recognition systems
Page 243 of 528

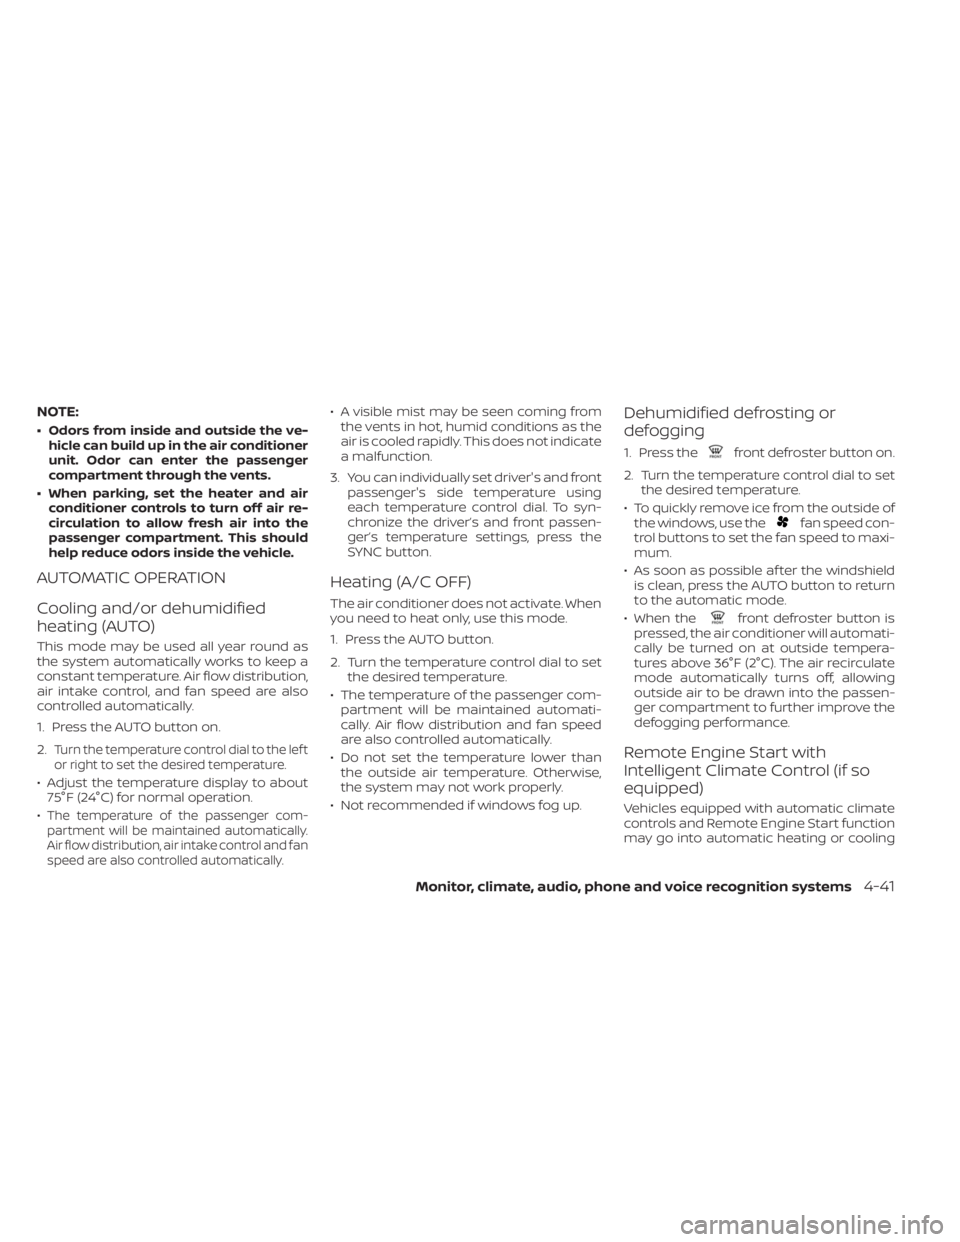
NOTE:
• Odors from inside and outside the ve-hicle can build up in the air conditioner
unit. Odor can enter the passenger
compartment through the vents.
• When parking, set the heater and air conditioner controls to turn off air re-
circulation to allow fresh air into the
passenger compartment. This should
help reduce odors inside the vehicle.
AUTOMATIC OPERATION
Cooling and/or dehumidified
heating (AUTO)
This mode may be used all year round as
the system automatically works to keep a
constant temperature. Air flow distribution,
air intake control, and fan speed are also
controlled automatically.
1. Press the AUTO button on.
2.
Turn the temperature control dial to the lef t
or right to set the desired temperature.
• Adjust the temperature display to about 75°F (24°C) for normal operation.
•
The temperature of the passenger com-
partment will be maintained automatically.
Air flow distribution, air intake control and fan
speed are also controlled automatically.
• A visible mist may be seen coming from the vents in hot, humid conditions as the
air is cooled rapidly. This does not indicate
a malfunction.
3. You can individually set driver's and front passenger's side temperature using
each temperature control dial. To syn-
chronize the driver’s and front passen-
ger’s temperature settings, press the
SYNC button.
Heating (A/C OFF)
The air conditioner does not activate. When
you need to heat only, use this mode.
1. Press the AUTO button.
2. Turn the temperature control dial to set the desired temperature.
• The temperature of the passenger com- partment will be maintained automati-
cally. Air flow distribution and fan speed
are also controlled automatically.
• Do not set the temperature lower than the outside air temperature. Otherwise,
the system may not work properly.
• Not recommended if windows fog up.
Dehumidified defrosting or
defogging
1. Press thefront defroster button on.
2. Turn the temperature control dial to set the desired temperature.
• To quickly remove ice from the outside of the windows, use the
fan speed con-
trol buttons to set the fan speed to maxi-
mum.
• As soon as possible af ter the windshield is clean, press the AUTO button to return
to the automatic mode.
• When the
front defroster button is
pressed, the air conditioner will automati-
cally be turned on at outside tempera-
tures above 36°F (2°C). The air recirculate
mode automatically turns off, allowing
outside air to be drawn into the passen-
ger compartment to further improve the
defogging performance.
Remote Engine Start with
Intelligent Climate Control (if so
equipped)
Vehicles equipped with automatic climate
controls and Remote Engine Start function
may go into automatic heating or cooling
Monitor, climate, audio, phone and voice recognition systems4-41
Page 245 of 528

Synchronize climate settings
Press the SYNC button to synchronize cli-
mate settings. The sync indicator will turn
on.
Pressing SYNC will synchronize driver's and
front passenger's climate settings.
To change climate settings when SYNC is
active (the SYNC indicator is on):
• The driver's side temperature control dialwill control the driver and front passenger
temperatures.
• The fan speed control dial will control the fan speeds.
To exit SYNC:
• To remove the front passenger from SYNC, turn the passenger's side tem-
perature control dial.
• Pressing SYNC multiple times will re- activate SYNC.
To turn system off
Press the ON-OFF button.
Rear window and outside mirror
defroster switch
For additional information, refer to “Rear
window and outside mirror (if so equipped)
defroster switch” in the “Instruments and
controls” section of this manual.
Heated seat switches (if so
equipped)
For additional information, refer to “Heated
seat switches” in the “Instruments and con-
trols” section of this manual.
Heated steering wheel switch (if
so equipped)
For additional information, refer to “Heated
steering wheel switch” in the “Instruments
and controls” section of this manual.
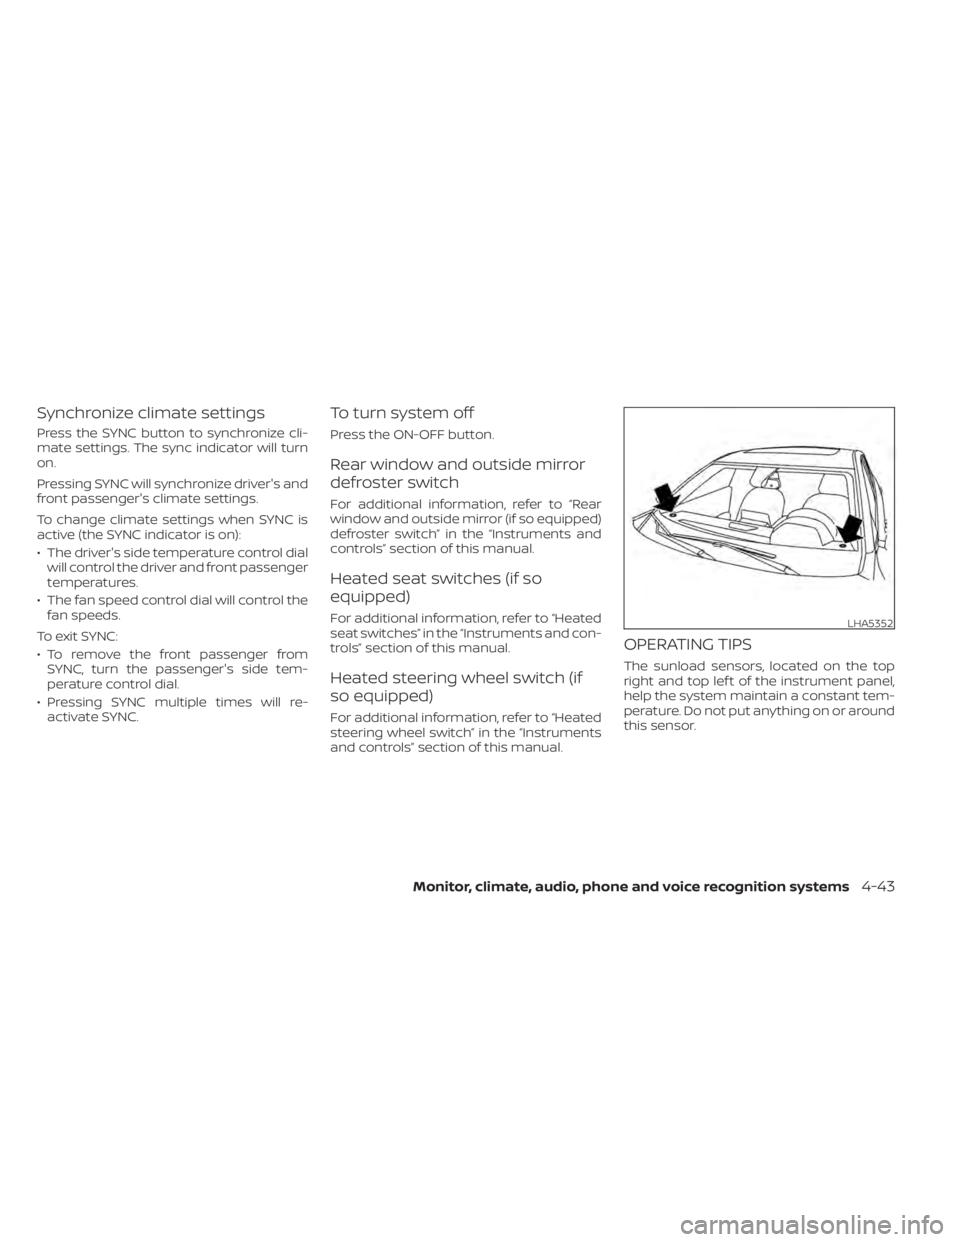
OPERATING TIPS
The sunload sensors, located on the top
right and top lef t of the instrument panel,
help the system maintain a constant tem-
perature. Do not put anything on or around
this sensor.
LHA5352