Page 18 of 528
1. Headlight/fog light (if so equipped)/turn signal switch (P. 2-55)
2. Steering wheel switch (P. 2-17) Audio controls (P. 4-45)
Bluetooth® Hands-Free Phone System
(P. 4-67)
3. Driver's supplemental air bag (P. 1-44) Horn (P. 2-62)
4. Meters and gauges (P. 2-4) Warning and indicators lights (P. 2-8)
Vehicle information display (P. 2-17),
(P. 2-34)
5. Cruise control switches (P. 5-58) Intelligent Cruise Control (ICC) switches
(if so equipped) (P. 5-59)
Bluetooth® Hands-Free Phone System
(P. 4-67)
6. Wiper and washer switch (P. 2-54)
7. Vents (P. 4-32)
8. Hazard warning flasher switch (P. 6-2)
9. Front passenger air bag status light
(P. 1-44)
10. Audio system (P. 4-45)
11. Front passenger supplemental air bag
(P. 1-44)
12. Glove box (P. 2-66)
13. Passenger supplemental knee air bag
(P. 1-44)
14. Shif t lever (P. 5-16)
15. Push-button ignition switch (P. 5-11)
16. Climate controls (P. 4-33, 4-40)
LII2638
INSTRUMENT PANEL
Page 92 of 528
1. Headlight/fog light (if so equipped)/turn signal switch (P. 2-55)
2. Steering wheel switch (P. 2-17) Audio controls (P. 4-45)
Bluetooth® Hands-Free Phone System
(P. 4-67)
3. Driver's supplemental air bag (P. 1-44) Horn (P. 2-62)
4. Meters and gauges (P. 2-4) Warning and indicators lights (P. 2-8)
Vehicle information display (P. 2-17),
(P. 2-34)
5. Cruise control switches (P. 5-58) Intelligent Cruise Control (ICC) switches
(if so equipped) (P. 5-59)
Bluetooth® Hands-Free Phone System
(P. 4-67)
6. Wiper and washer switch (P. 2-54)
7. Vents (P. 4-32)
8. Hazard warning flasher switch (P. 6-2)
9. Front passenger air bag status light
(P. 1-44)
10. Audio system (P. 4-45)
11. Front passenger supplemental air bag
(P. 1-44)
12. Glove box (P. 2-66)
13. Passenger supplemental knee air bag
(P. 1-44)
14. Shif t lever (P. 5-16)
15. Push-button ignition switch (P. 5-11)
16. Climate controls (P. 4-33, 4-40)
LII2638
INSTRUMENT PANEL
Page 124 of 528
The vehicle information display is located
to the lef t of the speedometer. It displays
such items as:
• Vehicle settings
• Drive computer information
• Drive system warnings and settings
• Cruise control system information
• NISSAN Intelligent Key® operation infor-mation
• Indicators and warnings
• Tire pressure information
• Audio information
• Bluetooth® Hands-free Phone informa- tion • Driving Aids
• Odometer/twin trip odometer
• Distance to empty
• Clock and outside temperatureHOW TO USE THE VEHICLE
INFORMATION DISPLAY
The vehicle information display can be
changed using the,, and OK buttons located on the steer-
ing wheel.
�1
LIC3224LIC3566
VEHICLE INFORMATION DISPLAY– 7
INCH (18 cm) TYPE B (if so equipped)
Page 204 of 528
Refer to the NissanConnect® Owner’s
Manual that includes the following infor-
mation.
• NissanConnect® Services (if so equipped)
• Audio system
• Apple CarPlay®
• Android Auto
TM
• Bluetooth® Hands-Free Phone system
• Viewing information
• Other settings
• Voice recognition
• General system information
Page 205 of 528
1. Display screen
2. TUNE·SCROLL knob / PUSH SOUNDbutton
3.
BACK button
4. DISP button 5.
button*
6.
MENU button
7.
(brightness control) button
8. VOL (volume) knob / PUSH
(power)
button * For additional information regarding the
Bluetooth® Hands-Free Phone System
control button, refer to “Bluetooth® Hands-
Free Phone System” in this section.
When you use this system, make sure the
engine is running.
If you use the system with the engine not
running for a long time, it will discharge
the battery, and the engine will not start.
Reference symbols:
“Example” — Words marked in quotes refer
to a key shown only on the display. These
keys can be selected by touching the
screen.
LHA4960
CONTROL PANEL BUTTONS
Monitor, climate, audio, phone and voice recognition systems4-3
Page 209 of 528

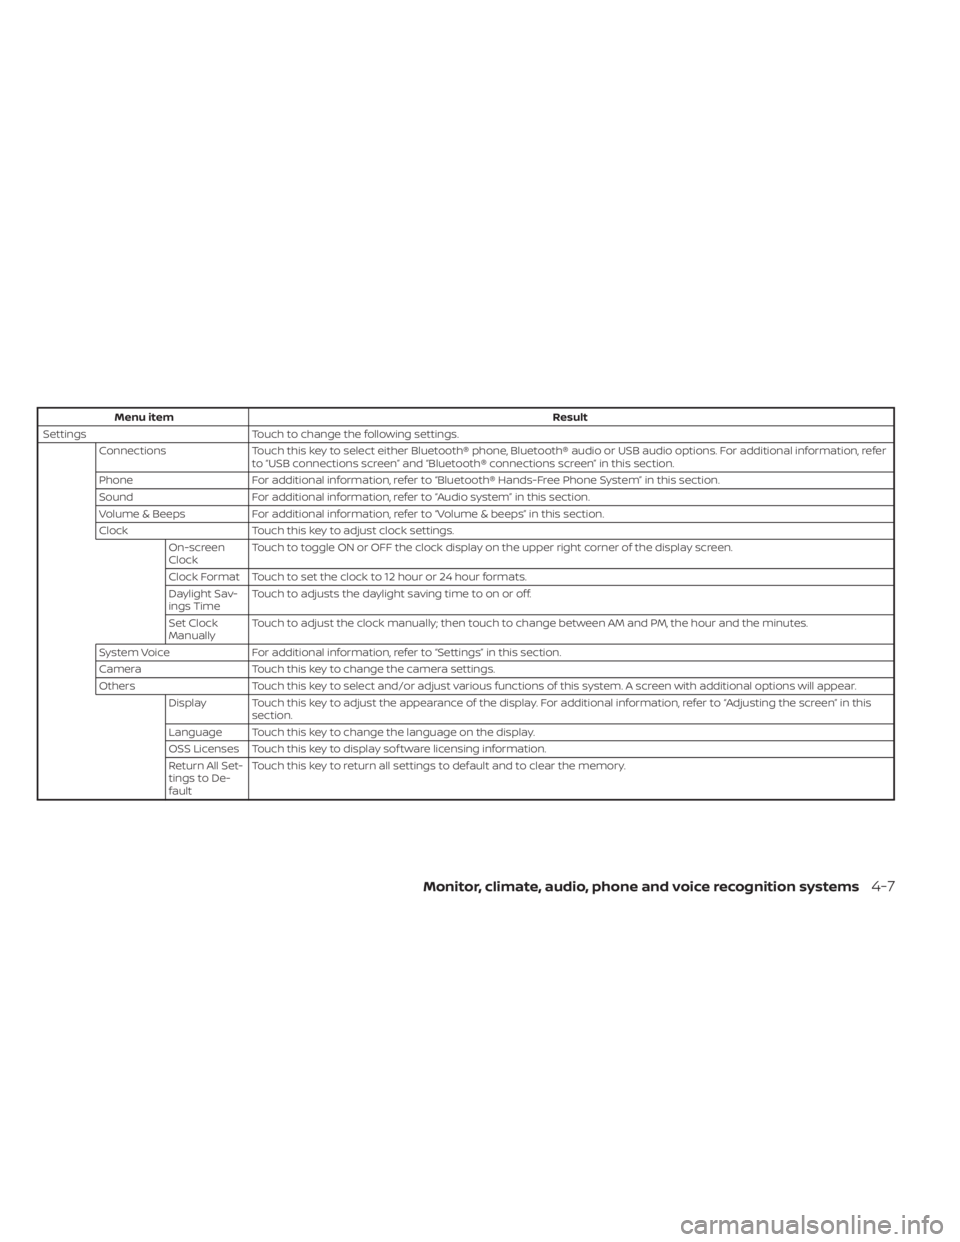
Menu itemResult
Settings Touch to change the following settings.
Connections Touch this key to select either Bluetooth® phone, Bluetooth® audio or USB audio options. For additional information, refer
to “USB connections screen” and “Bluetooth® connections screen” in this section.
Phone For additional information, refer to “Bluetooth® Hands-Free Phone System” in this section.
Sound For additional information, refer to “Audio system” in this section.
Volume & Beeps For additional information, refer to “Volume & beeps” in this section.
Clock Touch this key to adjust clock settings.
On-screen
Clock Touch to toggle ON or OFF the clock display on the upper right corner of the display screen.
Clock Format Touch to set the clock to 12 hour or 24 hour formats.
Daylight Sav-
ings Time Touch to adjusts the daylight saving time to on or off.
Set Clock
Manually Touch to adjust the clock manually; then touch to change between AM and PM, the hour and the minutes.
System Voice For additional information, refer to “Settings” in this section.
Camera Touch this key to change the camera settings.
Others Touch this key to select and/or adjust various functions of this system. A screen with additional options will appear.
Display Touch this key to adjust the appearance of the display. For additional information, refer to “Adjusting the screen” in this section.
Language Touch this key to change the language on the display.
OSS Licenses Touch this key to display sof tware licensing information.
Return All Set-
tings to De-
fault Touch this key to return all settings to default and to clear the memory.
Monitor, climate, audio, phone and voice recognition systems4-7
Page 210 of 528
(brightness control) BUTTON
To change the display brightness, press thebutton. Pressing the button again will
change the display to the day or the night
display.
Press and hold the
button for more
than 2 seconds to turn the display off. Press
and hold the button again to turn the dis-
play on.
HOW TO USE THE VOL (volume)
KNOB / PUSH
(power)
BUTTON
Press the PUSH(power) button to turn
audio function on and off. Turn the VOL
(volume) knob to adjust audio volume.
SELECTING MENU FROM LAUNCH
BAR
Various system functions can be accessed
by touching the items on the Launch Bar
O1which is displayed on most of the main
menu screens (the Launch Bar does not
appear on some screens such as settings
screens, camera screens, etc.)
Touch the keys on the Launch Bar to dis-
play the corresponding menu screens. The following menu items are available on
the Launch Bar:
•AM
•FM
• USB/iPod
• Bluetooth
•AUX
• Settings
LHA4707
4-8Monitor, climate, audio, phone and voice recognition systems
Page 250 of 528

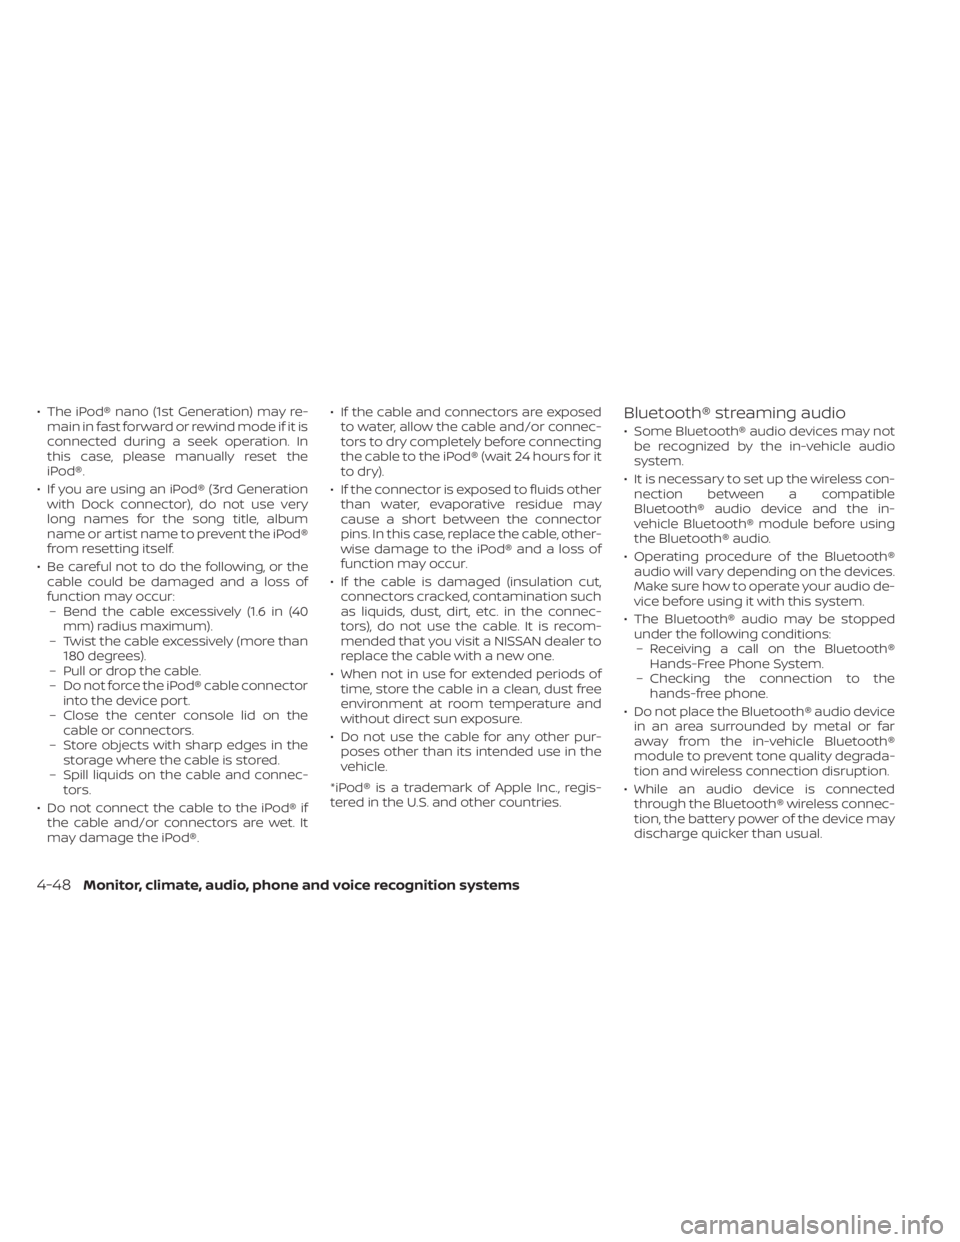
• The iPod® nano (1st Generation) may re-main in fast forward or rewind mode if it is
connected during a seek operation. In
this case, please manually reset the
iPod®.
• If you are using an iPod® (3rd Generation with Dock connector), do not use very
long names for the song title, album
name or artist name to prevent the iPod®
from resetting itself.
• Be careful not to do the following, or the cable could be damaged and a loss of
function may occur:– Bend the cable excessively (1.6 in (40 mm) radius maximum).
– Twist the cable excessively (more than 180 degrees).
– Pull or drop the cable.
– Do not force the iPod® cable connector into the device port.
– Close the center console lid on the cable or connectors.
– Store objects with sharp edges in the storage where the cable is stored.
– Spill liquids on the cable and connec- tors.
• Do not connect the cable to the iPod® if the cable and/or connectors are wet. It
may damage the iPod®. • If the cable and connectors are exposed
to water, allow the cable and/or connec-
tors to dry completely before connecting
the cable to the iPod® (wait 24 hours for it
to dry).
• If the connector is exposed to fluids other than water, evaporative residue may
cause a short between the connector
pins. In this case, replace the cable, other-
wise damage to the iPod® and a loss of
function may occur.
• If the cable is damaged (insulation cut, connectors cracked, contamination such
as liquids, dust, dirt, etc. in the connec-
tors), do not use the cable. It is recom-
mended that you visit a NISSAN dealer to
replace the cable with a new one.
• When not in use for extended periods of time, store the cable in a clean, dust free
environment at room temperature and
without direct sun exposure.
• Do not use the cable for any other pur- poses other than its intended use in the
vehicle.
*iPod® is a trademark of Apple Inc., regis-
tered in the U.S. and other countries.Bluetooth® streaming audio
• Some Bluetooth® audio devices may not be recognized by the in-vehicle audio
system.
• It is necessary to set up the wireless con- nection between a compatible
Bluetooth® audio device and the in-
vehicle Bluetooth® module before using
the Bluetooth® audio.
• Operating procedure of the Bluetooth® audio will vary depending on the devices.
Make sure how to operate your audio de-
vice before using it with this system.
• The Bluetooth® audio may be stopped under the following conditions:– Receiving a call on the Bluetooth® Hands-Free Phone System.
– Checking the connection to the hands-free phone.
• Do not place the Bluetooth® audio device in an area surrounded by metal or far
away from the in-vehicle Bluetooth®
module to prevent tone quality degrada-
tion and wireless connection disruption.
• While an audio device is connected through the Bluetooth® wireless connec-
tion, the battery power of the device may
discharge quicker than usual.
4-48Monitor, climate, audio, phone and voice recognition systems