2022 NISSAN SENTRA fuel
[x] Cancel search: fuelPage 308 of 528
•When the vehicle is stopped with the
engine running (for example, at a
stop light), shif t to N (Neutral) and re-
lease the clutch pedal with the foot
brake applied.
• Do not shif t to the N (Neutral) posi-
tion while driving. Doing so may re-
sult in an accident due to loss of en-
gine braking.
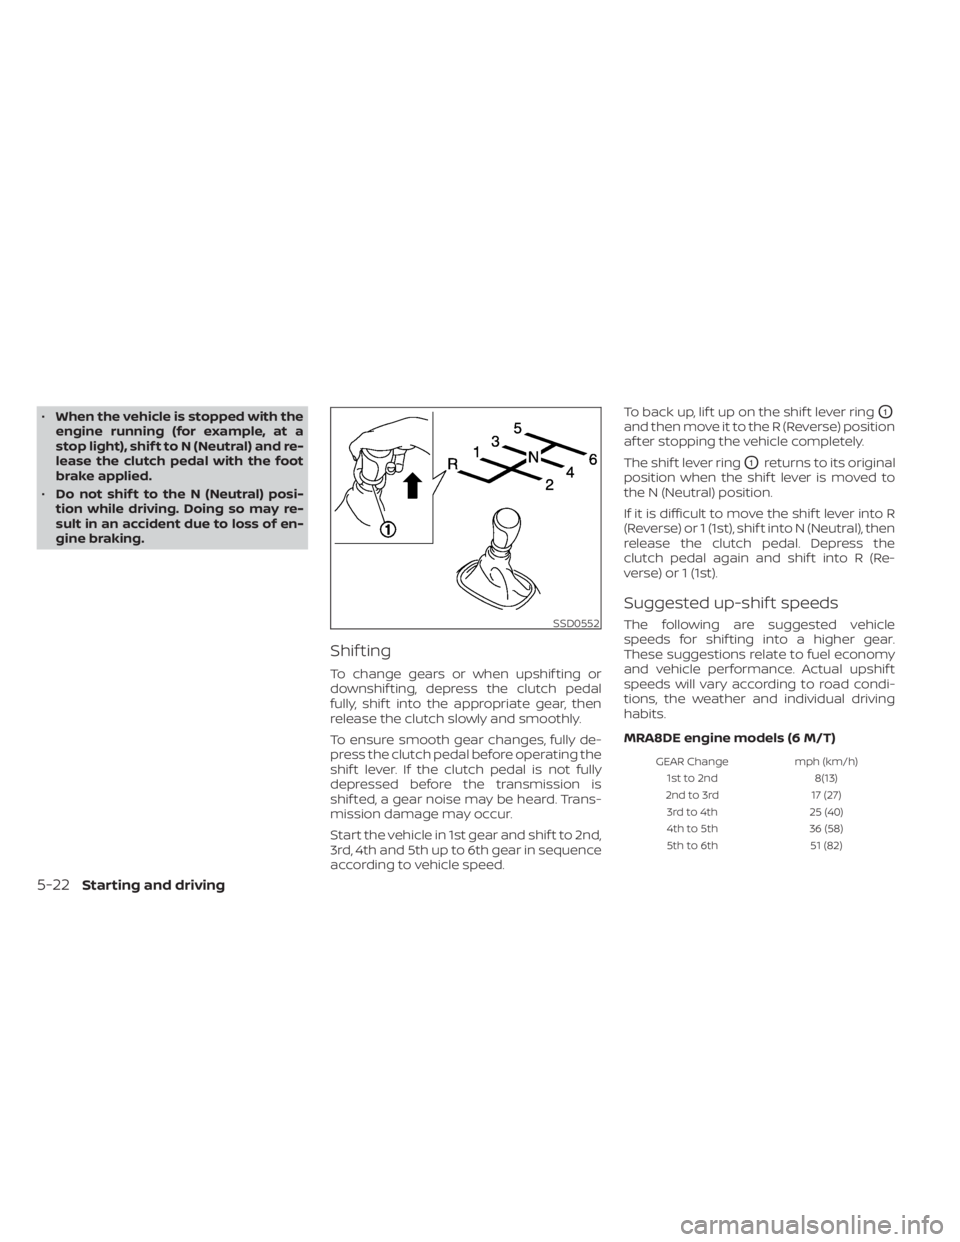
Shif ting
To change gears or when upshif ting or
downshif ting, depress the clutch pedal
fully, shif t into the appropriate gear, then
release the clutch slowly and smoothly.
To ensure smooth gear changes, fully de-
press the clutch pedal before operating the
shif t lever. If the clutch pedal is not fully
depressed before the transmission is
shif ted, a gear noise may be heard. Trans-
mission damage may occur.
Start the vehicle in 1st gear and shif t to 2nd,
3rd, 4th and 5th up to 6th gear in sequence
according to vehicle speed. To back up, lif t up on the shif t lever ring
O1
and then move it to the R (Reverse) position
af ter stopping the vehicle completely.
The shif t lever ring
O1returns to its original
position when the shif t lever is moved to
the N (Neutral) position.
If it is difficult to move the shif t lever into R
(Reverse) or 1 (1st), shif t into N (Neutral), then
release the clutch pedal. Depress the
clutch pedal again and shif t into R (Re-
verse) or 1 (1st).
Suggested up-shif t speeds
The following are suggested vehicle
speeds for shif ting into a higher gear.
These suggestions relate to fuel economy
and vehicle performance. Actual upshif t
speeds will vary according to road condi-
tions, the weather and individual driving
habits.
MRA8DE engine models (6 M/T)
GEAR Change mph (km/h)
1st to 2nd 8(13)
2nd to 3rd 17 (27)
3rd to 4th 25 (40)
4th to 5th 36 (58)
5th to 6th 51 (82)
SSD0552
5-22Starting and driving
Page 311 of 528
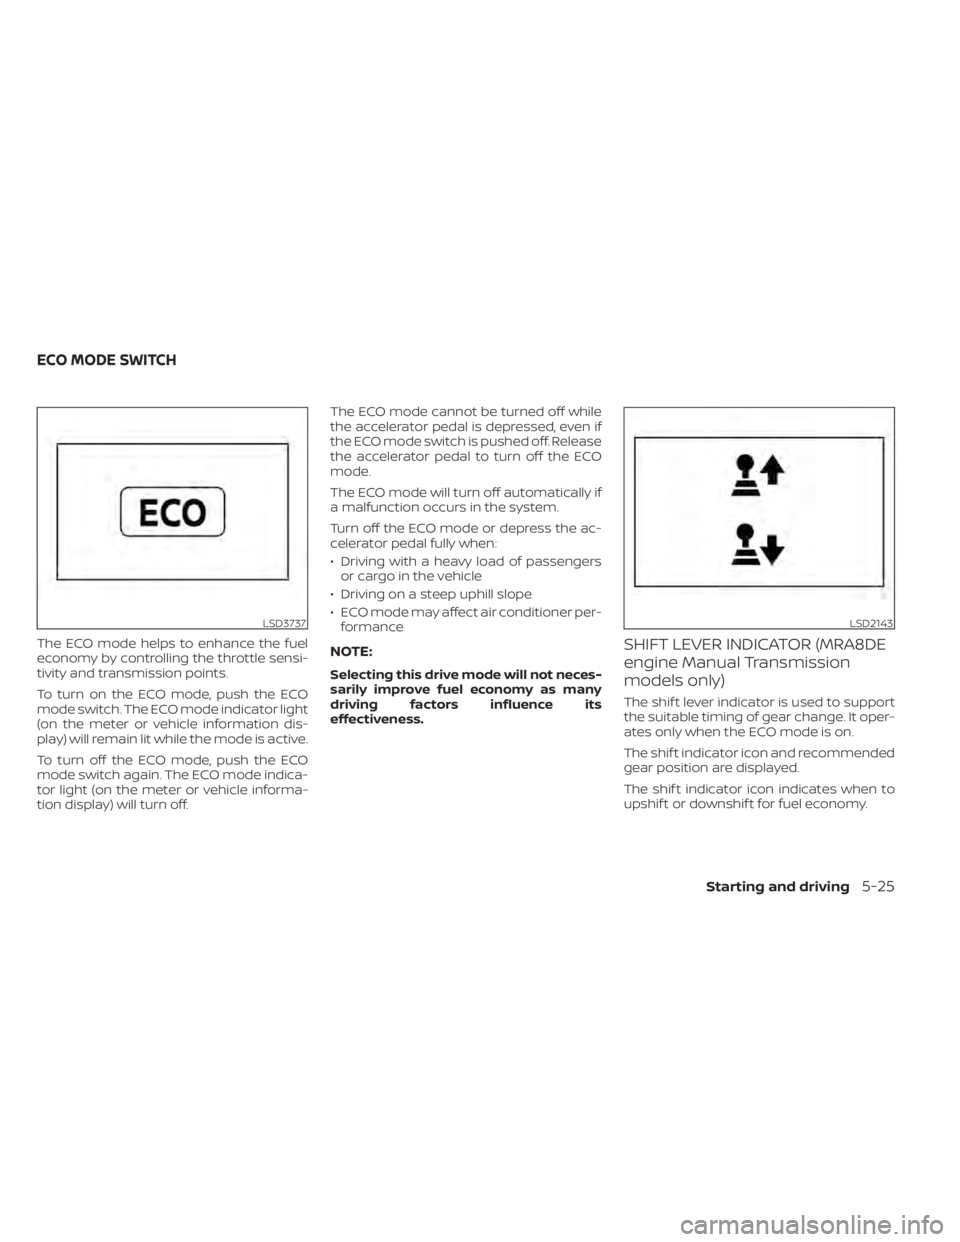
The ECO mode helps to enhance the fuel
economy by controlling the throttle sensi-
tivity and transmission points.
To turn on the ECO mode, push the ECO
mode switch. The ECO mode indicator light
(on the meter or vehicle information dis-
play) will remain lit while the mode is active.
To turn off the ECO mode, push the ECO
mode switch again. The ECO mode indica-
tor light (on the meter or vehicle informa-
tion display) will turn off.The ECO mode cannot be turned off while
the accelerator pedal is depressed, even if
the ECO mode switch is pushed off. Release
the accelerator pedal to turn off the ECO
mode.
The ECO mode will turn off automatically if
a malfunction occurs in the system.
Turn off the ECO mode or depress the ac-
celerator pedal fully when:
• Driving with a heavy load of passengers
or cargo in the vehicle
• Driving on a steep uphill slope
• ECO mode may affect air conditioner per- formanceNOTE:
Selecting this drive mode will not neces-
sarily improve fuel economy as many
driving factors influence its
effectiveness.
SHIFT LEVER INDICATOR (MRA8DE
engine Manual Transmission
models only)
The shif t lever indicator is used to support
the suitable timing of gear change. It oper-
ates only when the ECO mode is on.
The shif t indicator icon and recommended
gear position are displayed.
The shif t indicator icon indicates when to
upshif t or downshif t for fuel economy.
LSD3737LSD2143
ECO MODE SWITCH
Starting and driving5-25
Page 312 of 528
NOTE:
• The shif t indicator is a guide for fueleconomy. Always pay attention to road
conditions and other traffic.
• Downshif t the indicator icon to the 1 (1st) position if not displayed.
• If the downshif ting icon is displayed when decreasing your vehicle speed, it
indicates that the engine speed is low
compared to the gear position.
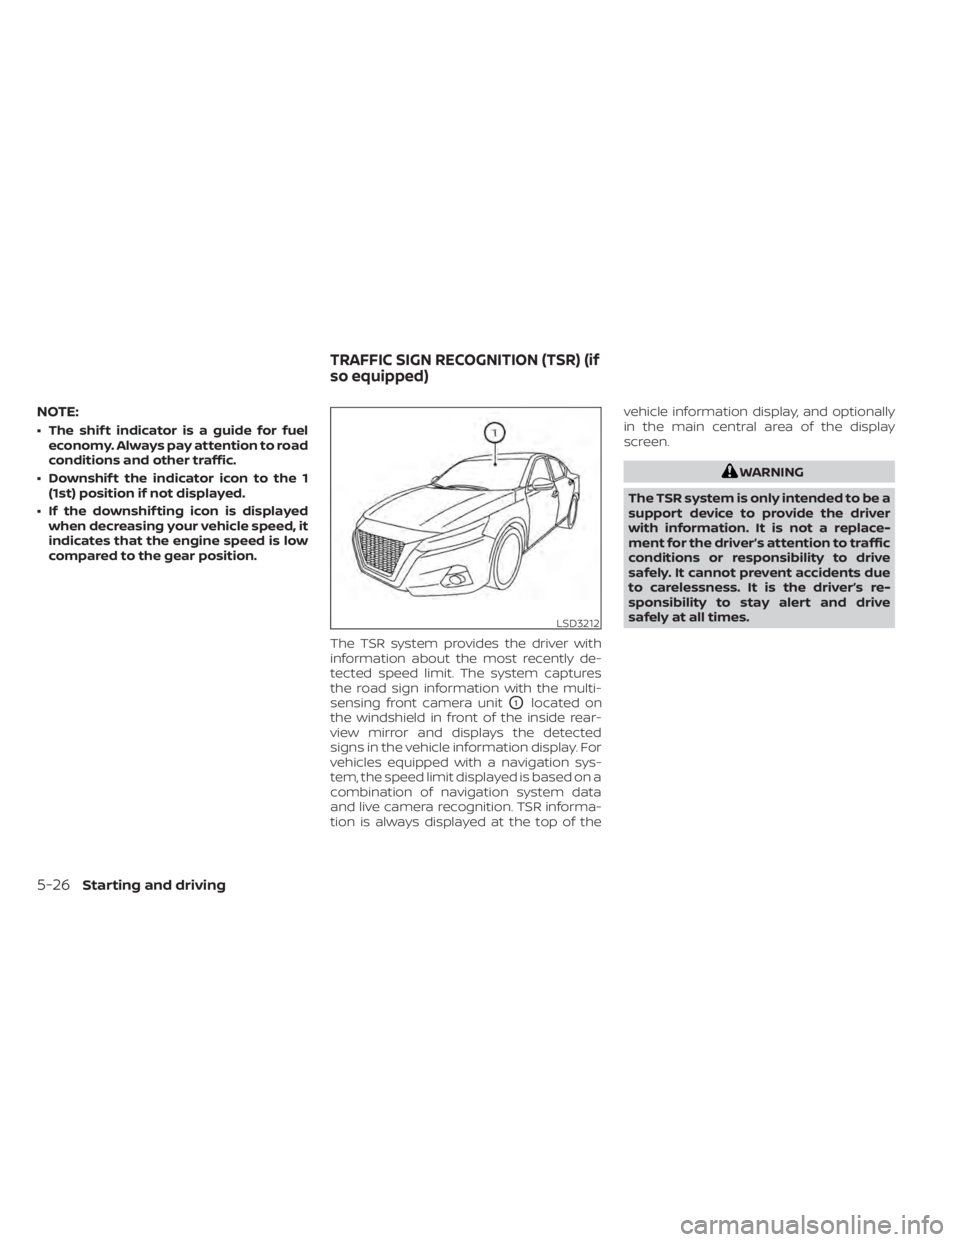
The TSR system provides the driver with
information about the most recently de-
tected speed limit. The system captures
the road sign information with the multi-
sensing front camera unit
O1located on
the windshield in front of the inside rear-
view mirror and displays the detected
signs in the vehicle information display. For
vehicles equipped with a navigation sys-
tem, the speed limit displayed is based on a
combination of navigation system data
and live camera recognition. TSR informa-
tion is always displayed at the top of the vehicle information display, and optionally
in the main central area of the display
screen.
Page 396 of 528

Follow these easy-to-use Fuel Efficient
Driving Tips to help you achieve the most
fuel economy from your vehicle.
1.Use Smooth Accelerator and Brake
Pedal Application
• Avoid rapid starts and stops
• Use smooth, gentle accelerator and brake application whenever possible
• Maintain constant speed while com- muting and coast whenever possible
2. Maintain Constant Speed
• Look ahead to try and anticipate and minimize stops
• Synchronizing your speed with traffic lights allows you to reduce your num-
ber of stops
• Maintaining a steady speed can mini- mize red light stops and improve fuel
efficiency
3. Use Air Conditioning (A/C) at Higher
Vehicle Speeds
• Below 40 mph (64 km/h), it is more efficient to open windows to cool the
vehicle due to reduced engine load
• Above 40 mph (64 km/h), it is more efficient to use A/C to cool the vehicle
due to increased aerodynamic drag • Recirculating the cool air in the cabin
when the A/C is on reduces cooling
load
4. Drive at Economical Speeds and
Distances
• Observing the speed limit and not ex- ceeding 60 mph (97 km/h) (where le-
gally allowed) can improve fuel effi-
ciency due to reduced aerodynamic
drag
• Maintaining a safe following distance behind other vehicles reduces unnec-
essary braking
• Safely monitoring traffic to anticipate changes in speed permits reduced
braking and smooth acceleration
changes
• Select a gear range suitable to road conditions
5. Use Cruise Control
• Using cruise control during highway driving helps maintain a steady speed
• Cruise control is particularly effective in providing fuel savings when driving
on flat terrains
6. Plan for the Shortest Route
• Utilize a map or navigation system to determine the best route to save time 7.
Avoid Idling
• Shutting off your engine when safe for stops exceeding 30–60 seconds saves
fuel and reduces emissions
8. Buy an Automated Pass for Toll Roads
• Automated passes permit drivers to use special lanes to maintain cruising
speed through the toll and avoid stop-
ping and starting
9. Winter Warm Up
• Limit idling time to minimize impact to fuel economy
• Vehicles typically need no more than 30 seconds of idling at start-up to ef-
fectively circulate the engine oil before
driving
• Your vehicle will reach its ideal operat- ing temperature more quickly while
driving versus idling
10. Keeping your Vehicle Cool
• Park your vehicle in a covered parking area or in the shade whenever pos-
sible
• When entering a hot vehicle, opening the windows will help to reduce the
inside temperature faster, resulting in
reduced demand on your A/C system
FUEL EFFICIENT DRIVING TIPS
5-110Starting and driving
Page 397 of 528
11.ECO Mode
• The ECO mode helps to enhance the fuel economy by controlling the en-
gine and Continuously Variable Trans-
mission (if so equipped) operation au-
tomatically to avoid rapid
acceleration. • Keep your engine tuned up.
• Follow the recommended scheduled
maintenance.
• Keep the tires inflated to the correct pres- sure. Low tire pressure increases tire
wear and lowers fuel economy.
• Keep the wheels in correct alignment. Im- proper alignment increases tire wear and
lowers fuel economy.
• Use the recommended viscosity engine oil. For additional information, refer to “En-
gine oil and oil filter recommendations” in
the “Technical and consumer informa-
tion” section of this manual.
INCREASING FUEL ECONOMY
Starting and driving5-111
Page 439 of 528
CAUTION
• NEVER remove dirt, sand or other de-
bris from the passenger compart-
ment by washing it out with a hose.
Remove dirt with a vacuum cleaner
or broom.
• Never allow water or other liquids to
come in contact with electronic com-
ponents inside the vehicle as this
may damage them.
Chemicals used for road surface de-icing
are extremely corrosive. They accelerate
corrosion and deterioration of underbody
components such as the exhaust system,
fuel and brake lines, brake cables, floor pan
and fenders.
In winter, the underbody must be
cleaned periodically.
For additional protection against rust and
corrosion, which may be required in some
areas, it is recommended that you visit a
NISSAN dealer.
Appearance and care7-9
Page 456 of 528
The viscous paper type filter element (if so
equipped) should not be cleaned and re-
used. The dry paper type filter element (if so
equipped) may be cleaned an reused. Re-
place it according to the maintenance log
shown in the “Maintenance and schedules”
section of this manual.
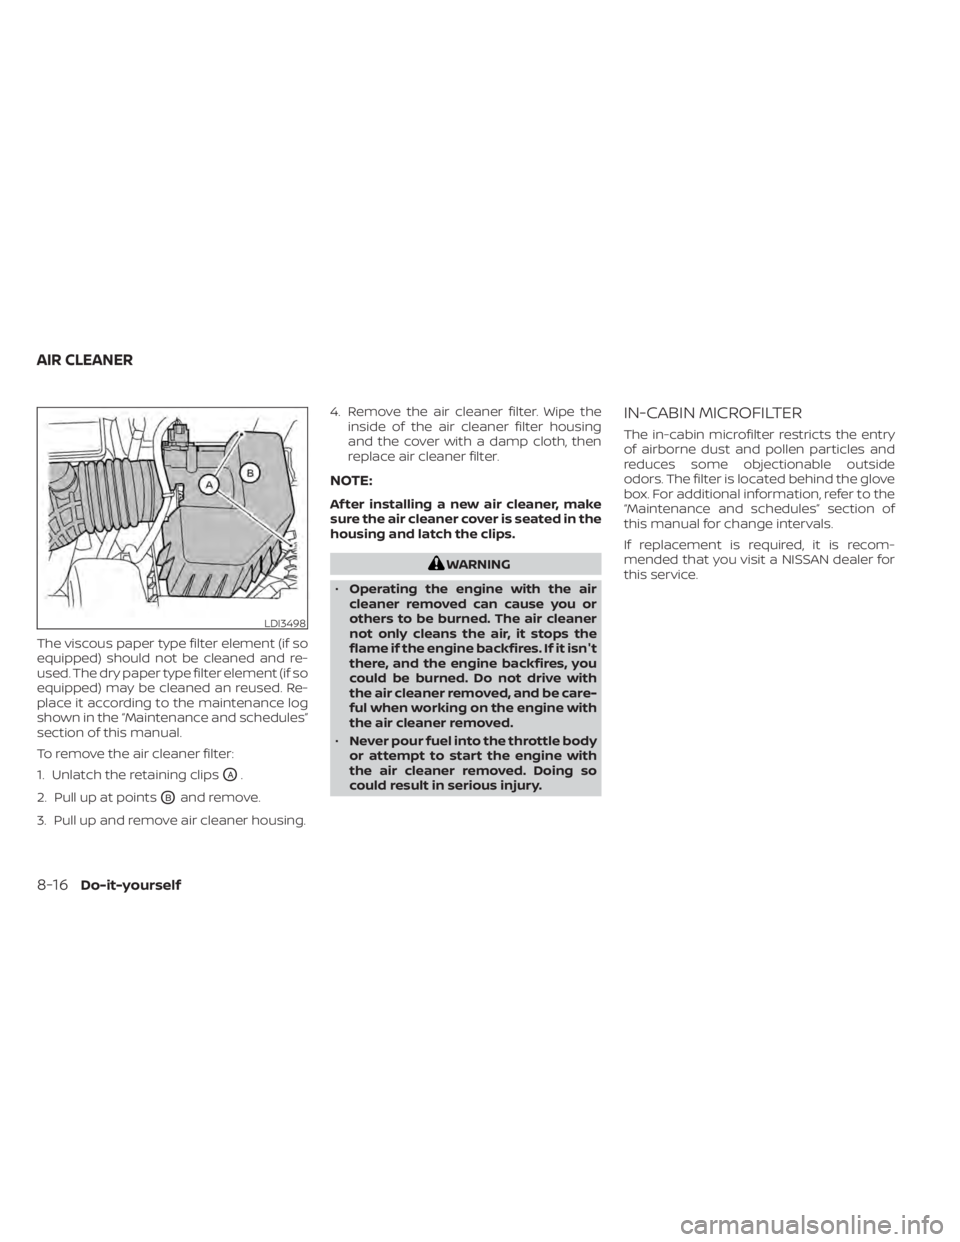
To remove the air cleaner filter:
1. Unlatch the retaining clips
OA.
2. Pull up at points
OBand remove.
3. Pull up and remove air cleaner housing. 4. Remove the air cleaner filter. Wipe the
inside of the air cleaner filter housing
and the cover with a damp cloth, then
replace air cleaner filter.
NOTE:
Af ter installing a new air cleaner, make
sure the air cleaner cover is seated in the
housing and latch the clips.
WARNING
• Operating the engine with the air
cleaner removed can cause you or
others to be burned. The air cleaner
not only cleans the air, it stops the
flame if the engine backfires. If it isn't
there, and the engine backfires, you
could be burned. Do not drive with
the air cleaner removed, and be care-
ful when working on the engine with
the air cleaner removed.
• Never pour fuel into the throttle body
or attempt to start the engine with
the air cleaner removed. Doing so
could result in serious injury.
IN-CABIN MICROFILTER
The in-cabin microfilter restricts the entry
of airborne dust and pollen particles and
reduces some objectionable outside
odors. The filter is located behind the glove
box. For additional information, refer to the
“Maintenance and schedules” section of
this manual for change intervals.
If replacement is required, it is recom-
mended that you visit a NISSAN dealer for
this service.
LDI3498
AIR CLEANER
Page 484 of 528
Parking brake:Check the parking brake
operation regularly. The vehicle should be
securely held on a fairly steep hill with only
the parking brake applied. If the parking
brake needs adjustment, it is recom-
mended that you visit a NISSAN dealer for
this service.
Seats: Check seat position controls such
as seat adjusters, seatback recliner, etc., to
ensure they operate smoothly and all
latches lock securely in every position.
Check that the head restraints/headrests
move up and down smoothly and the locks
(if so equipped) hold securely in all latched
positions.
Seat belts: Check that all parts of the seat
belt system (for example, buckles, anchors,
adjusters and retractors) operate properly
and smoothly, and are installed securely.
Check the belt webbing for cuts, fraying,
wear or damage.
Steering wheel: Check for changes in the
steering system, such as excessive free
play, hard steering or strange noises.
Warning lights and chimes: Make sure all
warning lights and chimes are operating
properly.
Windshield defroster: Check that the air
comes out of the defroster outlets properly and in sufficient quantity when operating
the heater or air conditioner.
Windshield wiper and washer*:
Check
that the wipers and washer operate prop-
erly and that the wipers do not streak.
Under the hood and vehicle
The maintenance items listed here should
be checked periodically (for example, each
time you check the engine oil or refuel).
Battery*: This vehicle is equipped with a
sealed maintenance free battery. It is rec-
ommended that you visit a NISSAN dealer
for service.
NOTE:
Care should be taken to avoid situations
that can lead to potential battery dis-
charge and potential no-start conditions
such as:
1. Installation or extended use of elec-
tronic accessories that consume bat-
tery power when the engine is not run-
ning (Phone chargers, GPS, DVD
players, etc.).
2. Vehicle is not driven regularly and/or
only driven short distances. In these cases, the battery may need to
be charged to maintain battery health.
Brake and clutch (if so equipped) fluid
level*:
Make sure that the brake and clutch
fluid levels are between the MIN and MAX
lines on the reservoir.
Engine coolant level*: Check the coolant
level when the engine is cold.
Engine drive belt*: Make sure the drive belt
is not frayed, worn, cracked or oily.
Engine oil level*: Check the level af ter
parking the vehicle on a level surface with
the engine off. Wait more than 15 minutes
for the oil to drain back into the oil pan.
Exhaust system: Make sure there are no
loose supports, cracks or holes. If the
sound of the exhaust seems unusual or
there is a smell of exhaust fumes, immedi-
ately have the exhaust system inspected. It
is recommended that you visit a NISSAN
dealer for this service. For additional infor-
mation, refer to “Exhaust gas (carbon mon-
oxide)” in the “Starting and driving” section
of this manual.
9-4Maintenance and schedules