2022 NISSAN SENTRA window
[x] Cancel search: windowPage 243 of 528
NOTE:
• Odors from inside and outside the ve-hicle can build up in the air conditioner
unit. Odor can enter the passenger
compartment through the vents.
• When parking, set the heater and air conditioner controls to turn off air re-
circulation to allow fresh air into the
passenger compartment. This should
help reduce odors inside the vehicle.
AUTOMATIC OPERATION
Cooling and/or dehumidified
heating (AUTO)
This mode may be used all year round as
the system automatically works to keep a
constant temperature. Air flow distribution,
air intake control, and fan speed are also
controlled automatically.
1. Press the AUTO button on.
2.
Turn the temperature control dial to the lef t
or right to set the desired temperature.
• Adjust the temperature display to about 75°F (24°C) for normal operation.
•
The temperature of the passenger com-
partment will be maintained automatically.
Air flow distribution, air intake control and fan
speed are also controlled automatically.
• A visible mist may be seen coming from the vents in hot, humid conditions as the
air is cooled rapidly. This does not indicate
a malfunction.
3. You can individually set driver's and front passenger's side temperature using
each temperature control dial. To syn-
chronize the driver’s and front passen-
ger’s temperature settings, press the
SYNC button.
Heating (A/C OFF)
The air conditioner does not activate. When
you need to heat only, use this mode.
1. Press the AUTO button.
2. Turn the temperature control dial to set the desired temperature.
• The temperature of the passenger com- partment will be maintained automati-
cally. Air flow distribution and fan speed
are also controlled automatically.
• Do not set the temperature lower than the outside air temperature. Otherwise,
the system may not work properly.
• Not recommended if windows fog up.
Dehumidified defrosting or
defogging
1. Press thefront defroster button on.
2. Turn the temperature control dial to set the desired temperature.
• To quickly remove ice from the outside of the windows, use the
fan speed con-
trol buttons to set the fan speed to maxi-
mum.
• As soon as possible af ter the windshield is clean, press the AUTO button to return
to the automatic mode.
• When the
front defroster button is
pressed, the air conditioner will automati-
cally be turned on at outside tempera-
tures above 36°F (2°C). The air recirculate
mode automatically turns off, allowing
outside air to be drawn into the passen-
ger compartment to further improve the
defogging performance.
Remote Engine Start with
Intelligent Climate Control (if so
equipped)
Vehicles equipped with automatic climate
controls and Remote Engine Start function
may go into automatic heating or cooling
Monitor, climate, audio, phone and voice recognition systems4-41
Page 244 of 528
mode when Remote Engine Start is acti-
vated depending on outside and cabin
temperatures. During this period, the cli-
mate control display and buttons will be
inoperable until the ignition switch is
turned on. In Remote Engine Start defrost-
ing mode, the rear window defroster and
heated steering wheel (if so equipped) may
be activated automatically.
MANUAL OPERATION
Fan speed control buttons
Press thefan speed control buttons
to manually control the fan speed.
Press the AUTO button to return to auto-
matic control of the fan speed.
Temperature control dial
The temperature control dial allows you to
adjust the temperature of the outlet air. To
lower the temperature, turn the dial to the
lef t. To increase the temperature, turn the
dial to the right. Temperature can be ad-
justed on the driver’s and passenger’s side.
Air recirculation
Press theair recirculation button to
recirculate interior air inside the vehicle.
The
indicator light on the button will
come on.
The air recirculation cannot be activated
when the air conditioner is in the
front
defrosting mode.
When the outside temperature exceeds
70°F (21°C), the air conditioning system may
default to air recirculation mode automati-
cally to reduce overall power consumption.
To exit air recirculation mode, deselect the
air recirculation button (indicator light will
turn off ) to enter fresh air mode.
Automatic intake air control
In the AUTO mode, the intake air will be
controlled automatically. To manually con-
trol the intake air, press the
air recir-
culation button. To return to the automatic
control mode, press and hold the
air
recirculation button for about 2 seconds.
The indicator light will flash twice, and then
the intake air will be controlled automati-
cally.
A/C (air conditioner) button
Start the engine, press thefan speed
control buttons to the desired position and
press the
button to turn on the air
conditioner. To turn off the air conditioner,
press the
button again.
The air conditioner cooling function op-
erates only when the engine is running.
Air flow control
Pressing thebutton manually con-
trols air flow and selects the air outlet:
— Air flows from center and side
vents.
— Air flows from center and sidevents and foot outlets.
— Air flows mainly from foot outlets.— Air flows from defroster and footoutlets.
4-42Monitor, climate, audio, phone and voice recognition systems
Page 245 of 528
Synchronize climate settings
Press the SYNC button to synchronize cli-
mate settings. The sync indicator will turn
on.
Pressing SYNC will synchronize driver's and
front passenger's climate settings.
To change climate settings when SYNC is
active (the SYNC indicator is on):
• The driver's side temperature control dialwill control the driver and front passenger
temperatures.
• The fan speed control dial will control the fan speeds.
To exit SYNC:
• To remove the front passenger from SYNC, turn the passenger's side tem-
perature control dial.
• Pressing SYNC multiple times will re- activate SYNC.
To turn system off
Press the ON-OFF button.
Rear window and outside mirror
defroster switch
For additional information, refer to “Rear
window and outside mirror (if so equipped)
defroster switch” in the “Instruments and
controls” section of this manual.
Heated seat switches (if so
equipped)
For additional information, refer to “Heated
seat switches” in the “Instruments and con-
trols” section of this manual.
Heated steering wheel switch (if
so equipped)
For additional information, refer to “Heated
steering wheel switch” in the “Instruments
and controls” section of this manual.
OPERATING TIPS
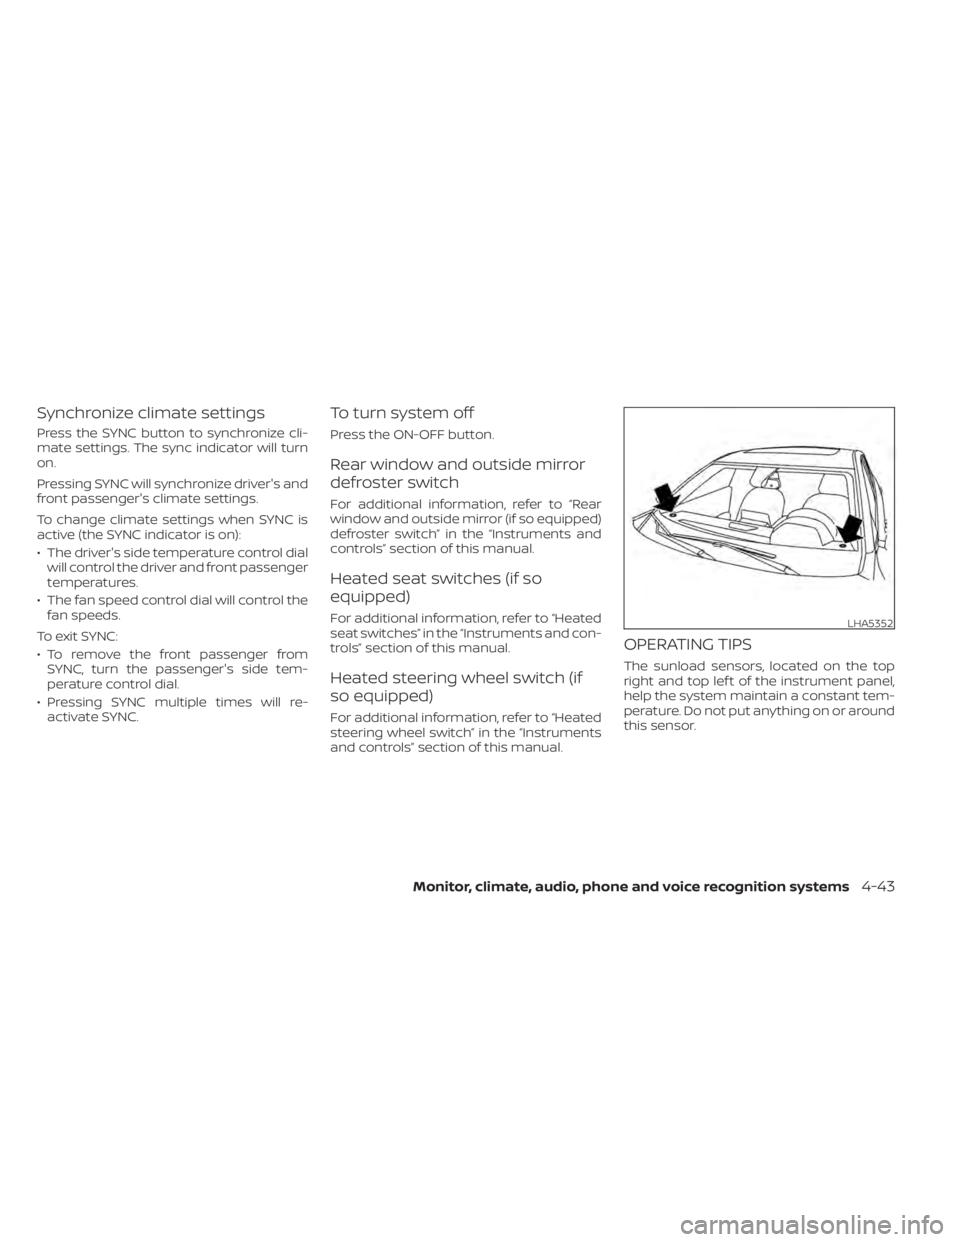
The sunload sensors, located on the top
right and top lef t of the instrument panel,
help the system maintain a constant tem-
perature. Do not put anything on or around
this sensor.
LHA5352
Page 248 of 528

Static: Caused by thunderstorms, electrical
power lines, electric signs and even traffic
lights.
AUDIO OPERATION PRECAUTIONS
MP3 or WMA terms
• MP3 — MP3 is short for Moving PicturesExperts Group Audio Layer 3. MP3 is the
most well-known compressed digital au-
dio file format. This format allows for near
“CD quality” sound, but at a fraction of the
size of normal audio files. MP3 conversion
of an audio track from CD-ROM can re-
duce the file size by approximately a 10:1
ratio with virtually no perceptible loss in
quality. MP3 compression removes the
redundant and irrelevant parts of a
sound signal that the human ear doesn’t
hear.
• WMA — Windows Media Audio (WMA)* is a compressed audio format created by Mi-
crosof t as an alternative to MP3. The WMA
codec offers greater file compression
than the MP3 codec, enabling storage of
more digital audio tracks in the same
amount of space when compared to
MP3s at the same level of quality. • Bit rate — Bit rate denotes the number of
bits per second used by a digital music
file. The size and quality of a compressed
digital audio file is determined by the bit
rate used when encoding the file.
• Sampling frequency — Sampling fre- quency is the rate at which the samples
of a signal are converted from analog to
digital (A/D conversion) per second.
• Multisession — Multisession is one of the methods for writing data to media. Writ-
ing data once to the media is called a
single session, and writing more than
once is called a multisession.
• ID3/WMA Tag — The ID3/WMA tag is the part of the encoded MP3 or WMA file that
contains information about the digital
music file such as song title, artist, encod-
ing bit rate, track time duration, etc. ID3
tag information is displayed on the Artist/
song title line on the display.
* Windows® and Windows Media® are reg-
istered trademarks and trademarks in the
United States of America and other coun-
tries of Microsof t Corporation of the USA.
USB (Universal Serial Bus)
Connection Port
CAUTION
• Do not force the USB device into the
USB port. Inserting the USB device
tilted or up-side-down into the port
may damage the port. Make sure
that the USB device is connected cor-
rectly into the USB port.
• Do not grab the USB port cover (if so
equipped) when pulling the USB de-
vice out of the port. This could dam-
age the port and the cover.
• Do not leave the USB cable in a place
where it can be pulled unintention-
ally. Pulling the cable may damage
the port.
4-46Monitor, climate, audio, phone and voice recognition systems
Page 266 of 528
ANTENNA
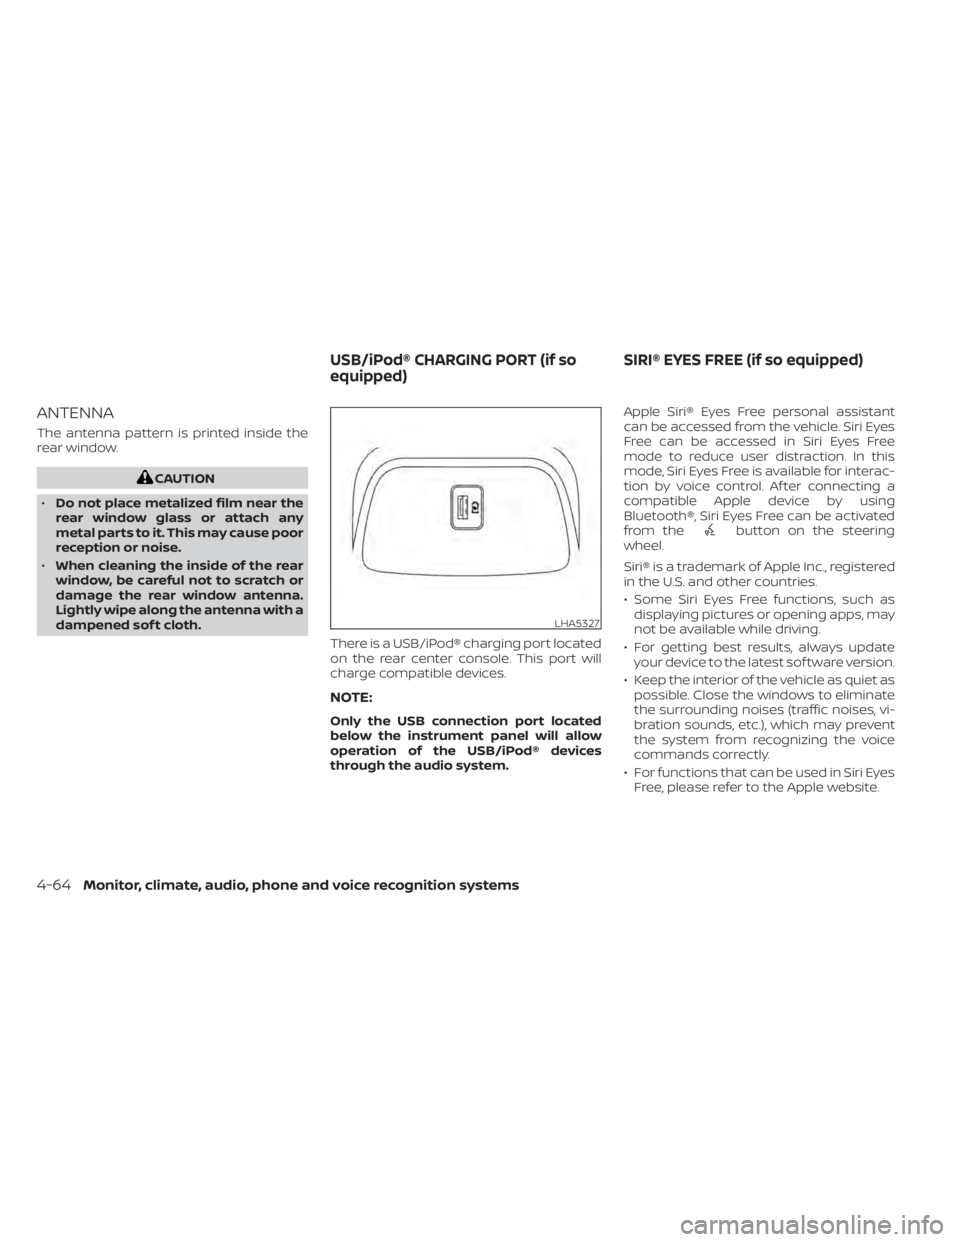
The antenna pattern is printed inside the
rear window.
button on the steering
wheel.
Siri® is a trademark of Apple Inc., registered
in the U.S. and other countries.
• Some Siri Eyes Free functions, such as displaying pictures or opening apps, may
not be available while driving.
• For getting best results, always update your device to the latest sof tware version.
• Keep the interior of the vehicle as quiet as possible. Close the windows to eliminate
the surrounding noises (traffic noises, vi-
bration sounds, etc.), which may prevent
the system from recognizing the voice
commands correctly.
• For functions that can be used in Siri Eyes Free, please refer to the Apple website.
LHA5327
USB/iPod® CHARGING PORT (if so
equipped) SIRI® EYES FREE (if so equipped)
Page 298 of 528
OPERATING RANGE
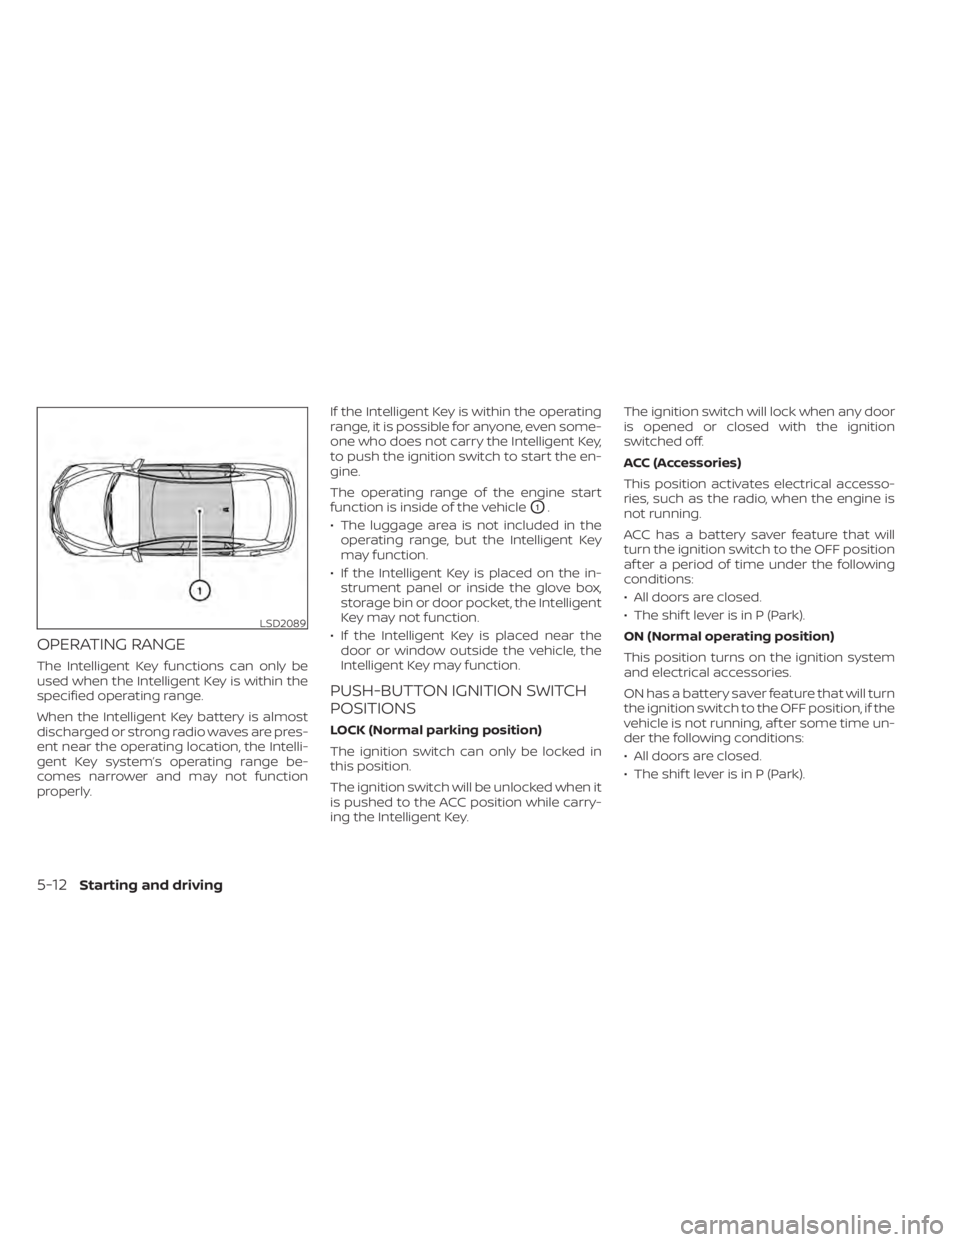
The Intelligent Key functions can only be
used when the Intelligent Key is within the
specified operating range.
When the Intelligent Key battery is almost
discharged or strong radio waves are pres-
ent near the operating location, the Intelli-
gent Key system’s operating range be-
comes narrower and may not function
properly.If the Intelligent Key is within the operating
range, it is possible for anyone, even some-
one who does not carry the Intelligent Key,
to push the ignition switch to start the en-
gine.
The operating range of the engine start
function is inside of the vehicle
O1.
• The luggage area is not included in the operating range, but the Intelligent Key
may function.
• If the Intelligent Key is placed on the in- strument panel or inside the glove box,
storage bin or door pocket, the Intelligent
Key may not function.
• If the Intelligent Key is placed near the door or window outside the vehicle, the
Intelligent Key may function.
PUSH-BUTTON IGNITION SWITCH
POSITIONS
LOCK (Normal parking position)
The ignition switch can only be locked in
this position.
The ignition switch will be unlocked when it
is pushed to the ACC position while carry-
ing the Intelligent Key. The ignition switch will lock when any door
is opened or closed with the ignition
switched off.
ACC (Accessories)
This position activates electrical accesso-
ries, such as the radio, when the engine is
not running.
ACC has a battery saver feature that will
turn the ignition switch to the OFF position
af ter a period of time under the following
conditions:
• All doors are closed.
• The shif t lever is in P (Park).
ON (Normal operating position)
This position turns on the ignition system
and electrical accessories.
ON has a battery saver feature that will turn
the ignition switch to the OFF position, if the
vehicle is not running, af ter some time un-
der the following conditions:
• All doors are closed.
• The shif t lever is in P (Park).
LSD2089
5-12Starting and driving
Page 300 of 528

NISSAN VEHICLE IMMOBILIZER
SYSTEM
The NISSAN Vehicle Immobilizer System
will not allow the engine to start without
the use of the registered key.
If the engine fails to start using a registered
key (for example, when interference is
caused by another registered key, an auto-
mated toll road device or automatic pay-
ment device on the key ring), restart the
engine using the following procedure:
1. Leave the ignition switch in the ON posi-tion for approximately 5 seconds.
2. Place the ignition switch in the OFF or LOCK position, and wait approximately
10 seconds.
3. Repeat steps 1 and 2.
4. Restart the engine while holding the de- vice (which may have caused the inter-
ference) separate from the registered
key.
If the no start condition re-occurs, NISSAN
recommends placing the registered key on
a separate key ring to avoid interference
from other devices. • Make sure the area around the vehicle is
clear.
• Check fluid levels such as engine oil, cool- ant, brake and clutch fluid (if so equipped),
and windshield-washer fluid as fre-
quently as possible, or at least whenever
you refuel.
• Check that all windows and lights are clean.
• Visually inspect tires for their appearance and condition. Also check tires for proper
inflation.
• Lock all doors.
• Position seat and adjust head restraints/ headrests.
• Adjust inside and outside mirrors.
• Fasten seat belts and ask all passengers to do likewise.
• Check the operation of warning lights when the ignition switch is placed in the
ON position. For additional information,
refer to “Warning lights, indicator lights
and audible reminders” in the “Instru-
ments and controls” section of this
manual. 1. Apply the parking brake.
2.
Continuously Variable Transmission
model:
Move the shif t lever to P (Park) or N (Neu-
tral). P (Park) is recommended.
The starter is designed not to operate
if the shif t lever is in any of the driving
positions.
Manual Transmission (M/T) model:
Move the shif t lever to N (Neutral). De-
press the clutch pedal to the floor.
The starter is designed not to operate
unless the clutch pedal is fully de-
pressed.
3. Push the ignition switch to the ON posi- tion. Depress the brake pedal and the
clutch pedal (if so equipped) and push
the ignition switch to start the engine.
To start the engine immediately, push
and release the ignition switch while de-
pressing the brake pedal with the igni-
tion switch in any position.
• If the engine is very hard to start in extremely cold weather or when re-
starting, depress the accelerator
pedal a little (approximately 1/3 to the
BEFORE STARTING THE ENGINE STARTING THE ENGINE
5-14Starting and driving
Page 340 of 528
–IllustrationOE: When the angle
formed by your vehicle and ap-
proaching vehicle is small.
• The following conditions may reduce
the ability of the radar to detect other
vehicles:
– Severe weather
– Road spray
– Ice/frost/snow/dirt build-up on
the vehicle
• Do not attach stickers (including
transparent material), install acces-
sories or apply additional paint near
the radar sensors. These conditions
may reduce the ability of the radar to
detect other vehicles.
• Excessive noise (e.g., audio system
volume, open vehicle window) will in-
terfere with the chime sound, and it
may not be heard.
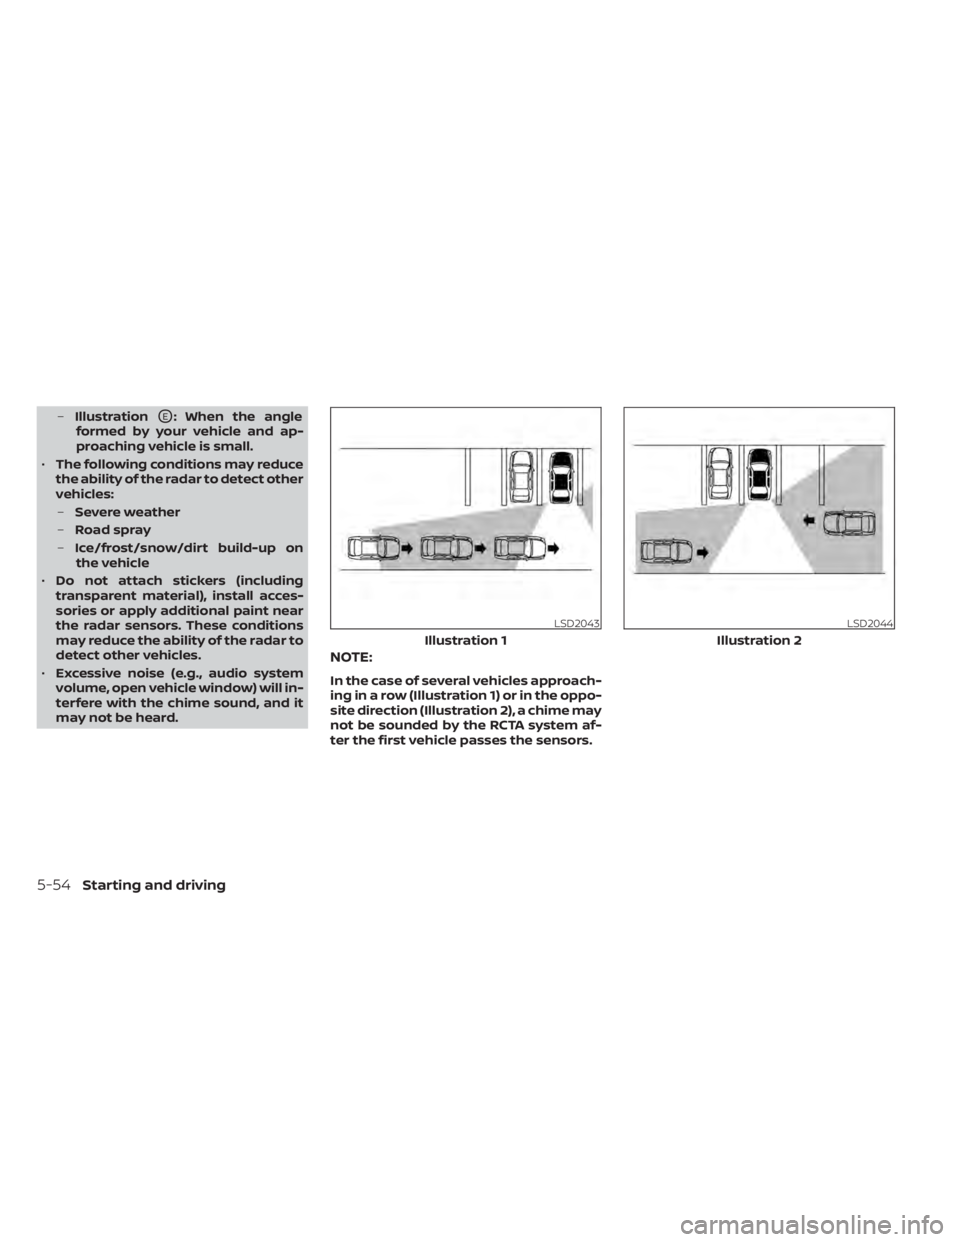
NOTE:
In the case of several vehicles approach-
ing in a row (Illustration 1) or in the oppo-
site direction (Illustration 2), a chime may
not be sounded by the RCTA system af-
ter the first vehicle passes the sensors.