2022 NISSAN SENTRA parking brake
[x] Cancel search: parking brakePage 227 of 528
NOTE:
Do not adjust any of the display settings
of the Intelligent Around View Monitor
while the vehicle is moving. Make sure
the parking brake is firmly applied.
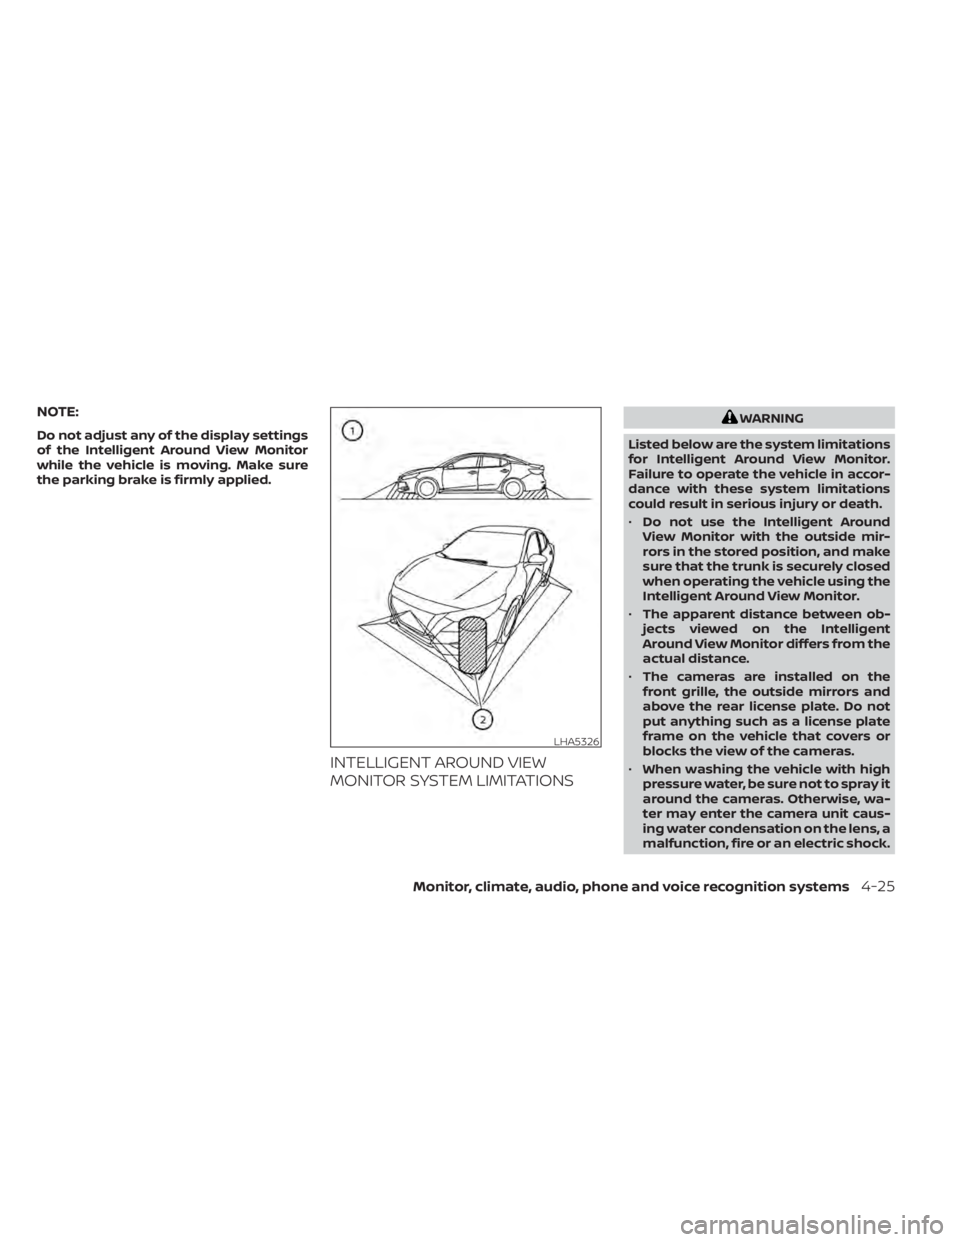
INTELLIGENT AROUND VIEW
MONITOR SYSTEM LIMITATIONS
Page 289 of 528

Increasing fuel economy.......................5-111
Parking/parking on hills .......................5-112
Power steering ................................ 5-113
Brake system ................................. 5-114
Brake precautions .......................... 5-114
Anti-lock Braking System (ABS) .............5-114
Brake Assist ................................ 5-116
Vehicle Dynamic Control (VDC) system ........5-116
Rise-up and build-up ....................... 5-118
Brake force distribution ....................5-118
Chassis Control ............................... 5-119
Intelligent Trace Control (I-TC) ..............5-119
Active Ride Control (ARC) ...................5-119
Hill start assist system ........................ 5-119
Rear Sonar System (RSS) ......................5-120System operation
.......................... 5-121
How to enable/disable the sonar
system ..................................... 5-122
Sonar limitations ........................... 5-124
System temporarily unavailable ............5-124
System maintenance ......................5-125
Cold weather driving .......................... 5-125
Freeing a frozen door lock ..................5-125
Antifreeze .................................. 5-125
Battery..................................... 5-125
Draining of coolant water ..................5-126
Tire equipment ............................. 5-126
Special winter equipment ..................5-126
Driving on snow or ice ......................5-126
Engine block heater (if so equipped) ........5-127
Page 294 of 528
(2) this device must accept any interfer-
ence received, including interference
that may cause undesired operation.
NOTE:
Changes or modifications not ex-
pressly approved by the party re-
sponsible for compliance could void
the user's authority to operate the
equipment.
For Canada:
This device complies with Industry
Canada licence-exempt RSS standard(s).
Operation is subject to the following two
conditions: (1) this device may not cause
interference, and (2) this device must ac-
cept any interference, including interfer-
ence that may cause undesired opera-
tion of the device.
TPMS with Easy-Fill Tire Alert
When adding air to an under-inflated tire,
the TPMS with Easy-Fill Tire Alert provides
visual and audible signals outside the ve-
hicle to help you inflate the tires to the rec-
ommended COLD tire pressure.
Vehicle set-up:
1. Park the vehicle in a safe and level place.2. Apply the parking brake and place the
shif t lever in the P (Park) position (if so
equipped).
3. Place the ignition switch in the ON posi- tion. Do not start the engine.
Operation:
1. Add air to the tire.
2. Af ter a few seconds, the hazard indica- tors will start flashing.
3. When the designated pressure is reached, the horn beeps once and the
hazard indicators stop flashing.
4. Perform the above steps for each tire. • If the tire is over-inflated more thanapproximately 4 psi (30 kPa), the horn
beeps and the hazard indicators flash
three times. To correct the pressure,
push the core of the valve stem on the
tire briefly to release pressure. When
the pressure reaches the designated
pressure, the horn beeps once.
• If the hazard indicator does not flash within approximately 15 seconds af ter
starting to inflate the tire, it indicates
that the Easy-Fill Tire Alert is not oper-
ating. • The TPMS will not activate the Easy-Fill
Tire Alert under the following condi-
tions:
– If there is interference from an ex- ternal device or transmitter.
– The air pressure from the inflation device is not sufficient to inflate the
tire.
– There is a malfunction in the TPMS system.
– There is a malfunction in the horn or hazard indicators.
– The identification code of the tire’s pressure sensor is not registered to
the system.
– The battery of the tire pressure sensor is low.
• If the Easy-Fill Tire Alert does not oper- ate due to TPMS interference, move
the vehicle about 3 f t (1 m) backward
or forward and try again.
If the Easy-Fill Tire Alert is not working, use a
tire pressure gauge.
5-8Starting and driving
Page 300 of 528

NISSAN VEHICLE IMMOBILIZER
SYSTEM
The NISSAN Vehicle Immobilizer System
will not allow the engine to start without
the use of the registered key.
If the engine fails to start using a registered
key (for example, when interference is
caused by another registered key, an auto-
mated toll road device or automatic pay-
ment device on the key ring), restart the
engine using the following procedure:
1. Leave the ignition switch in the ON posi-tion for approximately 5 seconds.
2. Place the ignition switch in the OFF or LOCK position, and wait approximately
10 seconds.
3. Repeat steps 1 and 2.
4. Restart the engine while holding the de- vice (which may have caused the inter-
ference) separate from the registered
key.
If the no start condition re-occurs, NISSAN
recommends placing the registered key on
a separate key ring to avoid interference
from other devices. • Make sure the area around the vehicle is
clear.
• Check fluid levels such as engine oil, cool- ant, brake and clutch fluid (if so equipped),
and windshield-washer fluid as fre-
quently as possible, or at least whenever
you refuel.
• Check that all windows and lights are clean.
• Visually inspect tires for their appearance and condition. Also check tires for proper
inflation.
• Lock all doors.
• Position seat and adjust head restraints/ headrests.
• Adjust inside and outside mirrors.
• Fasten seat belts and ask all passengers to do likewise.
• Check the operation of warning lights when the ignition switch is placed in the
ON position. For additional information,
refer to “Warning lights, indicator lights
and audible reminders” in the “Instru-
ments and controls” section of this
manual. 1. Apply the parking brake.
2.
Continuously Variable Transmission
model:
Move the shif t lever to P (Park) or N (Neu-
tral). P (Park) is recommended.
The starter is designed not to operate
if the shif t lever is in any of the driving
positions.
Manual Transmission (M/T) model:
Move the shif t lever to N (Neutral). De-
press the clutch pedal to the floor.
The starter is designed not to operate
unless the clutch pedal is fully de-
pressed.
3. Push the ignition switch to the ON posi- tion. Depress the brake pedal and the
clutch pedal (if so equipped) and push
the ignition switch to start the engine.
To start the engine immediately, push
and release the ignition switch while de-
pressing the brake pedal with the igni-
tion switch in any position.
• If the engine is very hard to start in extremely cold weather or when re-
starting, depress the accelerator
pedal a little (approximately 1/3 to the
BEFORE STARTING THE ENGINE STARTING THE ENGINE
5-14Starting and driving
Page 304 of 528
P (Park)
CAUTION
To prevent transmission damage, use
the P (Park) position only when the ve-
hicle is completely stopped.
Use the P (Park) shif t lever position when
the vehicle is parked or when starting the
engine. Make sure the vehicle is completely
stopped. The brake pedal must be de-
pressed and the shif t lever button
pressed in to move the shif t lever from N
(Neutral) or any drive position to P (Park).
Apply the parking brake. When parking on a
hill, apply the parking brake first, then place
the shif t lever into the P (Park) position.
R (Reverse)
CAUTION
To prevent transmission damage, use
the R (Reverse) position only when the
vehicle is completely stopped.
Use the R (Reverse) position to back up.
Make sure the vehicle is completely
stopped before selecting the R (Reverse)
position. The brake pedal must be de-
pressed and the shif t lever button pressed in to move the shif t lever from P
(Park), N (Neutral) or any drive position to
R (Reverse).
N (Neutral)
Neither forward nor reverse gear is en-
gaged. The engine can be started in this
position. You may shif t to N (Neutral) and
restart a stalled engine while the vehicle is
moving.
D (Drive)
Use this position for all normal forward
driving.
L (Low) (if so equipped)
Use this position for maximum engine
braking on steep downhill gradients/
climbing steep slopes and whenever ap-
proaching sharp bends. Do not use the L
(Low) position in any other circumstances.
Manual shif t mode (if so
equipped)
When the shif t lever is in the manual shif t
gate, the transmission is ready for the
manual shif t mode. Shif t ranges can be
selected manually by moving the shif t le-
ver up or down. To cancel manual shif t
mode, return the shif t lever to the D (Drive)position. The transmission returns to auto-
matic driving mode.
When the shif t lever is shif ted from D (Drive)
to the manual shif t gate with the vehicle
stopped or while driving, the transmission
enters the manual shif t mode. Shif t ranges
can be selected manually. In the manual
shif t mode, the shif t range is displayed on
the position indicator in the meter. When
moving the shif t lever to the manual shif t
gate, the position indicator displays 1 (1st)
up to 7 (7th) depending on vehicle speed.
Shif t ranges up or down one by one as
follows:
1⇔
2⇔ 3⇔ 4⇔ 5⇔ 6⇔ 7
M7 (7th)
Use this position for all normal forward
driving at highway speeds.
M6 (6th) and M5 (5th)
Use this position when driving up long
slopes or for engine braking when driving
down long slopes.
M4 (4th), M3 (3rd) and M2 (2nd)
Use for hill climbing or engine braking on
downhill grades.
5-18Starting and driving
Page 306 of 528
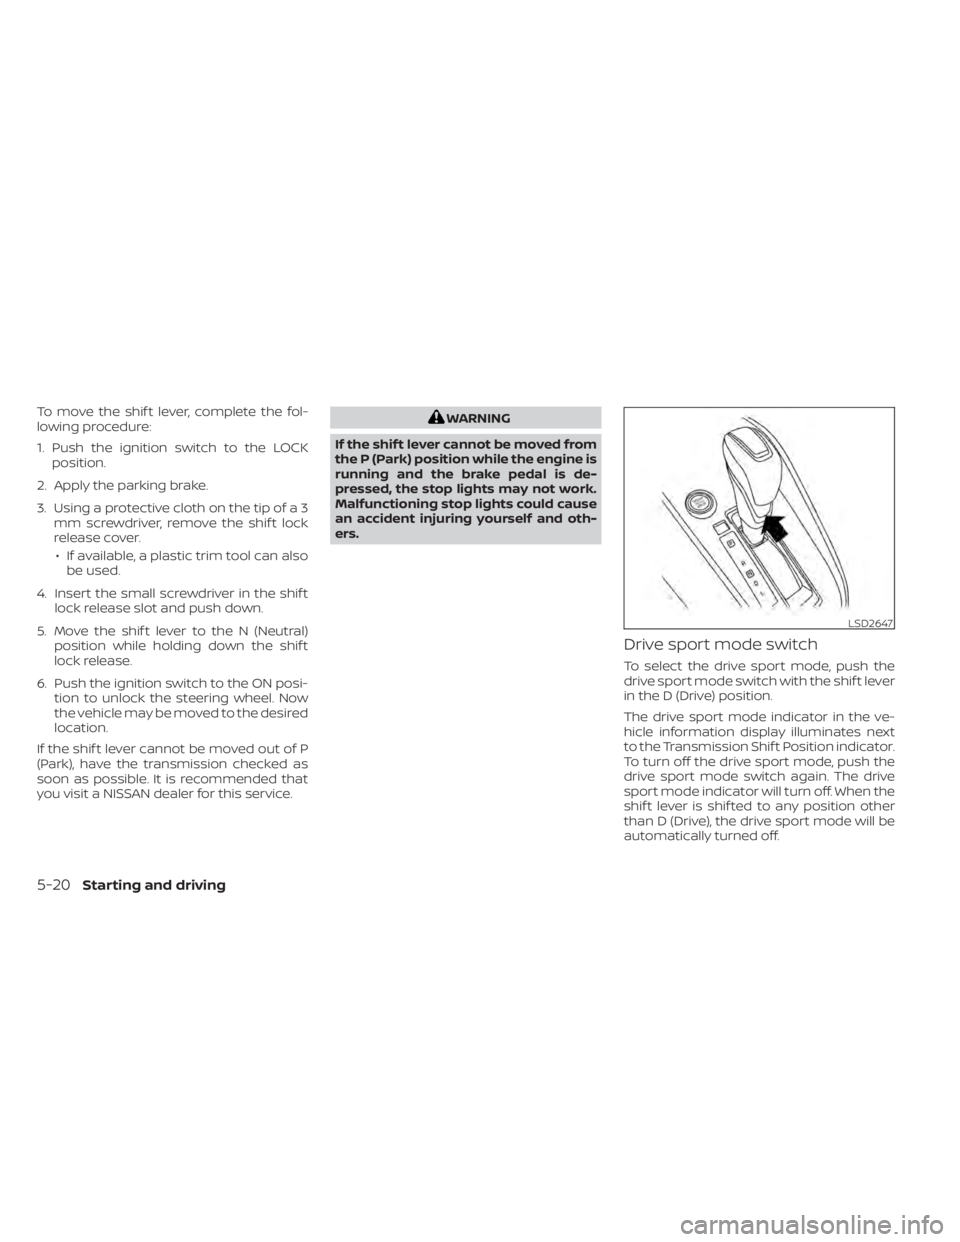
To move the shif t lever, complete the fol-
lowing procedure:
1. Push the ignition switch to the LOCKposition.
2. Apply the parking brake.
3. Using a protective cloth on the tip of a 3 mm screwdriver, remove the shif t lock
release cover.
• If available, a plastic trim tool can also be used.
4. Insert the small screwdriver in the shif t lock release slot and push down.
5. Move the shif t lever to the N (Neutral) position while holding down the shif t
lock release.
6. Push the ignition switch to the ON posi- tion to unlock the steering wheel. Now
the vehicle may be moved to the desired
location.
If the shif t lever cannot be moved out of P
(Park), have the transmission checked as
soon as possible. It is recommended that
you visit a NISSAN dealer for this service.
LSD2647
5-20Starting and driving
Page 310 of 528
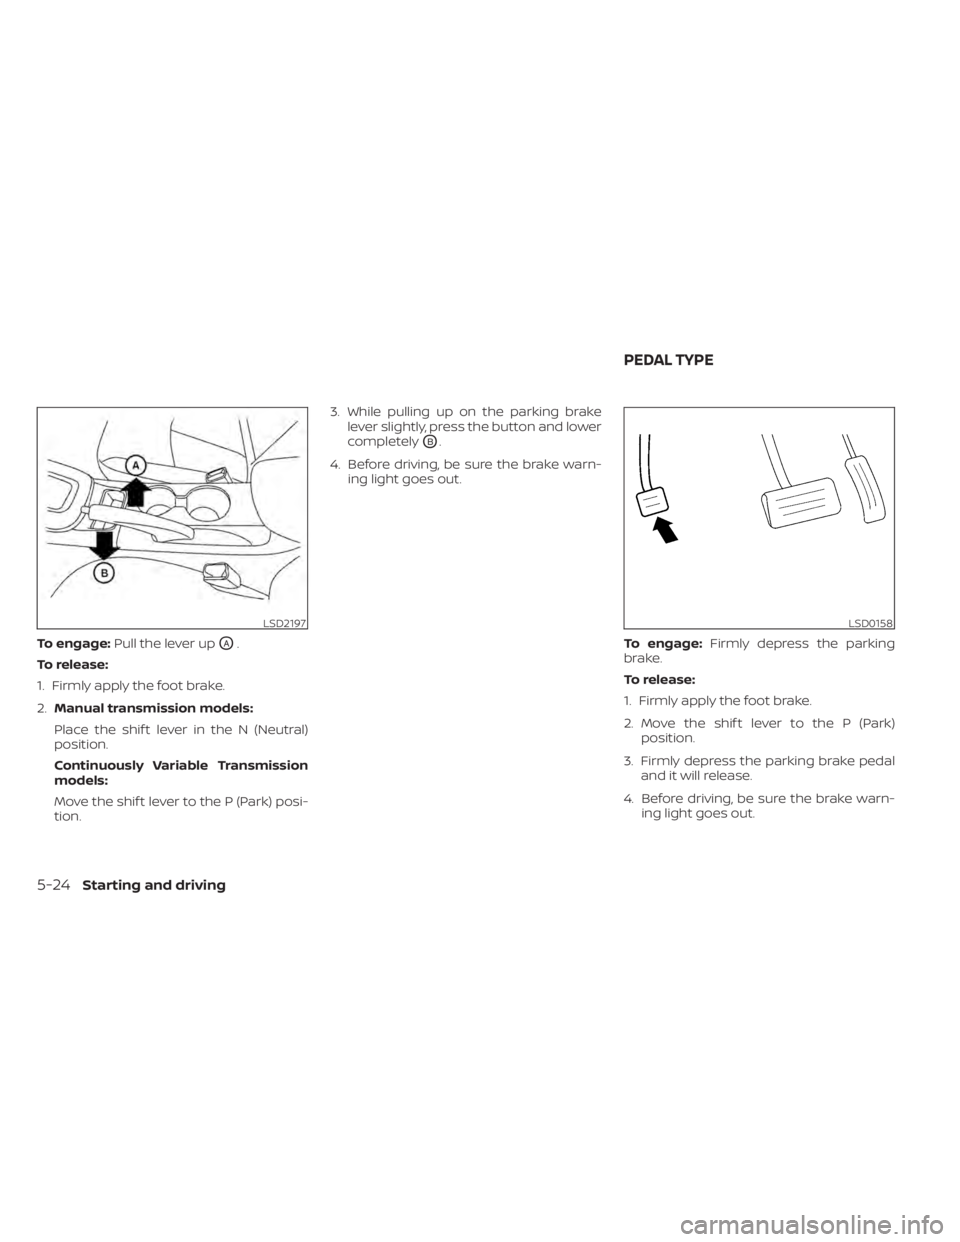
To engage:Pull the lever upOA.
To release:
1. Firmly apply the foot brake.
2. Manual transmission models:
Place the shif t lever in the N (Neutral)
position.
Continuously Variable Transmission
models:
Move the shif t lever to the P (Park) posi-
tion. 3. While pulling up on the parking brake
lever slightly, press the button and lower
completely
OB.
4. Before driving, be sure the brake warn- ing light goes out.
To engage:Firmly depress the parking
brake.
To release:
1. Firmly apply the foot brake.
2. Move the shif t lever to the P (Park) position.
3. Firmly depress the parking brake pedal and it will release.
4. Before driving, be sure the brake warn- ing light goes out.
LSD2197LSD0158
PEDAL TYPE
Page 350 of 528
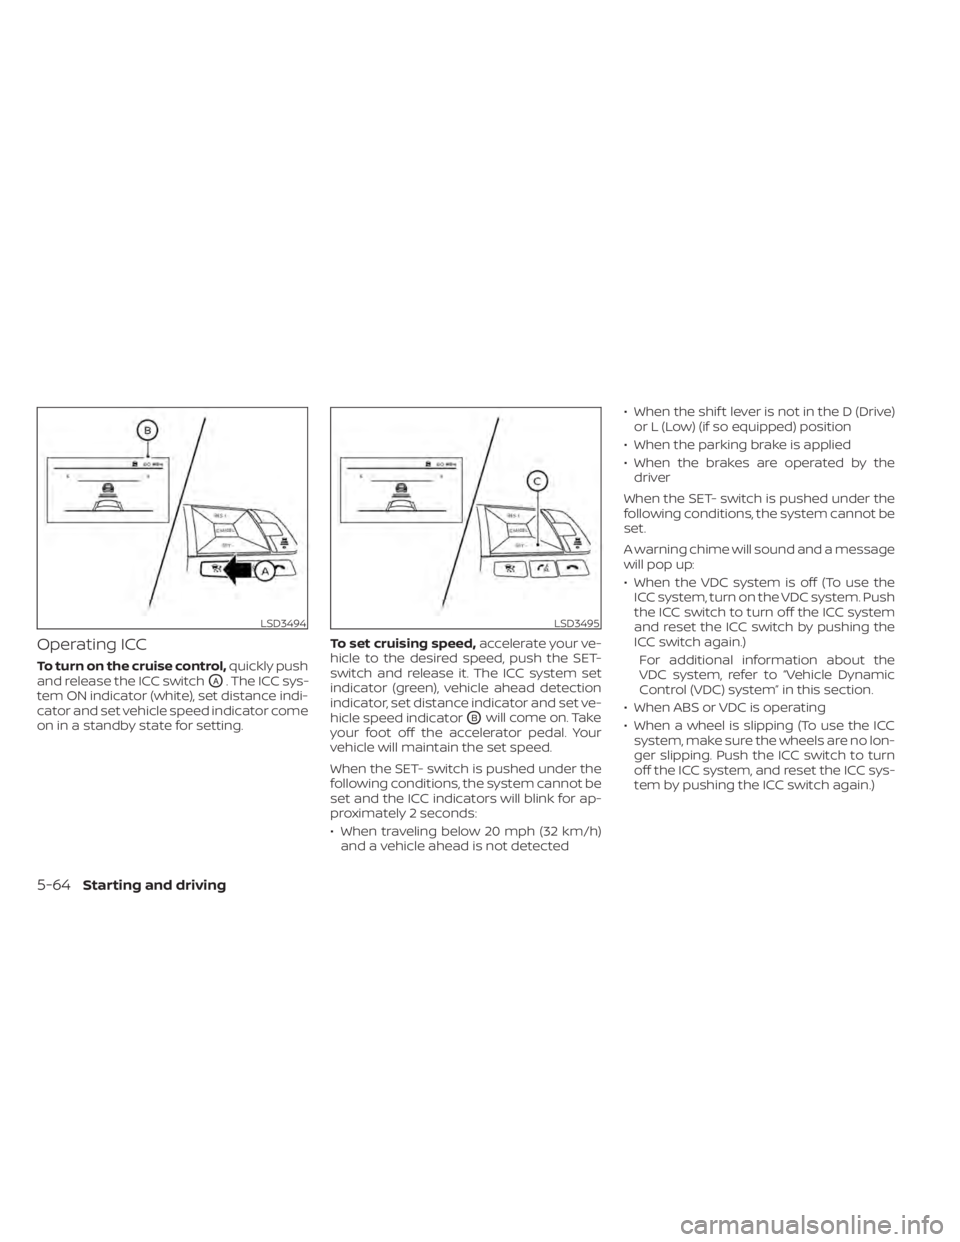
Operating ICC
To turn on the cruise control,quickly push
and release the ICC switch
OA. The ICC sys-
tem ON indicator (white), set distance indi-
cator and set vehicle speed indicator come
on in a standby state for setting. To set cruising speed,
accelerate your ve-
hicle to the desired speed, push the SET-
switch and release it. The ICC system set
indicator (green), vehicle ahead detection
indicator, set distance indicator and set ve-
hicle speed indicator
OBwill come on. Take
your foot off the accelerator pedal. Your
vehicle will maintain the set speed.
When the SET- switch is pushed under the
following conditions, the system cannot be
set and the ICC indicators will blink for ap-
proximately 2 seconds:
• When traveling below 20 mph (32 km/h) and a vehicle ahead is not detected • When the shif t lever is not in the D (Drive)
or L (Low) (if so equipped) position
• When the parking brake is applied
• When the brakes are operated by the driver
When the SET- switch is pushed under the
following conditions, the system cannot be
set.
A warning chime will sound and a message
will pop up:
• When the VDC system is off (To use the ICC system, turn on the VDC system. Push
the ICC switch to turn off the ICC system
and reset the ICC switch by pushing the
ICC switch again.)
For additional information about the
VDC system, refer to “Vehicle Dynamic
Control (VDC) system” in this section.
• When ABS or VDC is operating
• When a wheel is slipping (To use the ICC system, make sure the wheels are no lon-
ger slipping. Push the ICC switch to turn
off the ICC system, and reset the ICC sys-
tem by pushing the ICC switch again.)
LSD3494LSD3495
5-64Starting and driving