2022 NISSAN SENTRA display
[x] Cancel search: displayPage 282 of 528
•NextTouch this key to read the next message.
• Play/Stop Touch the “Play ” key to have the hands-
free phone system read out the received
message. Touch the “Stop” key to stop
reading. • Call
If the sender of the message is registered
in the phonebook, touch the “Call” key to
make a call to the sender.
• Reply A reply message can be selected from
the predefined list. Sending a text message (if so equipped)
This function may not be supported de-
pending on the cellular phone.
1. Press the
button on the control
panel.
2. Touch the “Text Message” key on the screen.
3. Touch the “Create Message” key on the screen.
The following items are available:
Available item Action
To Enter Number by Keypad Enter the phone number of the recipient using the keypad. Touch the “OK” key to confirm.
Quick Dial Select a recipient from the quick dial list.
Phonebook Select a recipient from the phonebook.
Call History Select a recipient/phone number from call history.
Select Text Touch to display a list of predefined text messages.
Send Touch to send the message.
4-80Monitor, climate, audio, phone and voice recognition systems
Page 283 of 528
BLUETOOTH® CONNECTIONS
SCREEN
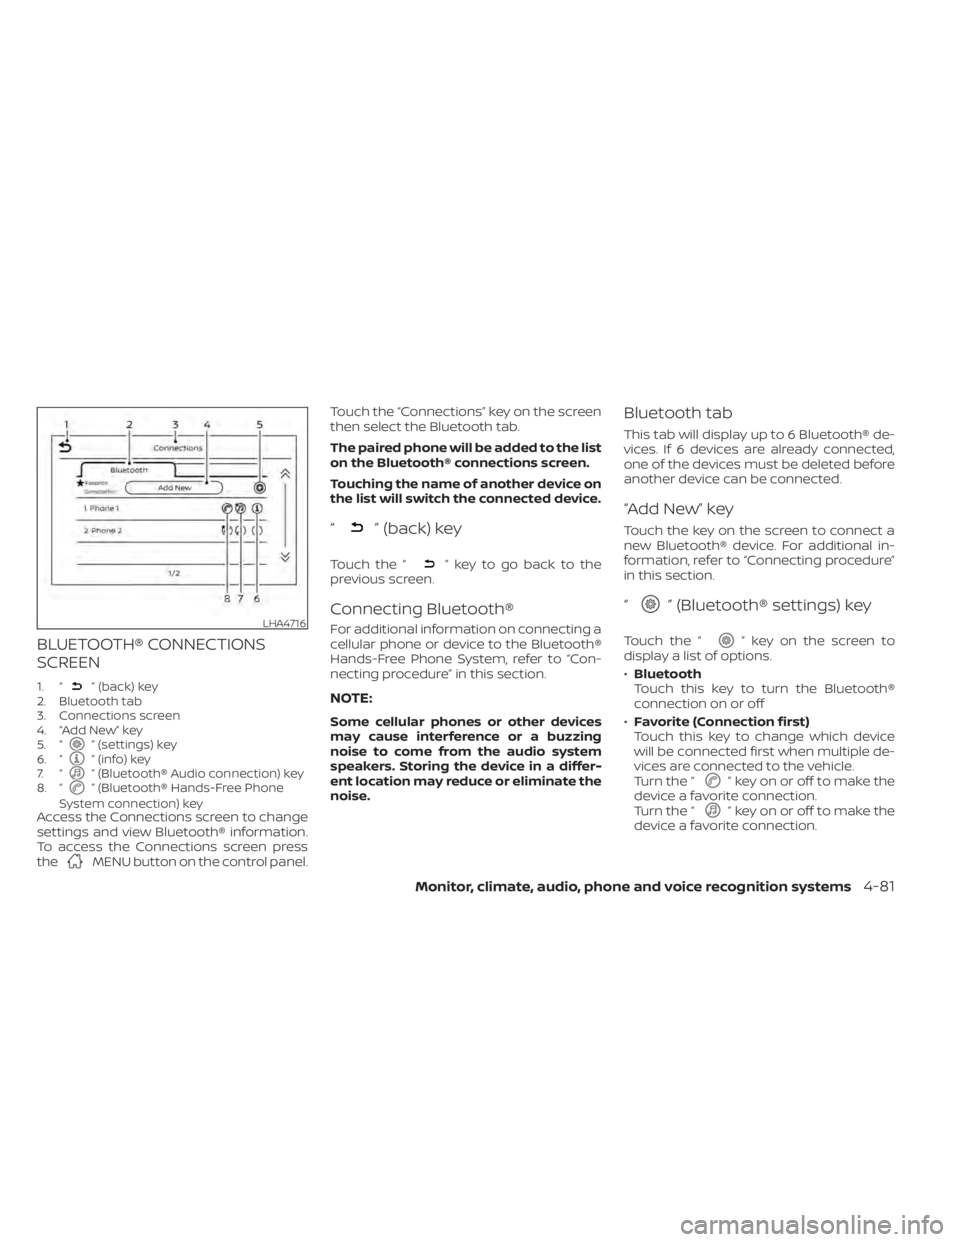
1. “” (back) key
2. Bluetooth tab
3. Connections screen
4. “Add New” key
5. “
” (settings) key
6. “” (info) key
7. “” (Bluetooth® Audio connection) key
8. “” (Bluetooth® Hands-Free Phone
System connection) key
Access the Connections screen to change
settings and view Bluetooth® information.
To access the Connections screen press
the
MENU button on the control panel. Touch the “Connections” key on the screen
then select the Bluetooth tab.
The paired phone will be added to the list
on the Bluetooth® connections screen.
Touching the name of another device on
the list will switch the connected device.
“” (back) key
Touch the “” key to go back to the
previous screen.
Connecting Bluetooth®
For additional information on connecting a
cellular phone or device to the Bluetooth®
Hands-Free Phone System, refer to “Con-
necting procedure” in this section.
NOTE:
Some cellular phones or other devices
may cause interference or a buzzing
noise to come from the audio system
speakers. Storing the device in a differ-
ent location may reduce or eliminate the
noise.
Bluetooth tab
This tab will display up to 6 Bluetooth® de-
vices. If 6 devices are already connected,
one of the devices must be deleted before
another device can be connected.
“Add New” key
Touch the key on the screen to connect a
new Bluetooth® device. For additional in-
formation, refer to “Connecting procedure”
in this section.
“” (Bluetooth® settings) key
Touch the “” key on the screen to
display a list of options.
• Bluetooth
Touch this key to turn the Bluetooth®
connection on or off
• Favorite (Connection first)
Touch this key to change which device
will be connected first when multiple de-
vices are connected to the vehicle.
Turn the “
” key on or off to make the
device a favorite connection.
Turn the “
” key on or off to make the
device a favorite connection.
LHA4716
Page 284 of 528
•Pin
Touch this key to customize the PIN code.
Input a four digit number then touch the
“OK” key. The new PIN will be set.
“” (info) key
Touch the “” key on the screen to
display the information of the cellular
phone or to delete the device.
Touch the “Delete” key to remove a paired
device then select “Yes” when a message
appears.
“” (Bluetooth® Hands-Free
Phone System connection) key
A list of connected devices will be displayed
on the screen. Touch the “” key next to
the name to connect a device to the
Hands-Free Phone System. If the phone is
listed as a favorite, a star will appear on the
icon. Select the key again to disconnect the
device. The device will not be removed
from the list. For additional information on
removing a device, refer to “
(info) key”
in this section.
“” (Bluetooth® Audio
connection) key
A list of connected devices will be displayed
on the screen. Touch the “” key next to
the name to connect a device to
Bluetooth® Audio. If the device is listed as a
favorite, a star will appear on the icon. Se-
lect the key again to disconnect the device.
The device will not be removed from the
list. For additional information on removing
a device, refer to “
(info) key” in this
section.
PHONE AND TEXT MESSAGE
SETTINGS
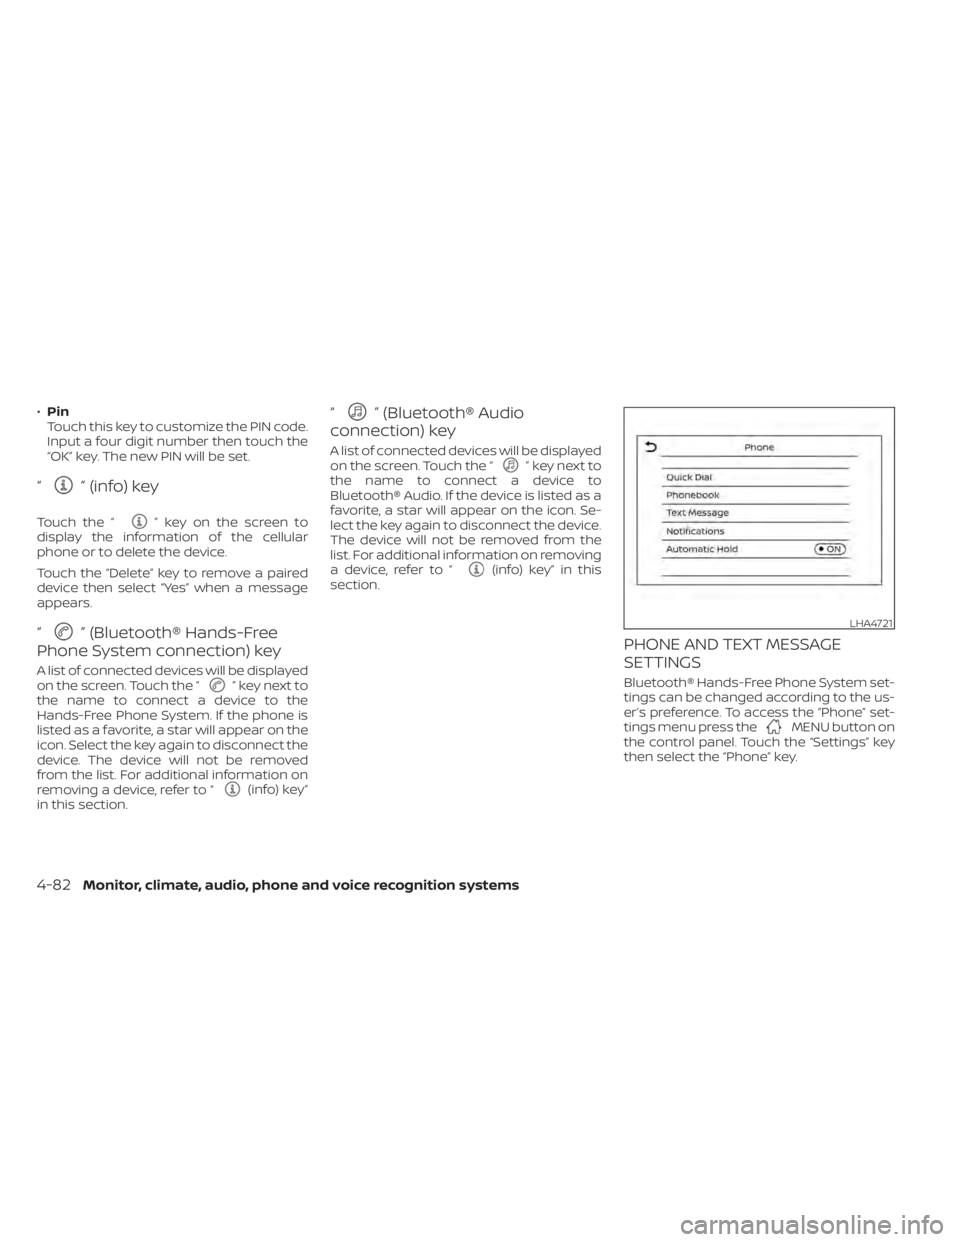
Bluetooth® Hands-Free Phone System set-
tings can be changed according to the us-
er’s preference. To access the “Phone” set-
tings menu press the
MENU button on
the control panel. Touch the “Settings” key
then select the “Phone” key.
LHA4721
4-82Monitor, climate, audio, phone and voice recognition systems
Page 285 of 528
The following options are available:
Menu ItemResult
Quick Dial Edit Entries in the Quick Dial can be edited. For additional information, refer to “Quick dial” in this section.
Delete All Deletes all of the stored phone numbers in quick dial.
Phonebook Download Entire Phone- book All the phone numbers that are stored in a phonebook in the cellular phone that is connected to the vehicle are
downloaded at once. For additional information, refer to the cellular phone’s owner’s manual.
Auto Downloaded Turns on/off automatic downloading of the phonebook when a new phone is connected.
Text Message Text Message Turns the text messaging function on/off.
Text Message Ringtone Turn the incoming message sound on/off.
Signature Turns the signature setting for the outgoing text message on/off.
Auto Reply Turns the automatic text message reply function on/off.
Auto Reply Text Message Select the text message to be used for the automatic reply. Choose from a list of predefined messages.
Notifications Driver Only When this item is turned on, incoming call notification is displayed only on the handset.
Vehicle Ringtone Turns the vehicle ringtone on/off.
Automatic Hold When this item turns on, an incoming call will be put on hold automatically.
Monitor, climate, audio, phone and voice recognition systems4-83
Page 292 of 528
Additional information:
• When replacing a wheel without theTPMS such as the spare tire, the TPMS
does not monitor the tire pressure of the
spare tire.
• The TPMS will activate only when the ve- hicle is driven at speeds above 16 mph (25
km/h). Also, this system may not detect a
sudden drop in tire pressure (for example,
a flat tire while driving).
• The low tire pressure warning light does not automatically turn off when the tire
pressure of all your tires is adjusted. Af ter
the tires are inflated to the recom-
mended pressure, the vehicle must be
driven at speeds above 16 mph (25 km/h)
to activate the TPMS and turn off the low
tire pressure warning light. Use a tire
pressure gauge to check the tire pres-
sure. • The “CHECK TIRE PRES” (TypeA-ifso
equipped) or the “Tire Pressure Low - Add
Air”(TypeB-ifsoequipped) warning mes-
sage is displayed in the odometer when
the low tire pressure warning light is illu-
minated and low tire pressure is de-
tected. The “CHECK TIRE PRES” (Typ eA-if
so equipped) or the “Tire Pressure Low -
AddAir”(TypeB-ifsoequipped) warning
message turns off when the low tire pres-
sure warning light turns off. The low tire
pressure warning light remains illumi-
nated until the tires are inflated to the
recommended COLD tire pressure. The
“CHECK TIRE PRES” (TypeA-ifso
equipped) or the “Tire Pressure Low - Add
Air”(TypeB-ifsoequipped) warning mes-
sage is displayed each time the ignition
switch is placed in the ON position as
long as the low tire pressure warning light
remains illuminated.
• The “CHECK TIRE PRES” (TypeA-ifso equipped) or the “Tire Pressure Low - Add
Air”(TypeB-ifsoequipped) warning is not
displayed if the low tire pressure warning
light illuminates to indicate a TPMS mal-
function. • Tire pressure rises and falls depending on
the heat caused by the vehicle’s opera-
tion and the outside temperature. Do not
reduce the tire pressure af ter driving be-
cause the tire pressure rises af ter driving.
Low outside temperature can lower the
temperature of the air inside the tire
which can cause a lower tire inflation
pressure. This may cause the low tire
pressure warning light to illuminate. If the
warning light illuminates, check the tire
pressure for all four tires.
• The Tire and Loading Information label is located in the driver's door opening.
For additional information, refer to “Check
tire pressure warning message” or “Low tire
pressure warning light” in the “Instruments
and controls” section and “Tire Pressure
Monitoring System (TPMS)” in the “In case of
emergency” section of this manual.
Page 297 of 528
WARNING
Do not operate the push-button igni-
tion switch while driving the vehicle ex-
cept in an emergency. (The engine will
stop when the ignition switch is pushed
three consecutive times in quick suc-
cession or the ignition switch is pushed
and held for more than 2 seconds.) If
the engine stops while the vehicle is
being driven, this could lead to a crash
and serious injury. When the ignition switch is pushed without
depressing the brake pedal or the clutch
pedal for manual transmission (M/T) mod-
els, the ignition switch position will illumi-
nate as follows:
Push center:
• Once to change to ACC.
• Two times to change to ON.
• Three times to return to OFF.
The ignition switch will automatically re-
turn to the LOCK position when any door is
either opened or closed with the switch in
the OFF position.
The ignition lock is designed so that the
ignition switch position cannot be placed
in the OFF position until the shif t lever is
moved to the P (Park) position or N (Neutral)
position (M/T).
When the ignition switch cannot be pushed
toward the OFF position, proceed as fol-
lows:
1. Move the shif t lever to the P (Park) posi-
tion or N (Neutral) position (M/T).
2. Push the ignition switch. The ignition switch position will change to the ON
position. 3. Push the ignition switch again to the
OFF position.
The shif t lever can be moved from the P
(Park) position if the ignition switch is in
the ON position and the brake pedal is
depressed.
If the battery of the vehicle is discharged,
the ignition switch cannot be moved
from the LOCK position.
Some indicators and warnings for opera-
tion are displayed in the meter. For addi-
tional information, refer to “Warning lights,
indicator lights and audible reminders” in
the “Instruments and controls” section of
this manual.
LSD2645
PUSH-BUTTON IGNITION SWITCH
Starting and driving5-11
Page 304 of 528
P (Park)
CAUTION
To prevent transmission damage, use
the P (Park) position only when the ve-
hicle is completely stopped.
Use the P (Park) shif t lever position when
the vehicle is parked or when starting the
engine. Make sure the vehicle is completely
stopped. The brake pedal must be de-
pressed and the shif t lever button
pressed in to move the shif t lever from N
(Neutral) or any drive position to P (Park).
Apply the parking brake. When parking on a
hill, apply the parking brake first, then place
the shif t lever into the P (Park) position.
R (Reverse)
CAUTION
To prevent transmission damage, use
the R (Reverse) position only when the
vehicle is completely stopped.
Use the R (Reverse) position to back up.
Make sure the vehicle is completely
stopped before selecting the R (Reverse)
position. The brake pedal must be de-
pressed and the shif t lever button pressed in to move the shif t lever from P
(Park), N (Neutral) or any drive position to
R (Reverse).
N (Neutral)
Neither forward nor reverse gear is en-
gaged. The engine can be started in this
position. You may shif t to N (Neutral) and
restart a stalled engine while the vehicle is
moving.
D (Drive)
Use this position for all normal forward
driving.
L (Low) (if so equipped)
Use this position for maximum engine
braking on steep downhill gradients/
climbing steep slopes and whenever ap-
proaching sharp bends. Do not use the L
(Low) position in any other circumstances.
Manual shif t mode (if so
equipped)
When the shif t lever is in the manual shif t
gate, the transmission is ready for the
manual shif t mode. Shif t ranges can be
selected manually by moving the shif t le-
ver up or down. To cancel manual shif t
mode, return the shif t lever to the D (Drive)position. The transmission returns to auto-
matic driving mode.
When the shif t lever is shif ted from D (Drive)
to the manual shif t gate with the vehicle
stopped or while driving, the transmission
enters the manual shif t mode. Shif t ranges
can be selected manually. In the manual
shif t mode, the shif t range is displayed on
the position indicator in the meter. When
moving the shif t lever to the manual shif t
gate, the position indicator displays 1 (1st)
up to 7 (7th) depending on vehicle speed.
Shif t ranges up or down one by one as
follows:
1⇔
2⇔ 3⇔ 4⇔ 5⇔ 6⇔ 7
M7 (7th)
Use this position for all normal forward
driving at highway speeds.
M6 (6th) and M5 (5th)
Use this position when driving up long
slopes or for engine braking when driving
down long slopes.
M4 (4th), M3 (3rd) and M2 (2nd)
Use for hill climbing or engine braking on
downhill grades.
5-18Starting and driving
Page 311 of 528
The ECO mode helps to enhance the fuel
economy by controlling the throttle sensi-
tivity and transmission points.
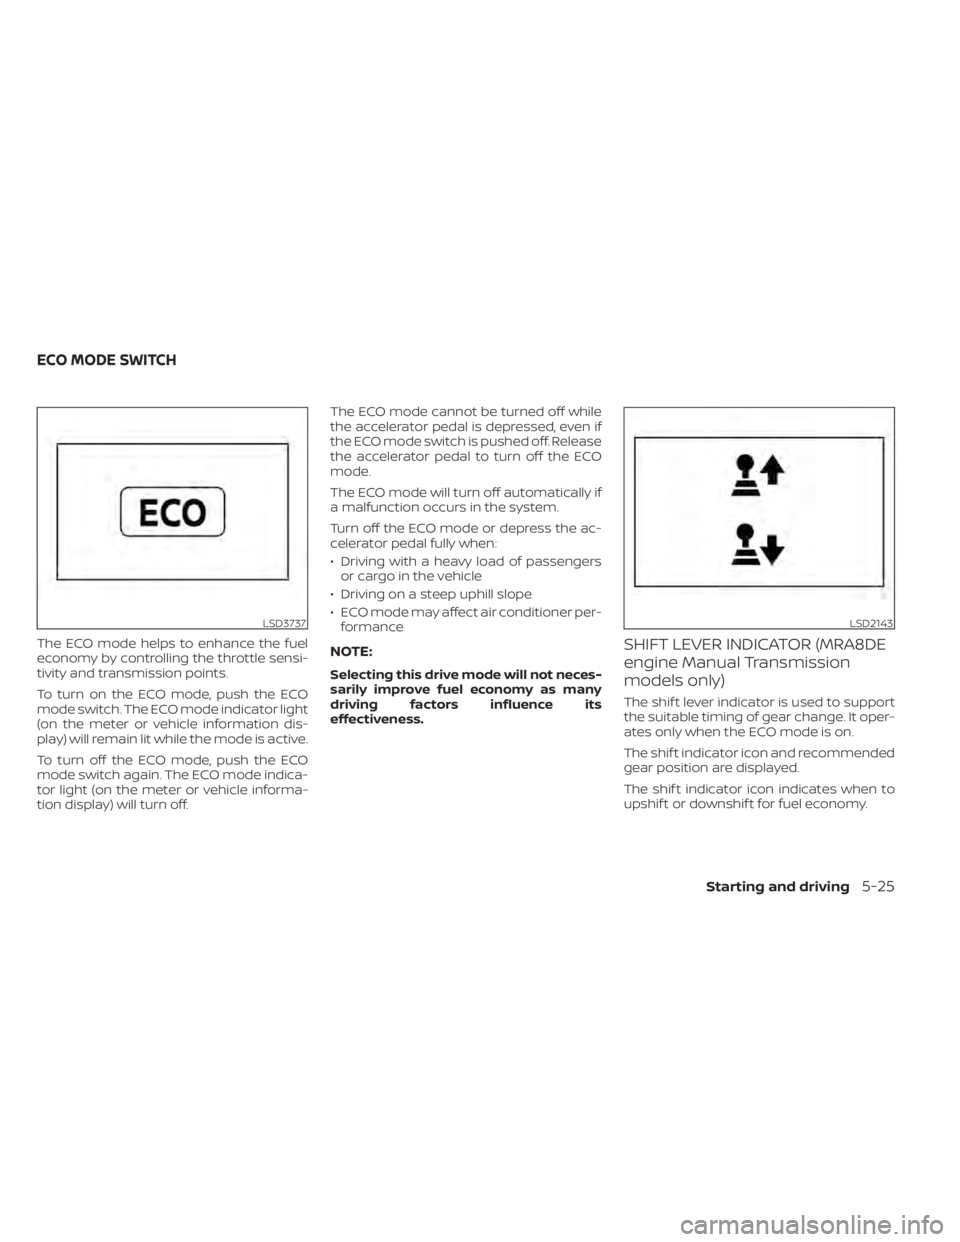
To turn on the ECO mode, push the ECO
mode switch. The ECO mode indicator light
(on the meter or vehicle information dis-
play) will remain lit while the mode is active.
To turn off the ECO mode, push the ECO
mode switch again. The ECO mode indica-
tor light (on the meter or vehicle informa-
tion display) will turn off.The ECO mode cannot be turned off while
the accelerator pedal is depressed, even if
the ECO mode switch is pushed off. Release
the accelerator pedal to turn off the ECO
mode.
The ECO mode will turn off automatically if
a malfunction occurs in the system.
Turn off the ECO mode or depress the ac-
celerator pedal fully when:
• Driving with a heavy load of passengers
or cargo in the vehicle
• Driving on a steep uphill slope
• ECO mode may affect air conditioner per- formanceNOTE:
Selecting this drive mode will not neces-
sarily improve fuel economy as many
driving factors influence its
effectiveness.
SHIFT LEVER INDICATOR (MRA8DE
engine Manual Transmission
models only)
The shif t lever indicator is used to support
the suitable timing of gear change. It oper-
ates only when the ECO mode is on.
The shif t indicator icon and recommended
gear position are displayed.
The shif t indicator icon indicates when to
upshif t or downshif t for fuel economy.
LSD3737LSD2143
ECO MODE SWITCH
Starting and driving5-25