Page 349 of 508
HOW TO ENABLE/DISABLE THE
INTELLIGENT DRIVER ALERTNESS
(I-DA) SYSTEMPerform the following steps to enable or
disable the I–DA system.1. Press the
button until “Settings” dis-
plays in the vehicle information display
and press the OK button. Use the
button to select “Driver Assistance.” Then
press the OK button.
2. Select “Driver Attention Alert” and press the OK button to turn the system on or
off.
NOTE:
The setting will be retained even if
the engine is restarted.
INTELLIGENT DRIVER ALERTNESS
(I-DA) SYSTEM LIMITATIONS
Page 350 of 508
–If you have adopted a sporty driv-
ing style with higher cornering
speeds or higher rates of
acceleration.
– Frequent lane changes or
changes to vehicle speed.
• The I–DA system will not provide an
alert in the following conditions:
– Vehicle speeds lower than 37 mph
(60 km/h).
– Short lapses of attention.
– Instantaneous distractions such
as dropping an object.
System malfunction
If the Intelligent Driver Alertness system
malfunctions, the system warning mes-
sage will appear in the vehicle information
display and the function will be stopped
automatically. Action to take
Stop the vehicle in a safe location, place the
vehicle in P (Park) position, turn the engine
off and restart the engine. If the system
warning message continues to appear,
have the system checked. It is recom-
mended that you visit a NISSAN dealer for
this service.
LIC3125
5-112Starting and driving
Page 353 of 508
The AWD high temperature message may
be displayed while trying to free a stuck
vehicle due to increased oil temperature.
The driving mode may change to 2-Wheel
Drive (2WD). If this message is displayed,
stop the vehicle with the engine idling, as
soon as it is safe to do so. Then if the mes-
sage turns off, you can continue driving.The tire size message may be displayed if
there is a large difference between the di-
ameters of front and rear wheels. Pull off
the road in a safe area, with the engine
idling. Check that all tire sizes are the same,
that the tire pressure is correct and that
the tires are not excessively worn.
If any warning messages continue to be
displayed, have your vehicle checked. It is
recommended that you visit a NISSAN
dealer as soon as possible.
LSD2530
Page 354 of 508

•Do not attempt to test an AWD
equipped vehicle on a 2-wheel dyna-
mometer (such as the dynamom-
eters used by some states for emis-
sions testing) or similar equipment
even if the other two wheels are
raised off the ground. Make sure that
you inform the test facility personnel
that your vehicle is equipped with
AWD before it is placed on a dyna-
mometer. Using the wrong test
equipment may result in drivetrain
damage or unexpected vehicle
movement which could result in seri-
ous personal injury or vehicle
damage.
CAUTION
• Do not operate the engine on a free
roller when any of the wheels are
raised.
• If you use the free roller, rotate four
wheels with the same speed without
raising any wheels. •
If an AWD warning message is dis-
played while driving there may be a
malfunction in the AWD system. Re-
duce the vehicle speed immediately
and have your vehicle checked. It is
recommended that you visit a
NISSAN dealer as soon as possible.
• The powertrain may be damaged if
you continue driving when the AWD
temperature or tire size incorrect
messages are displayed
• If the AWD high temperature mes-
sage is displayed while you are driv-
ing, pull off the road in a safe area,
and idle the engine. The driving
mode will change to 2WD to prevent
the AWD system from malfunction-
ing. If the warning message turns off,
you can drive again.
• If the tire size incorrect message is
displayed while you are driving, pull
off the road in a safe area with the
engine idling. Check that all tire sizes
are the same, that the tire pressure is
correct and that the tires are not ex-
cessively worn. •
If a warning message continues to be
displayed af ter the above opera-
tions, have your vehicle checked as
soon as possible. It is recommended
that you visit a NISSAN dealer for this
service.
5-116Starting and driving
Page 362 of 508

WARNING
• Never rely solely on the hill start as-
sist system to prevent the vehicle
from moving backward on a hill. Al-
ways drive carefully and attentively.
Depress the brake pedal when the
vehicle is stopped on a steep hill. Be
especially careful when stopped on a
hill on frozen or muddy roads. Failure
to prevent the vehicle from rolling
backwards may result in a loss of
control of the vehicle and possible
serious injury or death.
• The hill start assist system is not de-
signed to hold the vehicle at a stand-
still on a hill. Depress the brake pedal
when the vehicle is stopped on a
steep hill. Failure to do so may cause
the vehicle to roll backwards and
may result in a collision or serious
personal injury.
• The hill start assist may not prevent
the vehicle from rolling backwards
on a hill under all load or road condi-
tions. Always be prepared to depress
the brake pedal to prevent the ve-
hicle from rolling backwards. Failure
to do so may result in a collision or
serious personal injury. When the vehicle is stopped on a hill, the hill
start assist system automatically keeps
the brakes applied. This helps prevent the
vehicle from rolling backward in the time it
takes the driver to release the brake pedal
and apply the accelerator.
Hill start assist will operate automatically
under the following conditions:
• The shif t lever is moved to a forward or
reverse gear.
• The vehicle is stopped completely on a hill by applying the brake.
• The hill grade is above 10%.
The maximum holding time is two sec-
onds. Af ter two seconds the vehicle will be-
gin to roll back and hill start assist will stop
operating completely.
Hill start assist will not operate when the
shif t lever is moved to N (Neutral) or P (Park)
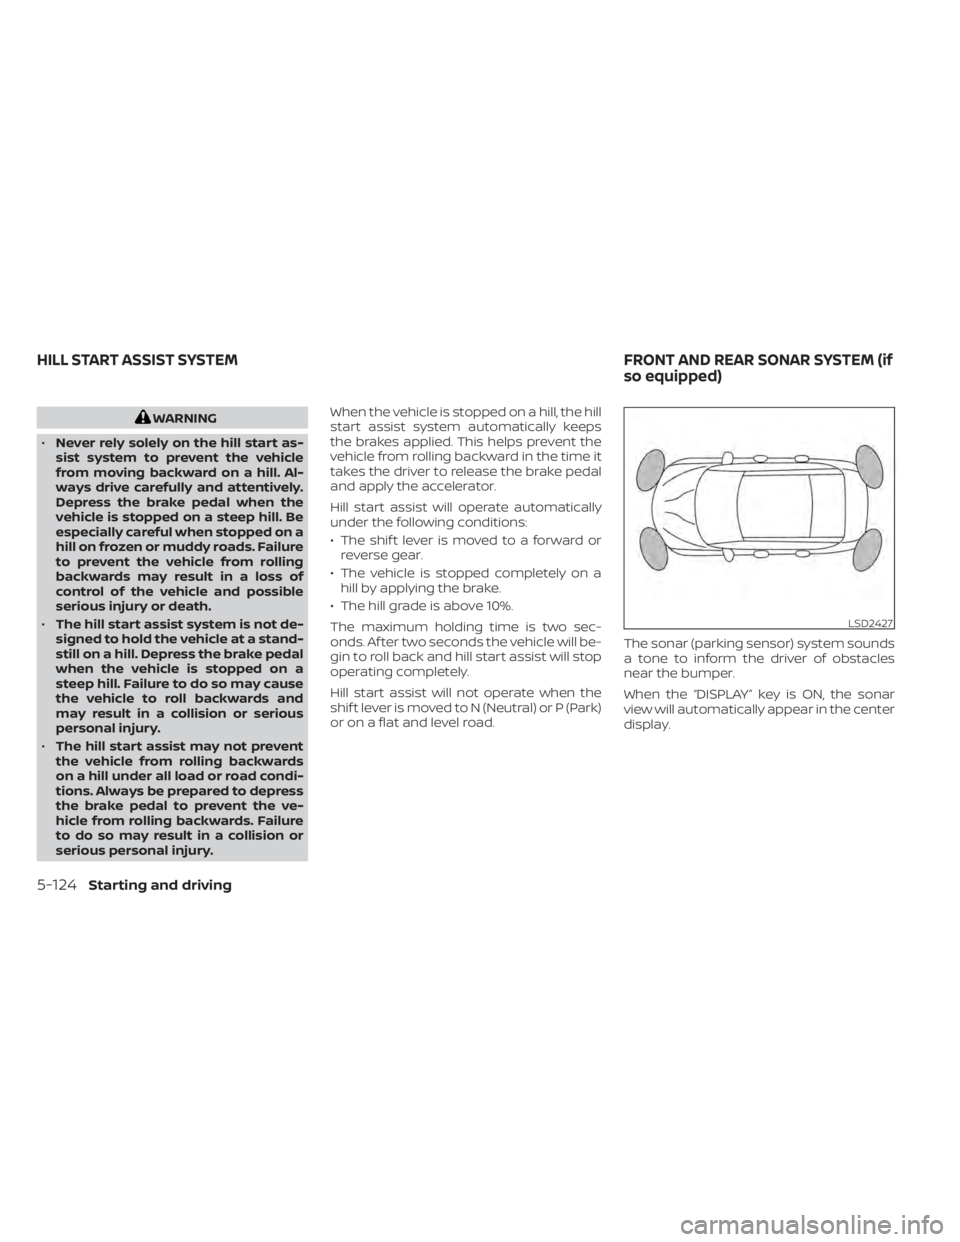
or on a flat and level road. The sonar (parking sensor) system sounds
a tone to inform the driver of obstacles
near the bumper.
When the “DISPLAY” key is ON, the sonar
view will automatically appear in the center
display.
LSD2427
HILL START ASSIST SYSTEM
FRONT AND REAR SONAR SYSTEM (if
so equipped)
Page 364 of 508
button until “Settings” ap-
pears in the vehicle information display
and then press OK. Use the
button
to select “Driver Assistance.” Then press
the OK button.
2. Select “Parking Aids” and press the OK button.
3. Select “Sensor” and press the OK button. Select “ON,” “OFF,” or “Front Only” and
press the OK button.
• Select “Range” to change the sonar distance to “Near,” “Mid,” or “Far.”
• Select “Volume” to change the volume to “High,” “Medium,” or “Low.”
NOTE:
The system automatically turns on every
time the engine is started, as long as it is
activated using the settings menu on
the vehicle information display.
5-126Starting and driving
Page 369 of 508
TIRE PRESSURE MONITORING
SYSTEM (TPMS)
This vehicle is equipped with the Tire Pres-
sure Monitoring System (TPMS). It monitors
tire pressure of all tires except the spare.
When the low tire pressure warning light is
lit, and the “Tire Pressure Low - Add Air”
warning appears in the vehicle information
display, one or more of your tires is signifi-
cantly under-inflated. If equipped, the sys-
tem also displays pressure of all tires (ex-
cept the spare tire) on the display screen by
sending a signal from a sensor that is in-
stalled in each wheel. If the vehicle is being
driven with low tire pressure, the TPMS will
activate and warn you of it by the low tire
pressure warning light. This system will ac-
tivate only when the vehicle is driven at
speeds above 16 mph (25 km/h). For addi-
tional information, see “Warning lights, indi-
cator lights and audible reminders” (P. 2-8)
and “Tire Pressure Monitoring System
(TPMS)” (P. 5-5).
Page 400 of 508

6. Coat the gasket on the new filter withclean engine oil.
7. Screw in the oil filter clockwise until a slight resistance is felt, then tighten addi-
tionally more than 2/3 turn.
Oil filter tightening torque: 11 to 15 f t-lb (14.7 to 20.6 N·m)
8. Clean and re-install the drain plug with a new washer. Securely tighten the drain
plug with a wrench. Do not use exces-
sive force.
Drain plug tightening torque: 22 to 29 f t-lb (29.4 to 39.2 N·m)
9. Refill the engine with the recommended oil through the oil filler opening, and in-
stall the oil filler cap securely.
For additional information about drain and
refill capacity, see “Recommended fluids/
lubricants and capacities” (P. 10-2). The
drain and refill capacity depends on the oil
temperature and drain time. Use these
specifications for reference only. Always
use the dipstick to determine the proper
amount of oil in the engine. 10. Start the engine and check for leakage
around the drain plug and the oil filter.
Correct as required. Turn the engine off
and wait more than 15 minutes. Check
the oil level with the dipstick. Add en-
gine oil if necessary.
Af ter the operation
1. Reinstall engine protectors in reverse or-der of removal.
2. Lower the vehicle carefully to the ground.
3. Reset oil and oil filter maintenance re- minder. For additional information, see
“Vehicle information display” (P. 2-17).
• Dispose of waste oil and filter properly.
• Check your local regulations.