2022 NISSAN MURANO display
[x] Cancel search: displayPage 174 of 508
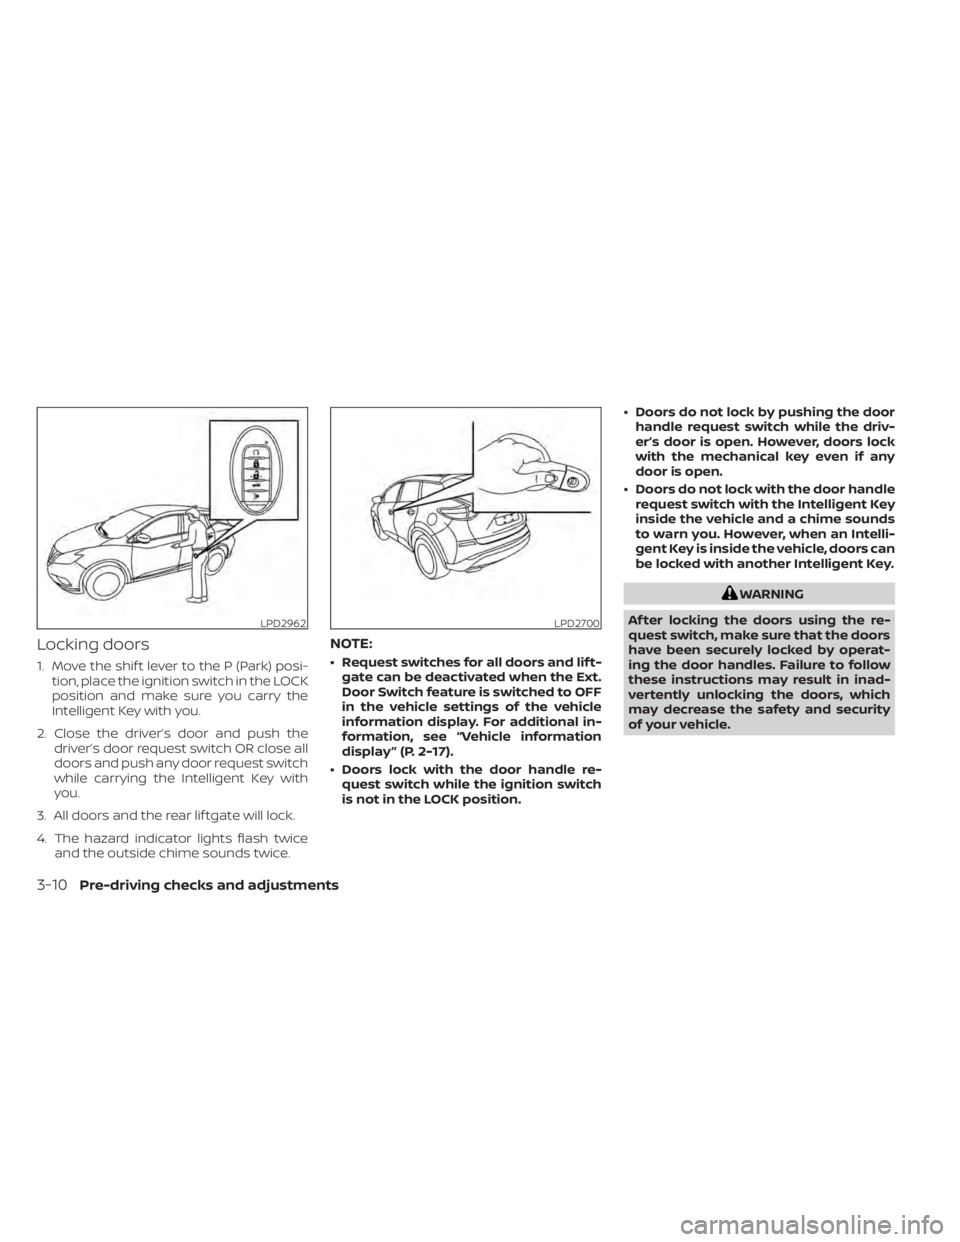
Locking doors
1. Move the shif t lever to the P (Park) posi-tion, place the ignition switch in the LOCK
position and make sure you carry the
Intelligent Key with you.
2. Close the driver’s door and push the driver’s door request switch OR close all
doors and push any door request switch
while carrying the Intelligent Key with
you.
3. All doors and the rear lif tgate will lock.
4. The hazard indicator lights flash twice and the outside chime sounds twice.
NOTE:
• Request switches for all doors and lif t-gate can be deactivated when the Ext.
Door Switch feature is switched to OFF
in the vehicle settings of the vehicle
information display. For additional in-
formation, see “Vehicle information
display ” (P. 2-17).
• Doors lock with the door handle re- quest switch while the ignition switch
is not in the LOCK position. • Doors do not lock by pushing the door
handle request switch while the driv-
er’s door is open. However, doors lock
with the mechanical key even if any
door is open.
• Doors do not lock with the door handle request switch with the Intelligent Key
inside the vehicle and a chime sounds
to warn you. However, when an Intelli-
gent Key is inside the vehicle, doors can
be locked with another Intelligent Key.
WARNING
Af ter locking the doors using the re-
quest switch, make sure that the doors
have been securely locked by operat-
ing the door handles. Failure to follow
these instructions may result in inad-
vertently unlocking the doors, which
may decrease the safety and security
of your vehicle.
LPD2700
3-10Pre-driving checks and adjustments
Page 176 of 508
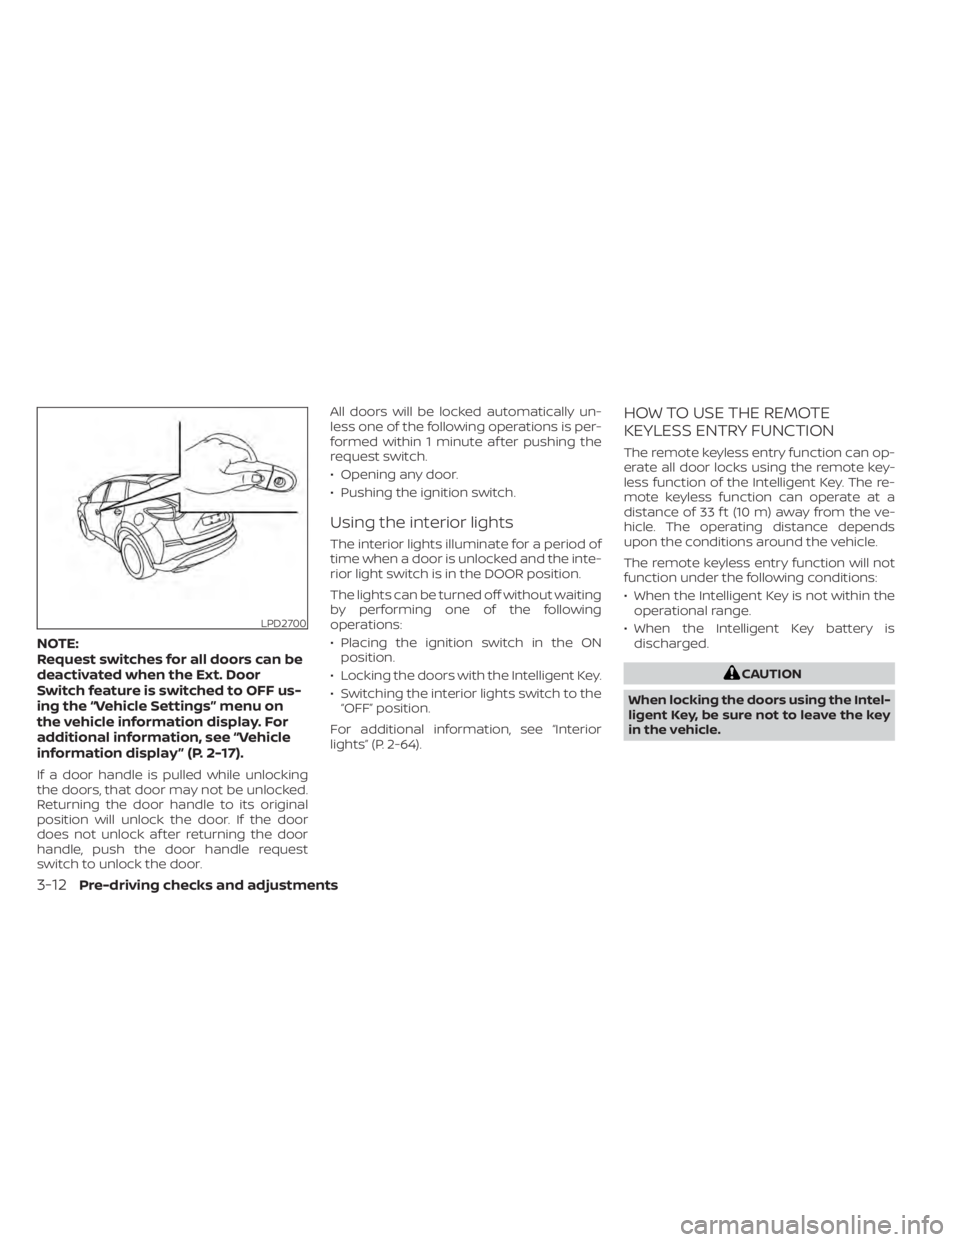
NOTE:
Request switches for all doors can be
deactivated when the Ext. Door
Switch feature is switched to OFF us-
ing the “Vehicle Settings” menu on
the vehicle information display. For
additional information, see “Vehicle
information display ” (P. 2-17).
If a door handle is pulled while unlocking
the doors, that door may not be unlocked.
Returning the door handle to its original
position will unlock the door. If the door
does not unlock af ter returning the door
handle, push the door handle request
switch to unlock the door.All doors will be locked automatically un-
less one of the following operations is per-
formed within 1 minute af ter pushing the
request switch.
• Opening any door.
• Pushing the ignition switch.
Using the interior lights
The interior lights illuminate for a period of
time when a door is unlocked and the inte-
rior light switch is in the DOOR position.
The lights can be turned off without waiting
by performing one of the following
operations:
• Placing the ignition switch in the ON
position.
• Locking the doors with the Intelligent Key.
• Switching the interior lights switch to the “OFF” position.
For additional information, see “Interior
lights” (P. 2-64).
HOW TO USE THE REMOTE
KEYLESS ENTRY FUNCTION
The remote keyless entry function can op-
erate all door locks using the remote key-
less function of the Intelligent Key. The re-
mote keyless function can operate at a
distance of 33 f t (10 m) away from the ve-
hicle. The operating distance depends
upon the conditions around the vehicle.
The remote keyless entry function will not
function under the following conditions:
• When the Intelligent Key is not within the operational range.
• When the Intelligent Key battery is discharged.
3-12Pre-driving checks and adjustments
Page 178 of 508
3. Press thebutton on the Intelli-
gent Key.
4. The hazard indicator lights flash twice and the horn beeps once.
5. All doors will be locked.
button on the Intelligent
Key to unlock the driver’s door.
2. The hazard indicator lights flash once and the driver’s door unlocks.
3. Press the
button again within 1
minute to unlock all doors.
NOTE:
The Selective Unlock feature can be
changed using the “Vehicle Settings”
menu on the vehicle information display.
For additional information, see “Vehicle
information display ” (P. 2-17).
All doors will be locked automatically un-
less one of the following operations is per-
formed within 1 minute af ter pressing the
button:
• Opening any doors.
• Pushing the ignition switch.
Using the interior lights
The interior lights illuminate for a period of
time when a door is unlocked and the inte-
rior light switch is in the DOOR position.
The lights can be turned off without waiting
by performing one of the following
operations:
• Placing the ignition switch in the ON position.
• Locking the doors with the Intelligent Key.
• Switching the interior lights switch to the “OFF” position.
For additional information, see “Interior
lights” (P. 2-64).
Opening windows
The Intelligent Key allows you to simultane-
ously open windows equipped with auto-
matic operation.
To open the windows, press and hold the
button on the Intelligent Key for lon-
ger than 3 seconds.
The door windows will lower while holding
down thebutton on the Intelligent Key.
NOTE:
The windows will stop lowering at the
time thebutton is released. How-
ever, the door windows cannot be closed
with the Intelligent Key.
Releasing the rear lif tgate (if so
equipped)
The rear lif tgate can be opened and closed
by performing the following:
• Press the
button for longer than 1
second to open the rear lif tgate.
• Press the
button again for longer
than 1 second to close the rear lif tgate.
When the
button is pressed during
the open or close process, the lif tgate mo-
tors will stop. When the
button is
pressed again for longer than 1 second the
lif tgate will reverse direction.
3-14Pre-driving checks and adjustments
Page 179 of 508
button on the Intelligent Key forlon-
ger than 0.5 seconds.
The panic alarm and headlights will stay on
for a period of time.
The panic alarm stops when:
• It has run for a period of time.
• Any button is pressed on the Intelligent Key.
• The request switch on the driver or pas- senger door is pushed and the Intelligent
Key is in range of the door handle.
Answer back horn feature
If desired, the answer back horn feature
can be deactivated using the Intelligent
Key. When it is deactivated and the
button is pressed, the hazard indicator
lights flash twice. When thebutton is
pressed, neither the hazard indicator lights
nor the horn operates.
NOTE:
If you change the Answer Back Horn
feature with the Intelligent Key, the
vehicle information display screen
will show the current mode af ter the
ignition switch has been cycled from
the OFF to the ON position. The ve-
hicle information display screen can
also be used to change the answer
back horn mode.
For additional information, see “Ve-
hicle settings” (P. 2-17).
To deactivate:
Press and hold theandbut-
tons for at least 2 seconds. The hazard
indicator lights will flash three times to con-
firm that the answer back horn feature has
been deactivated.
To activate:
Press and hold the
andbut-
tons for at least 2 seconds once more.
The hazard indicator lights will flash once
and the horn will sound once to confirm
that the horn beep feature has been
reactivated.
Deactivating the horn beep feature does
not silence the horn if the alarm is
triggered.
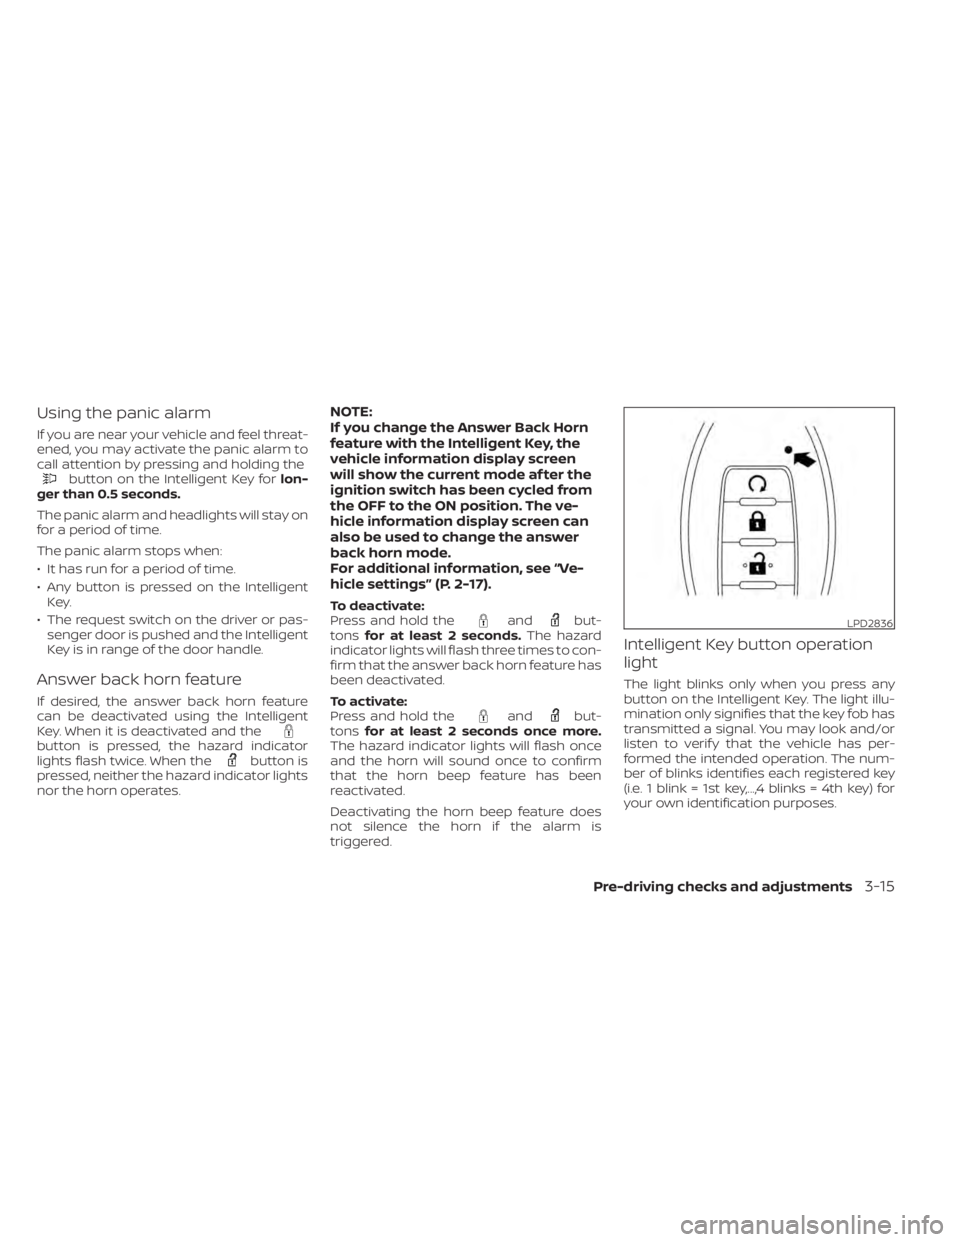
Intelligent Key button operation
light
The light blinks only when you press any
button on the Intelligent Key. The light illu-
mination only signifies that the key fob has
transmitted a signal. You may look and/or
listen to verif y that the vehicle has per-
formed the intended operation. The num-
ber of blinks identifies each registered key
(i.e. 1 blink = 1st key,...,4 blinks = 4th key) for
your own identification purposes.
LPD2836
Page 180 of 508
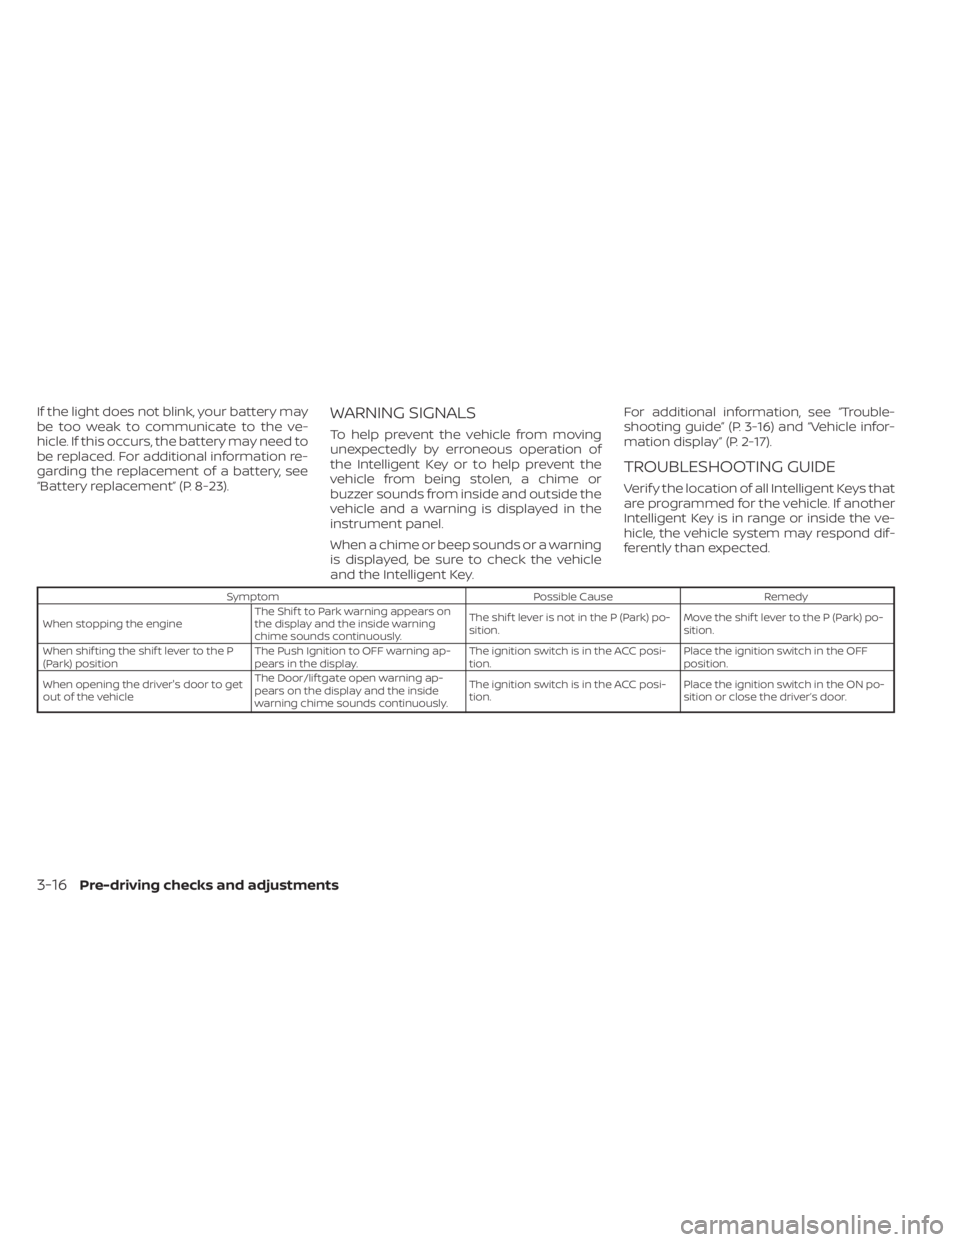
SymptomPossible CauseRemedy
When stopping the engine The Shif t to Park warning appears on
the display and the inside warning
chime sounds continuously. The shif t lever is not in the P (Park) po-
sition.
Move the shif t lever to the P (Park) po-
sition.
When shif ting the shif t lever to the P
(Park) position The Push Ignition to OFF warning ap-
pears in the display. The ignition switch is in the ACC posi-
tion.Place the ignition switch in the OFF
position.
When opening the driver's door to get
out of the vehicle The Door/lif tgate open warning ap-
pears on the display and the inside
warning chime sounds continuously. The ignition switch is in the ACC posi-
tion.
Place the ignition switch in the ON po-
sition or close the driver’s door.
3-16Pre-driving checks and adjustments
Page 181 of 508
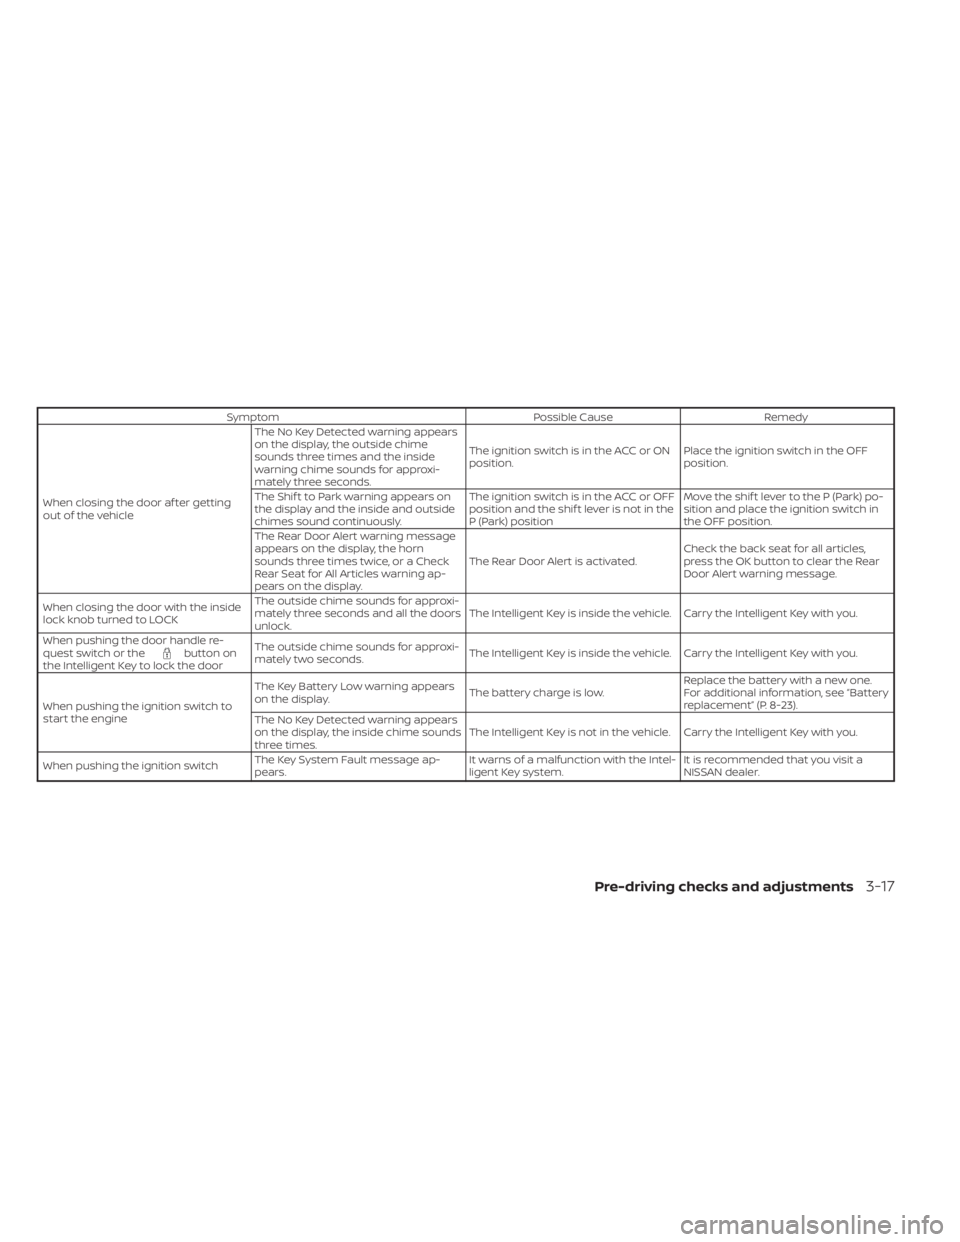
button on
the Intelligent Key to lock the door The outside chime sounds for approxi-
mately two seconds.
The Intelligent Key is inside the vehicle. Carry the Intelligent Key with you.
When pushing the ignition switch to
start the engine The Key Battery Low warning appears
on the display.
The battery charge is low.Replace the battery with a new one.
For additional information, see “Battery
replacement” (P. 8-23).
The No Key Detected warning appears
on the display, the inside chime sounds
three times. The Intelligent Key is not in the vehicle. Carry the Intelligent Key with you.
When pushing the ignition switch The Key System Fault message ap-
pears. It warns of a malfunction with the Intel-
ligent Key system.It is recommended that you visit a
NISSAN dealer.
Pre-driving checks and adjustments3-17
Page 184 of 508
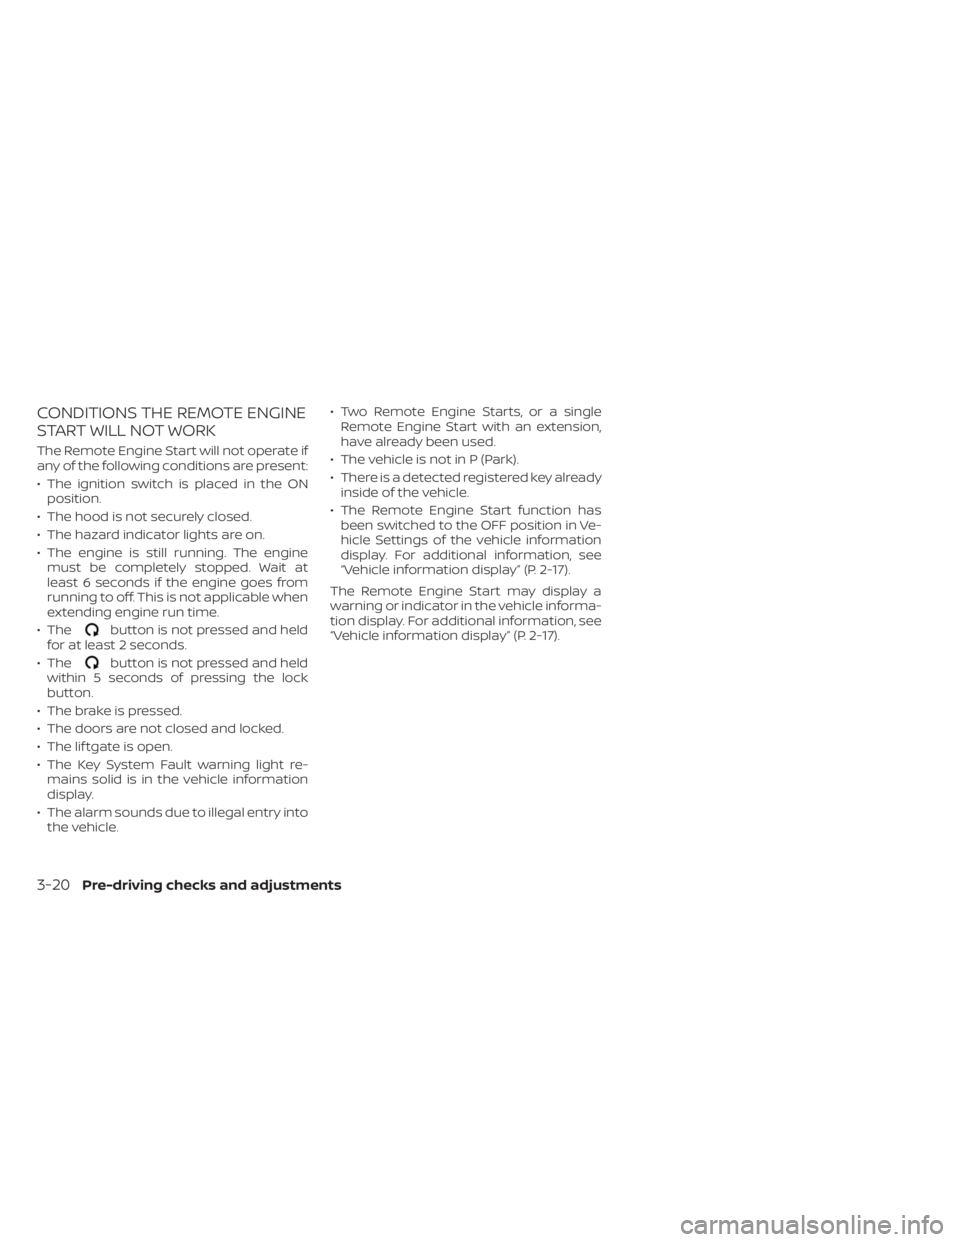
button is not pressed and held
for at least 2 seconds.
• The
button is not pressed and held
within 5 seconds of pressing the lock
button.
• The brake is pressed.
• The doors are not closed and locked.
• The lif tgate is open.
• The Key System Fault warning light re- mains solid is in the vehicle information
display.
• The alarm sounds due to illegal entry into the vehicle. • Two Remote Engine Starts, or a single
Remote Engine Start with an extension,
have already been used.
• The vehicle is not in P (Park).
• There is a detected registered key already inside of the vehicle.
• The Remote Engine Start function has been switched to the OFF position in Ve-
hicle Settings of the vehicle information
display. For additional information, see
“Vehicle information display” (P. 2-17).
The Remote Engine Start may display a
warning or indicator in the vehicle informa-
tion display. For additional information, see
“Vehicle information display” (P. 2-17).
3-20Pre-driving checks and adjustments
Page 194 of 508
•The Loose Fuel Cap warning mes-
sage will appear if the fuel-filler cap
is not properly tightened. It may take
a few driving trips for the message to
be displayed. Failure to tighten the
fuel-filler cap properly af ter the
Loose Fuel Cap warning message ap-
pears may cause the
Malfunc-
tion Indicator Light (MIL) to
illuminate.
• Failure to tighten the fuel-filler cap
properly may cause the
Mal-
function Indicator Light (MIL) to illu-
minate. If the
light illuminates
because the fuel-filler cap is loose or
missing, tighten or install the cap and
continue to drive the vehicle. The
light should turn off af ter a few
driving trips. If thelight does not
turn off af ter a few driving trips, have
the vehicle inspected. It is recom-
mended that you visit a NISSAN
dealer for this service.
• For additional information, see “Mal-
function Indicator Light (MIL)”
(P. 2-13).
• If fuel is spilled on the vehicle body,
flush it away with water to avoid
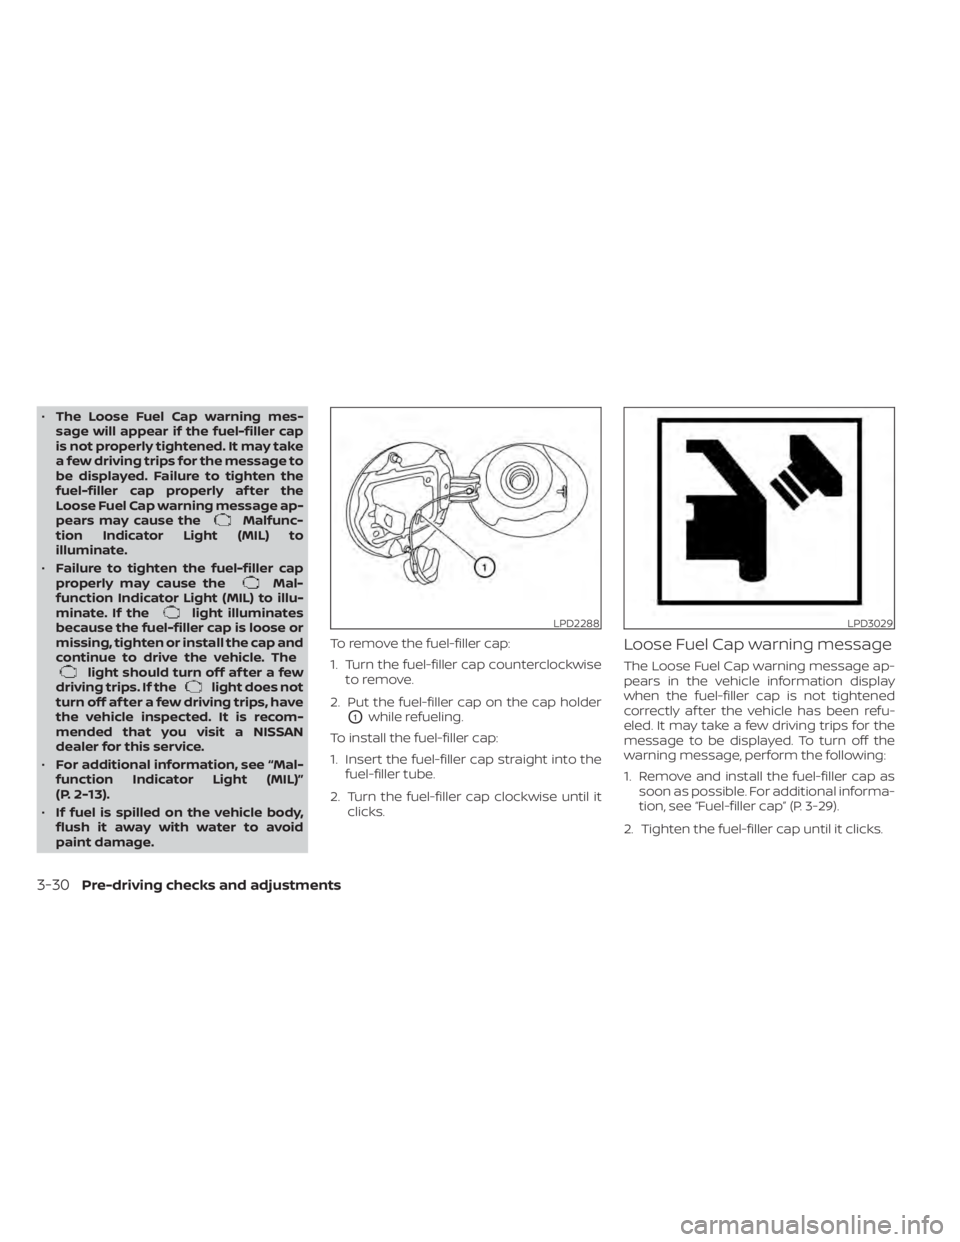
paint damage. To remove the fuel-filler cap:
1. Turn the fuel-filler cap counterclockwise
to remove.
2. Put the fuel-filler cap on the cap holder
O1while refueling.
To install the fuel-filler cap:
1. Insert the fuel-filler cap straight into the fuel-filler tube.
2. Turn the fuel-filler cap clockwise until it clicks.
Loose Fuel Cap warning message
The Loose Fuel Cap warning message ap-
pears in the vehicle information display
when the fuel-filler cap is not tightened
correctly af ter the vehicle has been refu-
eled. It may take a few driving trips for the
message to be displayed. To turn off the
warning message, perform the following:
1. Remove and install the fuel-filler cap assoon as possible. For additional informa-
tion, see “Fuel-filler cap” (P. 3-29).
2. Tighten the fuel-filler cap until it clicks.
LPD2288LPD3029
3-30Pre-driving checks and adjustments