2022 NISSAN MURANO brake
[x] Cancel search: brakePage 260 of 508
•When this situation occurs, the Con-
tinuously Variable Transmission (CVT)
position indicator light will blink and
the chime will sound.
• In the manual shif t mode, the trans-
mission may shif t up automatically to a
higher range than selected if the en-
gine speed is too high. When the ve-
hicle speed decreases, the transmis-
sion automatically shif ts down and
shif ts to first gear before the vehicle
comes to a stop.
• CVT operation is limited to automatic drive mode when CVT fluid temperature
is extremely low even if manual shif t
mode is selected. This is not a malfunc-
tion. When CVT fluid warms up, manual
mode can be selected.
• When the CVT fluid temperature is high, the shif t range may upshif t in lower rpm
than usual. This is not a malfunction.
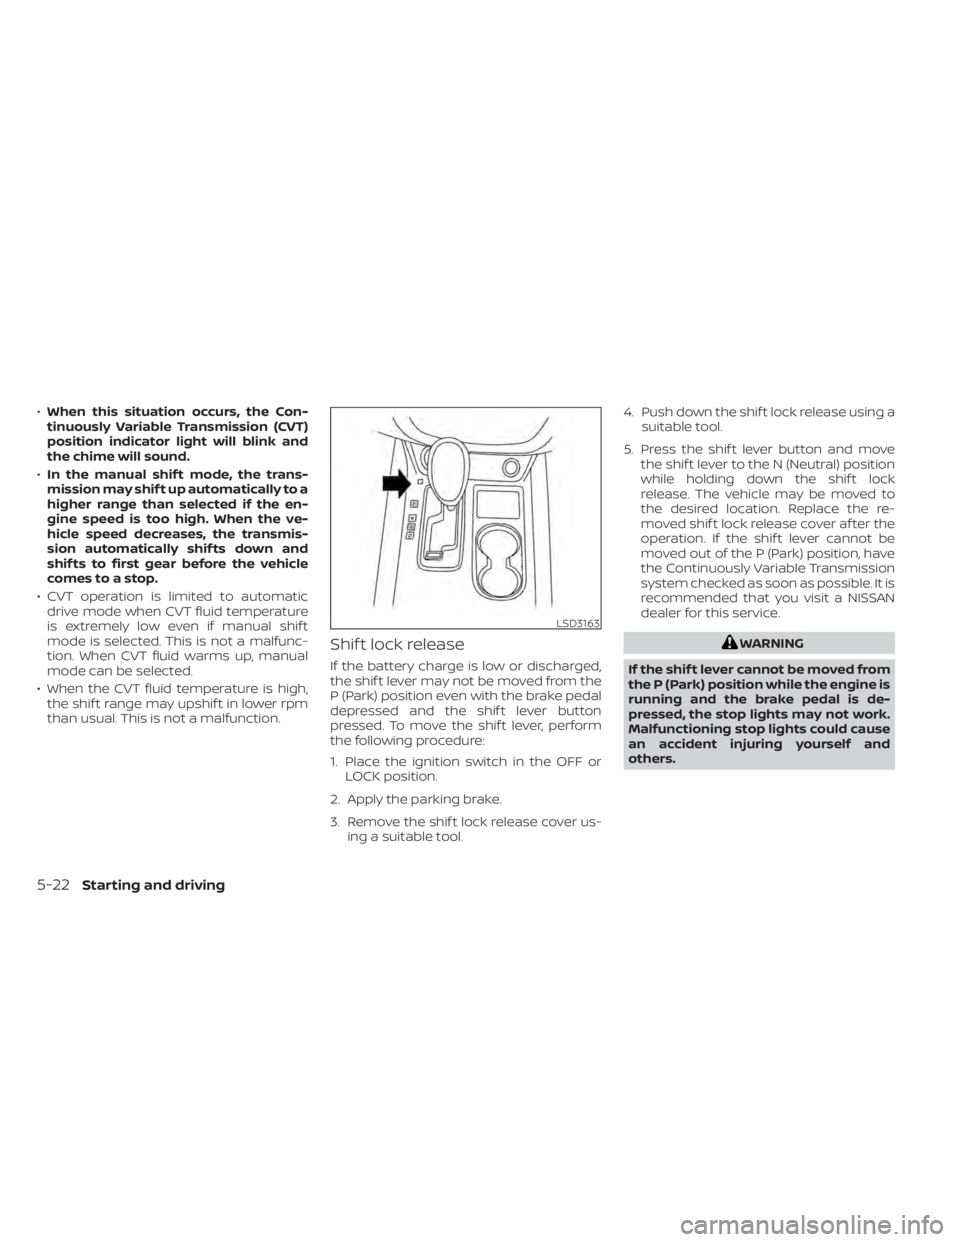
Shif t lock release
If the battery charge is low or discharged,
the shif t lever may not be moved from the
P (Park) position even with the brake pedal
depressed and the shif t lever button
pressed. To move the shif t lever, perform
the following procedure:
1. Place the ignition switch in the OFF or LOCK position.
2. Apply the parking brake.
3. Remove the shif t lock release cover us- ing a suitable tool. 4. Push down the shif t lock release using a
suitable tool.
5. Press the shif t lever button and move the shif t lever to the N (Neutral) position
while holding down the shif t lock
release. The vehicle may be moved to
the desired location. Replace the re-
moved shif t lock release cover af ter the
operation. If the shif t lever cannot be
moved out of the P (Park) position, have
the Continuously Variable Transmission
system checked as soon as possible. It is
recommended that you visit a NISSAN
dealer for this service.
5-22Starting and driving
Page 261 of 508
Accelerator downshif t
— in D (Drive) position —
For passing or hill climbing, depress the
accelerator pedal to the floor. This shif ts
the transmission down into a lower gear,
depending on the vehicle speed.
High fluid temperature protection
mode
This transmission has a high fluid tem-
perature protection mode. If the fluid tem-
perature becomes too high (for example,
when climbing steep grades in high tem-
peratures with heavy loads, such as when
towing a trailer), engine power and, under
some conditions, vehicle speed will be de-
creased automatically to reduce the
chance of transmission damage. Vehicle
speed can be controlled with the accelera-
tor pedal, but the engine and vehicle speed
may be limited.
Fail-safe
If the vehicle is driven under extreme
conditions, such as excessive wheel
spinning and subsequent hard braking,
the fail-safe system may be activated.
The Malfunction Indicator Light (MIL)
may come on to indicate the fail-safemode is activated. For additional infor-
mation, see “Malfunction Indicator Light
(MIL)” (P. 2-13). This will occur even if all
electrical circuits are functioning prop-
erly. In this case, place the ignition switch
in the OFF position and wait for 10 sec-
onds. Then push the switch back to the
ON position. The vehicle should return to
its normal operating condition. If it does
not return to its normal operating condi-
tion, have the transmission checked and
repaired, if necessary. It is recommended
that you visit a NISSAN dealer for this
service.
WARNING
When the high fluid temperature pro-
tection mode or fail-safe operation oc-
curs, vehicle speed may be gradually
reduced. The reduced speed may be
lower than other traffic, which could in-
crease the chance of a collision. Be es-
pecially careful when driving. If neces-
sary, pull to the side of the road at a safe
place and allow the transmission to re-
turn to normal operation, or have it re-
paired if necessary.WARNING
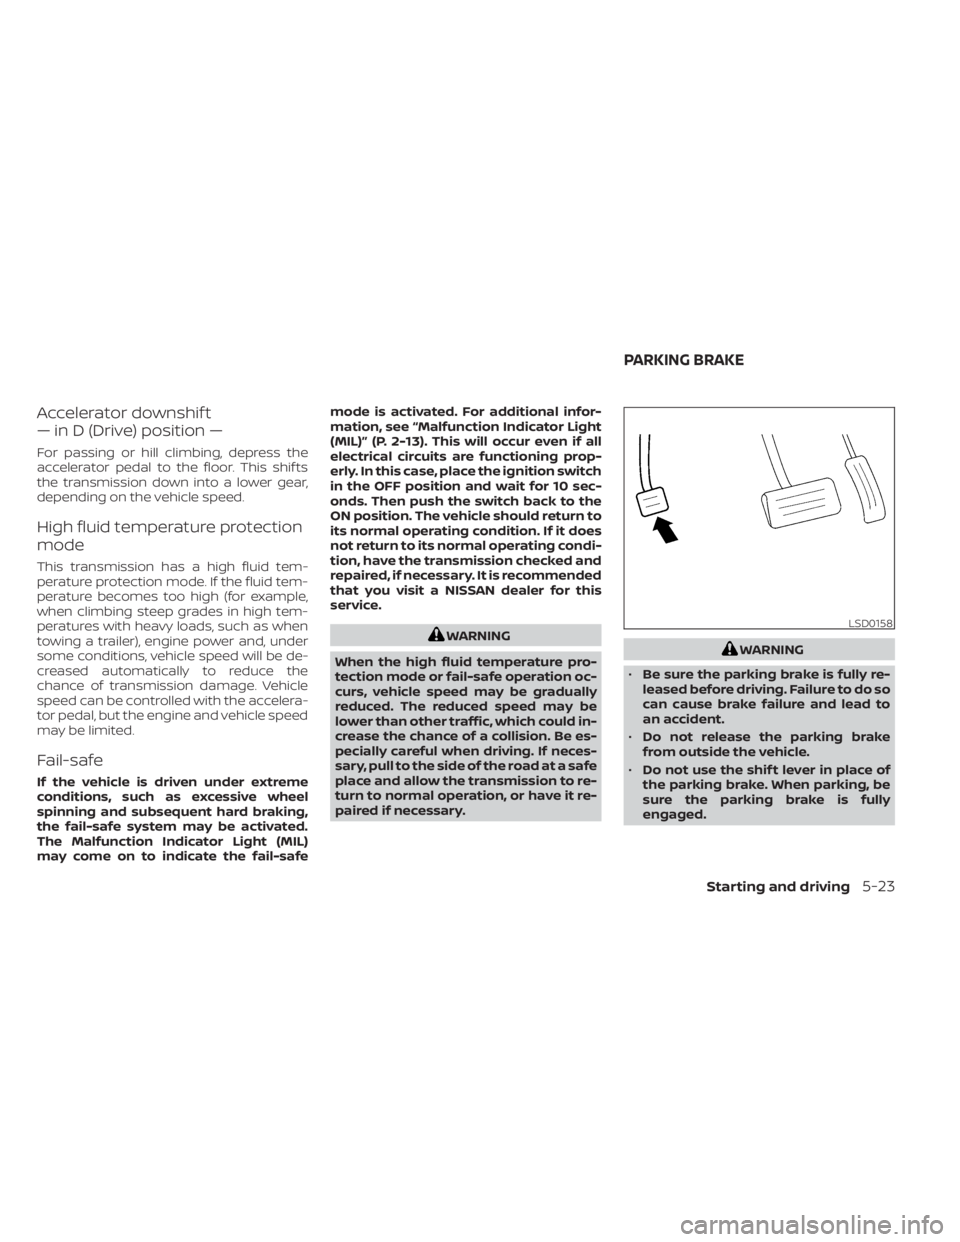
• Be sure the parking brake is fully re-
leased before driving. Failure to do so
can cause brake failure and lead to
an accident.
• Do not release the parking brake
from outside the vehicle.
• Do not use the shif t lever in place of
the parking brake. When parking, be
sure the parking brake is fully
engaged.
Starting and driving5-23
Page 262 of 508
•To help avoid risk of injury or death
through unintended operation of the
vehicle and/or its systems, do not
leave children, people who require
the assistance of others or pets unat-
tended in your vehicle. Additionally,
the temperature inside a closed ve-
hicle on a warm day can quickly be-
come high enough to cause a signifi-
cant risk of injury or death to people
and pets.
To engage:
Firmly depress the parking brake.
To release:
1. Firmly apply the foot brake.
2. Move the shif t lever to the P (Park) position.
3. Firmly depress the parking brake pedal and it will release.
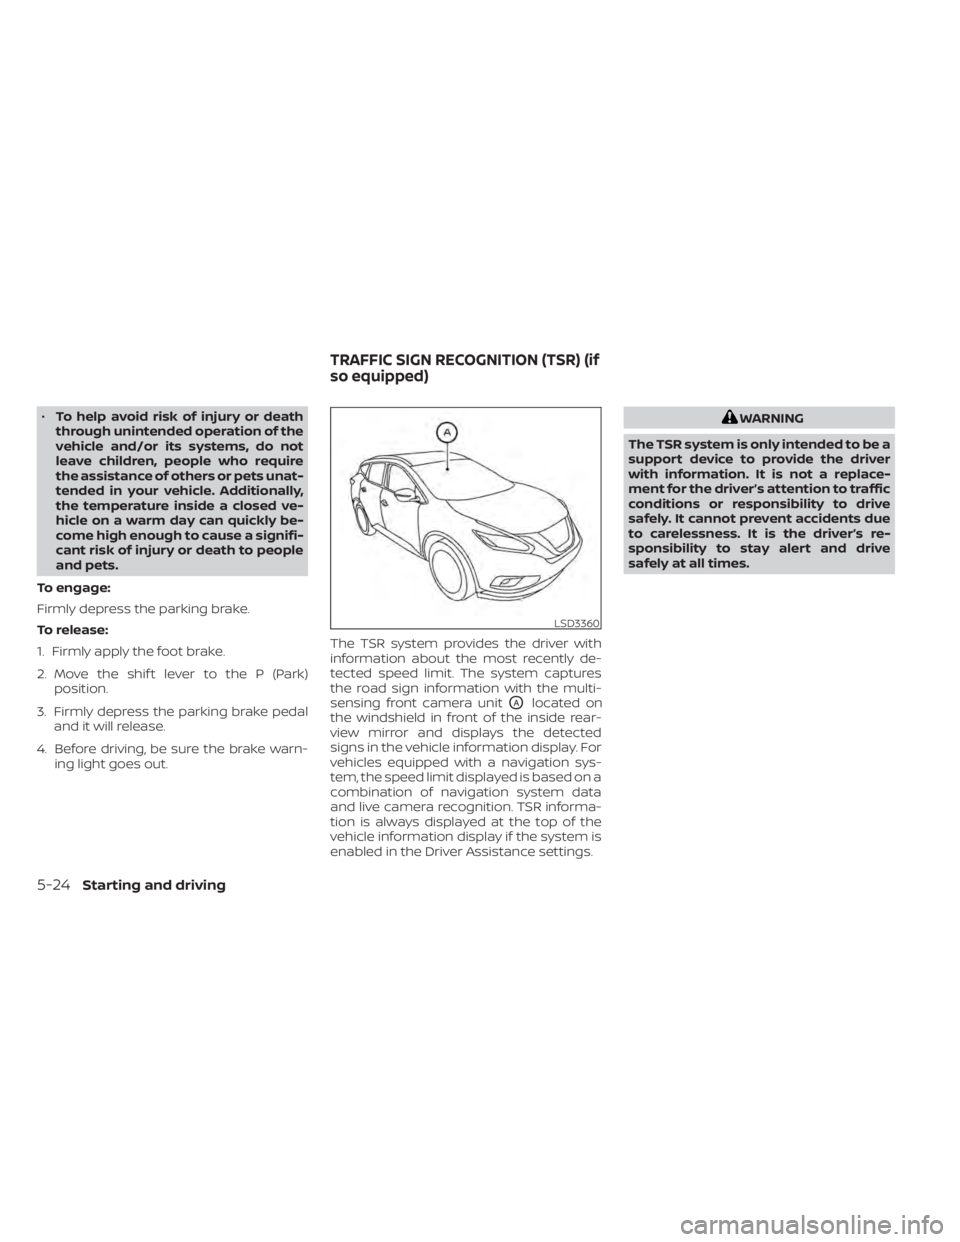
4. Before driving, be sure the brake warn- ing light goes out. The TSR system provides the driver with
information about the most recently de-
tected speed limit. The system captures
the road sign information with the multi-
sensing front camera unit
OAlocated on
the windshield in front of the inside rear-
view mirror and displays the detected
signs in the vehicle information display. For
vehicles equipped with a navigation sys-
tem, the speed limit displayed is based on a
combination of navigation system data
and live camera recognition. TSR informa-
tion is always displayed at the top of the
vehicle information display if the system is
enabled in the Driver Assistance settings.
Page 274 of 508
–When traveling close to the ve-
hicle in front of you, which ob-
structs the lane camera unit de-
tection range.
– When rain, snow or dirt adheres to
the windshield in front of the lane
camera unit.
– When the headlights are not
bright due to dirt on the lens or if
the aiming is not adjusted
properly.
– When strong light enters the lane
camera unit. (For example, the
light directly shines on the front of
the vehicle at sunrise or sunset.)
– When a sudden change in bright-
ness occurs. (For example, when
the vehicle enters or exits a tunnel
or under a bridge.)
While the I-LI system is operating, you may
hear a sound of brake operation. This is
normal and indicates that the I-LI system is
operating properly.SYSTEM TEMPORARILY
UNAVAILABLE
Condition A:
The warning and assist functions of the I-LI
system are not designed to work under the
following conditions:
• When you operate the lane change signal and change the traveling lanes in the di-
rection of the signal. (The I-LI system will
be deactivated for approximately 2 sec-
onds af ter the lane change signal is
turned off.)
• When the vehicle speed lowers to less than approximately 37 mph (60 km/h).
Af ter the above conditions have finished
and the necessary operating conditions
are satisfied, the warning and assist func-
tions will resume.
Condition B:
The assist function of the I-LI system is not
designed to work under the following con-
ditions (warning is still functional):
• When the brake pedal is depressed.
• When the steering wheel is turned as far as necessary for the vehicle to change
lanes.
• When the vehicle is accelerated during I-LI system operation. • When the Intelligent Cruise Control (ICC)
approach warning occurs.
• When the hazard warning flashers are operated.
• When driving on a curve at high speed.
Af ter the above conditions have finished
and the necessary operating conditions
are satisfied, the I-LI system application of
the brakes will resume.
Condition C:
If the following messages appear in the
vehicle information display, the I-LI system
will be turned off automatically.
• “Unavailable Road is Slippery”: When the VDC system (except Traction
Control System [TCS] function) or ABS
operates.
• “Currently Unavailable”: When the VDC system is turned off.
Action to take:
When the above conditions no longer exist,
turn off the I-LI system. Push the dynamic
driver assistance switch again to turn the
I-LI system back on.
5-36Starting and driving
Page 294 of 508
• If theindicator blinks, turn the cruise
control off and have the system checked.
It is recommended that you visit a NISSAN
dealer for this service.
• The
indicator may blink when the
ON/OFF switch is turned on while push-
ing the RES/+ switch, SET/- switch, or
CANCEL switch. To properly set the cruise
control system, use the following
procedures.
indicator in
the vehicle information display will illumi-
nate. If the Cruise Control Alerts are en-
abled in the Driving Aids menu, then the
“Cruise ON: Press SET to engage speed
control” message will appear in the vehicle
information display.
This message will disappear af ter about 6
seconds, or can be dismissed by pushing
the OK button. Cruise control status will
continue to display in the upper right cor-
ner of the vehicle information display while
the system is on.
To set cruising speed, accelerate the ve-
hicle to the desired speed, push the SET/–
switch and release it. Take your foot off the
accelerator pedal. Your vehicle maintains
the set speed. If the Cruise Control Alerts are enabled in
the Driving Aids menu, then the “Target
Speed SET. Press + or – to adjust” message
will appear in the vehicle information dis-
play when the SET/– switch is pushed. This
message will disappear af ter about 6 sec-
onds, or can be dismissed by pushing the
OK button. Cruise control status will con-
tinue to display in the upper right corner of
the vehicle information display while the
system is on.
•
To pass another vehicle, depress the ac-
celerator pedal. When you release the
pedal, the vehicle returns to the previ-
ously set speed.
• The vehicle may not maintain the set speed when going up or down steep hills.
If this happens, drive without the cruise
control.
To cancel the preset speed, use one of the
following three methods:
• Push the CANCEL switch.
• Tap the brake pedal.
• Push the ON/OFF switch off. The
indicator in the vehicle information dis-
play goes out.
5-56Starting and driving
Page 308 of 508
• When the shif t lever is not in the D (Drive)position, Manual mode.
• When the parking brake system is applied
• When the VDC system is turned off
• When VDC operates
• When distance measurement becomes impaired due to adhesion of dirt or ob-
struction to the sensor
• When a wheel slips
• When the radar signal is temporarily interrupted
VEHICLE-TO-VEHICLE DISTANCE
CONTROL MODE LIMITATIONS
Page 320 of 508
• When the parking brake is applied
• When the VDC operates (including thetraction control system)
• When a wheel slips
When the system is not operating properly,
the chime sounds and the color of the
cruise indicator will change to orange.
Action to take
If the color of the cruise indicator changes
to orange, stop the vehicle in a safe place
and place the shif t lever in the P (Park) po-
sition. Turn the engine off, restart the en-
gine, resume driving, and then perform the
setting again.
If it is not possible to set or the indicator
stays on, it may indicate that the system
is malfunctioning. Although the vehicle
is still drivable under normal conditions,
have the vehicle checked. It is recom-
mended that you visit a NISSAN dealer
for this service.WARNING
Failure to follow the warnings and in-
structions for proper use of the RAB
system could result in serious injury or
death.
• The RAB system is a supplemental
aid to the driver. It is not a replace-
ment for proper driving procedures.
Always use the side and rear mirrors
and turn and look in the direction you
will move before and while backing
up. Never rely solely on the RAB sys-
tem. It is the driver’s responsibility to
stay alert, drive safely, and be in con-
trol of the vehicle at all times.
• There is a limitation to the RAB sys-
tem capability. The RAB system is not
effective in all situations.
• Inclement weather or ultrasonic
sources such as an automatic car
wash, a truck’s compressed-air
brakes or a pneumatic drill may af-
fect the function of the system, this
may include reduced performance or
a false activation.
The RAB system can assist the driver when
the vehicle is backing up and approaching
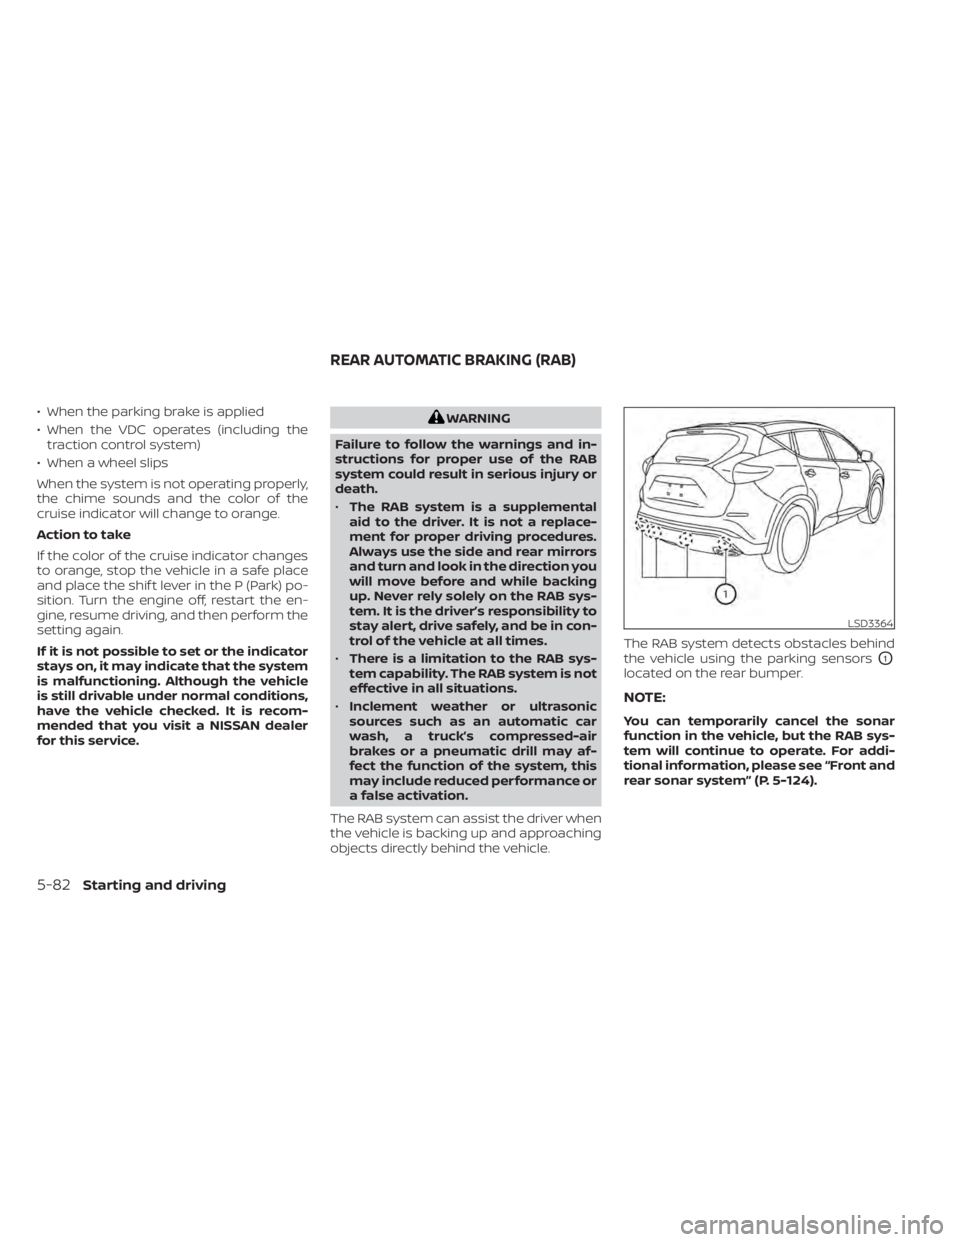
objects directly behind the vehicle. The RAB system detects obstacles behind
the vehicle using the parking sensors
O1
located on the rear bumper.
NOTE:
You can temporarily cancel the sonar
function in the vehicle, but the RAB sys-
tem will continue to operate. For addi-
tional information, please see “Front and
rear sonar system” (P. 5-124).
Page 322 of 508
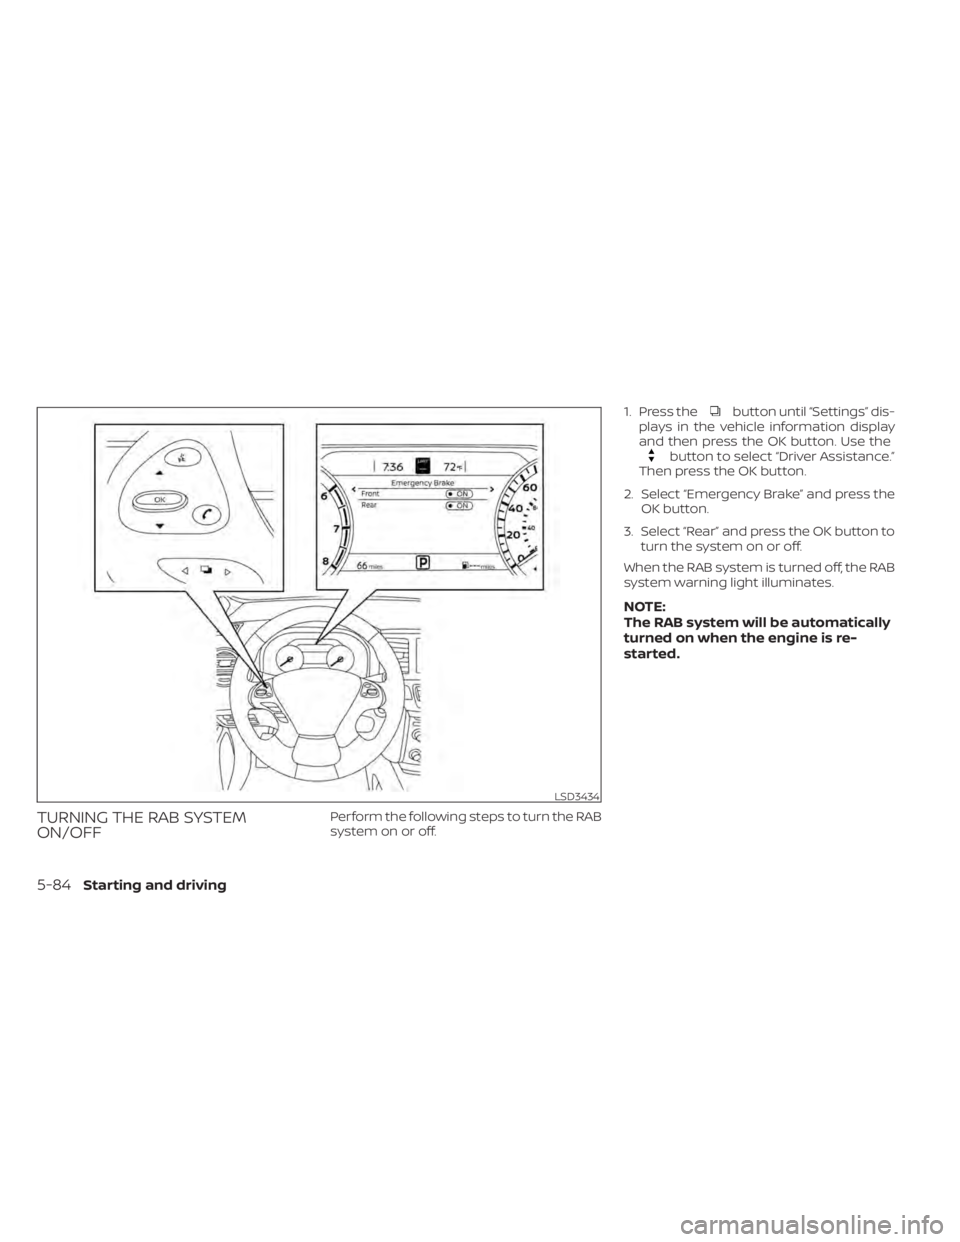
button until “Settings” dis-
plays in the vehicle information display
and then press the OK button. Use the
button to select “Driver Assistance.”
Then press the OK button.
2. Select “Emergency Brake” and press the OK button.
3. Select “Rear” and press the OK button to turn the system on or off.
When the RAB system is turned off, the RAB
system warning light illuminates.
NOTE:
The RAB system will be automatically
turned on when the engine is re-
started.
5-84Starting and driving