2022 NISSAN ARMADA tires
[x] Cancel search: tiresPage 11 of 604

WAA0285X
1. Hood (P.3-21)
2. Windshield wiper and washer— Switch operation (P.2-42)
— Window washer fluid (P.8-10)
— Windshield wiper deicer (if so equipped)
(P.2-46)
3. Moonroof (if so equipped) (P.2-78) 4. Power windows (P.2-75)
5. Roof rack (if so equipped) (P.2-74)
6. Sonar sensors
— Camera aiding sonar function (models
with Intelligent Around View® Monitor)
(P.4-26)
— Sonar system (if so equipped) (P.5-136) 7. Towing hook (P.6-19)
8. Front view camera (if so equipped) (P.4-12)
9. Fog light (if so equipped) (P.2-54)
10. Headlights and turn signal lights (P.2-46)
11. Tires
— Wheel and tires (P.8-28, P.10-9)
— Flat tire (P.6-3)
— Tire Pressure Monitoring System
(TPMS) (P.2-16, P.5-5)
12. Outside mirrors (P.3-38) — Side view camera (P.4-12)
— Welcome light (if so equipped) (P.2-80)
13. Side turn signal lights (if so equipped) (P.8-24)
14. Doors — Keys (P.3-2)
— Door locks (P.3-4)
— Intelligent Key system (P.3-7)
— Remote keyless entry system (P.3-15)
— Remote engine start (if so equipped)
(P.3-19)
15. Child safety rear door locks (P.3-6)
Illustrated table of contents0-3
EXTERIOR FRONT
Page 110 of 604

2-16Instruments and controls
For front passenger air bag status light
operation, see “NISSAN Advanced Air Bag
System (front seats)” (P.1-61).
Four-Wheel Drive (4WD) warn-
ing light (4WD models)
Thewarning light comes on when the
ignition switch is placed in the ON posi-
tion. It turns off soon after the engine is
started.
If the 4WD system malfunctions, or the
diameter of the front and the rear wheels
are different, the warning light will either
remain illuminated or blink. (See “NISSAN
all-mode 4WD®” (P.5-124).)
CAUTION
. If the warning light comes on
while driving there may be a
malfunction in the 4WD system.
Reduce the vehicle speed and
have your vehicle checked as
soon as possible. It is recom-
mended you visit a NISSAN dealer
for this service.
. If the 4WD warning light turns on
when driving on dry or hard
surfaced roads: — in the 4H(I) position, shift the
4WD shift switch to AUTO
— in the 4L(O) position, stop the vehicle and shift the transmis-
sion shift lever to the N (Neu-
tral) position and shift the
4WD shift switch to AUTO
. If the warning light is still on after
the above operations, have your
vehicle checked as soon as pos-
sible. It is recommended you visit
a NISSAN dealer for this service.
Low tire pressure warning
light
Your vehicle is equipped with a Tire
Pressure Monitoring System (TPMS) that
monitors the tire pressure of all tires
except the spare.
The low tire pressure warning light warns
of low tire pressure or indicates that the
TPMS is not functioning properly.
After the ignition switch is placed in the
ON position, this light illuminates for
about 1 second and turns off.
Low tire pressure warning:
If the vehicle is being driven with low tire
pressure, the warning light will illuminate.
The “Tire Pressure Low Add Air” warning also appears in the vehicle information
display. If you select the tire pressure
information in the vehicle information
display, the Low Pressure information will
be displayed. The tire pressure for each
tire will also be displayed.
When the low tire pressure warning light
illuminates, you should stop and adjust
the tire pressure to the recommended
COLD tire pressure shown on the Tire and
Loading Information label. The low tire
pressure warning light does not automa-
tically turn off when the tire pressure is
adjusted. After the tire is inflated to the
recommended pressure, the vehicle must
be driven at speeds above 16 MPH (25
km/h) to activate the TPMS and turn off
the low tire pressure warning light. Use a
tire pressure gauge to check the tire
pressure.
The “Tire Pressure Low Add Air” warning
appears each time the ignition switch is
placed in the ON position as long as the
low tire pressure warning light remains
illuminated.
For additional information, see “Vehicle
information display” (P.2-20), “Tire Pres-
sure Monitoring System (TPMS)” (P.5-5)
and “Tire Pressure Monitoring System
(TPMS) ” (P.6-3).
Page 111 of 604

TPMS malfunction:
If the TPMS is not functioning properly,
the low tire pressure warning light will
flash for approximately 1 minute when the
ignition switch is placed in the ON posi-
tion. The light will remain on after 1
minute. Have the system checked. It is
recommended you visit a NISSAN dealer
for this service. The “Tire Pressure Low -
Add Air” warning does not appear if the
low tire pressure warning light illuminates
to indicate a TPMS malfunction.
For additional information, see “Tire Pres-
sure Monitoring System (TPMS)” (P.5-5).
WARNING
.If the light does not illuminate
with the ignition switch placed in
the ON position, have the vehicle
checked as soon as possible. It is
recommended you visit a NISSAN
dealer for this service.
. If the light illuminates or Low
Pressure information is displayed
on the monitor screen while driv-
ing, avoid sudden steering man-
euvers or abrupt braking, reduce
vehicle speed, pull off the road to
a safe location and stop the
vehicle as soon as possible. Driv- ing with under-inflated tires may
permanently damage the tires
and increase the likelihood of tire
failure. Serious vehicle damage
could occur and may lead to an
accident and could result in ser-
ious personal injury. Check the
tire pressure for all four tires.
Adjust the tire pressure to the
recommended COLD tire pressure
shown on the Tire and Loading
Information label to turn the low
tire pressure warning light OFF. If
the light still illuminates while
driving after adjusting the tire
pressure, a tire may be flat or
the TPMS may be malfunctioning.
If you have a flat tire, replace it
with a spare tire as soon as
possible. If no tire is flat and all
tires are properly inflated, it is
recommended you consult a
NISSAN dealer.
. Since the spare tire is not
equipped with the TPMS, when a
spare tire is mounted or a wheel
is replaced, the TPMS will not
function and the low tire pressure
warning light will flash for ap-
proximately 1 minute. The light
will remain on after 1 minute.
Have your tires replaced and/or TPMS system reset as soon as
possible. It is recommended you
visit a NISSAN dealer for these
services.
. Replacing tires with those not
originally specified by NISSAN
could affect the proper operation
of the TPMS.
CAUTION
.The TPMS is not a substitute for
the regular tire pressure check.
Be sure to check the tire pressure
regularly.
. If the vehicle is being driven at
speeds of less than 16 MPH (25
km/h), the TPMS may not operate
correctly.
. Be sure to install the specified
size of tires to the four wheels
correctly.
Instruments and controls2-17
Page 120 of 604

2-26Instruments and controls
15).)
Maintenance
The maintenance mode allows user to set
alerts for the reminding of maintenance
intervals. To change an item:
Select “Maintenance” using the
but-
tonsand press the OKbutton.
. Oil and Filter
. Tire
. Other
Oil and Filter:
This indicator appears when user set
distance comes for changing the engine
oil and filter. You can set or reset the
distance for checking or replacing these
items. For scheduled maintenance items
and intervals, refer to the “9. Maintenance
and schedules” section.
Tire:
This indicator appears when the user set
distance comes for replacing tires. You
can set or reset the distance for replacing
tires.
WARNING
The tire replacement indicator is not
a substitute for regular tire checks,
including tire pressure checks. (See “Changing wheels and tires” (P.8-
36).) Many factors including tire in-
flation, alignment, driving habits and
road conditions affect tire wear and
when tires should be replaced.
Setting the tire replacement indica-
tor for a certain driving distance
does not mean your tires will last
that long. Use the tire replacement
indicator as a guide only and always
perform regular tire checks. Failure
to perform regular tire checks, in-
cluding tire pressure checks could
result in tire failure. Serious vehicle
damage could occur and may lead to
a collision, which could result in
serious personal injury or death.
Other:
This indicator appears when the user set
distance comes for checking or replacing
maintenance items other than the engine
oil, oil filter and tires. Other maintenance
items can include such things as air filter
or tire rotation. You can set or reset the
distance for checking or replacing the
items.
Customize Display
The display settings allows user to
choose from the various meter selections.
The display settings can be changed
using the
buttons.
Main Menu Selection:
Displays available screens that can be
shown in the vehicle information display.
Route Guidance (if so equipped):
To change the setting, use the
buttonsand press the OKbutton.
. Alerts
The “Alerts” allows user to turn the Route
Guidance alerts on or off.
Welcome Effect:
The “Welcome Effect” displays the avail-
able welcome effect settings.
. gauges (if so equipped)
. Animation
Page 132 of 604

2-38Instruments and controls
button for longer than 1 second.
The display is updated every 30 seconds.
At about the first 1/3 mile (500 m) after a
reset, the display shows “——”.
8. Intelligent Cruise Control (ICC)
system
This mode shows the operating condition
for the Intelligent Cruise Control (ICC)
system. (See “Intelligent Cruise Control
(ICC)” (P.5-74).)
NOTE:
If the ICC system is in a standby state,
this screen is automatically displayed.
9. Driving aids (if so equipped)
The driving aids mode shows the operat-
ing condition for the following systems, if
the vehicle is equipped with them.
. Automatic Emergency Braking (AEB)
with pedestrian detection system
. Intelligent Forward Collision Warning
(I-FCW)
. Lane Departure Warning (LDW)
. Intelligent Lane Intervention (I-LI)
. Blind Spot Warning (BSW)
. Intelligent Blind Spot Intervention (I-
BSI)
For more details, see “Automatic Emer-
gency Braking (AEB) with pedestrian de-
tection system” (P.5-96), “Intelligent Forward Collision Warning (I-FCW)” (P.5-
106), “Lane Departure Warning (LDW)” (P.5-
26), “Intelligent Lane Intervention (I-LI)”
(P.5-31), “Blind Spot Warning (BSW)” (P.5-
38) or “Intelligent Blind Spot Intervention
(I-BSI)” (P.5-46).
10. Tire pressures
The tire pressure mode shows the pres-
sure of all four tires while the vehicle is
driven.
When the “Tire Pressure Low Add Air”
warning appears, the display can be
switched to the tire pressure mode by
pushing the left or right side of the
button.
The tire pressure unit can be changed
using the “TPMS Setting” menu displayed
in the vehicle information display. (See
“TPMS Setting” (P.2-23).)
NOTE:
After the ignition switch is placed in the
ON position, it may take a period of time
for the tire pressure to be displayed
while the vehicle is driven. Depending
on the radio wave circumstance, tire
pressure may not correctly be dis-
played.WAC0225X
11. Auxiliary gauges
The auxiliary gauges consist of the bat-
tery voltage gauge and the engine oil
pressure gauge.
The engine oil pressure gauge indicates
current engine oil pressure. (See “Engine
oil pressure gauge” (P.2-9).)
The battery voltage gauge indicates cur-
rent battery voltage. (See “Voltmeter” (P.2-
10).)
Page 237 of 604

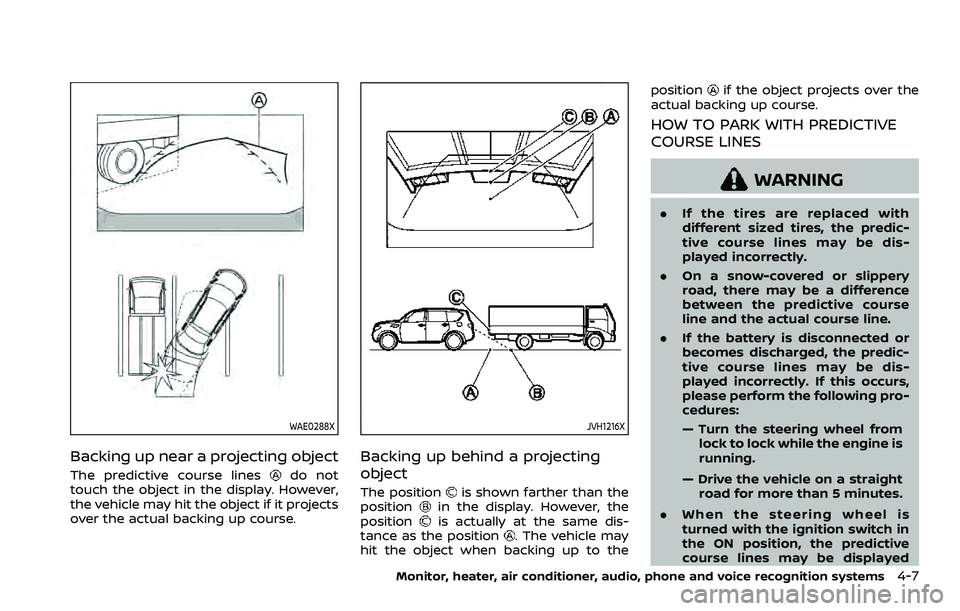
WAE0288X
Backing up near a projecting object
The predictive course linesdo not
touch the object in the display. However,
the vehicle may hit the object if it projects
over the actual backing up course.
JVH1216X
Backing up behind a projecting
object
The positionis shown farther than the
positionin the display. However, the
positionis actually at the same dis-
tance as the position. The vehicle may
hit the object when backing up to the position
if the object projects over the
actual backing up course.
HOW TO PARK WITH PREDICTIVE
COURSE LINES
WARNING
. If the tires are replaced with
different sized tires, the predic-
tive course lines may be dis-
played incorrectly.
. On a snow-covered or slippery
road, there may be a difference
between the predictive course
line and the actual course line.
. If the battery is disconnected or
becomes discharged, the predic-
tive course lines may be dis-
played incorrectly. If this occurs,
please perform the following pro-
cedures:
— Turn the steering wheel from
lock to lock while the engine is
running.
— Drive the vehicle on a straight road for more than 5 minutes.
. When the steering wheel is
turned with the ignition switch in
the ON position, the predictive
course lines may be displayed
Monitor, heater, air conditioner, audio, phone and voice recognition systems4-7
Page 244 of 604

4-14Monitor, heater, air conditioner, audio, phone and voice recognition systems
ber of occupants, fuel level, vehi-
cle position, road condition and
road grade.
. If the tires are replaced with
different sized tires, the predic-
tive course lines and the bird’s-
eye view may be displayed incor-
rectly.
. When driving the vehicle up a hill,
objects viewed in the monitor are
farther than they appear. When
driving the vehicle down a hill,
objects viewed in the monitor are
closer than they appear.
. Objects in the rear view will ap-
pear visually opposite compared
to when viewed in the rear view
and outside mirrors.
. Use the mirrors or actually look to
properly judge distances to other
objects.
. The distance between objects
viewed in the rear view differs
from actual distance because a
wide-angle lens is used.
. On a snow-covered or slippery
road, there may be a difference
between the predictive course
lines and the actual course line. .
The vehicle width and predictive
course lines are wider than the
actual width and course.
. The displayed lines on the rear
view will appear slightly off to the
right because the rearview cam-
era is not installed in the rear
center of the vehicle.
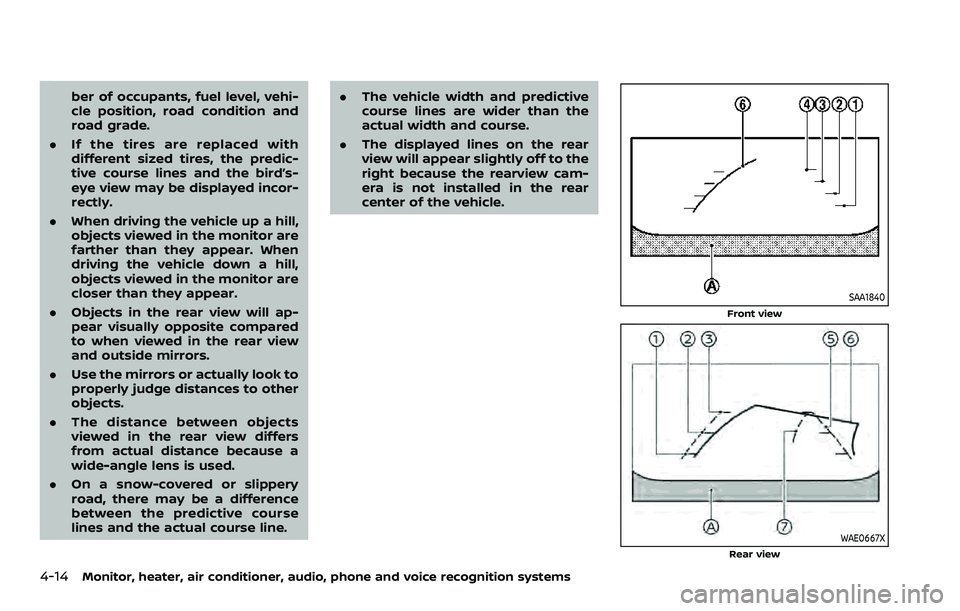
SAA1840
Front view
WAE0667XRear view
Page 249 of 604

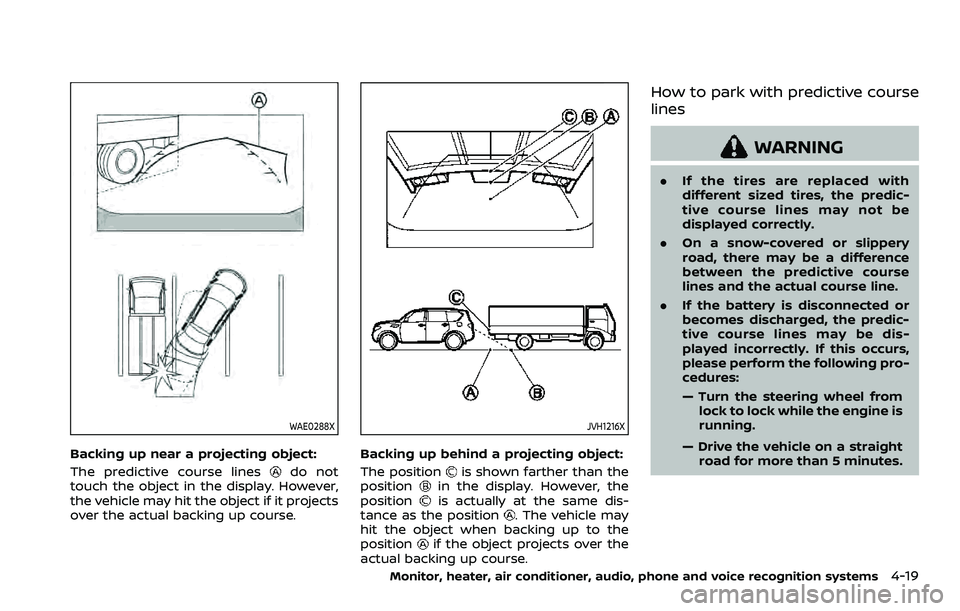
WAE0288X
Backing up near a projecting object:
The predictive course lines
do not
touch the object in the display. However,
the vehicle may hit the object if it projects
over the actual backing up course.
JVH1216X
Backing up behind a projecting object:
The position
is shown farther than the
positionin the display. However, the
positionis actually at the same dis-
tance as the position. The vehicle may
hit the object when backing up to the
position
if the object projects over the
actual backing up course.
How to park with predictive course
lines
WARNING
. If the tires are replaced with
different sized tires, the predic-
tive course lines may not be
displayed correctly.
. On a snow-covered or slippery
road, there may be a difference
between the predictive course
lines and the actual course line.
. If the battery is disconnected or
becomes discharged, the predic-
tive course lines may be dis-
played incorrectly. If this occurs,
please perform the following pro-
cedures:
— Turn the steering wheel from
lock to lock while the engine is
running.
— Drive the vehicle on a straight road for more than 5 minutes.
Monitor, heater, air conditioner, audio, phone and voice recognition systems4-19