2022 NISSAN ARMADA fuel
[x] Cancel search: fuelPage 116 of 604

2-22Instruments and controls
menus offer instruction prompts of the
steering switch buttons to indicate how
to control the vehicle information display.
The OK
button changes the audio
source and thebuttonsalso
control voice recognition manual mode.
The OK
button can be used to change
the audio source when the audio screen
is displayed. The
buttonscan be
used when controlling voice recognition
prompts manually. (See NissanConnect®
Owner’s Manual.)
STARTUP DISPLAY
When the ignition switch is placed in the
ON position, the vehicle information dis-
play may display the following screens if
the vehicle is equipped with them:
. Home
. Speed
. Drive Computer
. Fuel Economy
. Navigation
. Audio
. CRUISE
. Driving Aids
. TPMS
. Speed Limit Sign
Warnings will only display if there are any
present. (See “Operational indicators” (P.2-
30).) To control what items display in the
vehicle information display, see “Settings”
(P.2-22).
SETTINGS
The setting mode allows user to change
the information displayed in the vehicle
information display and some settings:
.
Driver Assistance
. TPMS Setting
. Clock
. Vehicle settings
. Maintenance
. Customize Display
. Unit/Language
. Factory Reset
Driver Assistance
To change the status, warnings or turn on
or off any of the systems/warnings dis-
played in the “Driver Assistance” menu,
use the
buttonsto select and
change a menu item:
. Emergency Brake
. Lane
. Blind Spot
. Speed Limit Sign
. Cross Traffic Alert
. Driver Attention Alert .
Timer Alert
. Low Temp. Alert
Emergency Brake:
. Front
Allows user to turn the Automatic
Emergency Braking (AEB) with pedes-
trian detection system and Intelligent
Forward Collision Warning (I-FCW) sys-
tem ON/OFF.
. Rear
Allows user to turn the Rear Auto-
matic Braking (RAB) system ON/OFF.
(See “Automatic Emergency Braking (AEB)
with pedestrian detection system” (P.5-
96), “Intelligent Forward Collision Warning
(I-FCW)” (P.5-106) and “Rear Automatic
Braking (RAB)” (P.5-116).)
Lane:
. Warning(LDW)
Allows user to turn the Lane Depar-
ture Warning (LDW) system ON/OFF.
. Prevention(LDP)
Allows user to turn the Intelligent Lane
Intervention (I-LI) system ON/OFF.
(See “Lane Departure Warning (LDW)” (P.5-
26) and “Intelligent Lane Intervention (I-
LI)” (P.5-31).)
Page 121 of 604

Unit/Language
The units that are shown in the vehicle
information display can be changed:
.Mileage/Fuel
. Temperature
. Language
Use the
buttonsand the OKbutton to select and change the units of
the vehicle information display.
Mileage/Fuel:
The unit for the mileage that is shown in
the vehicle information display can be
changed.
. km, l/100km
. km, km/l
. miles, MPG(US)
Use the
buttonsand the OKbutton to select and change the unit.
Temperature:
The temperature that is shown in the
vehicle information display can be chan-
ged from:
. °C
. °F
Use the OK
button to toggle choices.
Language:
The language of the vehicle information
display can be changed. Use the
buttonsand the OKbutton to select and change the lan-
guage of the vehicle information display.
Factory Reset
The settings in the vehicle information
display can be reset back to the factory
default. To reset the vehicle information
display:
1. Select “Factory Reset” using the
buttonsand press the OKbutton.
2. Select “Yes” to return all settings back to default by pushing the OK
button.
Instruments and controls2-27
Page 125 of 604

gent Key battery discharge” (P.5-15).)
10. Release Parking Brake
This warning appears when the vehicle
speed is above 4 MPH (7 km/h) and the
parking brake is applied. Stop the vehicle
and release the parking brake.
11. Low Fuel
This warning appears when the fuel level
in the tank is getting low. Refuel as soon
as it is convenient, preferably before the
fuel gauge reaches the 0 (Empty) position.
There is a small reserve of fuel remain-
ing in the tank when the fuel gauge
reaches the 0 (Empty) position.
12. Low Washer Fluid
This warning appears when the washer
tank fluid is at a low level. Add washer
fluid as necessary. (See “Window washer
fluid” (P.8-10).)
13. Loose Fuel Cap
This warning appears when the fuel-filler
cap is not tightened correctly after the
vehicle has been refueled. (See “Fuel-filler
cap” (P.3-26).)
14. Tire Pressure Low Add Air
This warning appears when the low tire
pressure warning light in the meter
illuminates and low tire pressure is de-
tected. The warning appears each time
the ignition switch is placed in the ON
position as long as the low tire pressure
warning light remains illuminated. If this
warning appears, stop the vehicle and
adjust the tire pressure to the recom-
mended COLD tire pressure shown on the
Tire and Loading Information label. (See
“Low tire pressure warning light” (P.2-16)
and “Tire Pressure Monitoring System
(TPMS)” (P.5-5).)
15. SNOW mode indicator
This indicator appears when SNOW mode
is selected by the SNOW mode switch.
(See “SNOW mode” (P.5-135).)
16. Four-Wheel Drive (4WD) shift
indicator (4WD models)
This indicator shows the Four-Wheel
Drive (4WD) driving mode (AUTO, 4HI or
4LO) that is selected by the 4WD shift
switch. (See “NISSAN all-mode 4WD®” (P.5-
124).)
17. Door/liftgate open warning
(ignition switch is in the ON posi-
tion)
This warning appears if any of the doors
and/or the liftgate are open or not closed
securely. The vehicle icon indicates which
door or the liftgate is open on the display.
18. Power will turn off to save the
battery
This warning appears after a period of
time if the ignition switch is in ACC or ON
position.
19. Power turned off to save the
battery
This warning appears after the ignition
switch is automatically turned OFF to
save the battery.
20. Light reminder warning
This warning appears when the driver
side door is opened with the headlight
switch is left ON and the ignition switch is
placed in the OFF or LOCK position. Place
the headlight switch in the OFF (if so
equipped) or AUTO position. For addi-
tional information, see “Headlight and
turn signal switch” (P.2-46).
Instruments and controls2-31
Page 131 of 604

WAC0616X
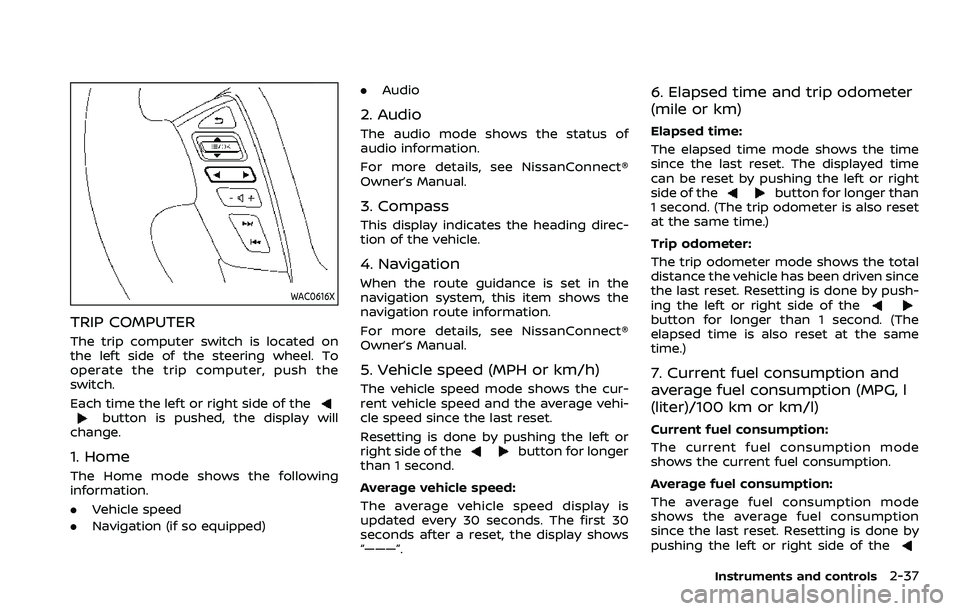
TRIP COMPUTER
The trip computer switch is located on
the left side of the steering wheel. To
operate the trip computer, push the
switch.
Each time the left or right side of the
button is pushed, the display will
change.
1. Home
The Home mode shows the following
information.
. Vehicle speed
. Navigation (if so equipped) .
Audio
2. Audio
The audio mode shows the status of
audio information.
For more details, see NissanConnect®
Owner’s Manual.
3. Compass
This display indicates the heading direc-
tion of the vehicle.
4. Navigation
When the route guidance is set in the
navigation system, this item shows the
navigation route information.
For more details, see NissanConnect®
Owner’s Manual.
5. Vehicle speed (MPH or km/h)
The vehicle speed mode shows the cur-
rent vehicle speed and the average vehi-
cle speed since the last reset.
Resetting is done by pushing the left or
right side of the
button for longer
than 1 second.
Average vehicle speed:
The average vehicle speed display is
updated every 30 seconds. The first 30
seconds after a reset, the display shows
“———”.
6. Elapsed time and trip odometer
(mile or km)
Elapsed time:
The elapsed time mode shows the time
since the last reset. The displayed time
can be reset by pushing the left or right
side of the
button for longer than
1 second. (The trip odometer is also reset
at the same time.)
Trip odometer:
The trip odometer mode shows the total
distance the vehicle has been driven since
the last reset. Resetting is done by push-
ing the left or right side of the
button for longer than 1 second. (The
elapsed time is also reset at the same
time.)
7. Current fuel consumption and
average fuel consumption (MPG, l
(liter)/100 km or km/l)
Current fuel consumption:
The current fuel consumption mode
shows the current fuel consumption.
Average fuel consumption:
The average fuel consumption mode
shows the average fuel consumption
since the last reset. Resetting is done by
pushing the left or right side of the
Instruments and controls2-37
Page 153 of 604

close to either the left or the right of a
traveling lane with detectable lane mar-
kers. (See “Lane Departure Warning (LDW)”
(P.5-26).)
The BSW system will turn on the side
indicator lights, on the outside mirrors, if
the radar sensors detect a vehicle in the
detection zone. If the turn signal is
activated in the direction of the detected
vehicle, a chime sounds twice and the
side indicator light will flash. (See “Blind
Spot Warning (BSW)” (P.5-38).)
SIC4454
For driving or starting the vehicle on
snowy roads or slippery areas, push on
the SNOW mode switch. The SNOW mode
indicator will illuminate. When the SNOW
mode is activated, engine output is con-
trolled to avoid wheel spin.
Push off the SNOW mode for normal
driving.
NOTE:
When the SNOW mode is activated, the
I-LI, I-BSI, and ICC systems will be turned
off automatically.
SIC4474
TOW MODE should be used when pulling
a heavy trailer or hauling a heavy load.
Driving the vehicle in TOW MODE with no
trailer/load or light trailer/light load will
not cause any damage. However, fuel
economy may be reduced, and the trans-
mission/engine driving characteristics
may feel unusual.
Push the TOW MODE switch to activate
TOW MODE. The indicator light on the
TOW MODE switch illuminates when TOW
MODE is selected. Push the TOW MODE
switch again to turn TOW MODE OFF.
TOW MODE is automatically canceled
when the ignition switch is placed in the
OFF position.
Instruments and controls2-59
SNOW MODE SWITCHTOW MODE SWITCH
Page 189 of 604

3 Pre-driving checks and adjustments
Keys ........................................................................\
................................. 3-2Intelligent Key ........................................................................\
... 3-2
Valet hand-off ........................................................................\
... 3-4
Doors ........................................................................\
.............................. 3-4 Locking with mechanical key ...................................... 3-4
Opening and closing windows with the
mechanical key ........................................................................\
3-5
Locking with inside lock knob ..................................... 3-5
Locking with power door lock switch ................... 3-5
Automatic door locks ......................................................... 3-6
Child safety rear door lock ........................................... 3-6
Intelligent Key system .............................................................. 3-7 Intelligent Key operating range ................................. 3-9
Door locks/unlocks precaution .................................. 3-9
Intelligent Key operation .............................................. 3-10
Battery saver system ....................................................... 3-12
Warning signals .................................................................... 3-12
Troubleshooting guide ................................................... 3-13
Remote keyless entry system ......................................... 3-15 How to use remote keyless entry system ...... 3-16
Remote engine start (if so equipped) ....................... 3-19 Remote engine start operating range ............... 3-19
Remote starting the engine ....................................... 3-19
Extending engine run time ......................................... 3-20 Canceling a remote engine start ........................ 3-20
Conditions the remote engine start will
not work ........................................................................\
.......... 3-20
Hood ........................................................................\
............................ 3-21
Liftgate ........................................................................\
...................... 3-22 Operating manual liftgate ......................................... 3-22
Operating power liftgate (if so equipped) ...... 3-22
Auto closure ........................................................................\
3-25
Liftgate release lever ..................................................... 3-26
Fuel-filler door ........................................................................\
..... 3-26
Opening the fuel-filler door ...................................... 3-26
Fuel-filler cap ....................................................................... 3-26
Tilt/telescopic steering ........................................................ 3-29
Electric operation ............................................................. 3-29
Sun visors ........................................................................\
................ 3-29
Mirrors ........................................................................\
........................ 3-30
Inside mirror ........................................................................\
. 3-30
Outside mirrors .................................................................. 3-38
Vanity mirror ........................................................................\
3-40
Memory seat (if so equipped) ......................................... 3-40
Entry/exit function .......................................................... 3-40
Memory storage ................................................................ 3-41
Setting memory function ........................................... 3-42
System operation ............................................................. 3-42
Page 193 of 604

(See “Vehicle settings” (P.2-24).)
OPENING AND CLOSING WINDOWS
WITH THE MECHANICAL KEY
The driver’s door key operation also
allows you to open and close all door
windows.
To open the windows, turn the driver’s
door key cylinder to the rear of the vehicle
forlonger than 1 second. The door is
unlocked and the window keeps opening
while turning the key.
This function can also be performed by
pushing and holding the door UNLOCK
button of the Intelligent Key. (See “Re-
mote keyless entry system” (P.3-15).)
To close the windows, turn the driver’s
door key cylinder to the front of the
vehicle for longer than 1 second. The
door is locked and the window keeps
closing while turning the key.
SPA2744
LOCKING WITH INSIDE LOCK KNOB
To lock the door individually, move the
inside lock knob to the lock position.
To unlock, move the inside lock knob to
the unlock position
.
Be sure not to leave the Intelligent Key
inside the vehicle.
JVP0319X
LOCKING WITH POWER DOOR LOCK
SWITCH
Operating the power door lock switch will
lock or unlock all the doors. The switches
are located on the driver’s and front
passenger’s door armrests.
To lock the doors, push the power door
lock switch to the lock position
.
Be sure not to leave the Intelligent Key
inside the vehicle.
To unlock the doors including the fuel-
filler door, push the power door lock
switch to the unlock position
.
Pre-driving checks and adjustments3-5
Page 203 of 604

WARNING
The Intelligent Key transmits radio
waves when the buttons are pushed.
The FAA advises that radio waves
may affect aircraft navigation and
communication systems. Do not op-
erate the Intelligent Key while on an
airplane. Make sure the buttons are
not operated unintentionally when
the unit is stored for a flight.
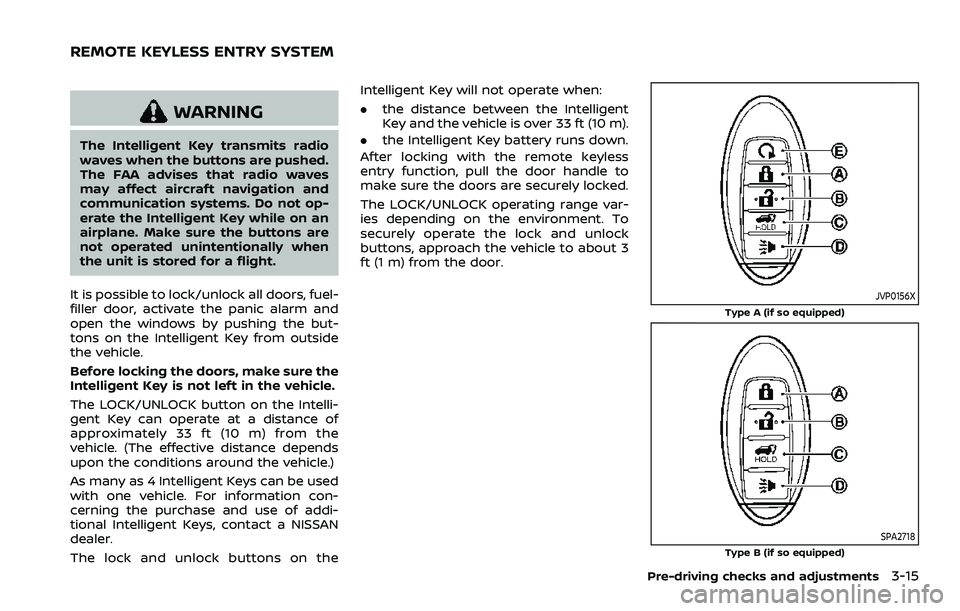
It is possible to lock/unlock all doors, fuel-
filler door, activate the panic alarm and
open the windows by pushing the but-
tons on the Intelligent Key from outside
the vehicle.
Before locking the doors, make sure the
Intelligent Key is not left in the vehicle.
The LOCK/UNLOCK button on the Intelli-
gent Key can operate at a distance of
approximately 33 ft (10 m) from the
vehicle. (The effective distance depends
upon the conditions around the vehicle.)
As many as 4 Intelligent Keys can be used
with one vehicle. For information con-
cerning the purchase and use of addi-
tional Intelligent Keys, contact a NISSAN
dealer.
The lock and unlock buttons on the Intelligent Key will not operate when:
.
the distance between the Intelligent
Key and the vehicle is over 33 ft (10 m).
. the Intelligent Key battery runs down.
After locking with the remote keyless
entry function, pull the door handle to
make sure the doors are securely locked.
The LOCK/UNLOCK operating range var-
ies depending on the environment. To
securely operate the lock and unlock
buttons, approach the vehicle to about 3
ft (1 m) from the door.
JVP0156X
Type A (if so equipped)
SPA2718Type B (if so equipped)
Pre-driving checks and adjustments3-15
REMOTE KEYLESS ENTRY SYSTEM