2022 NISSAN ALTIMA warning
[x] Cancel search: warningPage 215 of 559
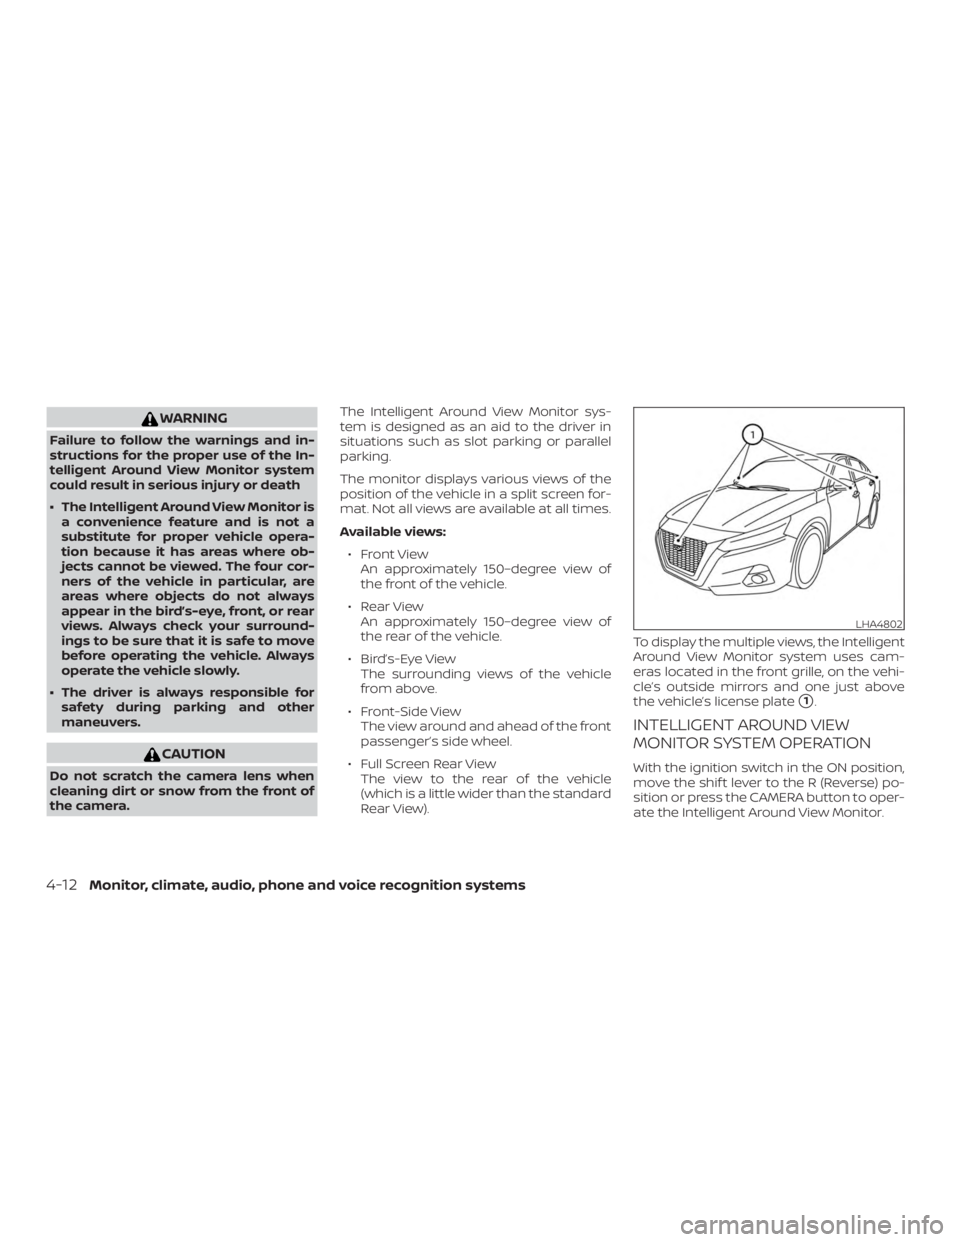
WARNING
Failure to follow the warnings and in-
structions for the proper use of the In-
telligent Around View Monitor system
could result in serious injury or death
∙ The Intelligent Around View Monitor isa convenience feature and is not a
substitute for proper vehicle opera-
tion because it has areas where ob-
jects cannot be viewed. The four cor-
ners of the vehicle in particular, are
areas where objects do not always
appear in the bird’s-eye, front, or rear
views. Always check your surround-
ings to be sure that it is safe to move
before operating the vehicle. Always
operate the vehicle slowly.
∙ The driver is always responsible for safety during parking and other
maneuvers.
Page 227 of 559
WARNING
Failure to follow the warnings and in-
structions for proper use of the Moving
Object Detection (MOD) system could
result in serious injury or death
∙ The MOD system is not a substitutefor proper vehicle operation and is not
designed to prevent contact with ob-
jects surrounding the vehicle. When
maneuvering, always use the outside
mirrors and rearview mirror and turn
and check the surroundings to ensure
it is safe to maneuver.
∙ The system is deactivated at speeds above 5 mph (8 km/h). It is reactivated
at lower speeds.
∙ The MOD system is not designed to detect surrounding stationary
objects.
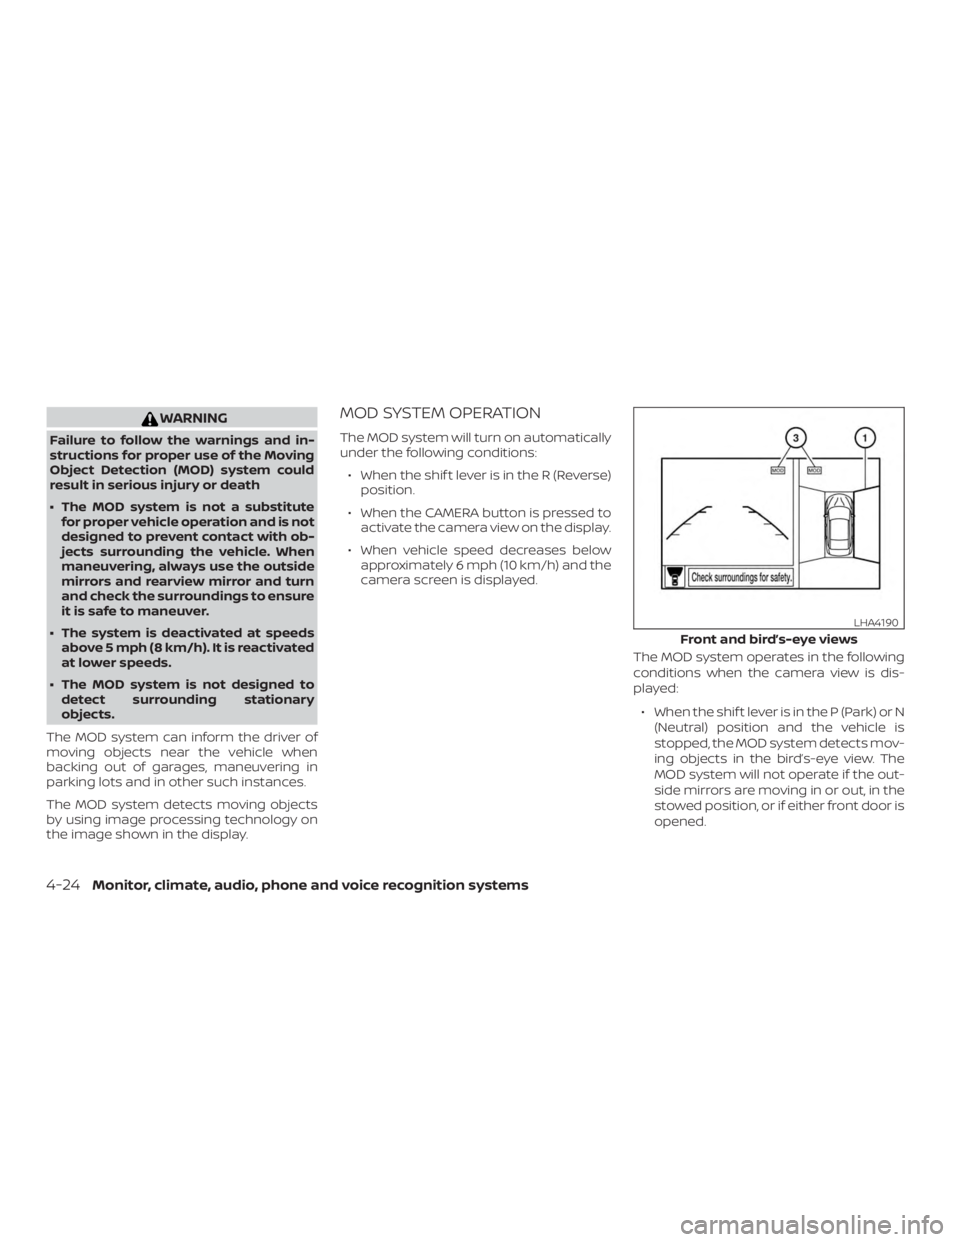
The MOD system can inform the driver of
moving objects near the vehicle when
backing out of garages, maneuvering in
parking lots and in other such instances.
The MOD system detects moving objects
by using image processing technology on
the image shown in the display.
MOD SYSTEM OPERATION
The MOD system will turn on automatically
under the following conditions: ∙ When the shif t lever is in the R (Reverse) position.
∙ When the CAMERA button is pressed to activate the camera view on the display.
∙ When vehicle speed decreases below approximately 6 mph (10 km/h) and the
camera screen is displayed.
The MOD system operates in the following
conditions when the camera view is dis-
played:∙ When the shif t lever is in the P (Park) or N (Neutral) position and the vehicle is
stopped, the MOD system detects mov-
ing objects in the bird’s-eye view. The
MOD system will not operate if the out-
side mirrors are moving in or out, in the
stowed position, or if either front door is
opened.
Page 251 of 559
WARNING
∙ Do not leave children or adults whowould normally require the assis-
tance of others alone in your vehicle.
Pets should also not be lef t alone.
They could accidentally injure them-
selves or others through inadvertent
operation of the vehicle. Also, on hot,
sunny days, temperatures in a closed
vehicle could quickly become high
enough to cause severe or possibly
fatal injuries to people or animals.
∙ Closely supervise children when they are around cars to prevent them from
playing and becoming locked in the
trunk where they could be seriously
injured. Keep the car locked, with the
rear seatback and trunk lid securely
latched when not in use, and prevent
children’s access to car keys.
EXHAUST GAS (carbon monoxide)
Page 253 of 559

Additional information:∙ When replacing a wheel without the TPMS such as the spare tire, the TPMS
does not monitor the tire pressure of
the spare tire.
∙ The TPMS will activate only when the vehicle is driven at speeds above
16 mph (25 km/h). Also, this system may
not detect a sudden drop in tire pres-
sure (for example, a flat tire while driv-
ing).
∙ The low tire pressure warning light does not automatically turn off when the tire
pressure is adjusted on all four tires. Af-
ter all four tires are inflated to the rec-
ommended pressure, the vehicle must
be driven at speeds above 16 mph
(25 km/h) to activate the TPMS and turn
off the low tire pressure warning light.
Use a tire pressure gauge to check the
tire pressure.
∙ The “Tire Pressure Low - Add Air” warn- ing appears in the vehicle information
display when the low tire pressure
warning light is illuminated and low tire
pressure is detected. The “Tire Pressure
Low - Add Air” warning turns off when
the low tire pressure warning light turns
off. ∙ The “Tire Pressure Low - Add Air” warn-
ing appears each time the ignition
switch is placed in the ON position as
long as the low tire pressure warning
light remains illuminated.
∙ The “Tire Pressure Low - Add Air” warn- ing does not appear if the low tire pres-
sure warning light illuminates to indi-
cate a TPMS malfunction.
∙ Tire pressure rises and falls depending on the heat caused by the vehicle’s op-
eration and the outside temperature.
Do not reduce the tire pressure af ter
driving because the tire pressure rises
af ter driving. Low outside temperature
can lower the temperature of the air
inside the tire which can cause a lower
tire inflation pressure. This may cause
the low tire pressure warning light to
illuminate. If the warning light illumi-
nates, check the tire pressure for all four
tires.
∙ The Tire and Loading Information label is located in the driver’s door opening. ∙ You can also check the tire pressure of
all tires (except the spare) on the vehicle
information display screen. The order of
the tire pressure figures displayed on
the screen corresponds with the actual
order of the tire position.
For additional information, refer to “Low tire
pressure warning light” in the “Instruments
and controls” section, “Tire Pressure Moni-
toring System (TPMS)” in the “In case of
emergency” section and “Tire pressure” in
the “Do-it-yourself ” section of this manual.
Page 254 of 559

∙ If the low tire pressure warning lightilluminates while driving, avoid sud-
den steering maneuvers or abrupt
braking, reduce vehicle speed, pull off
the road to a safe location and stop
the vehicle as soon as possible. Driv-
ing with underinflated tires may per-
manently damage the tires and in-
crease the likelihood of tire failure.
Serious vehicle damage could occur
and may lead to an accident and could
result in serious personal injury.
Check the tire pressure for all four
tires. Adjust the tire pressure to the
recommended COLD tire pressure
shown on the Tire and Loading Infor-
mation label to turn the low tire pres-
sure warning light off. If you have a flat
tire, replace it with a spare tire as soon
as possible. (For additional informa-
tion, refer to “Flat tire” in the “In case of
emergency ” section for changing a
flat tire.) ∙ When replacing a wheel without the
TPMS such as the spare tire, when a
spare tire is mounted or a wheel is
replaced, tire pressure will not be indi-
cated, the TPMS will not function and
the low tire pressure warning light will
flash for approximately 1 minute. The
light will remain on af ter 1 minute. It is
recommended that you visit a NISSAN
dealer for tire replacement and/or
system resetting.
∙ Replacing tires with those not origi- nally specified by NISSAN could affect
the proper operation of the TPMS.
∙ Do not inject any tire liquid or aerosol tire sealant into the tires, as this may
cause a malfunction of the tire pres-
sure sensors.
Page 264 of 559
∙ Make sure the area around the vehicle isclear.
∙ Check fluid levels such as engine oil, coolant, brake fluid, and windshield-
washer fluid as frequently as possible,
or at least whenever you refuel.
∙ Check that all windows and lights are clean.
∙ Visually inspect tires for their appear- ance and condition. Also check tires for
proper inflation.
∙ Lock all doors.
∙ Position seat and adjust headrests/head restraints.
∙ Adjust inside and outside mirrors.
∙ Fasten seat belts and ask all passen- gers to do likewise.
∙ Check the operation of warning lights when the ignition switch is pushed to
the ON position. For additional informa-
tion, refer to “Warning lights, indicator
lights and audible reminders” in the “In-
struments and controls” section of this
manual. 1. Apply the parking brake.
2. Move the shif t lever to P (Park) or N
(Neutral). P (Park) is recommended.
The starter is designed not to oper-
ate if the shif t lever is in any of the
driving positions.
3. Push the ignition switch to the ON po- sition. Depress the brake pedal and
push the ignition switch to start the
engine.
To start the engine immediately, push
and release the ignition switch while
depressing the brake pedal with the
ignition switch in any position.
∙ If the engine is very hard to start in extremely cold weather or when re-
starting, depress the accelerator
pedal a little (approximately 1/3 to the
floor) and while holding, crank the en-
gine. Release the accelerator pedal
when the engine starts.
∙ If the engine is very hard to start be- cause it is flooded, depress the accel-
erator pedal all the way to the floor
and hold it. Push the ignition switch
to the ON position to start cranking
the engine. Af ter 5 or 6 seconds, stop
cranking by pushing the ignition switch to the LOCK position. Af ter
cranking the engine, release the ac-
celerator pedal. Crank the engine
with your foot off the accelerator
pedal by depressing the brake pedal
and pushing the ignition switch to
start the engine. If the engine starts,
but fails to run, repeat the above pro-
cedure.
Page 266 of 559
CAUTION
∙ Except in an emergency, do not shif tto the N (Neutral) position while driv-
ing. Coasting with the transmission in
the N (Neutral) position may cause se-
rious damage to the transmission.
∙ To avoid possible damage to your ve- hicle, when stopping the vehicle on an
uphill grade, do not hold the vehicle by
depressing the accelerator pedal. The
foot brake should be used for this
purpose.
The CVT in your vehicle is electronically
controlled to produce maximum power
and smooth operation.
Follow these procedures for maximum ve-
hicle performance and driving enjoyment.
NOTE:
Engine power may be automatically re-
duced to protect the CVT if the engine
speed increases quickly when driving on
slippery roads or while being tested on
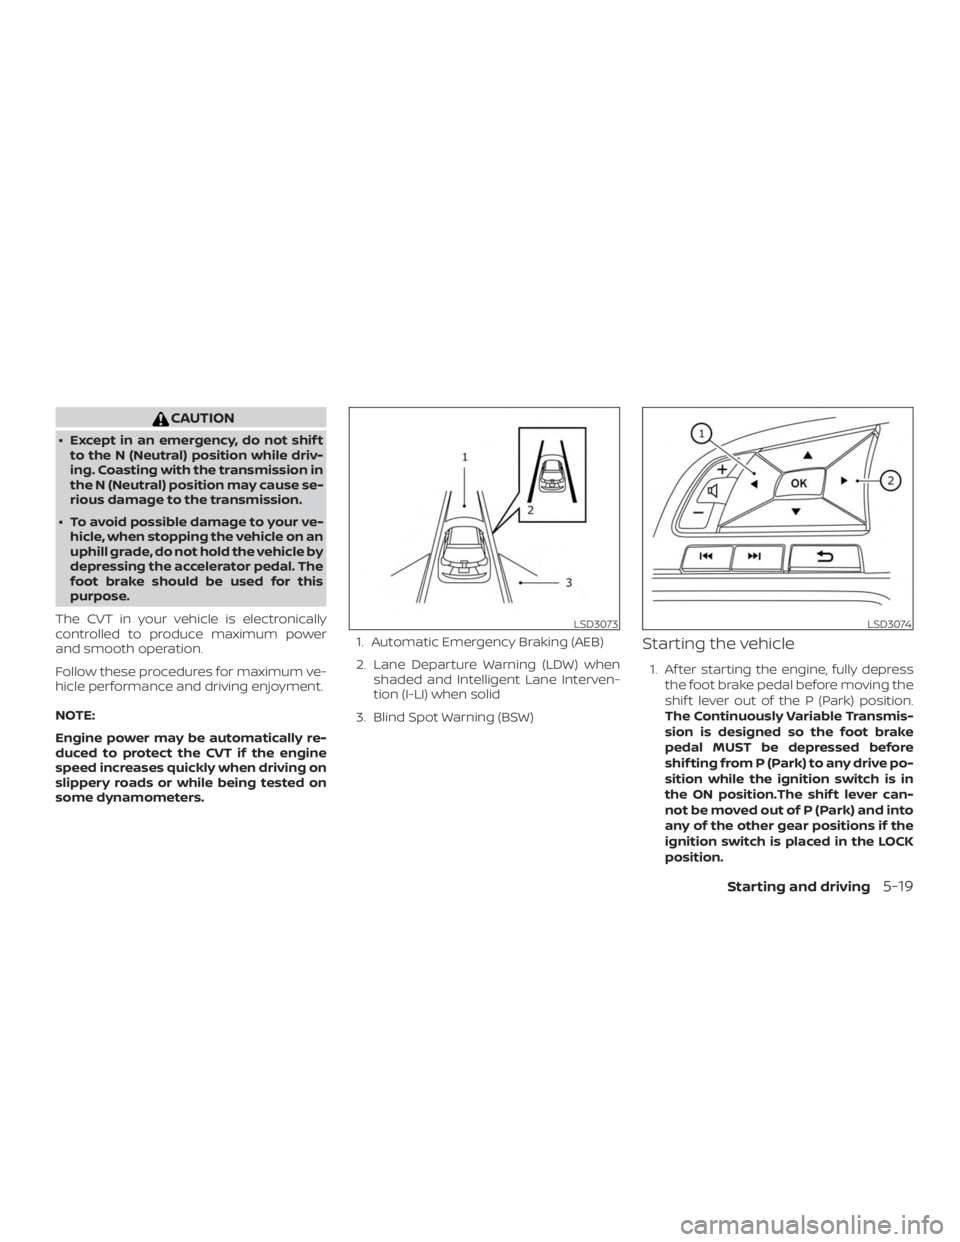
some dynamometers. 1. Automatic Emergency Braking (AEB)
2. Lane Departure Warning (LDW) when
shaded and Intelligent Lane Interven-
tion (I-LI) when solid
3. Blind Spot Warning (BSW)
Starting the vehicle
1. Af ter starting the engine, fully depress the foot brake pedal before moving the
shif t lever out of the P (Park) position.
The Continuously Variable Transmis-
sion is designed so the foot brake
pedal MUST be depressed before
shif ting from P (Park) to any drive po-
sition while the ignition switch is in
the ON position.The shif t lever can-
not be moved out of P (Park) and into
any of the other gear positions if the
ignition switch is placed in the LOCK
position.
Page 271 of 559
WARNING
If the shif t lever cannot be moved from
the P (Park) position while the engine is
running and the brake pedal is de-
pressed, the stop lights may not work.
Malfunctioning stop lights could cause
an accident injuring yourself and
others.
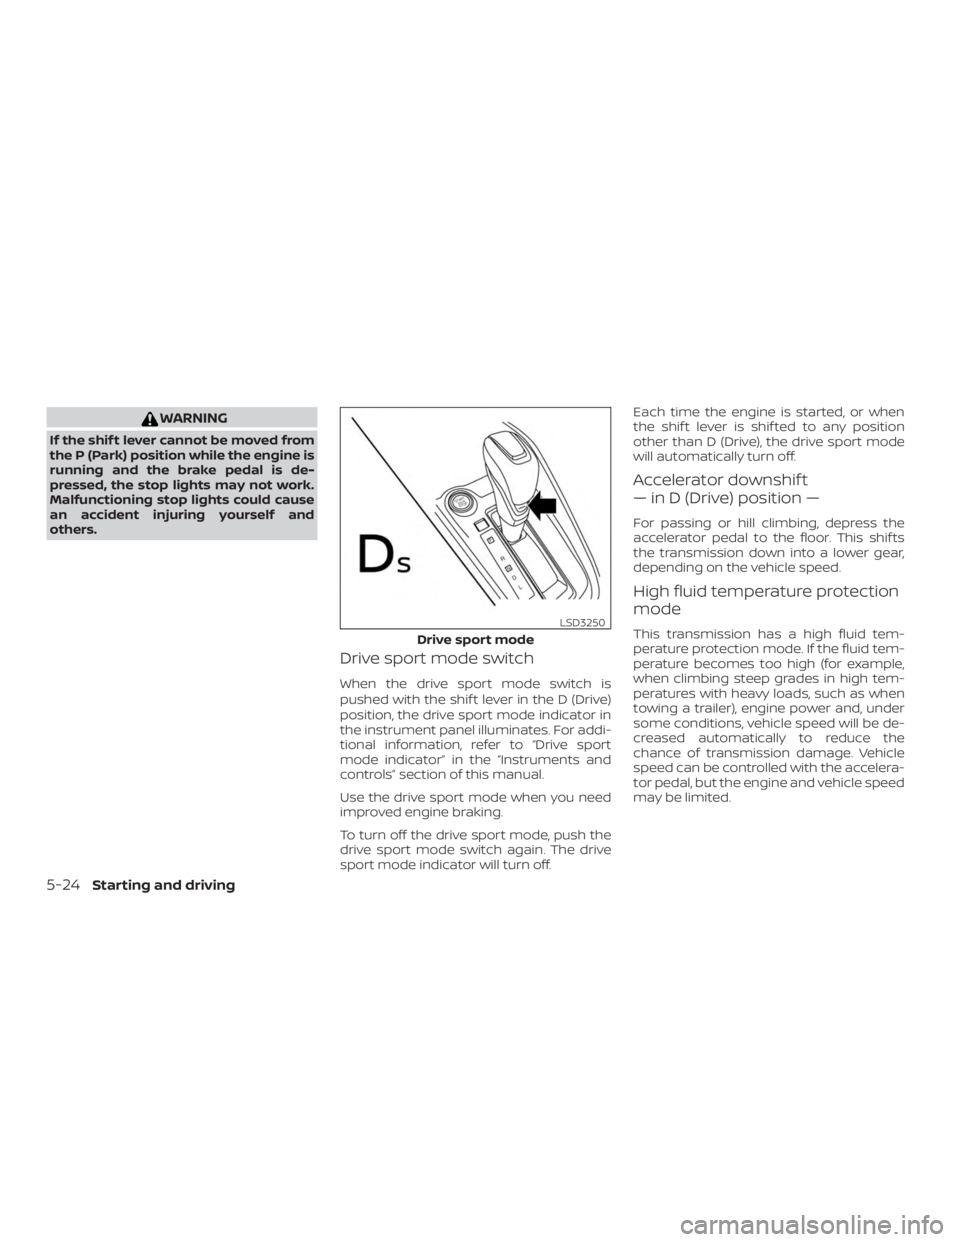
Drive sport mode switch
When the drive sport mode switch is
pushed with the shif t lever in the D (Drive)
position, the drive sport mode indicator in
the instrument panel illuminates. For addi-
tional information, refer to “Drive sport
mode indicator” in the “Instruments and
controls” section of this manual.
Use the drive sport mode when you need
improved engine braking.
To turn off the drive sport mode, push the
drive sport mode switch again. The drive
sport mode indicator will turn off.Each time the engine is started, or when
the shif t lever is shif ted to any position
other than D (Drive), the drive sport mode
will automatically turn off.
Accelerator downshif t
— in D (Drive) position —
For passing or hill climbing, depress the
accelerator pedal to the floor. This shif ts
the transmission down into a lower gear,
depending on the vehicle speed.
High fluid temperature protection
mode
This transmission has a high fluid tem-
perature protection mode. If the fluid tem-
perature becomes too high (for example,
when climbing steep grades in high tem-
peratures with heavy loads, such as when
towing a trailer), engine power and, under
some conditions, vehicle speed will be de-
creased automatically to reduce the
chance of transmission damage. Vehicle
speed can be controlled with the accelera-
tor pedal, but the engine and vehicle speed
may be limited.