2022 MAZDA MODEL MX-30 EV instrument
[x] Cancel search: instrumentPage 252 of 547

WARNING
Do not rely completely on the DM
and always drive carefully:
The DM is a system which detects
driver fatigue and sleepiness, and
encourages the driver to take a rest.
This is not designed to prevent driver
fatigue and sleepiness, and
over-reliance on the system could lead
to an accident. Drive carefully and turn
the steering wheel appropriately.
In addition, the system may not be
able to detect driver fatigue and
sleepiness correctly depending on the
traffic and driving conditions. The
driver must take sufficient rest in order
to drive safely.
Operation conditions
The DM begins monitoring after 20
minutes have passed since the driver
began driving the vehicle and when
the vehicle speed is about 5 km/h (3
mph) or faster.
NOTE
If the vehicle speed decreases to less
than about 5 km/h (3 mph) while
the DM is monitoring , the DM stops
monitoring for 6 mi nutes even if the
vehicle speed returns to about 5
km/h (3 mph) or faster.
If the driver monitoring camera does
not recognize the driver correctly, the
DM may not monitor correctly.
Refer to Driver Monitoring Camera
on page 4-81.
After the DM has displayed the first
message encouraging the driver to
take a rest, it does not display it
again during the following periods.
After displaying the warning
pattern (caution), the next warning
pattern (caution) is not displayed
until 45 minutes have passed.
After displaying the warning
pattern (warning), the next
warning pattern (warning) is not
displayed until 15 minutes have
passed.
After displaying the warning
pattern (warning), the next
warning pattern (caution) is not
displayed until 45 minutes have
passed.
▼ Driver Monitoring (DM) Display
When the Driver Monitoring (DM)
detects driver fatigue or sleepiness, it
activates the warning sound and
displays an alert in the instrument
cluster.
Warning pattern (caution) (white)
1. “Time for a Break” message is
displayed
Warning pattern (warning) (amber)
1. “Time for a Break” message is displayed
When Driving
i-ACTIVSENSE
4-103
MX -30_8JD4-EA -21G_Edition2_new 2021-5-18 14:38:07
Page 326 of 547

Cruise Set Indication (Green)
The indication turns on (green) when a
cruising speed has been set.
▼Activation/Deactivation
WARNING
Always turn o
ff the cruise control
system when it is not in use:
Leaving the cruise control system in an
activation-ready state while the cruise
control is not in use is dangerous as the
cruise control could unexpectedly
activate if the activation button is
accidentally pressed, and result in loss
of vehicle control and an accident.
If the headway control function is
disabled using a Mazda Connect
setting , the system switches to cruise
control.
Activation
To activate the system, press the cruise
switch. The cruise standby indication
(white) turns on.
Deactivation
To deactivate the system, press the
cruise switch again.
The cruise standby indication (white)
turns off.
▼ To Set Speed
1. Activate the cruise control system
by pressing the cruise switch. The
cruise standby indication (white)
turns on.
2. Accelerate to the desired speed,
which must be more than 25 km/h
(16 mph).
3. Adjust the system to the desired vehicle speed using the accelerator
pedal. Press the RES switch up (SET
+) or down (SET -) to start cruise
control. The cruise control
indication (green) in the instrument
cluster turns on at the same time.
Quickly release the switch when the
cruise control indication (green)
turns on.
NOTE
If the RES switch is operated up (SET
+) or down (SET -) while the vehicle
speed is between 25 and 30 km/h
(16 to 19 mph), the set speed is set
to 30 km/h (19 mph).
The cruise control speed setting
cannot be performed under the
following conditions:
Any of the doors is opened.The driver's seat belt is unfastened.The brake pedal is depressed.The parking brake is applied.The selector lever is in the P, N, or
R position.
On a steep grade, the vehicle may
momentarily slow down while
ascending or speed up while
descending.
The cruise control will cancel if the
vehicle speed decreases below 20
km/h (12 mph) when the cruise
control is activated, such as when
climbing a steep grade.
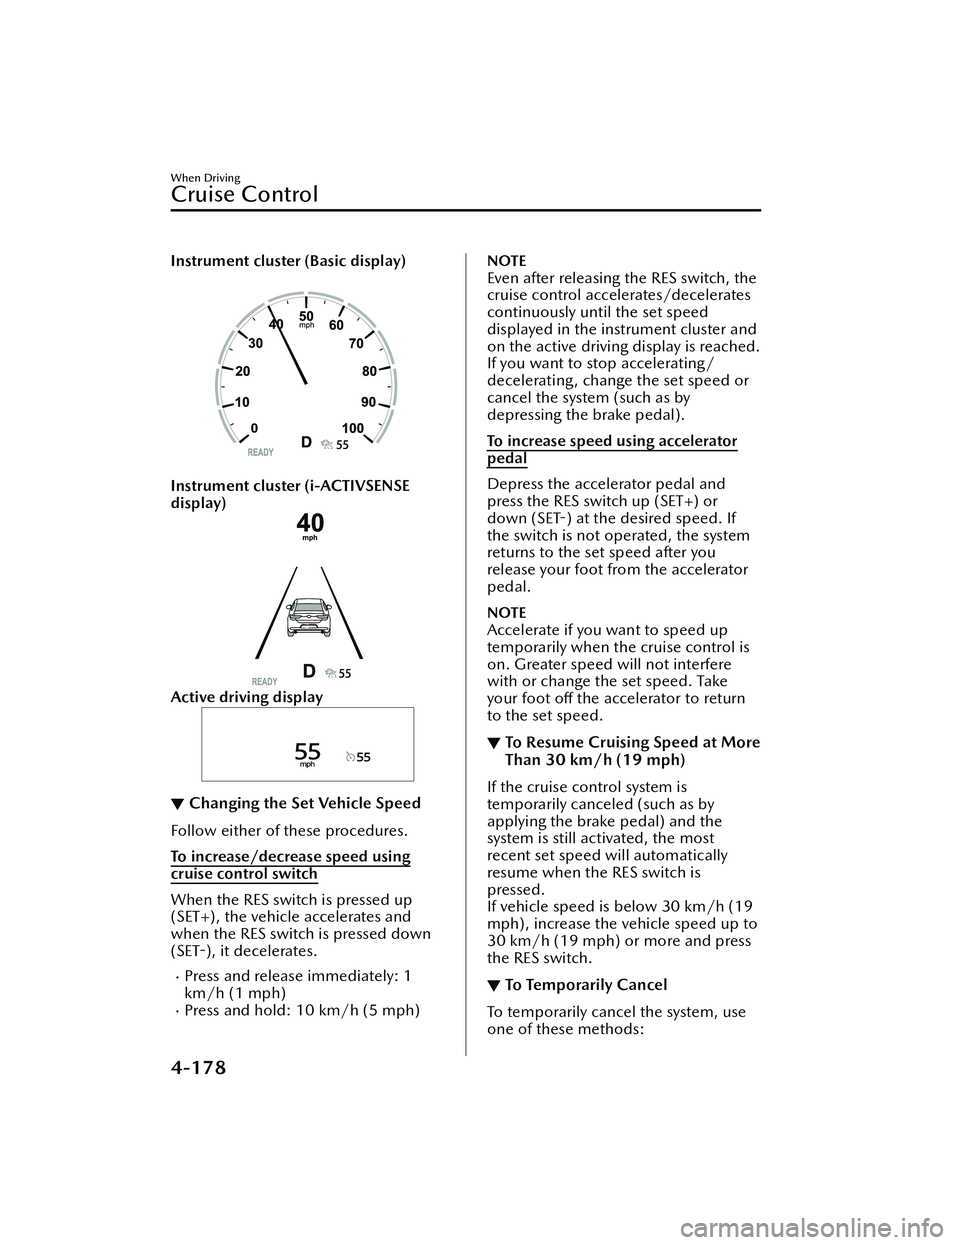
The vehicle speed preset using the
cruise control is displayed in the
instrument cluster and the active
driving display (vehicles with active
driving display).
When Driving
Cruise Control
4-177
MX -30_8JD4-EA -21G_Edition2_new 2021-5-18 14:38:07
Page 327 of 547

Instrument cluster (Basic display)
Instrument cluster (i-ACTIVSENSE
display)
Active driving display
▼Changing the Set Vehicle Speed
Follow either of these procedures.
To increase/decrease speed using
cruise control switch
When the RES switch is pressed up
(SET+), the vehicle accelerates and
when the RES switch is pressed down
(SET
-), it decelerates.
Press and release immediately: 1
km/h (1 mph)
Press and hold: 10 km/h (5 mph)
NOTE
Even after releasing the RES switch, the
cruise control accelerates/decelerates
continuously until the set speed
displayed in the instrument cluster and
on the active driving display is reached.
If you want to stop accelerating/
decelerating, change the set speed or
cancel the system (such as by
depressing the brake pedal).
To increase speed using accelerator
pedal
Depress the accelerator pedal and
press the RES switch up (SET+) or
down (SET -) at the desired speed. If
the switch is not operated, the system
returns to the set speed after you
release your foot from the accelerator
pedal.
NOTE
Accelerate if you want to speed up
temporarily when the cruise control is
on. Greater speed will not interfere
with or change the set speed. Take
your foot o ff the accelerator to return
to the set speed.
▼ To Resume Cruising Speed at More
Than 30 km/h (19 mph)
If the cruise control system is
temporarily canceled (such as by
applying the brake pedal) and the
system is still activated, the most
recent set speed will automatically
resume when the RES switch is
pressed.
If vehicle speed is below 30 km/h (19
mph), increase the vehicle speed up to
30 km/h (19 mph) or more and press
the RES switch.
▼To Temporarily Cancel
To temporarily cancel the system, use
one of these methods:
When Driving
Cruise Control
4-178
MX
-30_8JD4-EA -21G_Edition2_new 2021-5-18 14:38:07
Page 329 of 547

Tire Pressure MonitoringSystem (TPMS)
▼Tire Pressure Monitoring System
(TPMS)
The TPMS monitors the air pressure of
each tire and if it decreases below the
speci
fied value, the system
notifies the
driver by turning on the TPMS warning
light in the instrument cluster and
indicating a message on the
multi-information display.
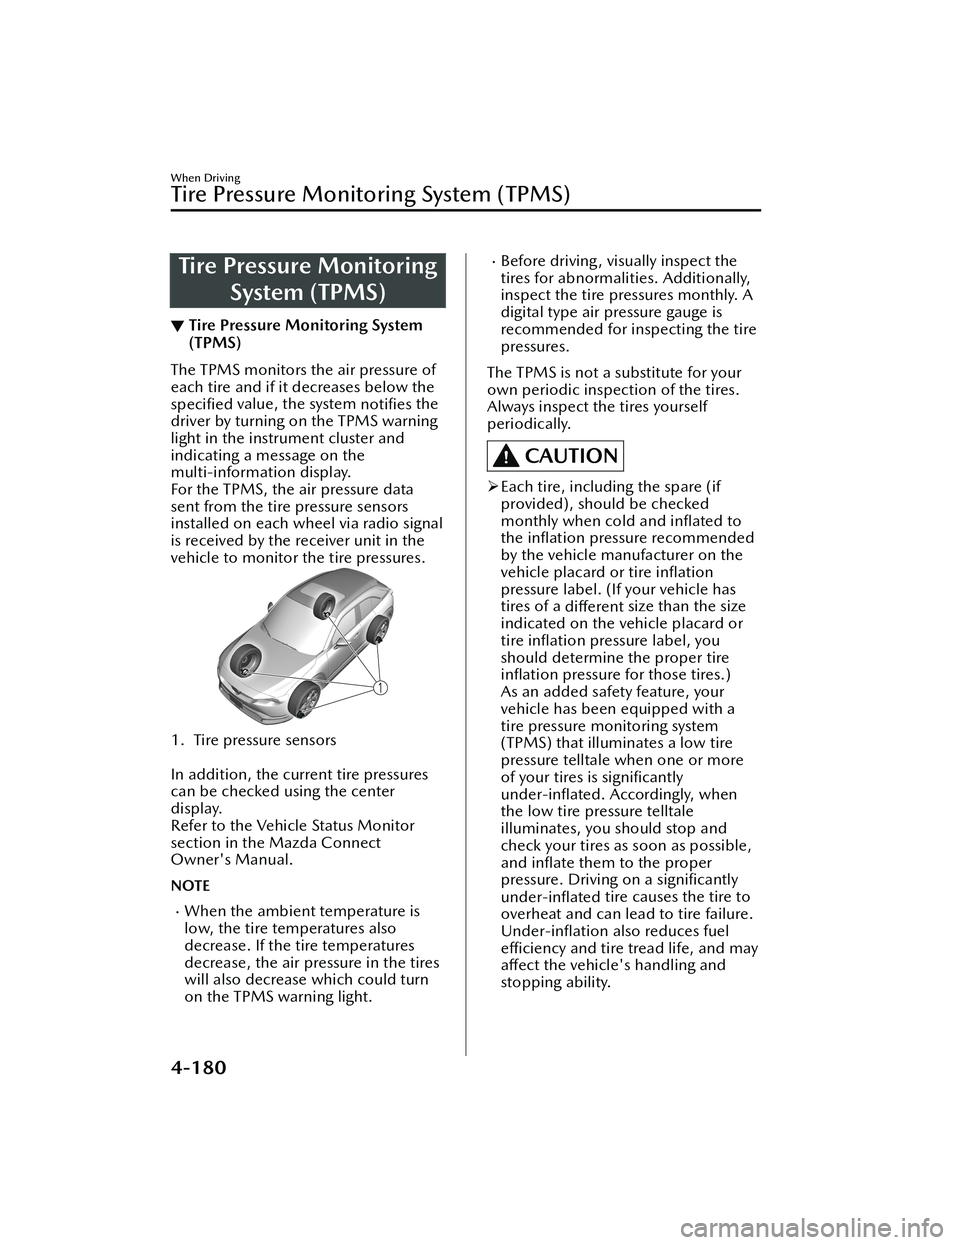
For the TPMS, the air pressure data
sent from the tire pressure sensors
installed on each wheel via radio signal
is received by the receiver unit in the
vehicle to monitor the tire pressures.
1. Tire pressure sensors
In addition, the current tire pressures
can be checked using the center
display.
Refer to the Vehicle Status Monitor
section in the Mazda Connect
Owner's Manual.
NOTE
When the ambient temperature is
low, the tire temperatures also
decrease. If the tire temperatures
decrease, the air pressure in the tires
will also decrease which could turn
on the TPMS warning light.
Before driving, visually inspect the
tires for abnormalities. Additionally,
inspect the tire pressures monthly. A
digital type air pressure gauge is
recommended for inspecting the tire
pressures.
The TPMS is not a substitute for your
own periodic inspection of the tires.
Always inspect the tires yourself
periodically.
CAUTION
Each tire, including the spare (if
provided), should be checked
monthly when cold and
inflated to
the in flation pressure recommended
by the vehicle manufacturer on the
vehicle placard or tire inflation
pressure label. (If your vehicle has
tires of a different size than the size
indicated on the vehicle placard or
tire in flation pressure label, you
should determine the proper tire in flation pressure for those tires.)
As an added safety feature, your
vehicle has been equipped with a
tire pressure monitoring system
(TPMS) that illuminates a low tire
pressure telltale when one or more
of your tires is significantly
under-in flated. Accordingly, when
the low tire pressure telltale
illuminates, you should stop and
check your tires as soon as possible,
and in flate them to the proper
pressure. Driving on a signi ficantly
under-in flated tire causes the tire to
overheat and can lead to tire failure.
Under-in flation also reduces fuel
e ffi ciency and tire tread life, and may
a ff ect the vehicle's handling and
stopping ability.
When Driving
Tire Pressure Monitoring System (TPMS)
4-180
MX -30_8JD4-EA -21G_Edition2_new 2021-5-18 14:38:07
Page 395 of 547

Do not use accessories that are not
genuine Mazda accessories or the
equivalent.
Close the cover when the
accessory socket is not in use to
prevent foreign objects and liquids
from getting into the accessory
socket.
Correctly insert the plug into the
accessory socket.
Do not insert the cigarette lighter
into the accessory socket.
Noise may occur on the audio
playback depending on the device
connected to the accessory socket.
Depending on the device connected
to the accessory socket, the vehicle's
electrical system may be aff ected,
which could cause the warning light
to illuminate. Disconnect the
connected device and make sure
that the problem is resolved. If the
problem is resolved, disconnect the
device from the socket and switch
the power switch o ff. If the problem
is not resolved, consult an
Authorized Mazda Dealer.
NOTE
To prevent the lead-acid battery from
depleting, do not use the socket for
long periods with the EV system
stopped.
AC Power Outlet*
▼ AC Power Outlet
The AC power outlet can be used as a
socket for accessories when the power
switch is switched to ACC or ON.
Only use AC 120 V/60 Hz accessories
that have a maximum power
consumption of 150 W or below.
WARNING
Never use medical instruments with
the power outlet:
Otherwise, the operation of the
medical device might be
aff ected.
Heed the following cautions when
using the AC power supply to prevent
electrical shock, smoking, or
combustion.
Be careful with the AC power outlet
and plug during and after use.
Because an electrical appliance
could operate at the moment it is
plugged in, check the safety before
plugging it in.
Do not plug accessories into the
power outlet or unplug them with
wet hands.
Be careful not to allow liquid to
penetrate the AC power outlet.
Do not put anything other than plugs
into the AC power outlet.
Do not disassemble the AC power
outlet.
Do not use the AC power outlet if it
is damaged. If part replacement or
repair is required, consult an
Authorized Mazda Dealer.
Interior Features
Interior Equipment
5-40*Some models.
MX -30_8JD4-EA -21G_Edition2_new 2021-5-18 14:38:07
Page 405 of 547

Scheduled Maintenance
▼Scheduled Maintenance (U.S.A.)
Vehicles utilizing the vehicle status monitor feature:
The vehicle status monitor feature alerts you of maintenance needs by turning on the
wrench indicator light or displaying a message in the instrument panel, or both.
Every maintenance must be done when the display/wrench indication comes on.
The display/wrench indication will come
on before reaching the maximum interval
of 16,000 km (10,000 miles), or 12 mont hs (after the previous maintenance).
Refer to the Information section in the Mazda Connect Owner's Manual. Please
contact an Authorized Mazda Dealer if necessary.
Reset Service Interval when the maintenance was performed regardless of the mes-
sage/wrench indicator light display.
USA Residents
Maintenance Item Number of times, maintenance was performed.
12345678
ELECTRIC VEHICLE SYSTEM
Coolant level IIIIIIII
Coolant
*1Replace at first 192,000 km (120,000 miles) or 180
months; after that, every 96,000 km (60,000 miles) or 60 months.
OTHER THAN ENGINE AND ELECTRIC VEHICLE SYSTEM
Brake lines, hoses and connections I I I I
Brake and clutch fl uid level IIIIIIII
Brake fluid RRR R
Disc brakes IIIIIIII
Steering operation and linkages III I
Front and rear suspension, ball joints and
wheel bearing axial play IIII
Driveshaft dust boot III I
Bolts and nuts on chassis and body TT TT
Cabin air filter Replace every 48,000 km (30,000 miles) or 24 months.
Tire rotation Rotate every 16,000 km (10,000 miles).
Tire in flation pressure and tire wear
*2IIIIIIII
Emergency flat tire repair kit (if equipped)
*3Inspect annually.
Function of all lights IIIIIIII
Chart symbols:
I: Inspect: Inspect and clean, repair, adjust, fill up, or replace if necessary.
Maintenance and Care
Scheduled Maintenance
6-4
MX -30_8JD4-EA -21G_Edition2_new 2021-5-18 14:38:07
Page 406 of 547

R: Replace
T: Tighten
Remarks:
*1Use of FL-22 is recommended when replacing coolant. Using coolant other than
FL-22 may cause
serious damage to the engine and cooling system.
*2 Inspect a spare tire if equipped.*3Check the tire repair fl uid expiration date every year when performing the periodic maintenance.
Replace the tire repair fluid bottle with a new one before the expiration date.
▼Scheduled Maintenance (Canada)
Vehicles utilizing the vehicle status monitor feature:
The vehicle status monitor feature alerts you of maintenance needs by turning on the
wrench indicator light or displaying a message in the instrument panel, or both.
The display/wrench indication will come on before reaching the maximum interval
of 16,000 km (10,000 miles), or 12 mont
hs (after the previous maintenance).
Refer to the owner's manual section of mazda.ca for the Mazda Connect owner's
manual or contact an Authorized Mazda Dealer if necessary.
Reset Service Interval when the maintena nce was performed regardless of the mes-
sage/wrench indicator light display.
Canada residents
Maintenance Interval Number of months or kilomete
rs (miles), whichever comes first.
Months 12 24 36 48 60 72
×1000 km 16 32 48 64 80 96
×1000 miles 10 20 30 40 50 60
ELECTRIC VEHICLE SYSTEM
Coolant level IIIIII
Coolant
*1Replace at first 192,000 km (120,000 miles) or 180
months; after that, every 96,000 km (60,000 miles) or 60 months.
OTHER THAN ENGINE AND ELECTRIC VEHICLE SYSTEM
Brake lines, hoses and connections I I I
Brake fluid RRR
Disc brakes IIIIII
Steering operation and linkages I I I
Front and rear suspension, ball joints and
wheel bearing axial play III
Driveshaft dust boot I I I
Bolts and nuts on chassis and body T T T
Maintenance and Care
Scheduled Maintenance
6-5
MX -30_8JD4-EA -21G_Edition2_new 2021-5-18 14:38:07
Page 432 of 547

No.FUSE RAT
-
ING PROTECTED COMPONENT
F41 ――
F42 20 A Windshield wiper
F43 ――
F44 30 A Accessory sockets
F45 10 A BEV control system
F46 15 A Audio
F47 15 A For protection of various circuits
F48 7.5 A Air bag
F49 15 A Instrument cluster
F50 15 A Room light
F51 25 A Audio
F52 10 A
Moonroof
*
F53 15 A BEV control system
F54 10 A i-ACTIVSENSE
F55 ――
F56 ――
Maintenance and Care
Owner Maintenance
*Some models.6-31
MX-30_8JD4-EA -21G_Edition2_new 2021-5-18 14:38:07