Page 317 of 547
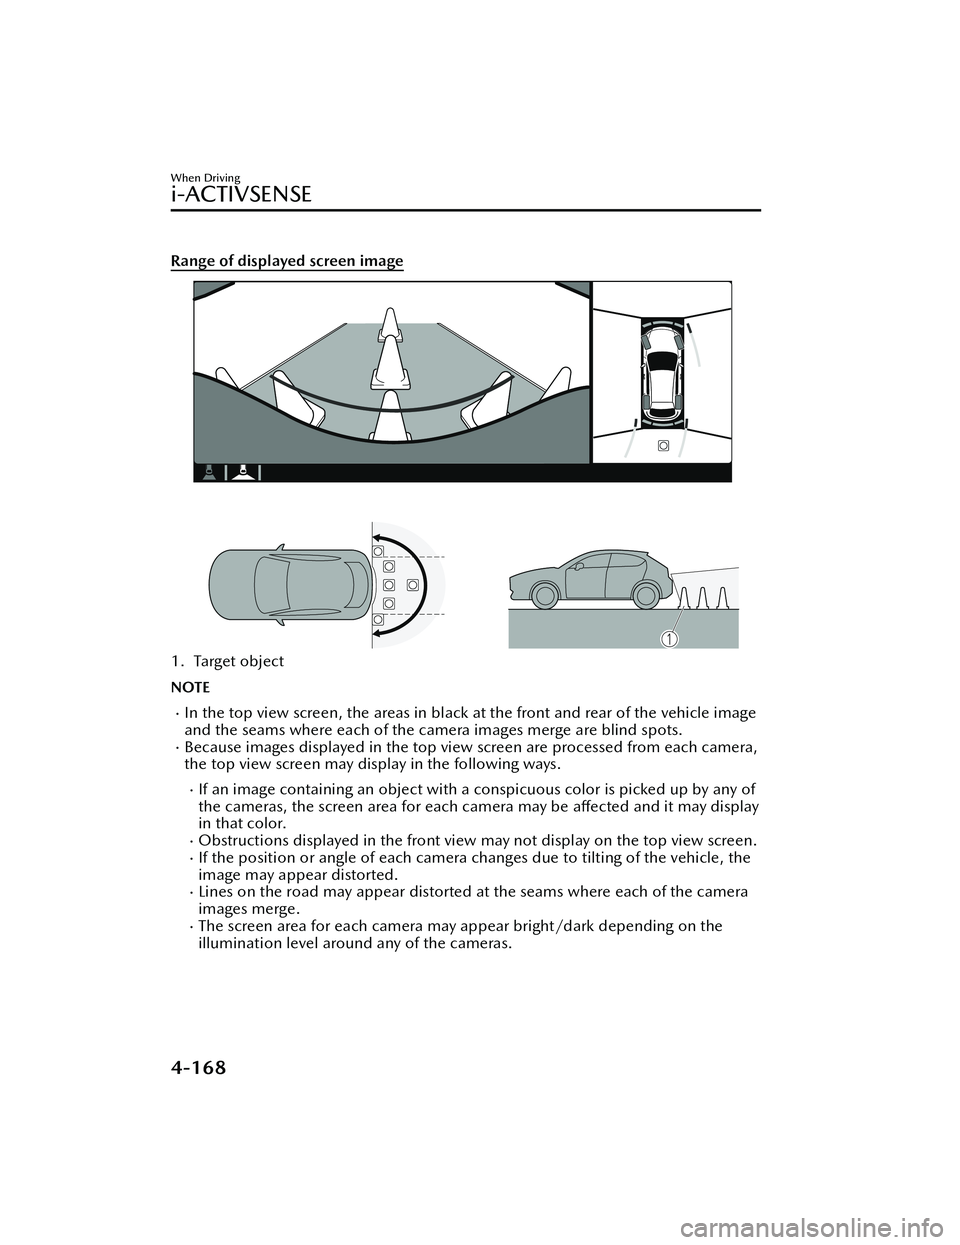
Range of displayed screen image
1. Target object
NOTE
In the top view screen, the areas in black at the front and rear of the vehicle image
and the seams where each of the camera images merge are blind spots.
Because images displayed in the top view screen are processed from each camera,
the top view screen may display in the following ways.
If an image containing an object with a conspicuous color is picked up by any of
the cameras, the screen area for each camera may be affected and it may display
in that color.
Obstructions displayed in the front view may not display on the top view screen.If the position or angle of each camera changes due to tilting of the vehicle, the
image may appear distorted.
Lines on the road may appear distorted at the seams where each of the camera
images merge.
The screen area for each camera may appear bright/dark depending on the
illumination level around any of the cameras.
When Driving
i-ACTIVSENSE
4-168
MX-30_8JD4-EA -21G_Edition2_new 2021-5-18 14:38:07
Page 318 of 547
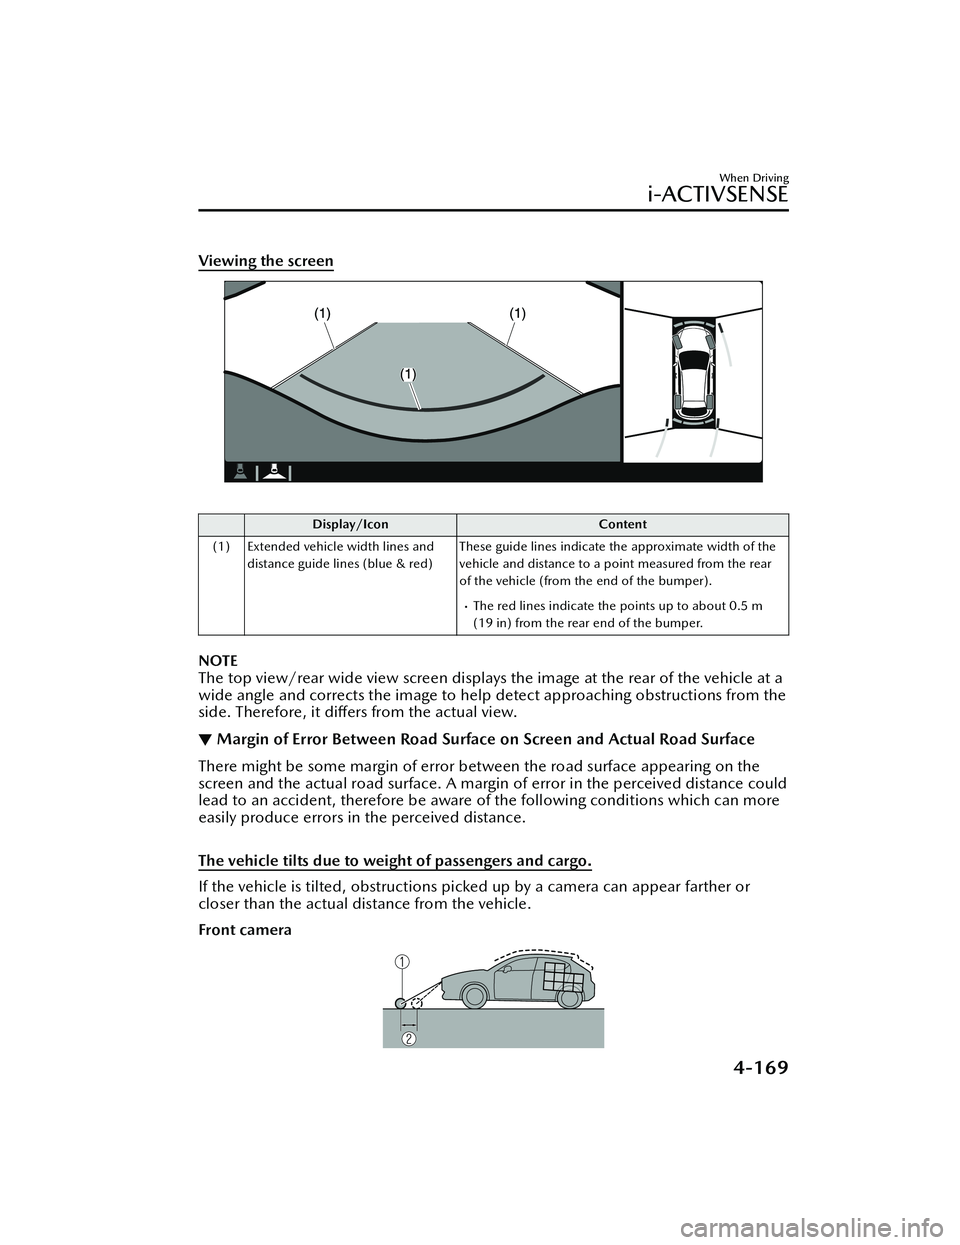
Viewing the screen
Display/IconContent
(1) Extended vehicle width lines and distance guide lines (blue & red) These guide lines indicate the approximate width of the
vehicle and distance to a point measured from the rear
of the vehicle (from the end of the bumper).
The red lines indicate the points up to about 0.5 m
(19 in) from the rear end of the bumper.
NOTE
The top view/rear wide view screen displays the image at the rear of the vehicle at a
wide angle and corrects the image to help
detect approaching obstructions from the
side. Therefore, it di ffers from the actual view.
▼ Margin of Error Between Road Surface
on Screen and Actual Road Surface
There might be some margin of error between the road surface appearing on the
screen and the actual road surface. A margin of error in the perceived distance could
lead to an accident, therefore be aware of the following conditions which can more
easily produce errors in the perceived distance.
The vehicle tilts due to weight of passengers and cargo.
If the vehicle is tilted, obstructions picked up by a camera can appear farther or
closer than the actual distance from the vehicle.
Front camera
When Driving
i-ACTIVSENSE
4-169
MX -30_8JD4-EA -21G_Edition2_new 2021-5-18 14:38:07
Page 322 of 547
Rear camera
1. Appears further than actual distance
2. Distance of obstruction being viewed on screen
3. Actual distance of obstruction from vehicle
4. Obstruction appearing on screen
5. Actual obstruction
6. Appears closer than actual distance
NOTE
If the vehicle is on a slope, obstructions taken by the camera can appear farther or
closer than the actual distance from the vehicle.
Three-dimensional object at vehicle front or rear
Because the vehicle front end guide lines (side camera) or the distance guide lines
(rear camera) are displayed based on a flat surface, the distance to the
three-dimensional object displayed on the screen is different from the actual
distance.
When Driving
i-ACTIVSENSE
4-173
MX -30_8JD4-EA -21G_Edition2_new 2021-5-18 14:38:07
Page 323 of 547
Side camera
1. (Screen display)
2. (Actual condition)
When Driving
i-ACTIVSENSE
4-174
MX-30_8JD4-EA -21G_Edition2_new 2021-5-18 14:38:07
Page 324 of 547
Rear camera
1. (Screen display)
2. (Actual condition)
3. Sensed distance on screen A>B>C
4. Actual distance B>C=A
▼System Problem Indication
Center display indication
CauseAction to be taken
“No camera signal.” is displayed The control unit might be damaged. Have your vehicle inspected by an Authorized Mazda
Dealer.
Screen is pitch-black and blank The camera might be damaged.
When Driving
i-ACTIVSENSE
4-175
MX
-30_8JD4-EA -21G_Edition2_new 2021-5-18 14:38:07
Page 326 of 547
Cruise Set Indication (Green)
The indication turns on (green) when a
cruising speed has been set.
▼Activation/Deactivation
WARNING
Always turn o
ff the cruise control
system when it is not in use:
Leaving the cruise control system in an
activation-ready state while the cruise
control is not in use is dangerous as the
cruise control could unexpectedly
activate if the activation button is
accidentally pressed, and result in loss
of vehicle control and an accident.
If the headway control function is
disabled using a Mazda Connect
setting , the system switches to cruise
control.
Activation
To activate the system, press the cruise
switch. The cruise standby indication
(white) turns on.
Deactivation
To deactivate the system, press the
cruise switch again.
The cruise standby indication (white)
turns off.
▼ To Set Speed
1. Activate the cruise control system
by pressing the cruise switch. The
cruise standby indication (white)
turns on.
2. Accelerate to the desired speed,
which must be more than 25 km/h
(16 mph).
3. Adjust the system to the desired vehicle speed using the accelerator
pedal. Press the RES switch up (SET
+) or down (SET -) to start cruise
control. The cruise control
indication (green) in the instrument
cluster turns on at the same time.
Quickly release the switch when the
cruise control indication (green)
turns on.
NOTE
If the RES switch is operated up (SET
+) or down (SET -) while the vehicle
speed is between 25 and 30 km/h
(16 to 19 mph), the set speed is set
to 30 km/h (19 mph).
The cruise control speed setting
cannot be performed under the
following conditions:
Any of the doors is opened.The driver's seat belt is unfastened.The brake pedal is depressed.The parking brake is applied.The selector lever is in the P, N, or
R position.
On a steep grade, the vehicle may
momentarily slow down while
ascending or speed up while
descending.
The cruise control will cancel if the
vehicle speed decreases below 20
km/h (12 mph) when the cruise
control is activated, such as when
climbing a steep grade.
The vehicle speed preset using the
cruise control is displayed in the
instrument cluster and the active
driving display (vehicles with active
driving display).
When Driving
Cruise Control
4-177
MX -30_8JD4-EA -21G_Edition2_new 2021-5-18 14:38:07
Page 327 of 547
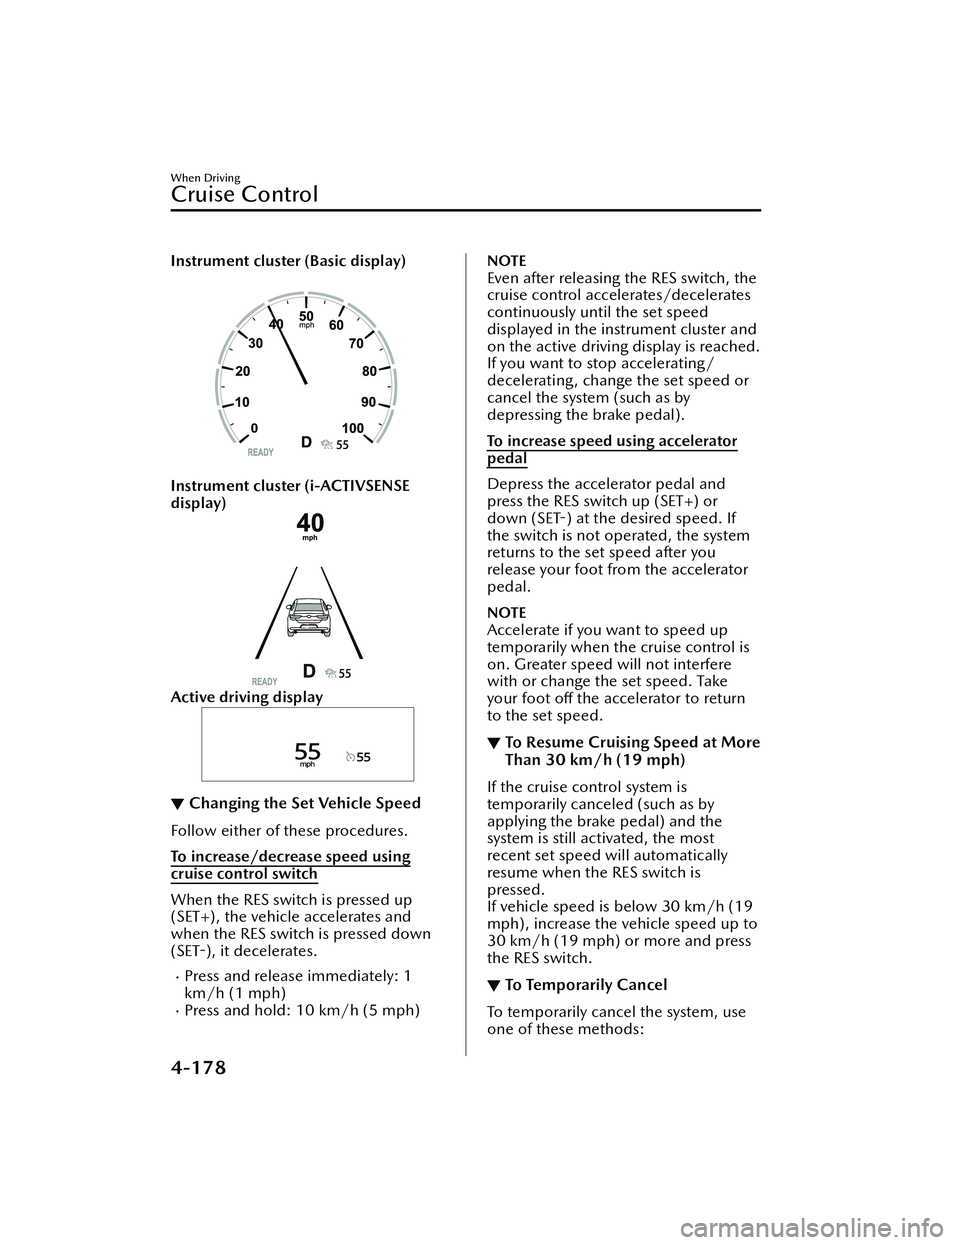
Instrument cluster (Basic display)
Instrument cluster (i-ACTIVSENSE
display)
Active driving display
▼Changing the Set Vehicle Speed
Follow either of these procedures.
To increase/decrease speed using
cruise control switch
When the RES switch is pressed up
(SET+), the vehicle accelerates and
when the RES switch is pressed down
(SET
-), it decelerates.
Press and release immediately: 1
km/h (1 mph)
Press and hold: 10 km/h (5 mph)
NOTE
Even after releasing the RES switch, the
cruise control accelerates/decelerates
continuously until the set speed
displayed in the instrument cluster and
on the active driving display is reached.
If you want to stop accelerating/
decelerating, change the set speed or
cancel the system (such as by
depressing the brake pedal).
To increase speed using accelerator
pedal
Depress the accelerator pedal and
press the RES switch up (SET+) or
down (SET -) at the desired speed. If
the switch is not operated, the system
returns to the set speed after you
release your foot from the accelerator
pedal.
NOTE
Accelerate if you want to speed up
temporarily when the cruise control is
on. Greater speed will not interfere
with or change the set speed. Take
your foot o ff the accelerator to return
to the set speed.
▼ To Resume Cruising Speed at More
Than 30 km/h (19 mph)
If the cruise control system is
temporarily canceled (such as by
applying the brake pedal) and the
system is still activated, the most
recent set speed will automatically
resume when the RES switch is
pressed.
If vehicle speed is below 30 km/h (19
mph), increase the vehicle speed up to
30 km/h (19 mph) or more and press
the RES switch.
▼To Temporarily Cancel
To temporarily cancel the system, use
one of these methods:
When Driving
Cruise Control
4-178
MX
-30_8JD4-EA -21G_Edition2_new 2021-5-18 14:38:07
Page 329 of 547
Tire Pressure MonitoringSystem (TPMS)
▼Tire Pressure Monitoring System
(TPMS)
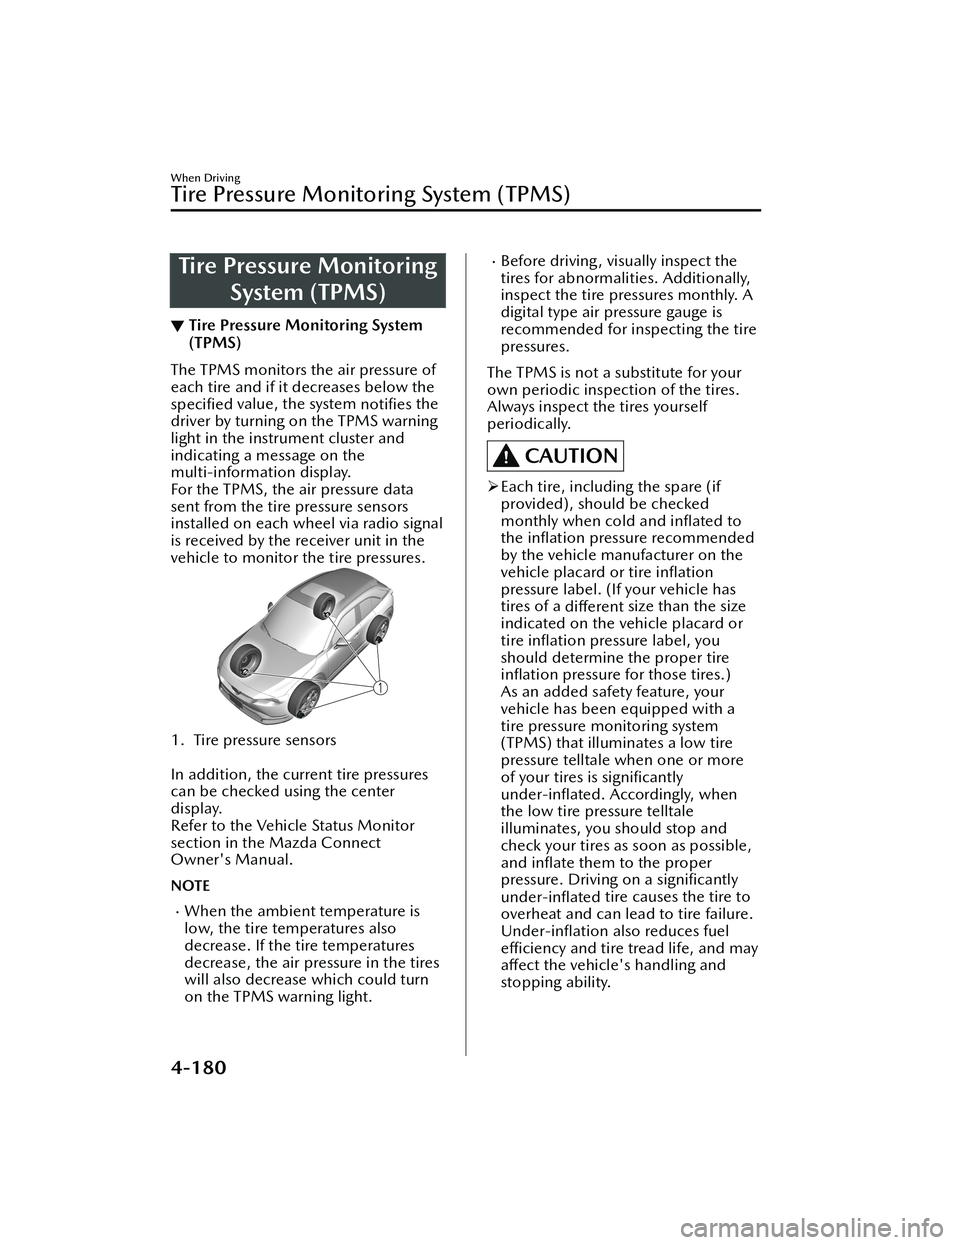
The TPMS monitors the air pressure of
each tire and if it decreases below the
speci
fied value, the system
notifies the
driver by turning on the TPMS warning
light in the instrument cluster and
indicating a message on the
multi-information display.
For the TPMS, the air pressure data
sent from the tire pressure sensors
installed on each wheel via radio signal
is received by the receiver unit in the
vehicle to monitor the tire pressures.
1. Tire pressure sensors
In addition, the current tire pressures
can be checked using the center
display.
Refer to the Vehicle Status Monitor
section in the Mazda Connect
Owner's Manual.
NOTE
When the ambient temperature is
low, the tire temperatures also
decrease. If the tire temperatures
decrease, the air pressure in the tires
will also decrease which could turn
on the TPMS warning light.
Before driving, visually inspect the
tires for abnormalities. Additionally,
inspect the tire pressures monthly. A
digital type air pressure gauge is
recommended for inspecting the tire
pressures.
The TPMS is not a substitute for your
own periodic inspection of the tires.
Always inspect the tires yourself
periodically.
CAUTION
Each tire, including the spare (if
provided), should be checked
monthly when cold and
inflated to
the in flation pressure recommended
by the vehicle manufacturer on the
vehicle placard or tire inflation
pressure label. (If your vehicle has
tires of a different size than the size
indicated on the vehicle placard or
tire in flation pressure label, you
should determine the proper tire in flation pressure for those tires.)
As an added safety feature, your
vehicle has been equipped with a
tire pressure monitoring system
(TPMS) that illuminates a low tire
pressure telltale when one or more
of your tires is significantly
under-in flated. Accordingly, when
the low tire pressure telltale
illuminates, you should stop and
check your tires as soon as possible,
and in flate them to the proper
pressure. Driving on a signi ficantly
under-in flated tire causes the tire to
overheat and can lead to tire failure.
Under-in flation also reduces fuel
e ffi ciency and tire tread life, and may
a ff ect the vehicle's handling and
stopping ability.
When Driving
Tire Pressure Monitoring System (TPMS)
4-180
MX -30_8JD4-EA -21G_Edition2_new 2021-5-18 14:38:07