Page 114 of 646
POWER RUNNING BOARD
PRECAUTIONS
WARNING: In extreme climates,
excessive ice buildup may occur, causing
the running boards not to deploy. Make
sure that the running boards have
deployed, and have finished moving before
attempting to step on them. The running
boards will resume normal function once
the blockage is cleared. WARNING:
Switch off the running
boards before jacking or placing any object
under your vehicle. Never place your hand
between the extended running board and
your vehicle. A moving running board may
cause injury.
Do not use the running boards, front and rear
hinge assemblies, running board motors, or
the running board underbody mounts to lift
your vehicle when jacking. Use proper
jacking points.
The running boards could move slower in
cold temperatures. POWER RUNNING BOARD
SETTINGS
1. Press
Features on the touchscreen.
2. Press
Running Boards.
3. Press a setting.
Running Boards (Modes)
Off
The power running boards remain stowed,
regardless of door position.
Auto
The power running boards deploy when you
approach your vehicle with a remote control,
unlock the door or open the door.
The power running boards stow:
• After a few seconds when you close the
doors.
• If you unlock the door but do not open
it.
• If you have switched Approach detection
on and do not open a door before the
Auto Timer
setting expires. Note:
When you select this mode, an option
displays that allows you to select how long
the running boards stay deployed without
opening the door.
Out
The power running boards remain deployed,
regardless of door position.
Approach detection
When you switch
Approach detection on
with Auto switched on, the running boards
deploy when you approach your vehicle with
a remote control.
DEPLOYING AND STOWING THE
POWER RUNNING BOARDS
The power running boards deploy when you
approach your vehicle with a remote control,
unlock the door or open the door.
110
2022 Navigator (TB9) Canada/United States of America, enUSA, Edition date: 202109, First-Printing Power Running Boards
Page 138 of 646
USING GLOBAL OPENING
1. Press and release the unlock button on
the remote control.
2. Within one second, press and hold the unlock button on the remote control.
3. Release the button when the windows start to open.
Press the lock or the unlock button on the
remote control to stop global opening.
Note: Global opening will only respond to a
press and hold of the unlock button for a
short period of time after the unlock button
is pressed on the remote control.
SWITCHING GLOBAL OPENING ON
AND OFF
1. Press the menu button on the steering wheel to enter the information display
main menu.
2. Select Settings.
3. Select
Vehicle.
4. Select
Windows.
5. Switch
Remote Open on or off. USING GLOBAL CLOSING WARNING:
When closing the power
windows, verify they are free of obstruction
and make sure that children and pets are
not in the proximity of the window
openings.
1. Press and hold the lock button on the remote control.
2. Release the button when the windows start to close.
Press the lock or the unlock button on the
remote control to stop global closing.
Note: Bounce-back is on during global
closing. See What Is Window Bounce-Back
(page
134).
SWITCHING GLOBAL CLOSING ON
AND OFF
1. Press the menu button on the steering wheel to enter the information display
main menu.
2. Select
Settings. 3. Select
Vehicle.
4. Select
Windows.
5. Switch
Remote Close on or off.
WINDOW BOUNCE-BACK
WHAT IS WINDOW BOUNCE-BACK
The window stops and reverses if it detects
an obstruction when closing.
OVERRIDING WINDOW BOUNCE-
BACK WARNING:
If you override
bounce-back, the window does not reverse
if it detects an obstacle. Take care when
closing the windows to avoid personal
injury or damage to your vehicle.
1. Close the window until it reaches the point of resistance and let it reverse.
134
2022 Navigator (TB9) Canada/United States of America, enUSA, Edition date: 202109, First-Printing Windows
Page 146 of 646
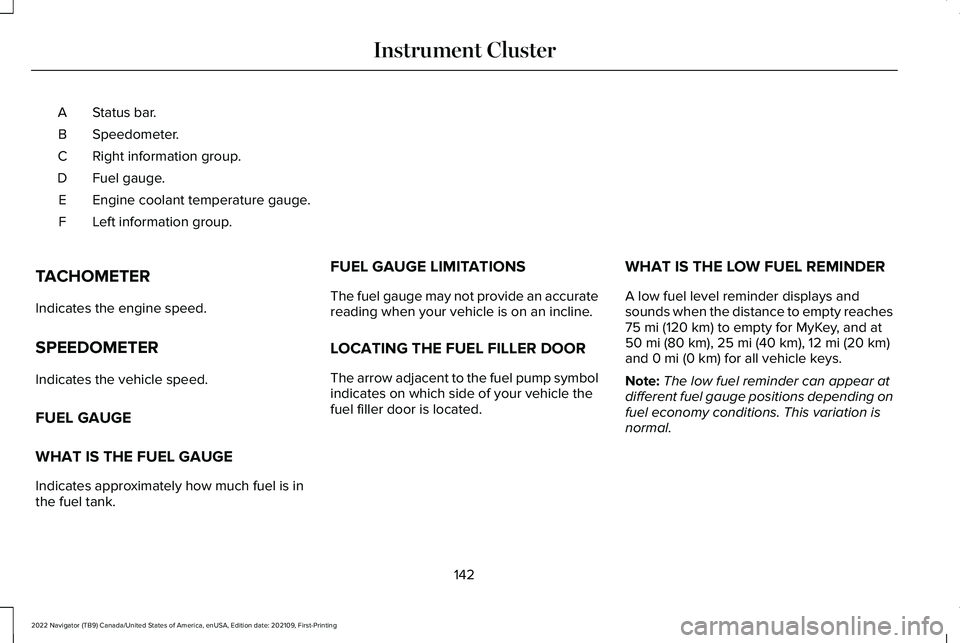
Status bar.
A
Speedometer.
B
Right information group.
C
Fuel gauge.
D
Engine coolant temperature gauge.
E
Left information group.
F
TACHOMETER
Indicates the engine speed.
SPEEDOMETER
Indicates the vehicle speed.
FUEL GAUGE
WHAT IS THE FUEL GAUGE
Indicates approximately how much fuel is in
the fuel tank. FUEL GAUGE LIMITATIONS
The fuel gauge may not provide an accurate
reading when your vehicle is on an incline.
LOCATING THE FUEL FILLER DOOR
The arrow adjacent to the fuel pump symbol
indicates on which side of your vehicle the
fuel filler door is located.
WHAT IS THE LOW FUEL REMINDER
A low fuel level reminder displays and
sounds when the distance to empty reaches
75 mi (120 km) to empty for MyKey, and at
50 mi (80 km), 25 mi (40 km), 12 mi (20 km)
and 0 mi (0 km) for all vehicle keys.
Note: The low fuel reminder can appear at
different fuel gauge positions depending on
fuel economy conditions. This variation is
normal.
142
2022 Navigator (TB9) Canada/United States of America, enUSA, Edition date: 202109, First-Printing Instrument Cluster
Page 151 of 646
USING THE INSTRUMENT
CLUSTER DISPLAY CONTROLS
WARNING: Driving while distracted
can result in loss of vehicle control, crash
and injury. We strongly recommend that
you use extreme caution when using any
device that may take your focus off the
road. Your primary responsibility is the safe
operation of your vehicle. We recommend
against the use of any hand-held device
while driving and encourage the use of
voice-operated systems when possible.
Make sure you are aware of all applicable
local laws that may affect the use of
electronic devices while driving. Note:
Some options could appear slightly
different or not at all if the items are optional.
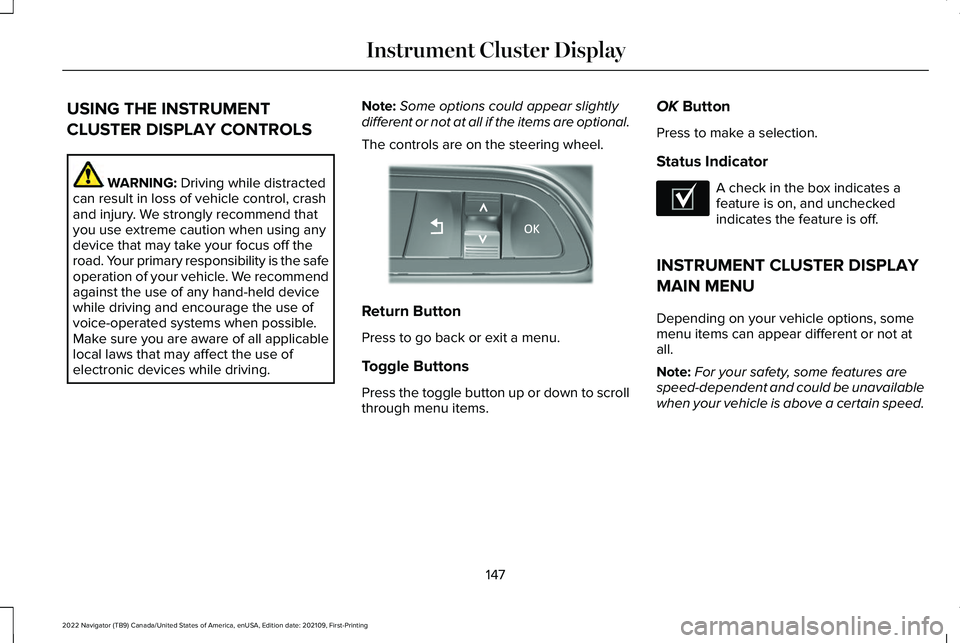
The controls are on the steering wheel. Return Button
Press to go back or exit a menu.
Toggle Buttons
Press the toggle button up or down to scroll
through menu items.OK
Button
Press to make a selection.
Status Indicator A check in the box indicates a
feature is on, and unchecked
indicates the feature is off.
INSTRUMENT CLUSTER DISPLAY
MAIN MENU
Depending on your vehicle options, some
menu items can appear different or not at
all.
Note: For your safety, some features are
speed-dependent and could be unavailable
when your vehicle is above a certain speed.
147
2022 Navigator (TB9) Canada/United States of America, enUSA, Edition date: 202109, First-Printing Instrument Cluster DisplayE357886 E204495
Page 152 of 646
HUD
SETTINGS
DISPLAY SETUP AUDIO
PHONE
NAVIGATION
TRIP COMPUTER
ACCESSING THE TRIP COMPUTER
Using the instrument cluster controls, select
the following to access the trip computer: Action
Menu Item
Press and hold the OK button until the system reset confirmationappears.
TRIP 1
Press and hold the
OK button until the system reset confirmationappears.
TRIP 2
148
2022 Navigator (TB9) Canada/United States of America, enUSA, Edition date: 202109, First-Printing Instrument Cluster Display
Page 153 of 646
RESETTING THE INDIVIDUAL TRIP
VALUES
Using the instrument cluster controls, select
the following to reset individual trip values: Action
Menu Item
Press and hold the OK button until the system reset confirmationappears.
TRIP 1
Press and hold the
OK button until the system reset confirmationappears.
TRIP 2
CUSTOMIZING THE INSTRUMENT
CLUSTER DISPLAY
You can customize the gauge displays
through the following: Action
Menu Item
Press the
OK button.
Display
Press the
OK button. Choose a gauge display.
Gauges
149
2022 Navigator (TB9) Canada/United States of America, enUSA, Edition date: 202109, First-Printing Instrument Cluster Display
Page 155 of 646
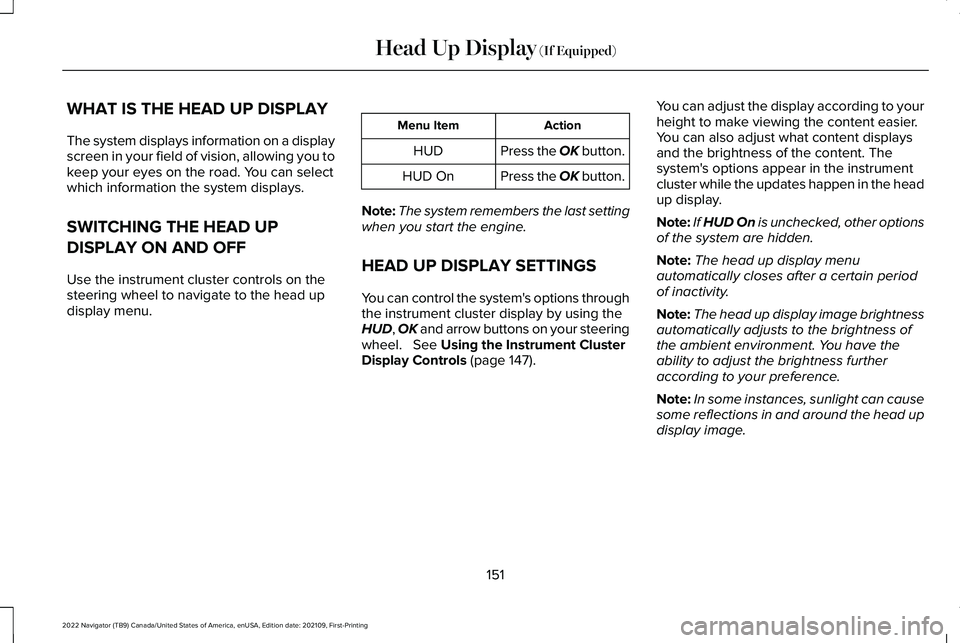
WHAT IS THE HEAD UP DISPLAY
The system displays information on a display
screen in your field of vision, allowing you to
keep your eyes on the road. You can select
which information the system displays.
SWITCHING THE HEAD UP
DISPLAY ON AND OFF
Use the instrument cluster controls on the
steering wheel to navigate to the head up
display menu.
Action
Menu Item
Press the OK button.
HUD
Press the OK button.
HUD On
Note: The system remembers the last setting
when you start the engine.
HEAD UP DISPLAY SETTINGS
You can control the system's options through
the instrument cluster display by using the
HUD, OK and arrow buttons on your steering
wheel. See Using the Instrument Cluster
Display Controls (page 147). You can adjust the display according to your
height to make viewing the content easier.
You can also adjust what content displays
and the brightness of the content. The
system's options appear in the instrument
cluster while the updates happen in the head
up display.
Note:
If HUD On is unchecked, other options
of the system are hidden.
Note: The head up display menu
automatically closes after a certain period
of inactivity.
Note: The head up display image brightness
automatically adjusts to the brightness of
the ambient environment. You have the
ability to adjust the brightness further
according to your preference.
Note: In some instances, sunlight can cause
some reflections in and around the head up
display image.
151
2022 Navigator (TB9) Canada/United States of America, enUSA, Edition date: 202109, First-Printing Head Up Display
(If Equipped)
Page 156 of 646
Head-Up Display (HUD)
Follow onscreen directions to confirm or modify your settings.
Brightness
Follow onscreen directions to confirm or
modify your settings.
Vertical Position
HUD Adjustments
Image Rotation
Turns the distance to empty, time and temperature on and off.
HUD Content
Select Your Setting
Cruise and Lane Control
Note: When you save a memory preset position, your current HUD settings are al\
so saved to that memory preset position. See What Is the
Memory Function (page 185).
152
2022 Navigator (TB9) Canada/United States of America, enUSA, Edition date: 202109, First-Printing Head Up Display
(If Equipped)