2022 LEXUS RX350 steering
[x] Cancel search: steeringPage 279 of 508
277
5
5
Interior features
Interior features
.5-1. Remote Touch/DisplayRemote Touch ............................ 278
Center Display ........................... 280
5-2. Lexus Climate Concierge Lexus Climate Concierge ..... 283
5-3. Using the air conditioning system and defogger
Front automatic air conditioning system ......................................... 284
Rear automatic air conditioning system ......................................... 294
Heated steering wheel/seat heat- ers/seat ventilators ................ 297
5-4. Using the interior lights Interior lights list......................... 300
5-5. Using the storage features List of storage features............ 303
Luggage compartment features ........................................................ 309
5-6. Using the other interior features Other interior features ............ 314
Garage door opener............... 326
Compass........................................ 331
Page 299 of 508
2975-3. Using the air conditioning system and defogger
5
Interior features
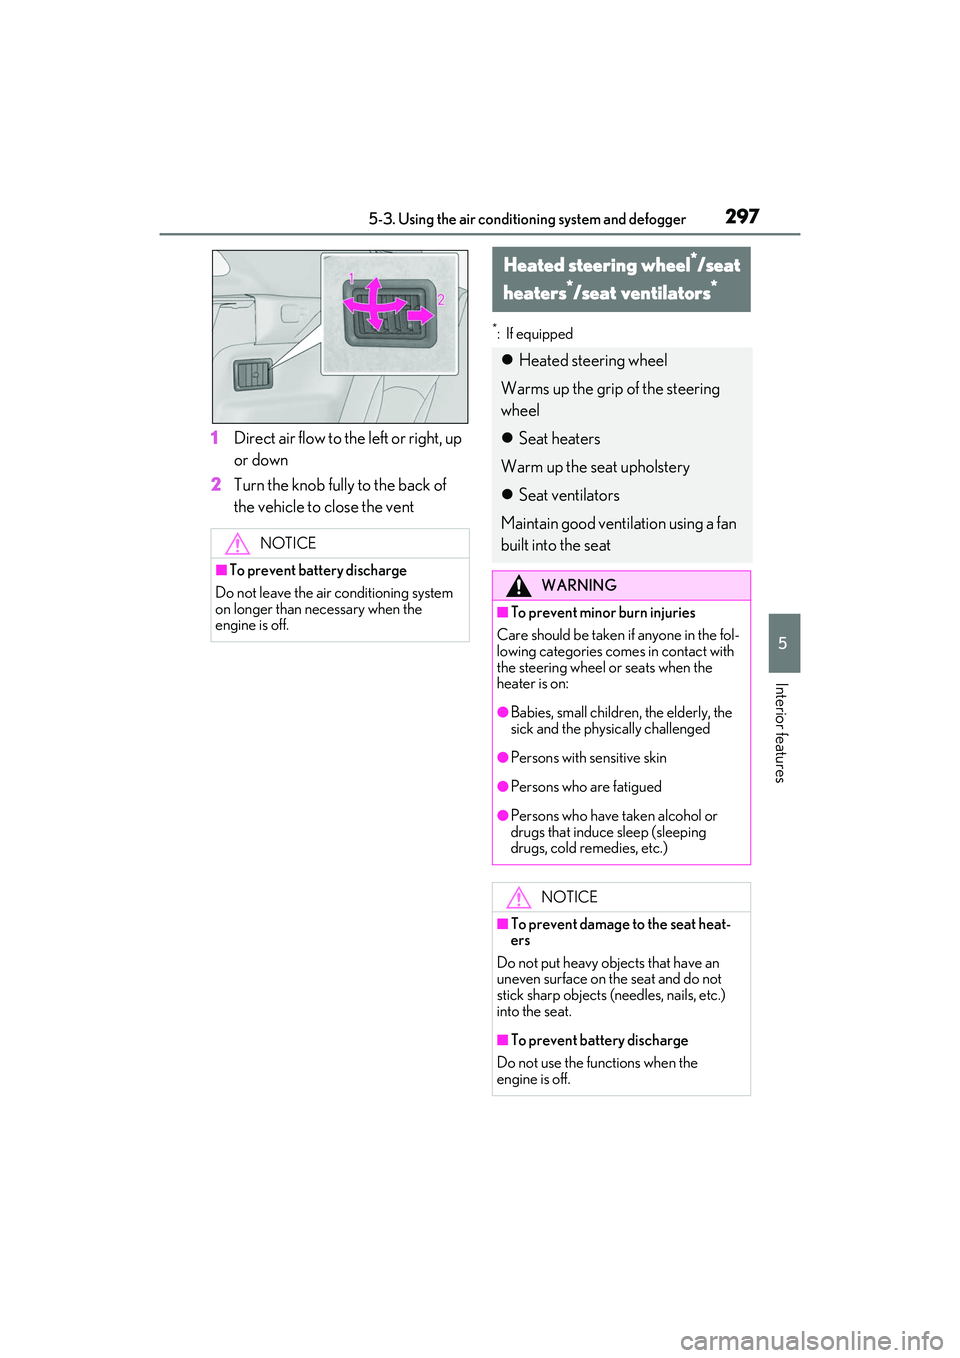
1Direct air flow to the left or right, up
or down
2 Turn the knob fully to the back of
the vehicle to close the vent
*: If equipped
NOTICE
■To prevent battery discharge
Do not leave the air conditioning system
on longer than ne cessary when the
engine is off.
Heated steering wheel*/seat
heaters
*/seat ventilators*
Heated steering wheel
Warms up the grip of the steering
wheel
Seat heaters
Warm up the seat upholstery
Seat ventilators
Maintain good ventilation using a fan
built into the seat
WARNING
■To prevent minor burn injuries
Care should be taken if anyone in the fol-
lowing categories comes in contact with
the steering wheel or seats when the
heater is on:
●Babies, small children, the elderly, the
sick and the physically challenged
●Persons with sensitive skin
●Persons who are fatigued
●Persons who have taken alcohol or
drugs that induce sleep (sleeping
drugs, cold remedies, etc.)
NOTICE
■To prevent damage to the seat heat-
ers
Do not put heavy objects that have an
uneven surface on the seat and do not
stick sharp objects (needles, nails, etc.)
into the seat.
■To prevent battery discharge
Do not use the functions when the
engine is off.
Page 300 of 508
2985-3. Using the air conditioning system and defogger
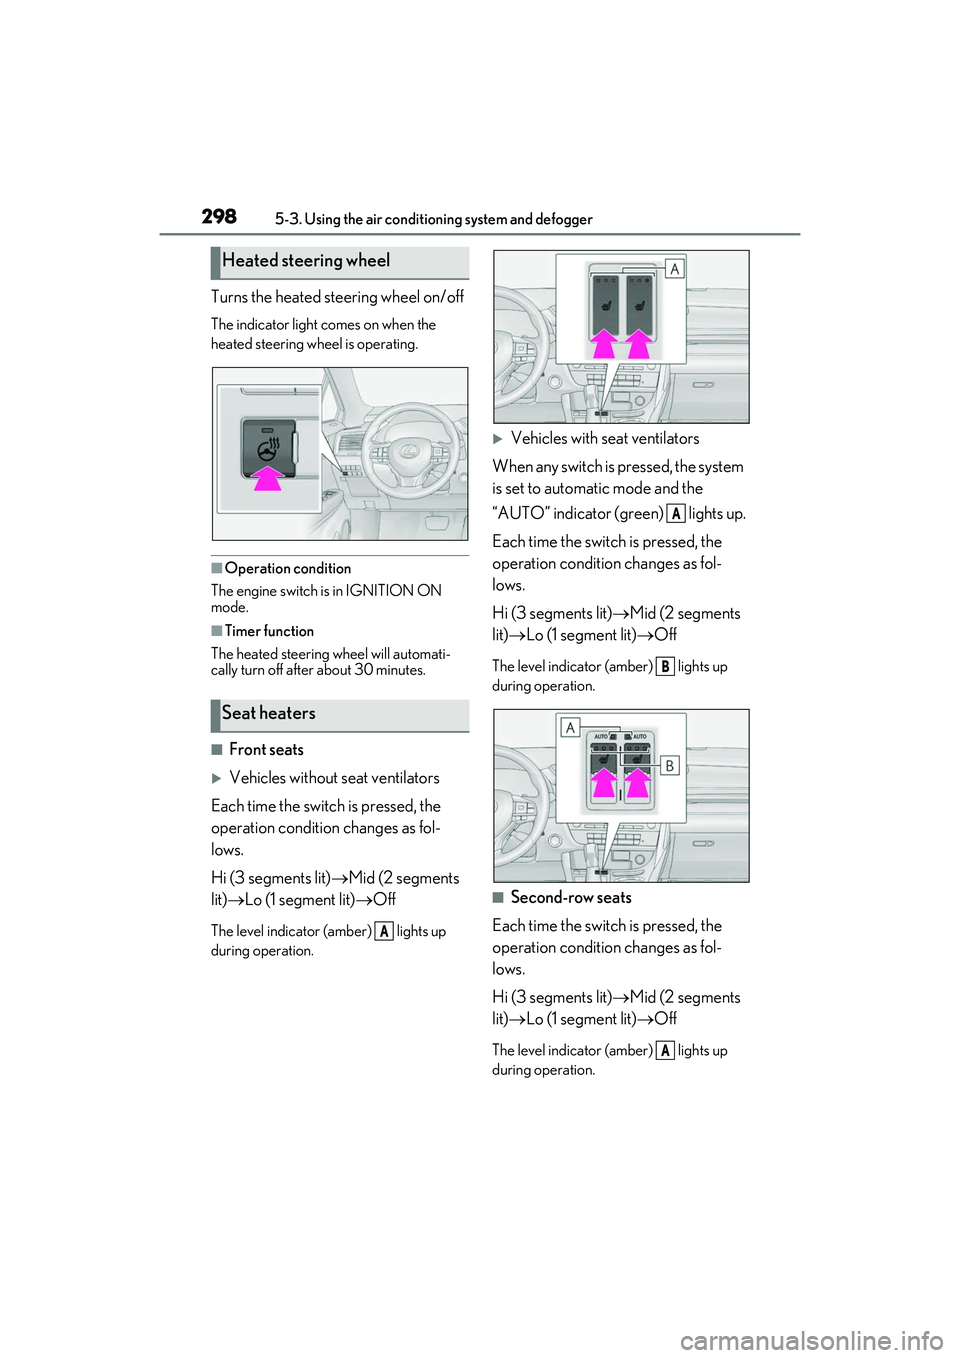
Turns the heated steering wheel on/off
The indicator light comes on when the
heated steering wheel is operating.
■Operation condition
The engine switch is in IGNITION ON
mode.
■Timer function
The heated steering wheel will automati-
cally turn off after about 30 minutes.
■Front seats
Vehicles without seat ventilators
Each time the switch is pressed, the
operation condition changes as fol-
lows.
Hi (3 segments lit) Mid (2 segments
lit) Lo (1 segment lit) Off
The level indicator (amber) lights up
during operation.
Vehicles with seat ventilators
When any switch is pressed, the system
is set to automatic mode and the
“AUTO” indicator (green) lights up.
Each time the switch is pressed, the
operation condition changes as fol-
lows.
Hi (3 segments lit) Mid (2 segments
lit) Lo (1 segment lit) Off
The level indicator (amber) lights up
during operation.
■Second-row seats
Each time the switch is pressed, the
operation condition changes as fol-
lows.
Hi (3 segments lit) Mid (2 segments
lit) Lo (1 segment lit) Off
The level indicator (amber) lights up
during operation.
Heated steering wheel
Seat heaters
A
A
B
A
Page 340 of 508
3386-1. Maintenance and care
WARNING
●BSM (if equipped)
●RCTA (if equipped)
●PKSB (if equipped)
NOTICE
■To prevent paint deterioration and
corrosion on the body and compo-
nents (aluminum wheels, etc.)
●Wash the vehicle immediately in the
following cases:
• After driving near the sea coast
• After driving on salted roads
• If coal tar or tree sap is present on the paint surface
• If dead insects, in sect droppings or
bird droppings are present on the
paint surface
• After driving in an area contaminated with soot, oily smoke, mine dust, iron
powder or chemical substances
• If the vehicle becomes heavily soiled with dust or mud
• If liquids such as benzene and gasoline are spilled on the paint surface
●If the paint is chip ped or scratched,
have it repair ed immediately.
●To prevent the wheels from corroding,
remove any dirt and store in a place
with low humidity when storing the
wheels.
■Cleaning the exterior lights
●Wash carefully. Do not use organic
substances or scrub with a hard brush.
This may damage the surfaces of the
lights.
●Do not apply wax to the surfaces of the
lights.
Wax may cause damage to the lenses.
■When using an automatic car wash
Set the wiper switch to the off position.
If the wiper switch is in “AUTO”, the wip-
ers may operate and the wiper blades
may be damaged.
■When using a high pressure car wash
●When washing the vehicle, do not
spray the camera or its surrounding
area directly with a high pressure
washer. Shock applied from high pres-
sure water may cause the device to not
operate normally.
●Do not spray water directly on the
radar which is equipped behind the
emblem. Otherwise it may cause the
device to be damaged.
●Do not bring the nozzle tip close to
boots (rubber or resin manufactured
cover), connectors or the following
parts. The parts may be damaged if
they come into contact with high-pres-
sure water.
• Traction related parts
•Steering parts
• Suspension parts
• Brake parts
●Keep the cleaning nozzle at least 11.9
in. (30 cm) away from the vehicle
body. Otherwise resin section, such as
moldings and bumpers, may be
deformed and damaged.
Also, do not continuously hold the nozzle
in the same place.
●Do not spray the lower part of the
windshield continuously.
If water enters the air conditioning sys-
tem intake located near the lower part of
the windshield, the air conditioning sys-
tem may not operate correctly.
●Do not wash the underside of the vehi-
cle using a high pressure car washer.
Page 347 of 508

3456-2. Maintenance
6
Maintenance and care
Seats• Do the seat controls operate properly?
Steering wheel
• Does the steering wheel rotate
smoothly?
• Does the steering wheel have the cor-
rect amount of free
play?
•There should not be any strange sounds
coming from the
steering wheel.
Vehicle exterior
ItemsCheck points
Doors• Do the doors oper-ate smoothly?
Engine hood
•Does the engine hood lock system
work properly?
Fluid leaks
•There should not be any signs of fluid
leakage after the
vehicle has been
parked.
ItemsCheck points
Tires
• Is the tire inflation pressure correct?
• The tires should not be damaged or
excessively worn.
• Have the tires been rotated according to
the maintenance
schedule?
•The wheel nuts should not be loose.
Windshield wip-
ers/rear window
wiper
• The wiper blades should not show any
signs of cracking,
splitting, wear, con-
tamination or defor-
mation.
• The wiper blades should clear the
windshield/rear win-
dow without streak-
ing or skipping.
ItemsCheck points
Page 377 of 508

3756-3. Do-it-yourself maintenance
6
Maintenance and care
■RearBack-up light (bulb type)
Rear turn signal light (bulb type)
■Replacing the following bulbs
If any of the lights listed below has
burnt out, have it replaced by your
Lexus dealer.
Headlight
Parking lights and daytime running
lights
Front turn signal lights (vehicles
without single-beam headlights)
Front side marker lights (vehicles
without single-beam headlights)
Front fog lights (if equipped)
Cornering lights (if equipped)
Side turn signal lights
Stop/tail lights
Back-up lights (LED type)
Rear turn signal light (LED type)
Rear side marker lights
High mounted stoplight
License plate lights
Outer foot lights
■LED Lights
The lights other than the front turn signal
lights (vehicles with single-beam head-
lights), front side marker lights (vehicles
with single-beam headlights), rear turn sig-
nal lights (bulb type) and back-up lights
(bulb type) each consist of a number of
LEDs. If any of the LEDs burn out, take your
vehicle to your Lexus dealer to have the
light replaced.
■Condensation build-up on the inside of
the lens
Temporary condensation build-up on the
inside of the headlight lens does not indi-
cate a malfunction. Contact your Lexus
dealer for more information in the following
situations:
●Large drops of water have built up on the
inside of the lens.
●Water has built up in side the headlight.
■When replacing light bulbs
P.372
■Front side marker lights (vehicles
with single-beam headlights)
1 To ensure enough space to per-
form work, turn the steering wheel
to rotate the front wheel away from
the bulb to be replaced.
Remove the 3 fender liner clips.
Turn the steering wheel to the left when
replacing the right side light bulb, and turn
the steering wheel to the right when
replacing the left side light bulb.
When removing a fender liner clip, use a
A
B
Replacing light bulbs
Page 387 of 508
3857-1. Essential information
7
When trouble arises
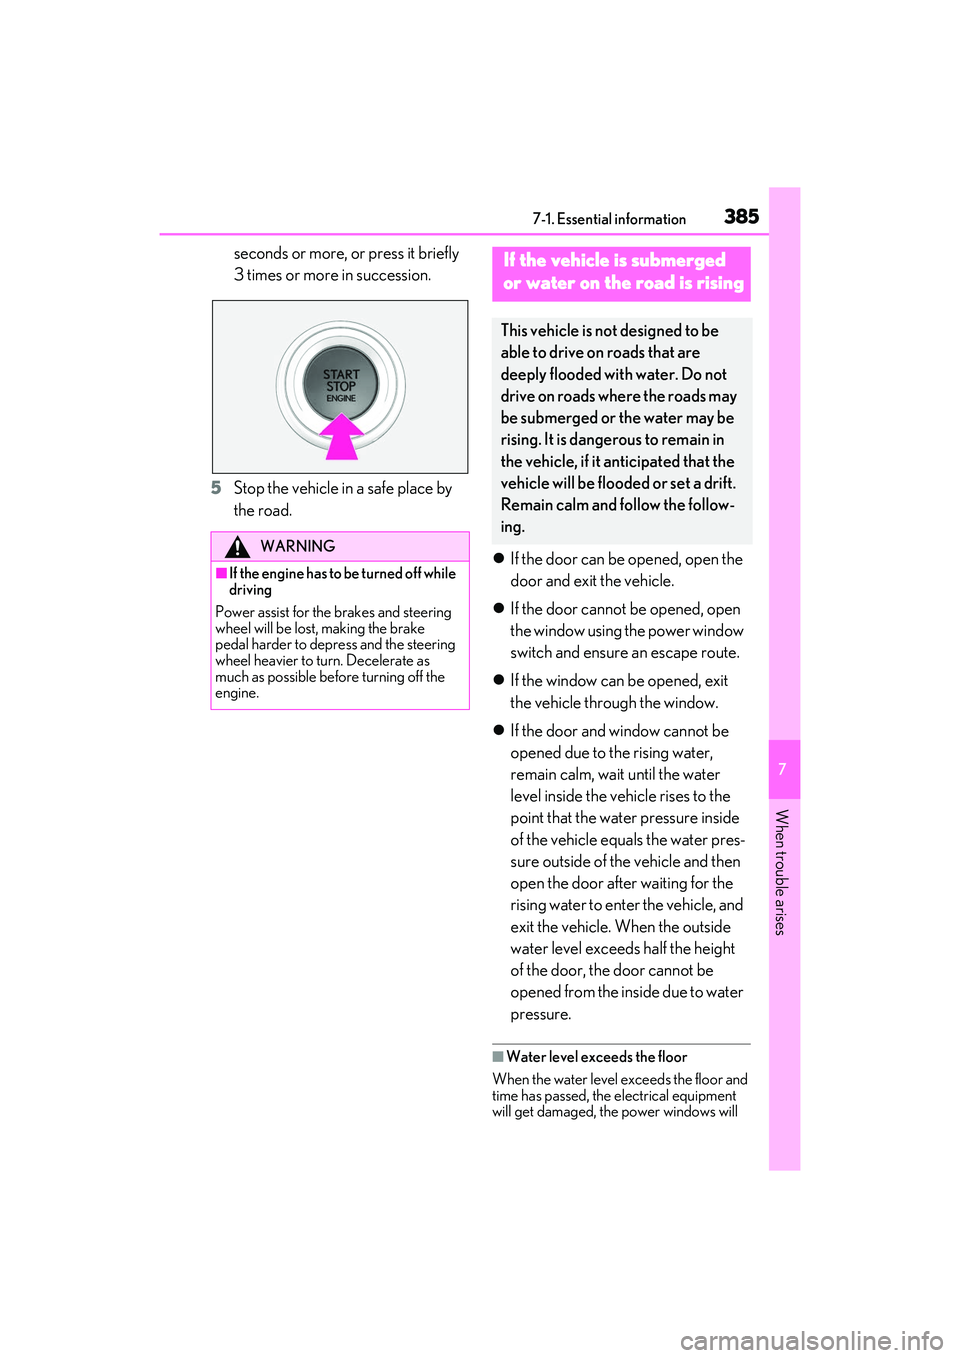
seconds or more, or press it briefly
3 times or more in succession.
5 Stop the vehicle in a safe place by
the road.
If the door can be opened, open the
door and exit the vehicle.
If the door cannot be opened, open
the window using the power window
switch and ensure an escape route.
If the window can be opened, exit
the vehicle through the window.
If the door and window cannot be
opened due to the rising water,
remain calm, wait until the water
level inside the vehicle rises to the
point that the water pressure inside
of the vehicle equals the water pres-
sure outside of the vehicle and then
open the door after waiting for the
rising water to enter the vehicle, and
exit the vehicle. When the outside
water level exceeds half the height
of the door, the door cannot be
opened from the inside due to water
pressure.
■Water level exceeds the floor
When the water level exceeds the floor and
time has passed, the electrical equipment
will get damaged, the power windows will
WARNING
■If the engine has to be turned off while
driving
Power assist for the brakes and steering
wheel will be lost, making the brake
pedal harder to depress and the steering
wheel heavier to turn. Decelerate as
much as possible before turning off the
engine.
If the vehicle is submerged
or water on the road is rising
This vehicle is no t designed to be
able to drive on roads that are
deeply flooded with water. Do not
drive on roads where the roads may
be submerged or the water may be
rising. It is dangerous to remain in
the vehicle, if it anticipated that the
vehicle will be flooded or set a drift.
Remain calm and follow the follow-
ing.
Page 390 of 508
3887-2. Steps to take in an emergency
The following may indicate a problem
with your transmission. Contact your
Lexus dealer or commercial towing
service before towing.
The engine is running but the vehi-
cle does not move.
The vehicle makes an abnormal
sound.
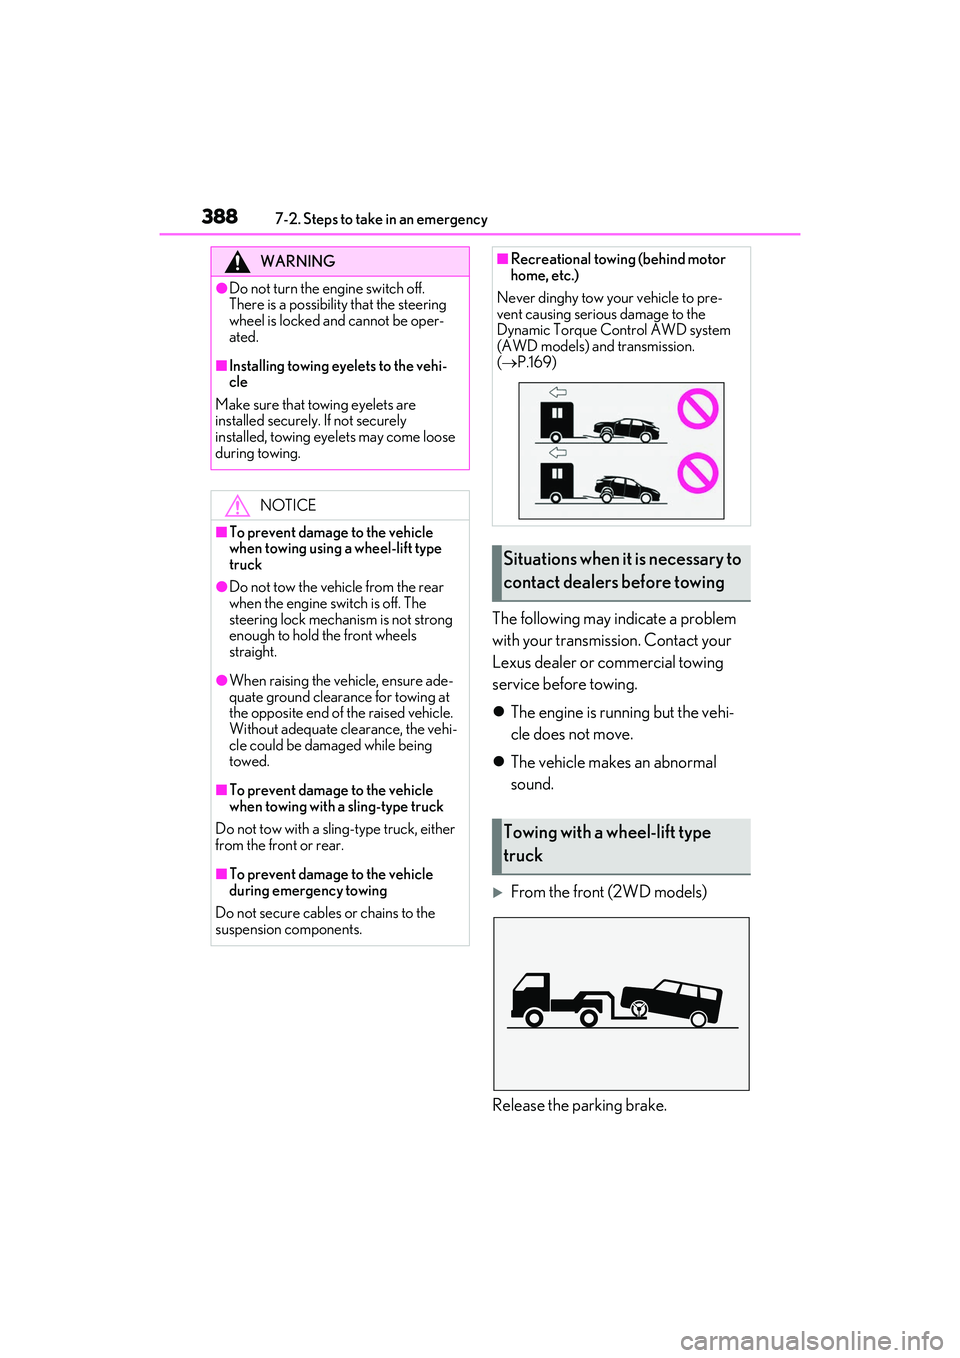
From the front (2WD models)
Release the parking brake.
WARNING
●Do not turn the engine switch off.
There is a possibility that the steering
wheel is locked and cannot be oper-
ated.
■Installing towing eyelets to the vehi-
cle
Make sure that towing eyelets are
installed securely. If not securely
installed, towing eyelets may come loose
during towing.
NOTICE
■To prevent damage to the vehicle
when towing using a wheel-lift type
truck
●Do not tow the vehicle from the rear
when the engine switch is off. The
steering lock mechanism is not strong
enough to hold the front wheels
straight.
●When raising the vehicle, ensure ade-
quate ground clearance for towing at
the opposite end of the raised vehicle.
Without adequate clearance, the vehi-
cle could be damaged while being
towed.
■To prevent damage to the vehicle
when towing with a sling-type truck
Do not tow with a sling-type truck, either
from the front or rear.
■To prevent damage to the vehicle
during emergency towing
Do not secure cables or chains to the
suspension components.
■Recreational towing (behind motor
home, etc.)
Never dinghy tow your vehicle to pre-
vent causing serious damage to the
Dynamic Torque Control AWD system
(AWD models) and transmission.
( P.169)
Situations when it is necessary to
contact dealers before towing
Towing with a wheel-lift type
truck