2022 LEXUS RX350 Turning off
[x] Cancel search: Turning offPage 294 of 508

2925-3. Using the air conditioning system and defogger
matically switches between outside air and
recirculated air modes.
When the dehumidification function is off,
and the fan is operating, turning automatic
mode on will activate the dehumidification
function.
This function automatically controls the
air conditioning airflo w so that priority
is given to the front seats. When the
front passenger seat is not occupied,
airflow may switch to only the driver's
seat. Unnecessary air conditioning is
suppressed, contributing to increased
fuel efficiency.
Front seat concentrated airflow mode
operates in the following situations.
No passengers are detected in the
rear seats
The windshield defogger is not
operating
While operating, illuminates.
■Manually turning front seat con-
centrated airflow mode on/off
In front seat concentrated airflow
mode, directing airflow to the front
seats only and to all seats can be
switched via switch operation. When
the mode has been switched manually,
automatic airflow control stops operat-
ing.
Select on the center display
and switch the airflow.
Indicator illuminated: Airflow to the front seats only
Indicator off: Airflow to all the seats
■Operation of automatic airflow control
●In order to maintain a comfortable inte-
rior, airflow may be directed to seats
without passengers immediately after the
engine is started and at other times
depending on the outside temperature.
●After the engine is started, if passengers
move around inside or enter/exit the vehi-
cle, the system cannot accurately detect
the presence of passengers and auto-
matic airflow control will not operate.
■Operation of manual airflow control
Even if the function is manually switched to
directing airflow to only the front seats,
when a rear seat is occupied, it may auto-
matically direct airflow to all seats.
■To return to automatic airflow control
1 With the indicator off, turn the engine
switch off.
2 After 60 minutes or more elapse, turn
the engine switch to ON.
Vehicles with DUAL-ZONE climate
control
To turn on the “DUAL” mode, perform
any of the following procedures:
Select “DUAL” on the sub function
menu. ( P.288)
Select “DUAL” on the option con-
trol screen.
Adjust the passenger’s side tem-
perature setting.
The indicator on the main control screen
comes on when the “DUAL” mode is on.
Front seat concentrated airflow
mode (S-FLOW)
Adjusting the temperature for
the driver and passenger seats
separately
Page 326 of 508

3245-6. Using the other interior features
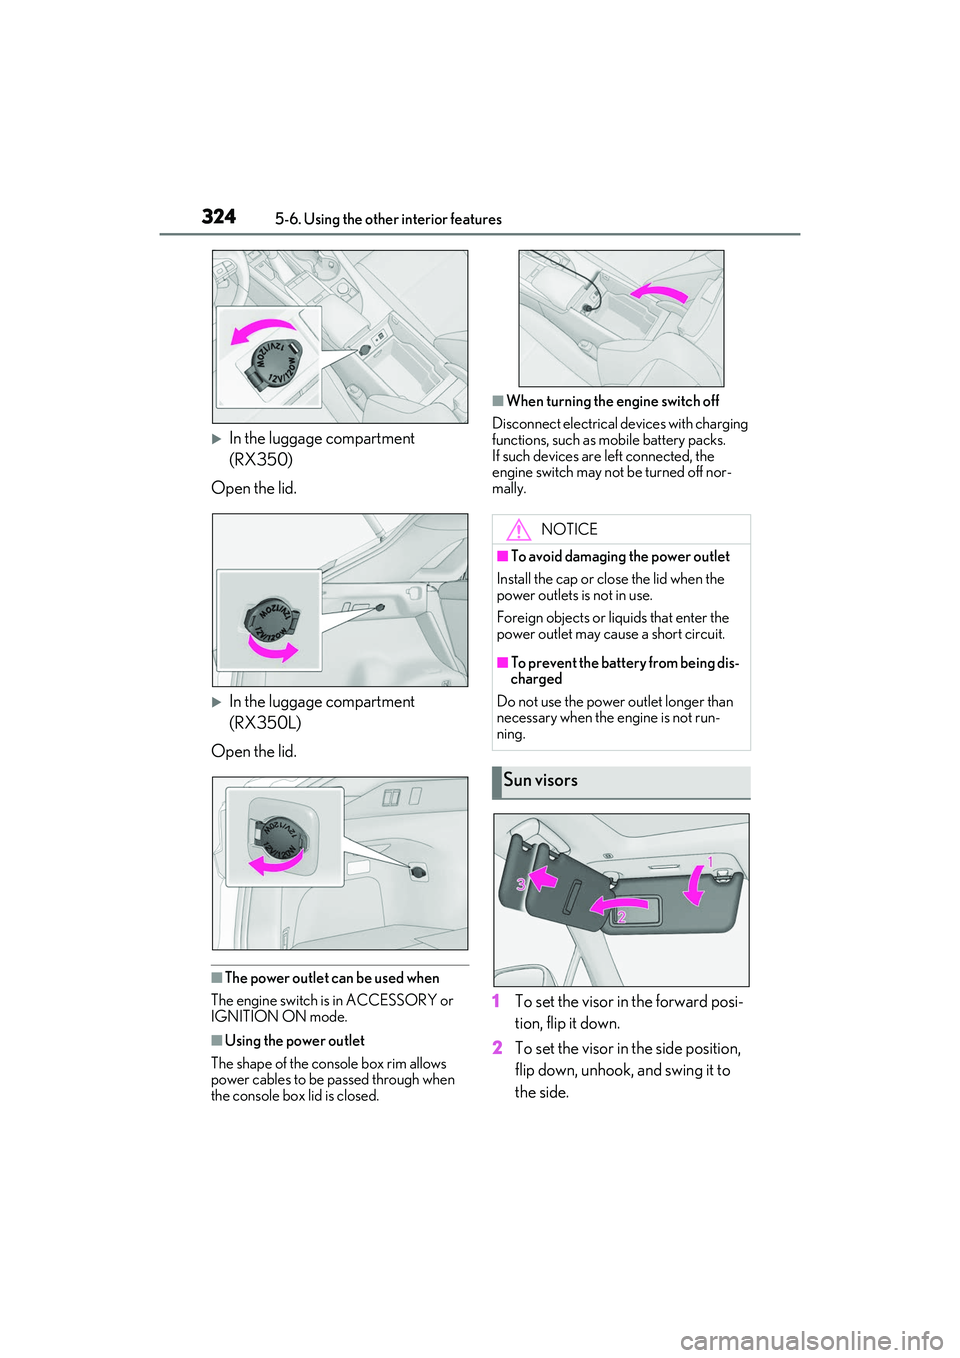
In the luggage compartment
(RX350)
Open the lid.
In the luggage compartment
(RX350L)
Open the lid.
■The power outlet can be used when
The engine switch is in ACCESSORY or
IGNITION ON mode.
■Using the power outlet
The shape of the console box rim allows
power cables to be passed through when
the console box lid is closed.
■When turning the engine switch off
Disconnect electrical devices with charging
functions, such as mobile battery packs.
If such devices are left connected, the
engine switch may not be turned off nor-
mally.
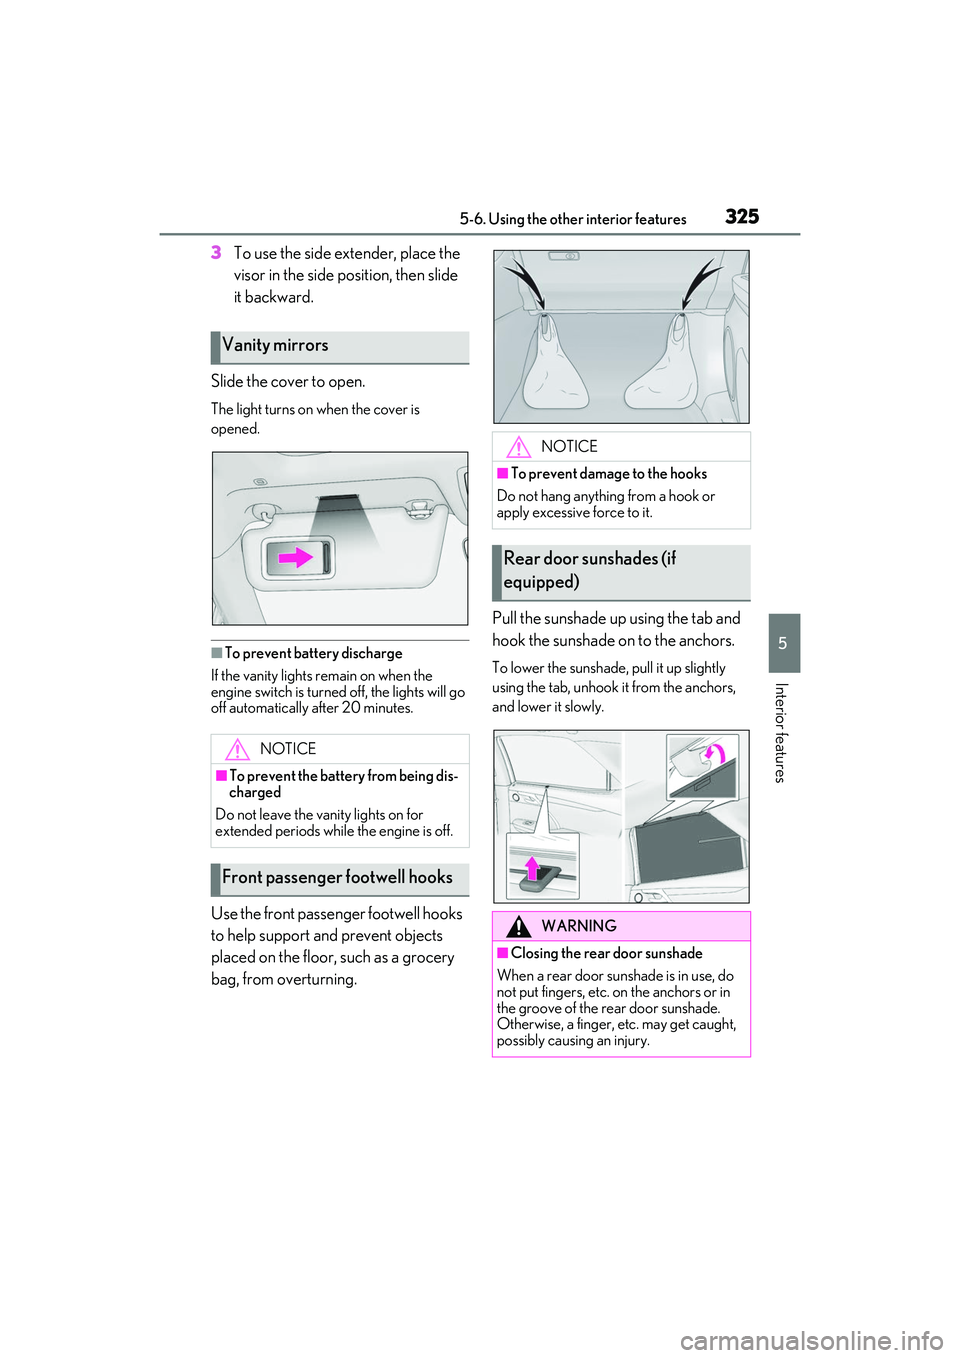
1 To set the visor in the forward posi-
tion, flip it down.
2 To set the visor in the side position,
flip down, unhook, and swing it to
the side.
NOTICE
■To avoid damaging the power outlet
Install the cap or close the lid when the
power outlets is not in use.
Foreign objects or li quids that enter the
power outlet may cause a short circuit.
■To prevent the battery from being dis-
charged
Do not use the power outlet longer than
necessary when the engine is not run-
ning.
Sun visors
Page 327 of 508

3255-6. Using the other interior features
5
Interior features
3To use the side extender, place the
visor in the side position, then slide
it backward.
Slide the cover to open.
The light turns on when the cover is
opened.
■To prevent battery discharge
If the vanity lights remain on when the
engine switch is turned off, the lights will go
off automatically after 20 minutes.
Use the front passenger footwell hooks
to help support and prevent objects
placed on the floor, such as a grocery
bag, from overturning. Pull the sunshade up using the tab and
hook the sunshade on to the anchors.
To lower the sunshade, pull it up slightly
using the tab, unhook it from the anchors,
and lower it slowly.
Vanity mirrors
NOTICE
■To prevent the battery from being dis-
charged
Do not leave the vanity lights on for
extended periods whil e the engine is off.
Front passenger footwell hooks
NOTICE
■To prevent damage to the hooks
Do not hang anything from a hook or
apply excessive force to it.
Rear door sunshades (if
equipped)
WARNING
■Closing the rear door sunshade
When a rear door sunshade is in use, do
not put fingers, etc. on the anchors or in
the groove of the rear door sunshade.
Otherwise, a finger, etc. may get caught,
possibly causing an injury.
Page 333 of 508

3315-6. Using the other interior features
5
Interior features
garage door. However, if there are
obstructions between the garage door
and the vehicle, such as houses and
trees, feedback signals from the
garage door may not be received.
To recall the previous door operation
status, press and release either
HomeLink
® buttons and
or and simulta-
neously. The last recorded status will
be displayed for 3 seconds.
Press and hold the 2 outside buttons
for 10 seconds until the HomeLink
®
indicator light changes from continu-
ously lit (orange) to rapidly flashing
(green).
If you sell your vehicle, be sure to erase the
programs stored in the HomeLink
® mem-
ory.
*: If equipped
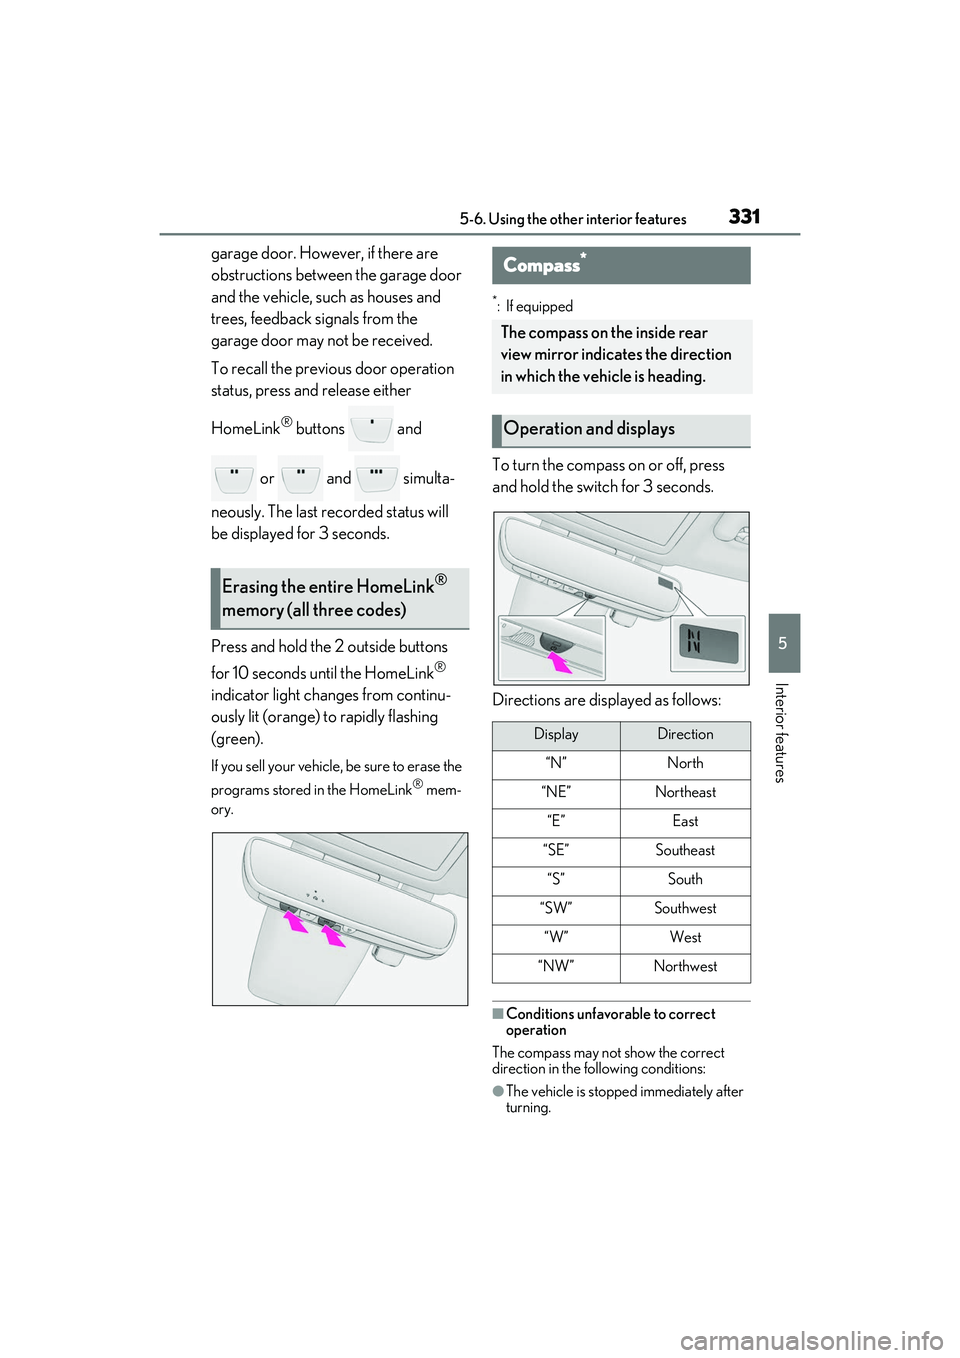
To turn the compass on or off, press
and hold the switch for 3 seconds.
Directions are displayed as follows:
■Conditions unfavorable to correct
operation
The compass may not show the correct
direction in the fo llowing conditions:
●The vehicle is stopped immediately after
turning.
Erasing the entire HomeLink®
memory (all three codes)
Compass*
The compass on the inside rear
view mirror indicates the direction
in which the vehicle is heading.
Operation and displays
DisplayDirection
“N”North
“NE”Northeast
“E”East
“SE”Southeast
“S”South
“SW”Southwest
“W”West
“NW”Northwest
Page 353 of 508

3516-3. Do-it-yourself maintenance
6
Maintenance and care
Washer fluid tank (P.356)
Engine oil filler cap ( P.352)
Engine oil level dipstick ( P.351)
Engine coolant reservoir ( P.353)
Battery ( P.355)
Brake fluid reservoir ( P.354)
Fuse box ( P.371)
Radiator ( P.354)
Condenser ( P.354)
Electric cooling fans
With the engine at operating tempera-
ture and turned off, check the oil level
on the dipstick.
■Checking the engine oil
1 Park the vehicle on level ground.
After warming up the engine and
turning off the engine, wait more
Engine compartment
Components
A
B
C
D
E
F
G
H
I
J
Checking and adding the engine
oil
Page 384 of 508

3826-3. Do-it-yourself maintenance
WARNING
■To prevent injury
Before performing any light bulb
replacement procedure, be sure to turn
the engine switch off. Failure to do so
may result in burns from hot components
or a part of your body may get caught on
an operating component, possibly caus-
ing serious injury.
■Replacing light bulbs
●Turn off the lights. Do not attempt to
replace the bulb immediately after
turning off the lights.
The bulbs become very hot and may
cause burns.
●Do not touch the glass portion of the
light bulb with bare hands. When it is
unavoidable to hold the glass portion,
use and hold with a clean dry cloth to
avoid getting moisture and oils on the
bulb.
Also, if the bulb is scratched or
dropped, it may blow out or crack.
●Fully install light bulbs and any parts
used to secure them. Failure to do so
may result in heat damage, fire, or
water entering the headlight unit. This
may damage the headlights or cause
condensation to buil d up on the lens.
●Do not attempt to repair or disassem-
ble the light bulbs, connectors, electric
circuits or component parts.
Doing so may result in death or serious
injury due to electric shock.
■To prevent damage or fire
●Make sure bulbs are fully seated and
locked.
●Check the wattage of the bulb before
installing to prevent heat damage.
Page 387 of 508

3857-1. Essential information
7
When trouble arises
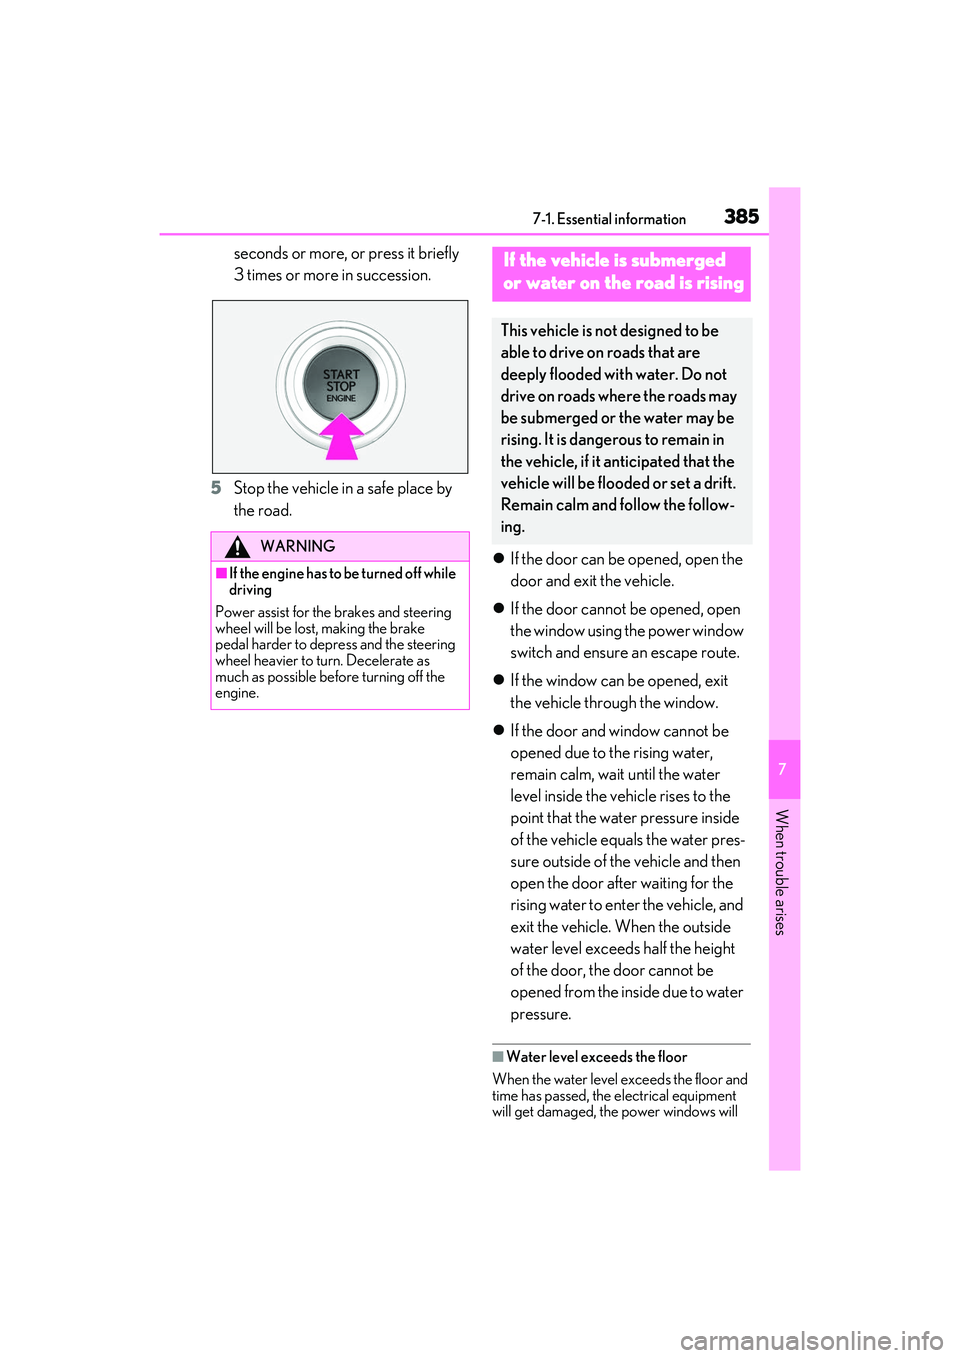
seconds or more, or press it briefly
3 times or more in succession.
5 Stop the vehicle in a safe place by
the road.
If the door can be opened, open the
door and exit the vehicle.
If the door cannot be opened, open
the window using the power window
switch and ensure an escape route.
If the window can be opened, exit
the vehicle through the window.
If the door and window cannot be
opened due to the rising water,
remain calm, wait until the water
level inside the vehicle rises to the
point that the water pressure inside
of the vehicle equals the water pres-
sure outside of the vehicle and then
open the door after waiting for the
rising water to enter the vehicle, and
exit the vehicle. When the outside
water level exceeds half the height
of the door, the door cannot be
opened from the inside due to water
pressure.
■Water level exceeds the floor
When the water level exceeds the floor and
time has passed, the electrical equipment
will get damaged, the power windows will
WARNING
■If the engine has to be turned off while
driving
Power assist for the brakes and steering
wheel will be lost, making the brake
pedal harder to depress and the steering
wheel heavier to turn. Decelerate as
much as possible before turning off the
engine.
If the vehicle is submerged
or water on the road is rising
This vehicle is no t designed to be
able to drive on roads that are
deeply flooded with water. Do not
drive on roads where the roads may
be submerged or the water may be
rising. It is dangerous to remain in
the vehicle, if it anticipated that the
vehicle will be flooded or set a drift.
Remain calm and follow the follow-
ing.
Page 406 of 508

4047-2. Steps to take in an emergency
In some situations, the master warning light and warning buzzer may not oper-
ate as specified. In this case, follow the instructions displayed in the warning
message.
If a warning light comes on or flashes at the same time that a warning message is
displayed, take corrective actio n according to the warning light. ( P.393)
*: A buzzer sounds the first time a message is shown on the multi-information display.
■Warning messages
The warning messages explained below
may differ from the actual messages
according to operation conditions and vehi-
cle specifications.
■Warning buzzer
In some cases, the bu zzer may not be heard
due to being in a noisy location or audio
sound.
■If “Shift to P Before Exiting Vehicle” is
displayed
Message is displayed when the driver’s
door is opened withou t turning the engine
switch off with the shift lever in any position
other than P.
Shift the shift lever to P.
■If “Power Turned Off to Save Battery” is
displayed
This message is disp layed when the power
was cut off due to the automatic power off
function. The next time the engine is started,
increase the engine speed slightly and
maintain it at that speed for approximately
5 minutes to recharge the battery.
■If “AWD System Overheated Switching
to 2WD Mode” or “AWD System Over-
heated 2WD Mode Engaged” is dis-
played (AWD models)
This message may be displayed when driv-
ing under extremely high load conditions.
Drive the vehicle at low speeds or stop the
vehicle in a safe place with the engine run-
ning until the message is cleared.
If the message is not cleared, have the vehi-
cle inspected by your Lexus dealer.
■If “Headlight System Malfunction Visit
Your Dealer” is displayed
The following systems may be malfunction-
ing. Have the vehicle inspected by your
Lexus dealer immediately.
●The LED headlight system
●AFS (Adaptive Front-lighting System) (if
equipped)
●The automatic headlight leveling system
●Automatic High Beam
■If “Radar Cruise Control Unavailable
See Owner's Manual” is displayed
The dynamic radar cruise control with
full-speed range syst em is suspended tem-
porarily or until the problem shown in the
message is re solved. (causes and coping
methods: P.202)
Comes onDoes not sound
Indicates a condition, such as malfunction of electri-
cal components, their cond ition, or indicates the
need for maintenance
FlashesDoes not sound
Indicates a situation, such as when an operation has
been performed incorrectly, or indicates how to
perform an operation correctly
Warning buzzer*Warning