Page 206 of 630

4117
Features of your vehicle
Rear View Monitor will activate with
the ignition switch or ENGINE
START/STOP button in the ON and
the shift lever in the R (Reverse) posi-
tion.
The rear view monitor may be turned
off by pressing the ON/OFF button
when the rear view monitor is activat-
ed.To turn the camera on again, press
the ON/OFF button again when the
ignition switch is on and the shift
lever is in R (Reverse). Also, the
camera will turn on automatically
whenever the ignition switch is
turned off and on again.
• This system is a supplementary
function only. It is the responsibility
of the driver to always check the
inside/outside rearview mirrors and
the area behind the vehicle before
and while backing up because
there is a dead zone that can't be
seen by the camera.
If the camera lens is covered with foreign material, the Rear View
Monitor may not operate normally.
Always keep the camera lens
clean.
However, do not use chemical sol-
vents such as strong detergents
containing high alkaline or volatile
organic solvents (gasoline, ace-
tone etc.). This may damage the
camera lens
❈If your vehicle is equipped with an
Infotainment System, rearview dis-
play will show through the
Infotainment System, monitor
while backing-up. Refer to a sepa-
rately supplied manual for detailed
information.
REAR VIEW MONITOR (RVM)
OQL048403L
OQL048404N
WARNING - Backing up &
using camera
Never rely solely on the rear view
camera when backing. You must
always use methods of viewing
the area behind you including
looking over both shoulders as
well as continuously checking all
three rear view mirrors. Due to
the difficulty of ensuring that the
area behind you remains clear,
always back slowly and stop
immediately if you even suspect .
This system is a supplemental
system that shows behind the
vehicle through the rearview dis-
play mirror while backing up. If
the vehicle is equipped with a
navigation system, then the sys-
tem will display on the screen.
Page 215 of 630
Features of your vehicle
126
4
Self-diagnosis
When you shift the gear to the R
(Reverse) position and if one or more
of the below occurs you may have a
malfunction in Forward/Reverse
Parking Distance Warning.
You don't hear an audible warning
sound or if the buzzer sounds inter-
mittently.
If this occurs, we recommend that the
system be checked by an authorized
Kia dealer.
✽ ✽ NOTICE
Your new vehicle warranty does not
cover any accidents or damage to
the vehicle or injuries to its occu-
pants related to Parking Distance
Warning system. Always drive safe-
ly and cautiously.
WARNING
Pay close attention when the
vehicle is driven close to
objects on the road, particularly
pedestrians, and especially
children. Be aware that some
objects may not be detected by
the sensors, due to the objects
distance, size or material, all of
which can limit the effective-
ness of the sensor. Always per-
form a visual inspection to
make sure the vehicle is clear of
all obstructions before moving
the vehicle in any direction.
is displayed. (if equipped)
(blinks)
Page 222 of 630
4133
Features of your vehicle
If an indicator stays on and does not
flash or if it flashes abnormally, one of
the turn signal bulbs may be burned
out and will require replacement.
✽ ✽NOTICE
If an indicator flash is abnormally
quick or slow, a bulb may be burned
out or have a poor electrical connec-
tion in the circuit.
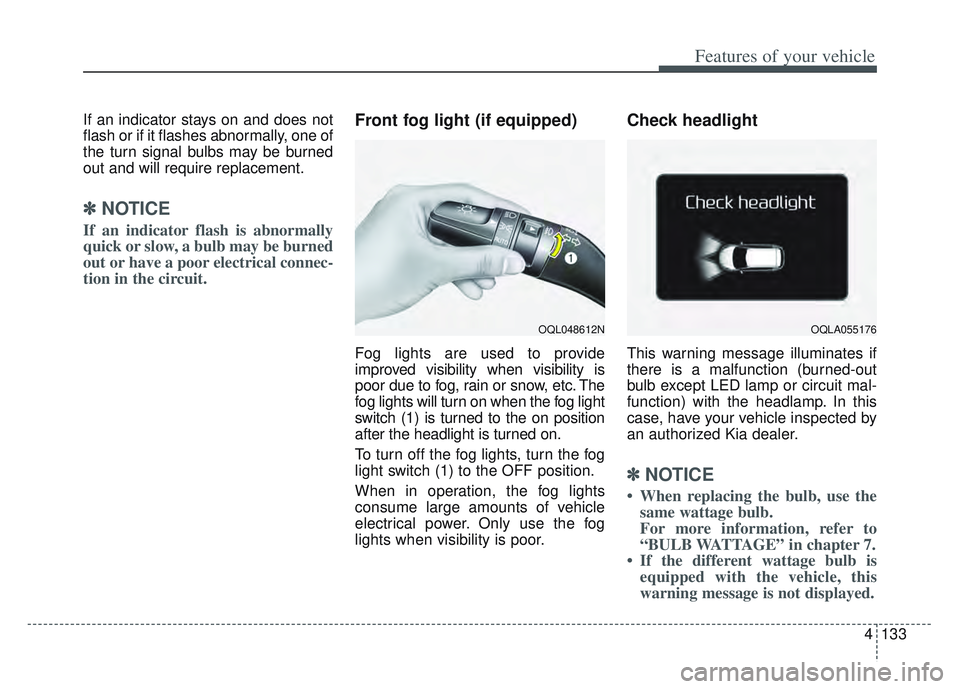
Front fog light (if equipped)
Fog lights are used to provide
improved visibility when visibility is
poor due to fog, rain or snow, etc. The
fog lights will turn on when the fog light
switch (1) is turned to the on position
after the headlight is turned on.
To turn off the fog lights, turn the fog
light switch (1) to the OFF position.
When in operation, the fog lights
consume large amounts of vehicle
electrical power. Only use the fog
lights when visibility is poor.
Check headlight
This warning message illuminates if
there is a malfunction (burned-out
bulb except LED lamp or circuit mal-
function) with the headlamp. In this
case, have your vehicle inspected by
an authorized Kia dealer.
✽ ✽NOTICE
• When replacing the bulb, use the
same wattage bulb.
For more information, refer to
“BULB WATTAGE” in chapter 7.
• If the different wattage bulb is equipped with the vehicle, this
warning message is not displayed.
OQL048612NOQLA055176
Page 244 of 630
4155
Features of your vehicle
AUTOMATIC CLIMATE CONTROL SYSTEM (IF EQUIPPED)
OQL048301/OQL048329L
1. Driver’s temperature control knob
2. AUTO (automatic control) button
3. Front windshield defroster button
4. Rear window defroster button
5. Air conditioning button
6. Air intake control button
7. OFF button
8. Fan speed control button
9. Mode selection button
10. Passenger's temperature control knob
11. SYNC temperature control selection but-ton
12. Climate control display
13. Climate information screen selection button
✽ ✽ NOTICE
Operating the blower when the
ignition switch is in the ON posi-
tion could cause the battery to dis-
charge. Operate the blower when
the engine is running.
■ ■Type B
■ ■Type A
Page 245 of 630
Features of your vehicle
156
4
Automatic heating and air con-
ditioning
1. Press the AUTO button. The
modes, fan speeds, air intake and
air-conditioning will be controlled
automatically by setting the tem-
perature. 2. Turn the temperature control knob
to the desired temperature.
✽ ✽NOTICE
• To turn the automatic operation
off, select any button or switch of
the following:
- Mode selection button
- Air conditioning button
- Front windshield defroster button(Press the button one more time
to deselect the front windshield
defroster function. The ‘AUTO’
sign will illuminate on the infor-
mation display once again.)
- Air intake control button
- Fan speed control switch
The selected function will be con-
trolled manually while other func-
tions operate automatically.
• For your convenience and to improve the effectiveness of the
climate control, use the AUTO
button and set the temperature to
73°F (23°C).
OQL048311L
■Driver’s side■Passenger’s side
OQL048315L
Page 249 of 630
Features of your vehicle
160
4
Adjusting the driver and passenger
side temperature individually
Press the “SYNC” button again to
adjust the driver and passenger
side temperature individually. The
illumination of button turns off.
Operate the driver side tempera- ture control knob to adjust the driv-
er side temperature.
Operate the passenger side tem- perature control knob to adjust the
passenger side temperature.
Temperature conversion
You can switch the temperature
mode from Centigrade to Fahrenheit
as follows:
While pressing the OFF button,
press the AUTO button for 3 seconds
or more.
The display will change from
Centigrade to Fahrenheit, or from
Fahrenheit to Centigrade.
If the battery has been discharged or
disconnected, the temperature mode
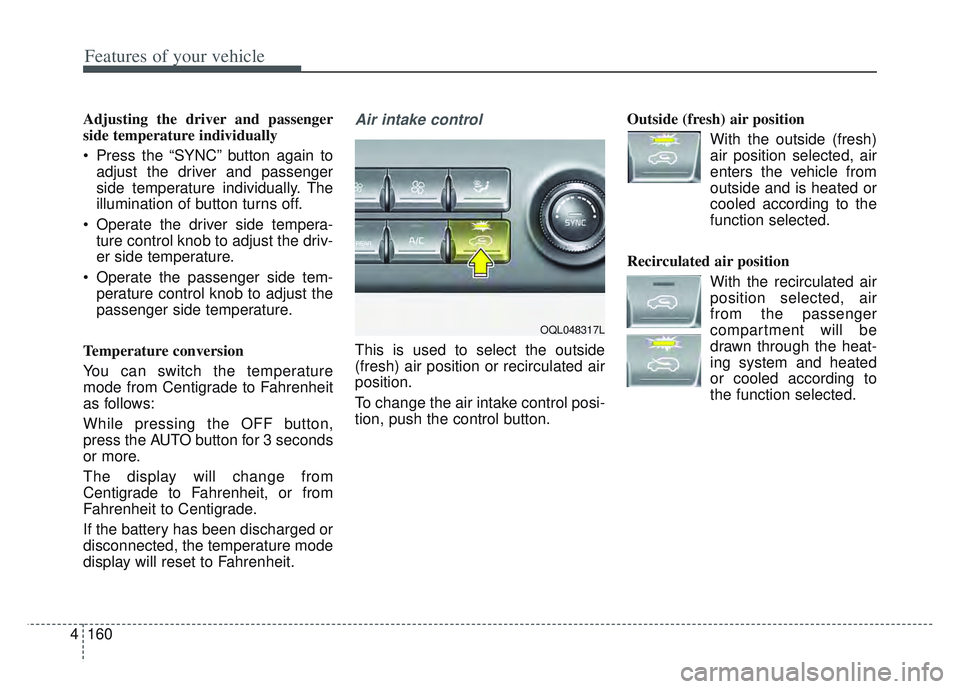
display will reset to Fahrenheit.Air intake control
This is used to select the outside
(fresh) air position or recirculated air
position.
To change the air intake control posi-
tion, push the control button. Outside (fresh) air position
With the outside (fresh)air position selected, air
enters the vehicle from
outside and is heated or
cooled according to the
function selected.
Recirculated air position With the recirculated airposition selected, air
from the passenger
compartment will be
drawn through the heat-
ing system and heated
or cooled according to
the function selected.
OQL048317L
Page 252 of 630
4163
Features of your vehicle
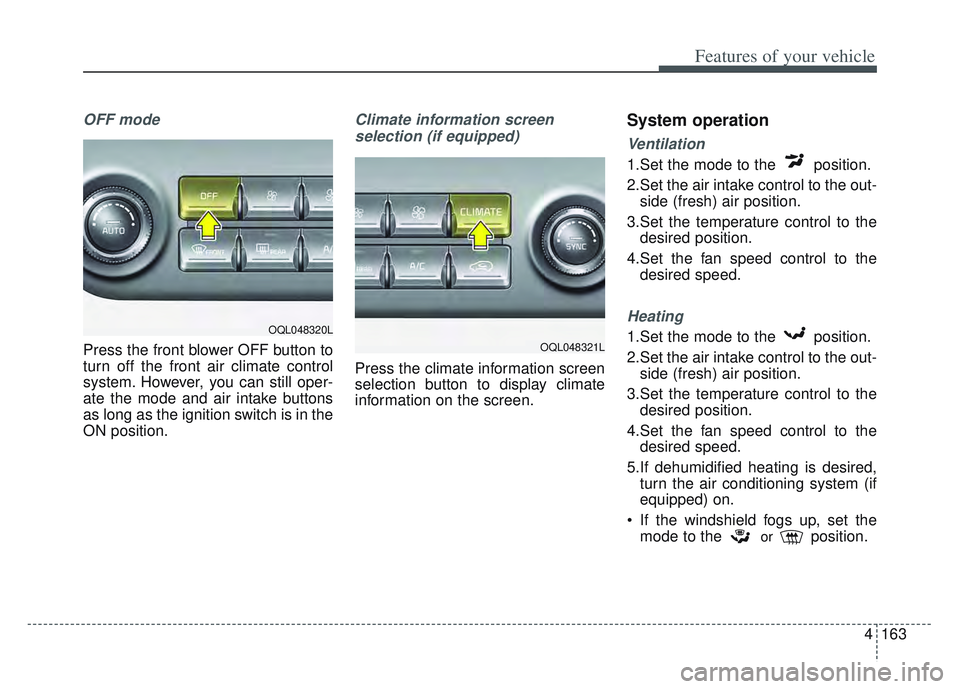
OFF mode
Press the front blower OFF button to
turn off the front air climate control
system. However, you can still oper-
ate the mode and air intake buttons
as long as the ignition switch is in the
ON position.
Climate information screen selection (if equipped)
Press the climate information screen
selection button to display climate
information on the screen.
System operation
Ventilation
1.Set the mode to the position.
2.Set the air intake control to the out- side (fresh) air position.
3.Set the temperature control to the desired position.
4.Set the fan speed control to the desired speed.
Heating
1.Set the mode to the position.
2.Set the air intake control to the out-side (fresh) air position.
3.Set the temperature control to the desired position.
4.Set the fan speed control to the desired speed.
5.If dehumidified heating is desired, turn the air conditioning system (if
equipped) on.
If the windshield fogs up, set the mode to the
orposition.
OQL048321L
OQL048320L
Page 272 of 630
4183
Features of your vehicle
✽ ✽NOTICE
• When the interior temperature of
the wireless charging system rises
above a set temperature, the wire-
less charging will cease to func-
tion. After the interior tempera-
ture drops below the threshold,
the wireless charging function will
resume.
• The wireless charging may not function properly when there is a
heavy accessory cover on the
smart phone.
• The wireless charging will stop when using the wireless smart key
search function to prevent radio
wave disruption.
• The wireless charging will stop when the smart key is moved out
of the vehicle with the ignition in
ON.
• The wireless charging will stop when any of the doors is opened
(applicable for vehicles equipped
with smart keys).
• The wireless charging will stop when the vehicle is turned OFF.
(Continued)(Continued)
• The wireless charging will stop
when the smart phone is not in
complete contact with the wireless
charging pad.
• Items equipped with magnetic components such as credit cards,
telephone cards, bankbooks or a
transportation ticket may become
damaged during wireless charg-
ing.
• Place the smart phone on the cen- ter of the charge pad for best
results. The smart phone may not
charge when placed near the rim
of the charging pad. When the
smart phone does get charged, it
may heat up excessively.
• For smart phones without built-in wireless charging system, an
appropriate accessory has to be
equipped.
• Smart phones of some manufac- turers may display messages on
weak current. This is due to the
particular characteristic of the
smart phone and does not imply a
malfunction on wireless charging
function. (Continued)(Continued)
• The indicator light of some manu-
facturers’ smart phones may still
be orange after the smart phone is
fully charged. This is due to the
particular characteristic of the
smart phone and not a malfunc-
tion of the wireless charging.
• When any smart phone without a wireless charging function or a
metallic object is placed on the
charging pad, a small noise may
sound. This small sound is due to
the vehicle discerning compatibili-
ty of the object placed on the
charging pad. It does not affect
your vehicle or the smart phone in
any way.