2022 KIA SPORTAGE engine
[x] Cancel search: enginePage 475 of 630
What to do in an emergency
16
6
Removing and storing the
spare tire
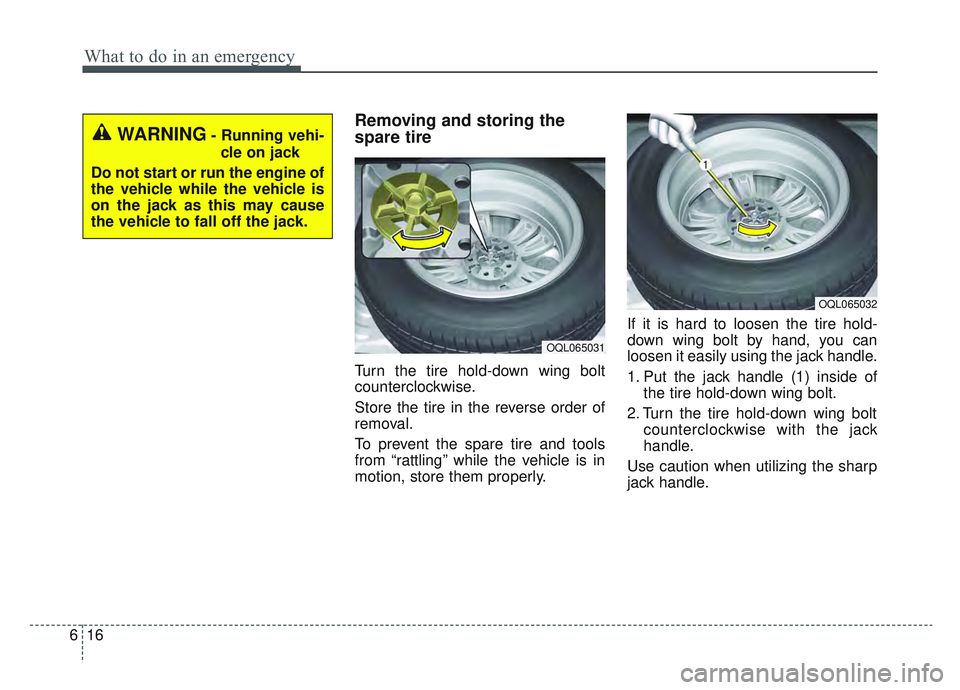
Turn the tire hold-down wing bolt
counterclockwise.
Store the tire in the reverse order of
removal.
To prevent the spare tire and tools
from “rattling” while the vehicle is in
motion, store them properly. If it is hard to loosen the tire hold-
down wing bolt by hand, you can
loosen it easily using the jack handle.
1. Put the jack handle (1) inside of
the tire hold-down wing bolt.
2. Turn the tire hold-down wing bolt counterclockwise with the jack
handle.
Use caution when utilizing the sharp
jack handle.
WARNING- Running vehi- cle on jack
Do not start or run the engine of
the vehicle while the vehicle is
on the jack as this may cause
the vehicle to fall off the jack.
OQL065031
OQL065032
Page 482 of 630
623
What to do in an emergency
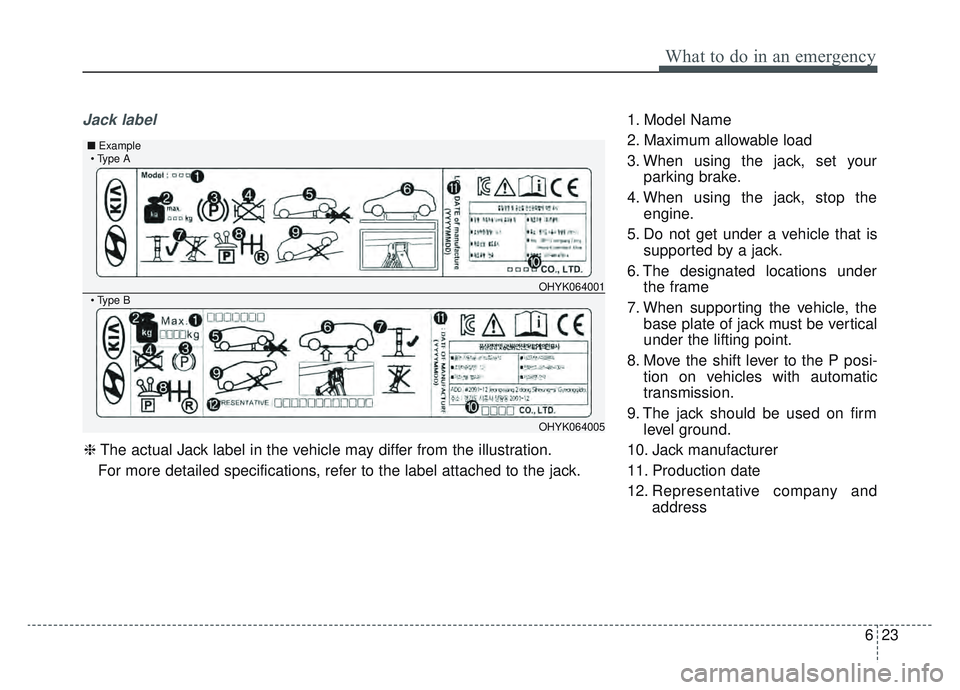
Jack label1. Model Name
2. Maximum allowable load
3. When using the jack, set yourparking brake.
4. When using the jack, stop the engine.
5. Do not get under a vehicle that is supported by a jack.
6. The designated locations under the frame
7. When supporting the vehicle, the base plate of jack must be vertical
under the lifting point.
8. Move the shift lever to the P posi- tion on vehicles with automatic
transmission.
9. The jack should be used on firm level ground.
10. Jack manufacturer
11. Production date
12. Representative company and address
OHYK064001
OHYK064005
■Example
❈The actual Jack label in the vehicle may differ from the illustration.
For more detailed specifications, refer to the label attached to the jack.
Page 485 of 630
What to do in an emergency
26
6
Notes on the safe use of the
Tire Mobility Kit
Park your car at the side of the
road so that you can work with the
Tire Mobility Kit away from moving
traffic. Place your warning triangle
in a prominent place to make pass-
ing vehicles aware of your location.
To be sure your vehicle will not move, even when you're on fairly
level ground, always set your park-
ing brake.
Only use the Tire Mobility Kit for sealing/inflation passenger car
tires. Do not use on motorcycles,
bicycles or any other type of tires.
Do not remove any foreign objects- such as nails or screws -that have
penetrated the tire.
Before using the Tire Mobility Kit, read the precautionary advice
printed on the sealant bottle! Provided the car is outdoors, leave
the engine running. Otherwise
operating the compressor may
eventually drain the car battery.
Never leave the Tire Mobility Kit unattended while it is being used.
Do not leave the compressor run- ning for more than 10 min. at a time
or it may overheat.
Do not use the Tire Mobility Kit if the ambient temperature is below
-22°F (-30°C).
When the tire and wheel are dam- aged, do not use Tire Mobility Kit
for your safety.
WARNING
Do not use the Tire Mobility Kit
if a tire is severely damaged.
Only punctured areas located
within the tread region of the
tire can be sealed using the Tire
Mobility Kit.
Page 489 of 630
What to do in an emergency
30
6
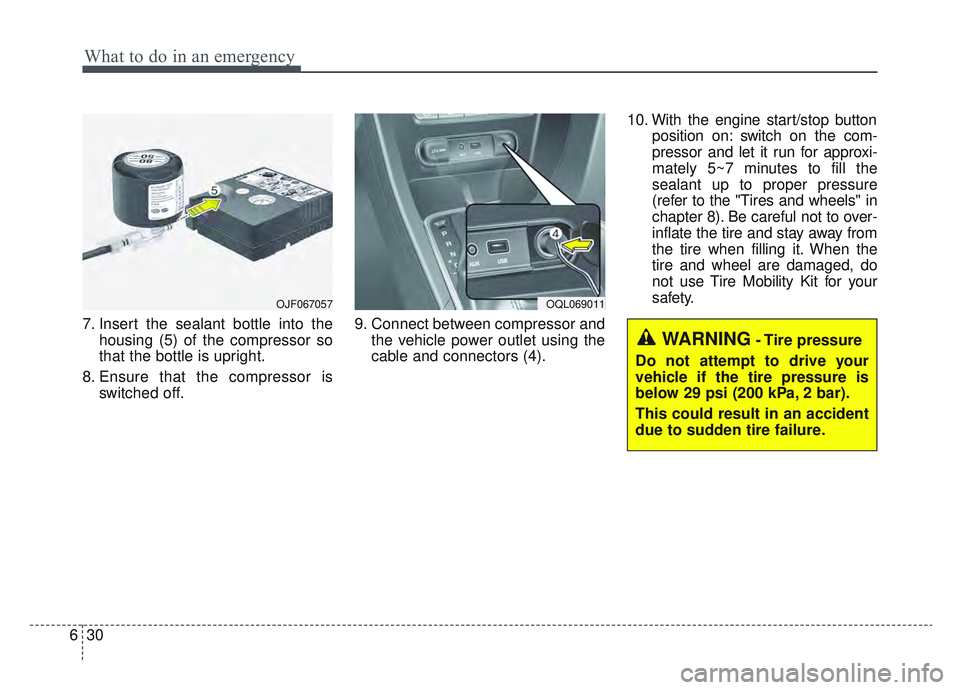
7. Insert the sealant bottle into the
housing (5) of the compressor so
that the bottle is upright.
8. Ensure that the compressor is switched off. 9. Connect between compressor and
the vehicle power outlet using the
cable and connectors (4). 10. With the engine start/stop button
position on: switch on the com-
pressor and let it run for approxi-
mately 5~7 minutes to fill the
sealant up to proper pressure
(refer to the "Tires and wheels" in
chapter 8). Be careful not to over-
inflate the tire and stay away from
the tire when filling it. When the
tire and wheel are damaged, do
not use Tire Mobility Kit for your
safety.
OJF067057OQL069011
WARNING- Tire pressure
Do not attempt to drive your
vehicle if the tire pressure is
below 29 psi (200 kPa, 2 bar).
This could result in an accident
due to sudden tire failure.
Page 490 of 630
631
What to do in an emergency
11. Switch off the compressor.
12. Detach the hose from the sealantbottle connector and from the tire
valve.
Return the Tire Mobility Kit to its stor-
age location in the vehicle.Distributing the sealant
13. Immediately drive approximately 4 ~ 6 miles (7 ~ 10 km or, about
10 min) to evenly distribute the
sealant in the tire.
Checking the tire inflation
pressure
1. After driving approximately 4 ~ 6miles (7 ~ 10 km or about 10 min-
utes), stop at a suitable location.
2. Connect the filling hose (3) of the compressor (clip mounted side)
directly and then connect the filling
hose (3) (opposite side) to the tire
valve.
3. Connect between compressor and the vehicle power outlet using the
cable and connectors.
4. Adjust the tire inflation pressure to 29 psi (200 kPa). With the Engine
Start/Stop button ON position,
proceed as follows.
- To increase the inflation pres- sure: Switch on the compressor,
position I. To check the current
inflation pressure setting, briefly
switch off the compressor.
CAUTION
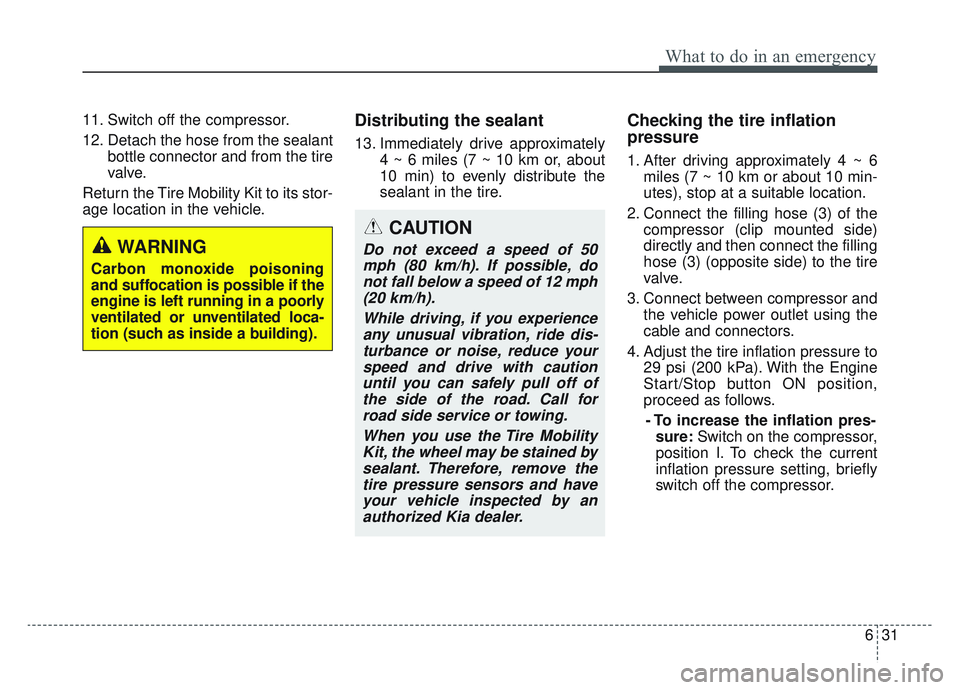
Do not exceed a speed of 50 mph (80 km/h). If possible, donot fall below a speed of 12 mph(20 km/h).
While driving, if you experienceany unusual vibration, ride dis-turbance or noise, reduce yourspeed and drive with cautionuntil you can safely pull off ofthe side of the road. Call forroad side service or towing.
When you use the Tire MobilityKit, the wheel may be stained bysealant. Therefore, remove thetire pressure sensors and haveyour vehicle inspected by anauthorized Kia dealer.WARNING
Carbon monoxide poisoning
and suffocation is possible if the
engine is left running in a poorly
ventilated or unventilated loca-
tion (such as inside a building).
Page 496 of 630
637
What to do in an emergency
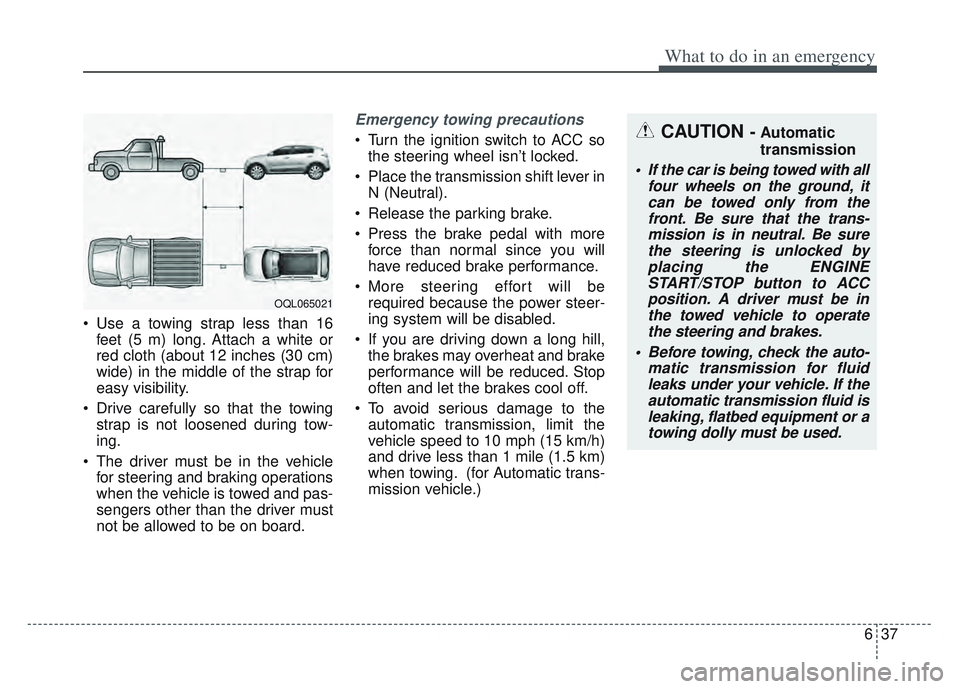
• Use a towing strap less than 16feet (5 m) long. Attach a white or
red cloth (about 12 inches (30 cm)
wide) in the middle of the strap for
easy visibility.
Drive carefully so that the towing strap is not loosened during tow-
ing.
The driver must be in the vehicle for steering and braking operations
when the vehicle is towed and pas-
sengers other than the driver must
not be allowed to be on board.
Emergency towing precautions
Turn the ignition switch to ACC sothe steering wheel isn’t locked.
Place the transmission shift lever in N (Neutral).
Release the parking brake.
Press the brake pedal with more force than normal since you will
have reduced brake performance.
More steering effort will be required because the power steer-
ing system will be disabled.
If you are driving down a long hill, the brakes may overheat and brake
performance will be reduced. Stop
often and let the brakes cool off.
To avoid serious damage to the automatic transmission, limit the
vehicle speed to 10 mph (15 km/h)
and drive less than 1 mile (1.5 km)
when towing. (for Automatic trans-
mission vehicle.)CAUTION - Automatic
transmission
• If the car is being towed with all four wheels on the ground, itcan be towed only from thefront. Be sure that the trans-mission is in neutral. Be surethe steering is unlocked byplacing the ENGINESTART/STOP button to ACCposition. A driver must be inthe towed vehicle to operatethe steering and brakes.
Before towing, check the auto- matic transmission for fluidleaks under your vehicle. If theautomatic transmission fluid isleaking, flatbed equipment or atowing dolly must be used.
OQL065021
Page 497 of 630
Maintenance
Engine compartment . . . . . . . . . . . . . . . . . . . . . . . . 7-3
Maintenance services . . . . . . . . . . . . . . . . . . . . . . . . 7-4
• Owner’s responsibility . . . . . . . . . . . . . . . . . . . . . . . . . 7-4
• Owner maintenance precautions . . . . . . . . . . . . . . . . . 7-5
Owner maintenance . . . . . . . . . . . . . . . . . . . . . . . . . 7-7
• Owner maintenance schedule. . . . . . . . . . . . . . . . . . . . 7-7
Scheduled maintenance service. . . . . . . . . . . . . . . . 7-9
Explanation of scheduled maintenance items . . . 7-21
Checking fluid levels . . . . . . . . . . . . . . . . . . . . . . . 7-26
Engine oil. . . . . . . . . . . . . . . . . . . . . . . . . . . . . . . . . 7-27
• Checking the engine oil level . . . . . . . . . . . . . . . . . . . 7-27
• Changing the engine oil and filter . . . . . . . . . . . . . . . 7-28
Engine coolant . . . . . . . . . . . . . . . . . . . . . . . . . . . . 7-29
• Checking the coolant level . . . . . . . . . . . . . . . . . . . . . 7-29
• Changing the coolant . . . . . . . . . . . . . . . . . . . . . . . . . 7-32
Brake fluid . . . . . . . . . . . . . . . . . . . . . . . . . . . . . . . 7-33
• Checking the brake fluid level . . . . . . . . . . . . . . . . . . 7-33
Washer fluid . . . . . . . . . . . . . . . . . . . . . . . . . . . . . . 7-34
• Checking the washer fluid level . . . . . . . . . . . . . . . . . 7-34
Parking brake . . . . . . . . . . . . . . . . . . . . . . . . . . . . . 7-35
• Checking the parking brake. . . . . . . . . . . . . . . . . . . . 7-35
Air cleaner. . . . . . . . . . . . . . . . . . . . . . . . . . . . . . . . 7-36
• Filter replacement . . . . . . . . . . . . . . . . . . . . . . . . . . . . 7-36
Climate control air filter . . . . . . . . . . . . . . . . . . . . 7-38
• Filter inspection . . . . . . . . . . . . . . . . . . . . . . . . . . . . . . 7-38
Wiper blades . . . . . . . . . . . . . . . . . . . . . . . . . . . . . . 7-40
• Blade inspection . . . . . . . . . . . . . . . . . . . . . . . . . . . . . . 7-40
• Blade replacement . . . . . . . . . . . . . . . . . . . . . . . . . . . . 7-40
Battery . . . . . . . . . . . . . . . . . . . . . . . . . . . . . . . . . . . 7-\
43
• For best battery service . . . . . . . . . . . . . . . . . . . . . . . 7-43
• Recharging the battery . . . . . . . . . . . . . . . . . . . . . . . . 7-44
• Reset items . . . . . . . . . . . . . . . . . . . . . . . . . . . . . . . . . . 7-45\
Tires and wheels . . . . . . . . . . . . . . . . . . . . . . . . . . . 7-46
• Tire care . . . . . . . . . . . . . . . . . . . . . . . . . . . . . . . . . . . . \
7-46
• Recommended cold tire inflation pressures . . . . . . . 7-46
• Tire pressure . . . . . . . . . . . . . . . . . . . . . . . . . . . . . . . . 7-47
• Checking tire inflation pressure. . . . . . . . . . . . . . . . . 7-47
• Tire rotation . . . . . . . . . . . . . . . . . . . . . . . . . . . . . . . . 7-48
• Wheel alignment and tire balance . . . . . . . . . . . . . . . 7-49
• Tire replacement . . . . . . . . . . . . . . . . . . . . . . . . . . . . . 7-50
• Wheel replacement . . . . . . . . . . . . . . . . . . . . . . . . . . . 7-51
• Tire traction . . . . . . . . . . . . . . . . . . . . . . . . . . . . . . . . . 7-51
• Tire maintenance . . . . . . . . . . . . . . . . . . . . . . . . . . . . 7-51
• Tire sidewall labeling . . . . . . . . . . . . . . . . . . . . . . . . . 7-51
• All season tires . . . . . . . . . . . . . . . . . . . . . . . . . . . . . . . 7-58
• Summer tires . . . . . . . . . . . . . . . . . . . . . . . . . . . . . . . . 7-58
• Snow tires . . . . . . . . . . . . . . . . . . . . . . . . . . . . . . . . . . . 7-\
58
• Tire chains . . . . . . . . . . . . . . . . . . . . . . . . . . . . . . . . . . 7-58\
7
Page 498 of 630
• Radial-ply tires . . . . . . . . . . . . . . . . . . . . . . . . . . . . . . 7-59
• Low aspect ratio tire . . . . . . . . . . . . . . . . . . . . . . . . . . 7-59
Fuses . . . . . . . . . . . . . . . . . . . . . . . . . . . . . . . . . . . . \
7-61
• Inner panel fuse replacement . . . . . . . . . . . . . . . . . . . 7-63
• Engine compartment fuse replacement. . . . . . . . . . . 7-65
• Fuse/relay panel description. . . . . . . . . . . . . . . . . . . . 7-67
Light bulbs . . . . . . . . . . . . . . . . . . . . . . . . . . . . . . . 7-79
• Bulb replacement precaution . . . . . . . . . . . . . . . . . . . 7-79
• Light bulb position (Front) . . . . . . . . . . . . . . . . . . . . 7-81
• Light bulb position (Rear) . . . . . . . . . . . . . . . . . . . . . 7-82
• Light bulb position (Side) . . . . . . . . . . . . . . . . . . . . . . 7-83
• Headlamp (High/Low beam) bulb replacement . . . . 7-83
• Front turn signal lamp bulb replacement . . . . . . . . . 7-84
• Position lamp + DRL bulb replacement . . . . . . . . . . 7-85
• Front fog lamp (Bulb and LED type) bulbreplacement . . . . . . . . . . . . . . . . . . . . . . . . . . . . . . . . 7-86
• Stop and tail lamp bulb replacement . . . . . . . . . . . . 7-86
• Tail lamp (inside) bulb replacement . . . . . . . . . . . . . 7-87
• Stop and tail lamp (LED type) bulb replacement . . 7-88
• Back-up lamp and Rear turn signal lamp (Bulb type) bulb replacement . . . . . . . . . . . . . . . . . 7-89
• High mounted stop lamp (LED type) bulb replacement . . . . . . . . . . . . . . . . . . . . . . . . . . . . . . . . 7-89
• License plate lamp (Bulb type) bulb replacement . . 7-89
• Side repeater lamp (LED type) bulb replacement . . 7-90 • Map lamp (Bulb and LED type)
bulb replacement. . 7-90
• Vanity mirror lamp (Bulb type) bulb replacement . . 7-91
• Room lamp (Bulb type) bulb replacement . . . . . . . 7-91
• Personal lamp (LED type) bulb replacement . . . . . . 7-92
• Glove box lamp (Bulb type) bulb replacement . . . . 7-92
• Liftgate room lamp (Bulb type) bulb replacement . . 7-93
Appearance care . . . . . . . . . . . . . . . . . . . . . . . . . . . 7-94
• Exterior care . . . . . . . . . . . . . . . . . . . . . . . . . . . . . . . . 7-94
• Interior care . . . . . . . . . . . . . . . . . . . . . . . . . . . . . . . . . 7-99
Emission control system . . . . . . . . . . . . . . . . . . . 7-102
• Crankcase emission control system . . . . . . . . . . . . . 7-102
• Evaporative emission control (including ORVR: Onboard Refueling Vapor Recovery) system . . . . . 7-102
• Exhaust emission control system . . . . . . . . . . . . . . . 7-103
7