2022 HYUNDAI VELOSTER lock
[x] Cancel search: lockPage 108 of 446
3-30
Convenient features of your vehicle
Information
Make sure to refuel your vehicle
according to the "Fuel Requirements"
suggested in the Introduction chapter.
• Do not spill fuel on the exterior
surfaces of the vehicle. Any type
of fuel spilled on painted sur-
faces may damage the paint.
• If the fuel filler cap requires
replacement, use only a genuine
HYUNDAI cap or the equivalent
specified for your vehicle. An
incorrect fuel filler cap can
result in a serious malfunction
of the fuel system or emission
control system.
NOTICE
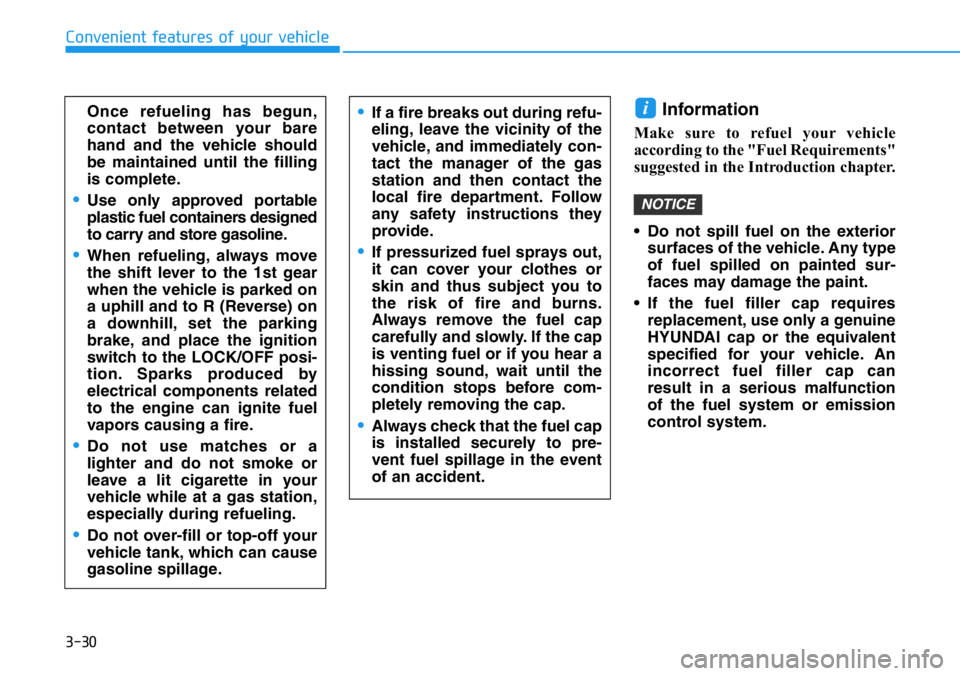
i•If a fire breaks out during refu-
eling, leave the vicinity of the
vehicle, and immediately con-
tact the manager of the gas
station and then contact the
local fire department. Follow
any safety instructions they
provide.
•If pressurized fuel sprays out,
it can cover your clothes or
skin and thus subject you to
the risk of fire and burns.
Always remove the fuel cap
carefully and slowly. If the cap
is venting fuel or if you hear a
hissing sound, wait until the
condition stops before com-
pletely removing the cap.
•Always check that the fuel cap
is installed securely to pre-
vent fuel spillage in the event
of an accident.
Once refueling has begun,
contact between your bare
hand and the vehicle should
be maintained until the filling
is complete.
•Use only approved portable
plastic fuel containers designed
to carry and store gasoline.
•When refueling, always move
the shift lever to the 1st gear
when the vehicle is parked on
a uphill and to R (Reverse) on
a downhill, set the parking
brake, and place the ignition
switch to the LOCK/OFF posi-
tion. Sparks produced by
electrical components related
to the engine can ignite fuel
vapors causing a fire.
•Do not use matches or a
lighter and do not smoke or
leave a lit cigarette in your
vehicle while at a gas station,
especially during refueling.
•Do not over-fill or top-off your
vehicle tank, which can cause
gasoline spillage.
Page 117 of 446
3-39
Convenient features of your vehicle
3
If the brake fluid level in the reser-
voir is low:
1. Drive carefully to the nearest safe
location and stop your vehicle.
2. With the engine stopped, check the
brake fluid level immediately and
add fluid as required (For more
details, refer to "Brake Fluid" in
chapter 7). After adding brake
fluid, check all brake components
for fluid leaks. If a brake fluid leak is
found, or if the warning light
remains on, or if the brakes do not
operate properly, do not drive the
vehicle. Have the vehicle inspected
by an authorized HYUNDAI dealer.
Dual-diagonal braking system
Your vehicle is equipped with dual-
diagonal braking systems. This
means you still have braking on two
wheels even if one of the dual sys-
tems should fail.
With only one of the dual systems
working, more than normal pedal
travel and greater pedal pressure is
required to stop the vehicle.Also, the vehicle will not stop in as
short a distance with only a portion
of the brake system working.
If the brakes fail while you are driv-
ing, shift to a lower gear for addition-
al engine braking and stop the vehi-
cle as soon as it is safe to do so.
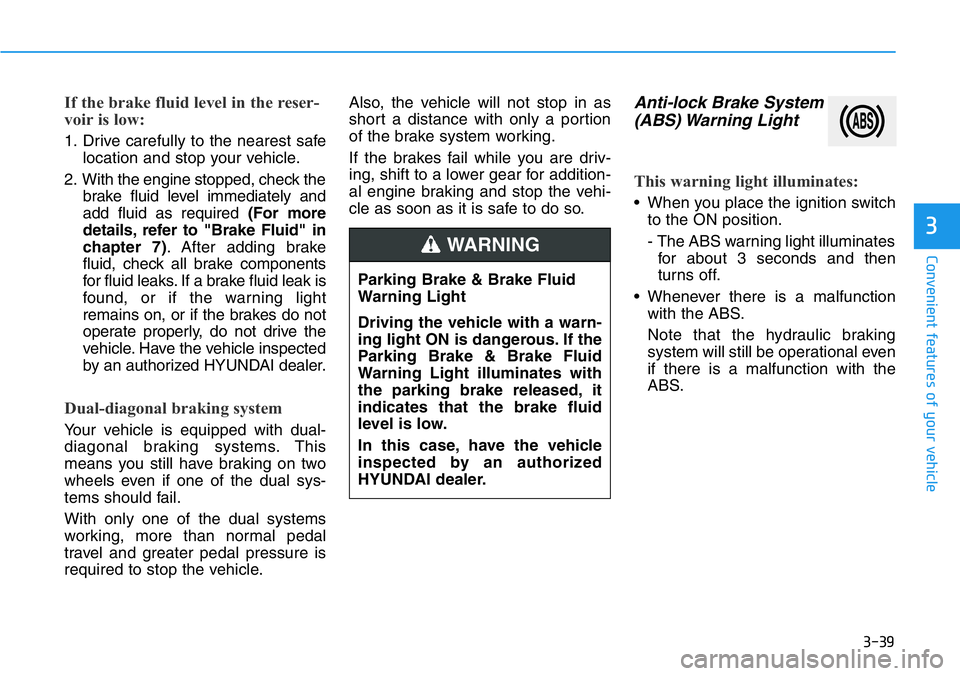
Anti-lock Brake System
(ABS) Warning Light
This warning light illuminates:
• When you place the ignition switch
to the ON position.
- The ABS warning light illuminates
for about 3 seconds and then
turns off.
• Whenever there is a malfunction
with the ABS.
Note that the hydraulic braking
system will still be operational even
if there is a malfunction with the
ABS.
Parking Brake & Brake Fluid
Warning Light
Driving the vehicle with a warn-
ing light ON is dangerous. If the
Parking Brake & Brake Fluid
Warning Light illuminates with
the parking brake released, it
indicates that the brake fluid
level is low.
In this case, have the vehicle
inspected by an authorized
HYUNDAI dealer.
WARNING
Page 133 of 446
3-55
Convenient features of your vehicle
3
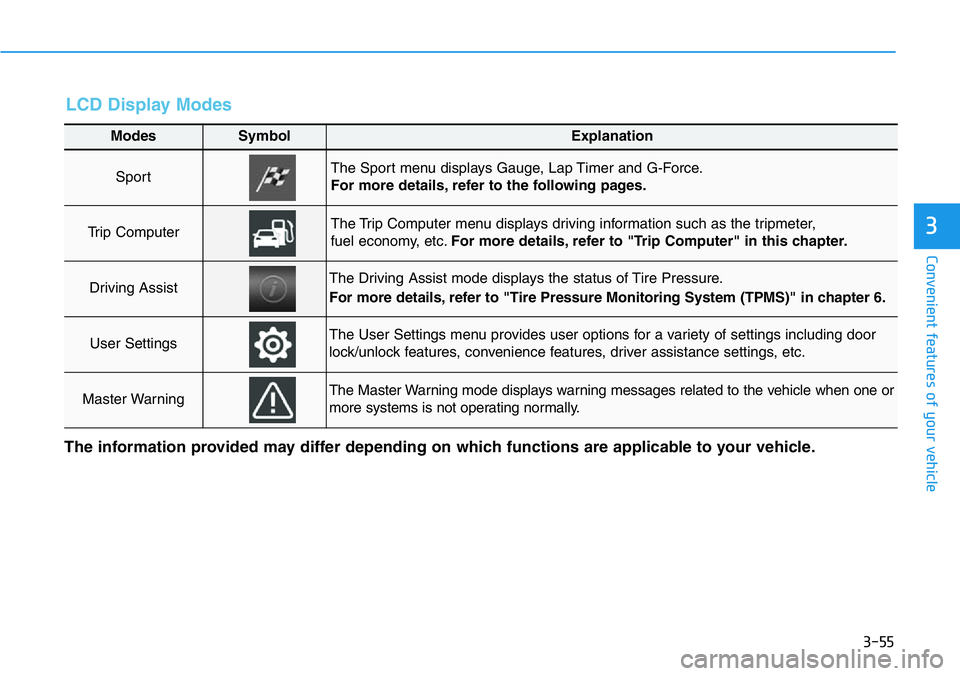
LCD Display Modes
Modes SymbolExplanation
Sport The Sport menu displays Gauge, Lap Timer and G-Force.
For more details, refer to the following pages.
Trip Computer The Trip Computer menu displays driving information such as the tripmeter,
fuel economy, etc.For more details, refer to "Trip Computer" in this chapter.
Driving AssistThe Driving Assist mode displays the status of Tire Pressure.
For more details, refer to "Tire Pressure Monitoring System (TPMS)" in chapter 6.
User SettingsThe User Settings menu provides user options for a variety of settings including door
lock/unlock features, convenience features, driver assistance settings, etc.
Master WarningThe Master Warning mode displays warning messages related to the vehicle when one or
more systems is not operating normally.
The information provided may differ depending on which functions are applicable to your vehicle.
Page 137 of 446
3-59
Convenient features of your vehicle
3
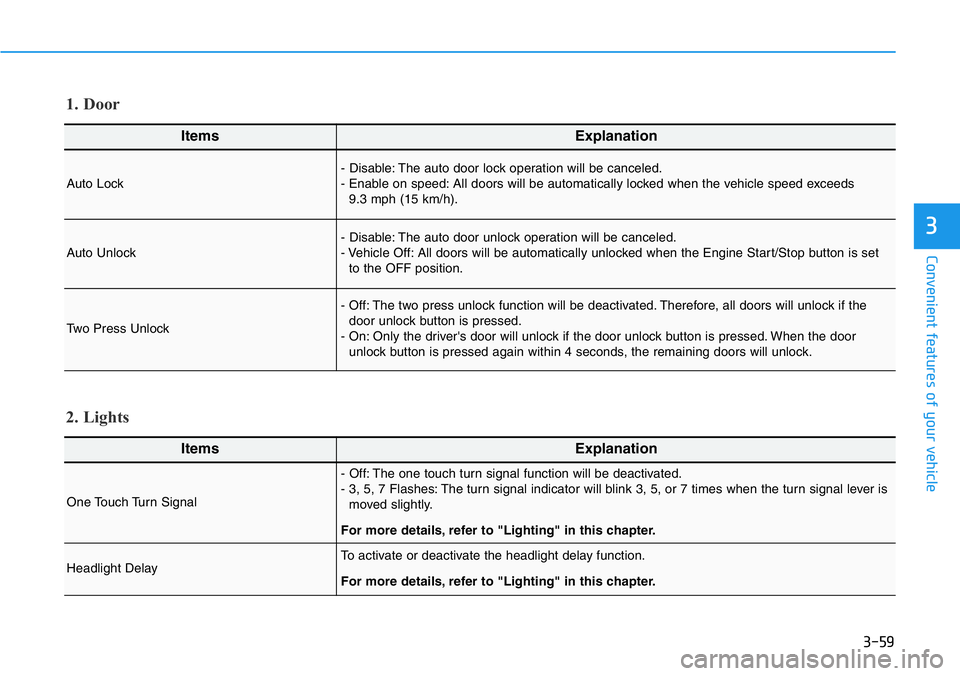
ItemsExplanation
Auto Lock- Disable: The auto door lock operation will be canceled.
- Enable on speed: All doors will be automatically locked when the vehicle speed exceeds
9.3 mph (15 km/h).
Auto Unlock- Disable: The auto door unlock operation will be canceled.
- Vehicle Off: All doors will be automatically unlocked when the Engine Start/Stop button is set
to the OFF position.
Two Press Unlock
- Off: The two press unlock function will be deactivated. Therefore, all doors will unlock if the
door unlock button is pressed.
- On: Only the driver's door will unlock if the door unlock button is pressed. When the door
unlock button is pressed again within 4 seconds, the remaining doors will unlock.
1. Door
ItemsExplanation
One Touch Turn Signal
- Off: The one touch turn signal function will be deactivated.
- 3, 5, 7 Flashes: The turn signal indicator will blink 3, 5, or 7 times when the turn signal lever is
moved slightly.
For more details, refer to "Lighting" in this chapter.
Headlight DelayTo activate or deactivate the headlight delay function.
For more details, refer to "Lighting" in this chapter.
2. Lights
Page 149 of 446

3-71
Convenient features of your vehicle
Battery saver function
The purpose of this feature is to pre-
vent the battery from being dis-
charged. The system automatically
turns off the parking lamp when the
driver turns the vehicle off and opens
the driver-side door.
With this feature, the parking lamps
will turn off automatically if the driver
parks on the side of road at night.
If necessary, to keep the lamps on
when the vehicle is turned off, perform
the following:
1) Open the driver-side door.
2) Turn the parking lamps OFF and
ON again using the headlamp
switch on the steering column.
Headlamp delay function
If the key is removed from the ignition
switch or placed in the ACC position
or the LOCK/OFF position with the
headlamps ON, the headlamps
(and/or parking lamps) remain on for
about 5 minutes. However, if the dri-
ver’s door is opened and closed, the
headlights are turned off after 15
seconds. Also, with the engine off if
the driver's door is opened and
closed, the headlamps (and/or park-
ing lamps) are turned off after 15
seconds.
The headlamps (and/or parking
lamps) can be turned off by pressing
the lock button on the smart key
twice or turning the headlamp switch
to the OFF or AUTO position.
You can activate or deactivate the
Headlamp Delay function from the
User Settings Mode in the LCD dis-
play.
For more details, refer to the "LCD
Display" section in this chapter.If the driver exits the vehicle
through another door besides the
driver door, the battery saver func-
tion does not operate and the
headlamp delay function does not
turn OFF automatically.
This may cause the battery to dis-
charge. To avoid battery dis-
charge, turn OFF the headlamps
manually from the headlamp
switch before exiting the vehicle.
NOTICE
3
Page 150 of 446

3-72
Daytime running light (DRL)
The Daytime Running Lights (DRL)
can make it easier for others to see
the front of your vehicle during the
day, especially after dawn and before
sunset.
The DRL system will turn the dedi-
cated lamp OFF when :
• The headlamps are ON.
• The parking lamps are ON.
• The vehicle is turned off.
• The parking brake is engaged.
Interior Lights
Do not use the interior lights for
extended periods when the vehi-
cle is turned off or the battery will
discharge.
Interior lamp AUTO cut
The interior lamps will automatically
go off approximately 20 minutes after
the engine is turned off and the
doors are closed. If a door is opened,
the lamp will go off 40 minutes after
the engine is turned off. If the doors
are locked by the smart key and the
vehicle enters the armed stage of the
theft alarm system, the lamps will go
off five seconds later.
Front lamps
Front Map Lamp (1) :
Press either lenses to turn the map
lamp on or off. This light produces a
spot beam for convenient use as a
map lamp at night or as a personal
lamp for the driver and the front pas-
senger.
NOTICE
Convenient features of your vehicle
Do not use the interior lights
when driving in the dark. The
interior lights may obscure your
view and cause an accident.
WARNING
OPD046041
Page 151 of 446
3-73
Convenient features of your vehicle
Front Door Lamp (2) ( ):
The front or rear room lamps come on
when the front or rear doors are
opened if the engine is running or not.
When doors are unlocked by the
smart key, the front and rear lamps
come on for approximately 30 sec-
onds as long as any door is not
opened. The front and rear room
lamps go out gradually after approxi-
mately 30 seconds when the door is
closed. However, if the ignition switch
is in the ON position or all doors are
locked, the front and rear lamps will
turn off. If a door is opened with the
ignition switch in the ACC position or
the OFF position, the front and rear
lamps stay on for about 20 minutes.
Front room lamp
•(3) :
Press the button to turn ON the
room lamp for the front/rear seats.
•(4):
Press the button to turn OFF the
room lamp for the front/rear seats
regardless of front or rear door open
position.
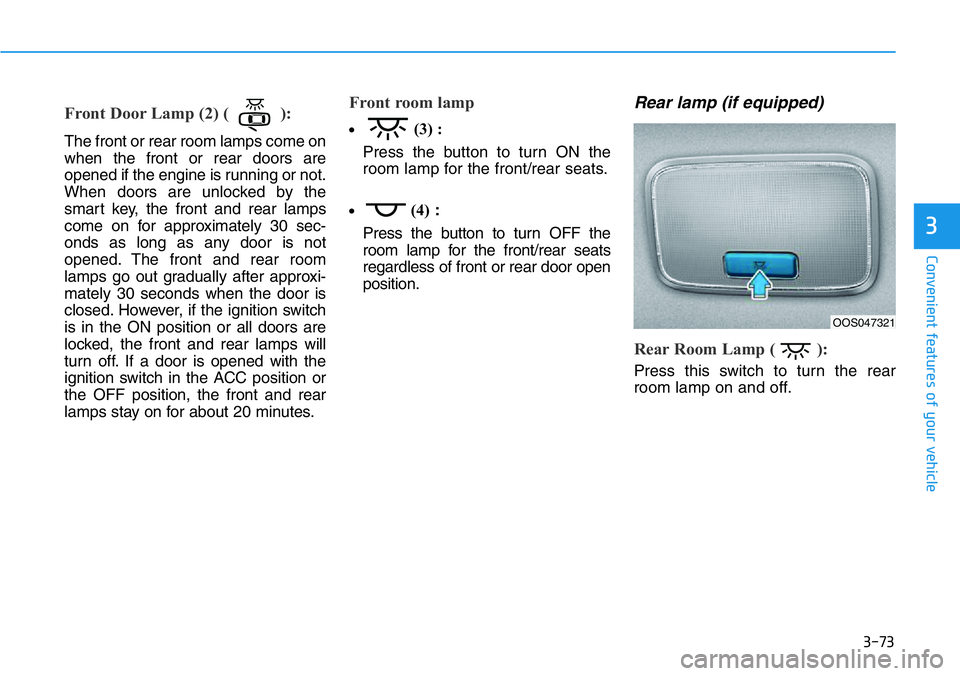
Rear lamp (if equipped)
Rear Room Lamp ( ):
Press this switch to turn the rear
room lamp on and off.
3
OOS047321
Page 182 of 446
3-104
Convenient features of your vehicle
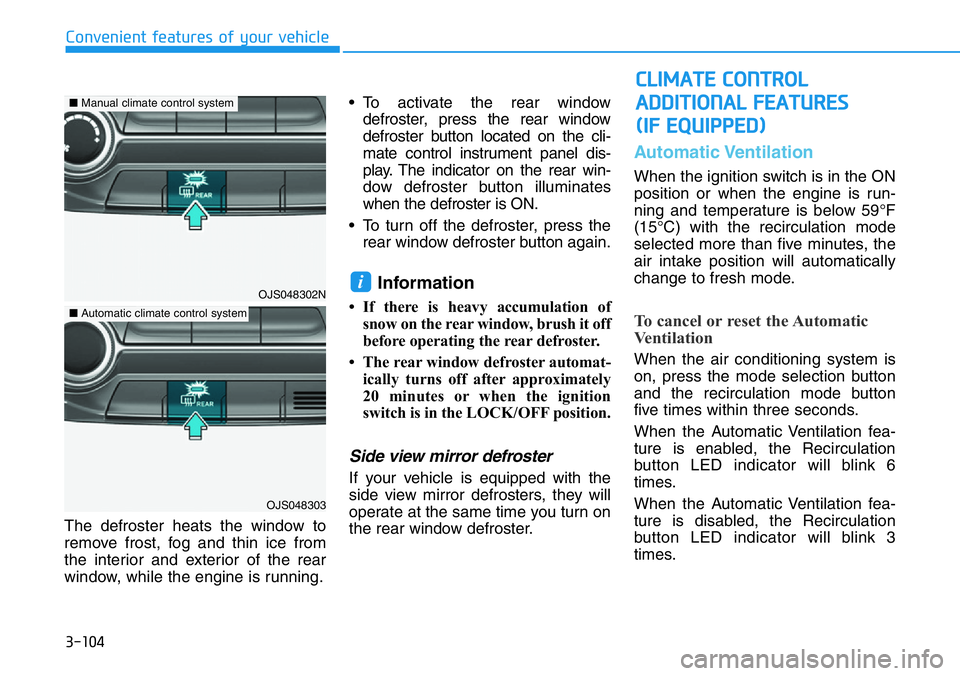
The defroster heats the window to
remove frost, fog and thin ice from
the interior and exterior of the rear
window, while the engine is running.• To activate the rear window
defroster, press the rear window
defroster button located on the cli-
mate control instrument panel dis-
play. The indicator on the rear win-
dow defroster button illuminates
when the defroster is ON.
• To turn off the defroster, press the
rear window defroster button again.
Information
• If there is heavy accumulation of
snow on the rear window, brush it off
before operating the rear defroster.
• The rear window defroster automat-
ically turns off after approximately
20 minutes or when the ignition
switch is in the LOCK/OFF position.
Side view mirror defroster
If your vehicle is equipped with the
side view mirror defrosters, they will
operate at the same time you turn on
the rear window defroster.
Automatic Ventilation
When the ignition switch is in the ON
position or when the engine is run-
ning and temperature is below 59°F
(15°C) with the recirculation mode
selected more than five minutes, the
air intake position will automatically
change to fresh mode.
To cancel or reset the Automatic
Ventilation
When the air conditioning system is
on, press the mode selection button
and the recirculation mode button
five times within three seconds.
When the Automatic Ventilation fea-
ture is enabled, the Recirculation
button LED indicator will blink 6
times.
When the Automatic Ventilation fea-
ture is disabled, the Recirculation
button LED indicator will blink 3
times.
i
CLIMATE CONTROL
ADDITIONAL FEATURES
(IF EQUIPPED)
OJS048302N
OJS048303
■Manual climate control system
■Automatic climate control system