2022 HYUNDAI VELOSTER lock
[x] Cancel search: lockPage 63 of 446
2-46
Safety system of your vehicle
You can take steps to help reduce
the risk of being injured by an inflat-
ing air bag. The greatest risk is sitting
too close to the air bag. An air bag
needs about 10 inches (25 cm) of
space to inflate. NHTSA recom-
mends that drivers allow at least 10
inches (25 cm) between the center of
the steering wheel and the chest.
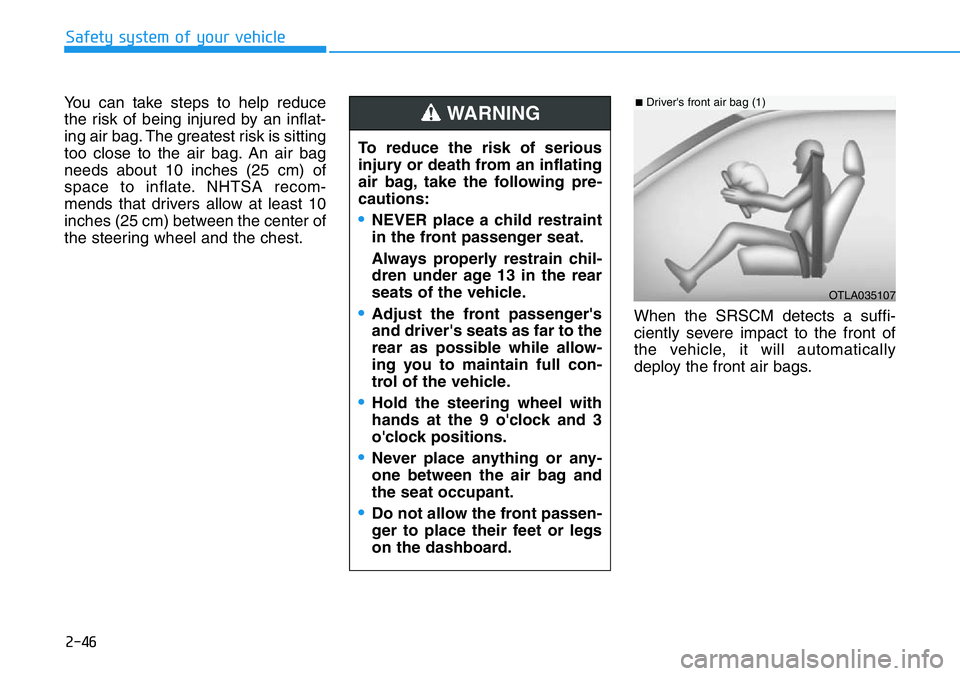
When the SRSCM detects a suffi-
ciently severe impact to the front of
the vehicle, it will automatically
deploy the front air bags.
OTLA035107
■Driver's front air bag (1)
To reduce the risk of serious
injury or death from an inflating
air bag, take the following pre-
cautions:
•NEVER place a child restraint
in the front passenger seat.
Always properly restrain chil-
dren under age 13 in the rear
seats of the vehicle.
•Adjust the front passenger's
and driver's seats as far to the
rear as possible while allow-
ing you to maintain full con-
trol of the vehicle.
•Hold the steering wheel with
hands at the 9 o'clock and 3
o'clock positions.
•Never place anything or any-
one between the air bag and
the seat occupant.
•Do not allow the front passen-
ger to place their feet or legs
on the dashboard.
WARNING
Page 71 of 446
2-54
Safety system of your vehicle
Why Didn't My Air Bag Go Off
in a Collision?
Air bags are not designed to inflate in
every collision.There are certain
types of accidents in which the air bag
would not be expected to provide
additional protection. These include
rear impacts, second or third colli-
sions in multiple impact accidents, as
well as low speed impacts. Damage
to the vehicle indicates a collision
energy absorption, and is not an indi-
cator of whether or not an air bag
should have inflated.
Air bag collision sensors
•NEVER place a rear-facing or
front-facing child restraint in
the front passenger's seat of
the vehicle.
•An inflating frontal air bag
could forcefully strike a child
resulting in serious injury or
death.
•Always properly restrain chil-
dren in an appropriate child
restraint in the rear seat of the
vehicle.
WARNING
To reduce the risk of an air bag
deploying unexpectedly and
causing serious injury or death:
•Do not hit or allow any objects
to impact the locations where air
bags or sensors are installed.
WARNING
•Do not perform maintenance
on or around the air bag sen-
sors. If the location or angle of
the sensors is altered, the air
bags may deploy when they
should not or may not deploy
when they should.
•Do not install bumper guards
or replace the bumper with a
non-genuine HYUNDAI parts.
This may adversely affect the
collision and air bag deploy-
ment performance.
•Place the ignition switch in
the LOCK/OFF or ACC posi-
tion when the vehicle is being
towed to prevent inadvertent
air bag deployment.
•Have all air bag repairs conduct-
ed by an authorized HYUNDAI
dealer.
Page 79 of 446
Convenient features of your vehicle
Accessing Your Vehicle .........................................3-3
Smart Key ............................................................................3-3
Immobilizer System ...........................................................3-8
Door Locks ............................................................3-10
Operating Door Locks from Outside the Vehicle ....3-10
Operating Door Locks from Inside the Vehicle .......3-11
Automatic Door Lock and Unlock Features .............3-13
Child-Protector Rear Door Locks ...............................3-13
Theft-Alarm System ............................................3-14
Steering Wheel .....................................................3-15
Electric Power Steering (EPS) .....................................3-15
Tilt Steering / Telescope Steering ..............................3-16
Horn ....................................................................................3-16
Mirrors ...................................................................3-17
Inside Rearview Mirror ..................................................3-17
Side View Mirrors ...........................................................3-18
Windows ................................................................3-21
Power Windows ...............................................................3-22
Exterior Features .................................................3-25
Hood ...................................................................................3-25
Liftgate ..............................................................................3-26
Fuel Filler Door ................................................................3-28
Instrument cluster................................................3-31
Instrument Cluster Control............................................3-32
Gauges and Meters ........................................................3-33
Transmission shift indicator .........................................3-36
Warning and Indicator Lights .......................................3-38
LCD Display Messages ...................................................3-48
LCD Display ...........................................................3-54
LCD Display Control ........................................................3-54
LCD Display Modes .........................................................3-55
Trip Computer .......................................................3-64
Lighting..................................................................3-68
Exterior Lights .................................................................3-68
Interior Lights...................................................................3-72
High Beam Assist (HBA) .....................................3-75
System operation ............................................................3-76
System malfunction and limitations ...........................3-77
Wipers And Washers ...........................................3-79
Windshield Wipers...........................................................3-79
Windshield Washers .......................................................3-80
Rear Window Wiper and Washer ................................3-81
Rear View Monitor (RVM) ..................................3-82
3
Page 80 of 446
Manual Climate Control System.........................3-83
Heating and Air Conditioning .......................................3-84
System Operation............................................................3-87
System Maintenance ......................................................3-89
Automatic Climate Control System ....................3-91
Automatic Temperature Control Mode ......................3-92
Manual Temperature Control Mode ...........................3-93
System Operation............................................................3-97
System Maintenance ......................................................3-99
Windshield Defrosting and Defogging ............3-101
Rear Window Defroster ..............................................3-103
Climate Control Additional Features ...............3-104
Automatic Ventilation ...................................................3-104
Storage Compartment .......................................3-105
Center Console Storage ..............................................3-105
Glove Box ........................................................................3-105
Sunglass Holder.............................................................3-106
Interior Features ................................................3-107
Cup Holder ......................................................................3-107
Sunvisor ...........................................................................3-108
Power Outlet ..................................................................3-108
USB charger ...................................................................3-109
Clock .................................................................................3-110
Clothes Hanger ..............................................................3-110
Floor Mat Anchor(s).....................................................3-111
Cargo Area Cover..........................................................3-112
3
Page 81 of 446
3-3
Convenient features of your vehicle
Smart Key
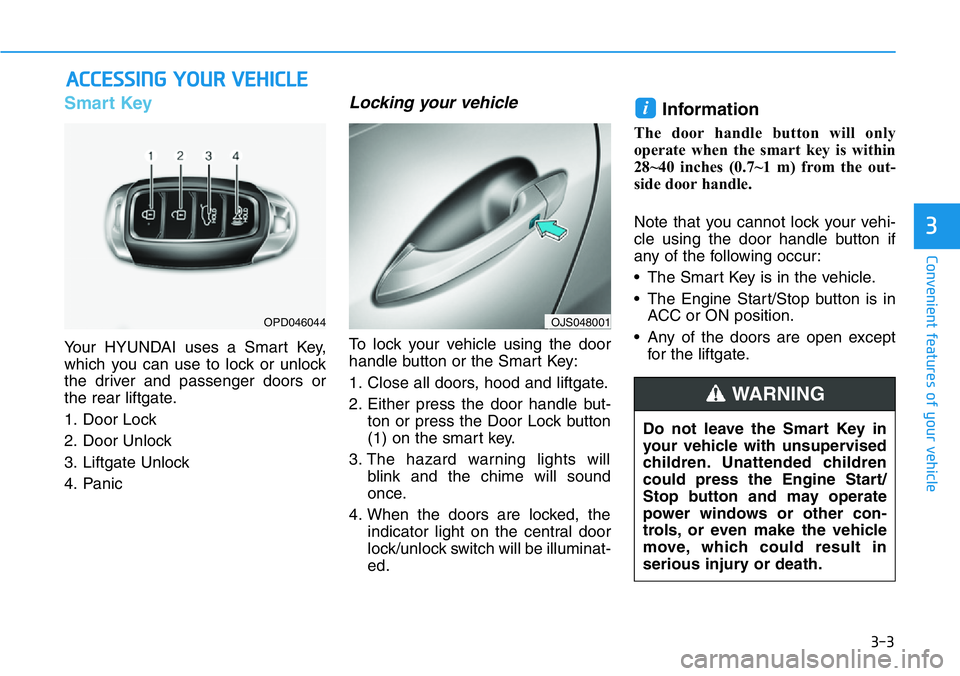
Your HYUNDAI uses a Smart Key,
which you can use to lock or unlock
the driver and passenger doors or
the rear liftgate.
1. Door Lock
2. Door Unlock
3. Liftgate Unlock
4. Panic
Locking your vehicle
To lock your vehicle using the door
handle button or the Smart Key:
1. Close all doors, hood and liftgate.
2. Either press the door handle but-
ton or press the Door Lock button
(1) on the smart key.
3. The hazard warning lights will
blink and the chime will sound
once.
4. When the doors are locked, the
indicator light on the central door
lock/unlock switch will be illuminat-
ed.
Information
The door handle button will only
operate when the smart key is within
28~40 inches (0.7~1 m) from the out-
side door handle.
Note that you cannot lock your vehi-
cle using the door handle button if
any of the following occur:
• The Smart Key is in the vehicle.
• The Engine Start/Stop button is in
ACC or ON position.
• Any of the doors are open except
for the liftgate.
i
ACCESSING YOUR VEHICLE
3
OPD046044
Do not leave the Smart Key in
your vehicle with unsupervised
children. Unattended children
could press the Engine Start/
Stop button and may operate
power windows or other con-
trols, or even make the vehicle
move, which could result in
serious injury or death.
WARNING
OJS048001
Page 82 of 446
3-4
Unlocking your vehicle
To unlock your vehicle:
1. Make sure you have the smart key
in your possession.
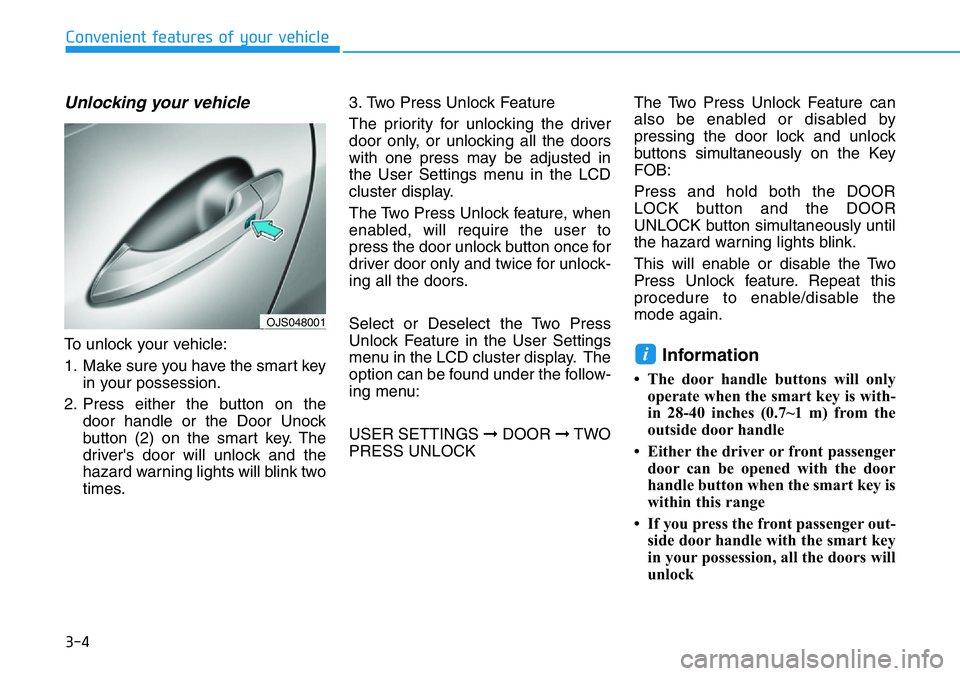
2. Press either the button on the
door handle or the Door Unock
button (2) on the smart key. The
driver's door will unlock and the
hazard warning lights will blink two
times.3. Two Press Unlock Feature
The priority for unlocking the driver
door only, or unlocking all the doors
with one press may be adjusted in
the User Settings menu in the LCD
cluster display.
The Two Press Unlock feature, when
enabled, will require the user to
press the door unlock button once for
driver door only and twice for unlock-
ing all the doors.
Select or Deselect the Two Press
Unlock Feature in the User Settings
menu in the LCD cluster display. The
option can be found under the follow-
ing menu:
USER SETTINGS ➞DOOR ➞TWO
PRESS UNLOCKThe Two Press Unlock Feature can
also be enabled or disabled by
pressing the door lock and unlock
buttons simultaneously on the Key
FOB:
Press and hold both the DOOR
LOCK button and the DOOR
UNLOCK button simultaneously until
the hazard warning lights blink.
This will enable or disable the Two
Press Unlock feature. Repeat this
procedure to enable/disable the
mode again.Information
• The door handle buttons will only
operate when the smart key is with-
in 28-40 inches (0.7~1 m) from the
outside door handle
• Either the driver or front passenger
door can be opened with the door
handle button when the smart key is
within this range
• If you press the front passenger out-
side door handle with the smart key
in your possession, all the doors will
unlock
i
Convenient features of your vehicle
OJS048001
Page 83 of 446
3-5
Convenient features of your vehicle
Opening the liftgate
To unlock and open the liftgate:
1. Make sure you have the smart key
in your possession.
2. Press either the liftgate handle
release button on the vehicle or
press and hold the Liftgate Unlock
button on the smart key for more
than one second. The hazard
warning lights will blink two times
and the liftgate latch will unlock.
The liftgate must be operated
manually to open the liftgate.
Once the liftgate latch is
unlocked, pull upward on the lift-
gate handle to fully open the lift-
gate.
3. Once the liftgate is opened and
then closed, the liftgate will lock
automatically.Information
• The liftgate handle button will only
operate when the smart key is with-
in 28 inches (0.7 m) from the liftgate
handle.
• The Liftgate Unlock button (3) will
only unlock the liftgate. It will not
release the latch and open the lift-
gate automatically. If the Liftgate
Unlock button is used, someone
must still press the liftgate handle
button to open the liftgate.
Panic button
Press and hold the Panic button (4)
for more than one second. The horn
sounds and hazard warning lights
blink for about 30 seconds. To cancel
the panic mode, press any button on
the Smart Key.
Start-up
You can start the vehicle without
inserting the key.
For information, refer to the
"Engine Start/Stop Button" sec-
tion in chapter 5.
To prevent damaging the smart key:
• Keep the smart key in a cool, dry
place to avoid damage or mal-
function. Exposure to moisture
or high temperature may cause
the internal circuit of the smart
key to malfunction which may
not be covered under warranty.
• Avoid dropping or throwing the
smart key.
• Protect the smart key from
extreme temperatures.
NOTICE
i
NOTICE
3
Page 84 of 446
3-6
Convenient features of your vehicle
Mechanical key
If the Smart Key does not operate
normally, you can lock or unlock the
driver's door by using the mechanical
key.
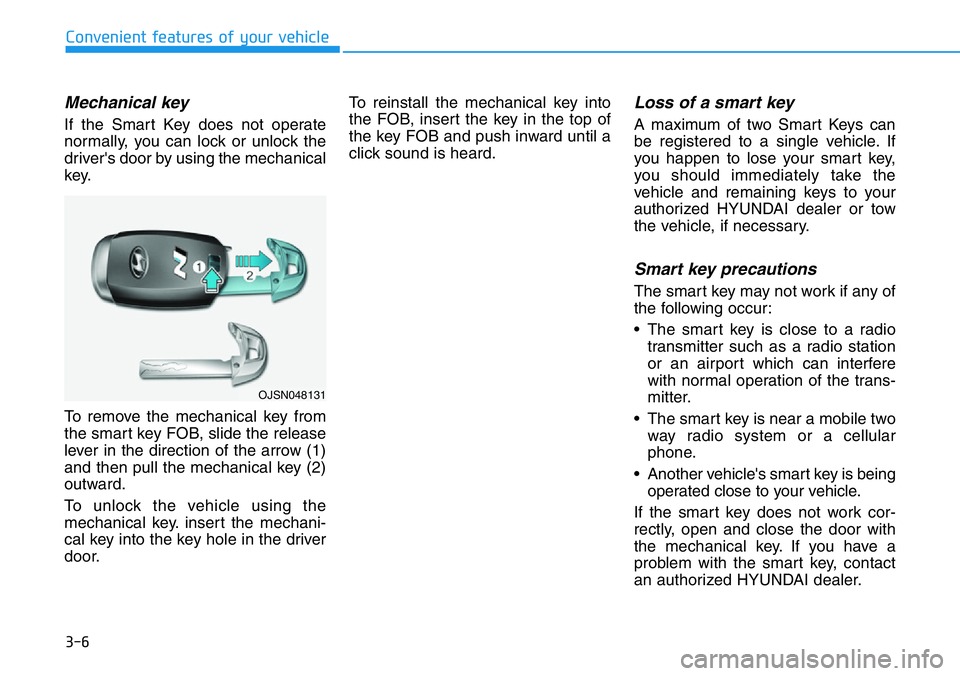
To remove the mechanical key from
the smart key FOB, slide the release
lever in the direction of the arrow (1)
and then pull the mechanical key (2)
outward.
To unlock the vehicle using the
mechanical key. insert the mechani-
cal key into the key hole in the driver
door.To reinstall the mechanical key into
the FOB, insert the key in the top of
the key FOB and push inward until a
click sound is heard.
Loss of a smart key
A maximum of two Smart Keys can
be registered to a single vehicle. If
you happen to lose your smart key,
you should immediately take the
vehicle and remaining keys to your
authorized HYUNDAI dealer or tow
the vehicle, if necessary.
Smart key precautions
The smart key may not work if any of
the following occur:
• The smart key is close to a radio
transmitter such as a radio station
or an airport which can interfere
with normal operation of the trans-
mitter.
• The smart key is near a mobile two
way radio system or a cellular
phone.
• Another vehicle's smart key is being
operated close to your vehicle.
If the smart key does not work cor-
rectly, open and close the door with
the mechanical key. If you have a
problem with the smart key, contact
an authorized HYUNDAI dealer.
OJSN048131