Page 82 of 446
3-4
Unlocking your vehicle
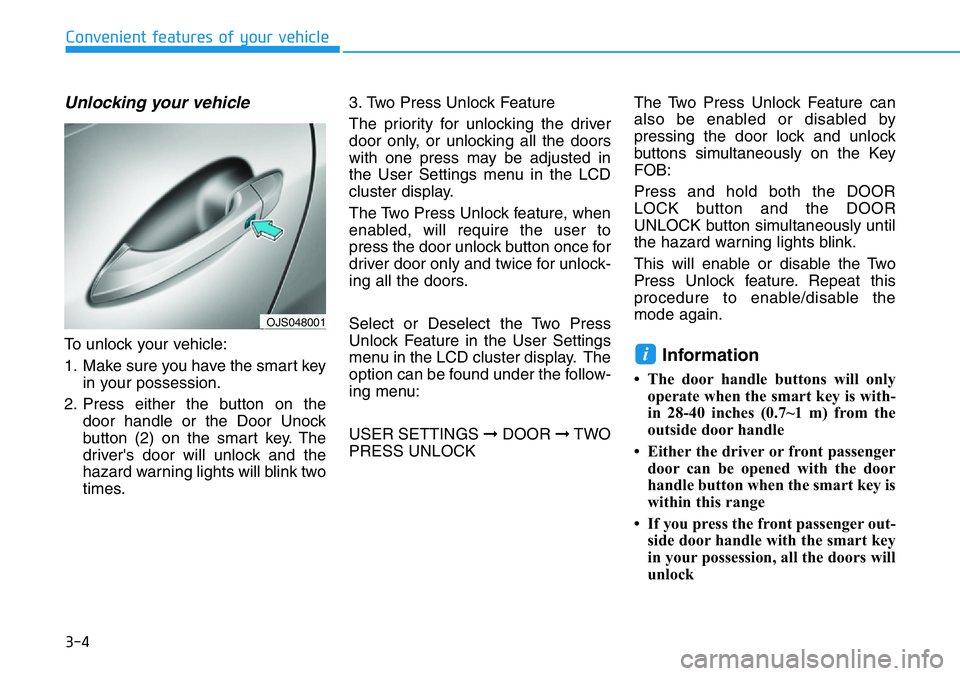
To unlock your vehicle:
1. Make sure you have the smart key
in your possession.
2. Press either the button on the
door handle or the Door Unock
button (2) on the smart key. The
driver's door will unlock and the
hazard warning lights will blink two
times.3. Two Press Unlock Feature
The priority for unlocking the driver
door only, or unlocking all the doors
with one press may be adjusted in
the User Settings menu in the LCD
cluster display.
The Two Press Unlock feature, when
enabled, will require the user to
press the door unlock button once for
driver door only and twice for unlock-
ing all the doors.
Select or Deselect the Two Press
Unlock Feature in the User Settings
menu in the LCD cluster display. The
option can be found under the follow-
ing menu:
USER SETTINGS ➞DOOR ➞TWO
PRESS UNLOCKThe Two Press Unlock Feature can
also be enabled or disabled by
pressing the door lock and unlock
buttons simultaneously on the Key
FOB:
Press and hold both the DOOR
LOCK button and the DOOR
UNLOCK button simultaneously until
the hazard warning lights blink.
This will enable or disable the Two
Press Unlock feature. Repeat this
procedure to enable/disable the
mode again.Information
• The door handle buttons will only
operate when the smart key is with-
in 28-40 inches (0.7~1 m) from the
outside door handle
• Either the driver or front passenger
door can be opened with the door
handle button when the smart key is
within this range
• If you press the front passenger out-
side door handle with the smart key
in your possession, all the doors will
unlock
i
Convenient features of your vehicle
OJS048001
Page 113 of 446
3-35
Convenient features of your vehicle
3
Avoid driving with an extremely
low fuel level. Running out of fuel
could cause the engine to misfire
damaging the catalytic converter.
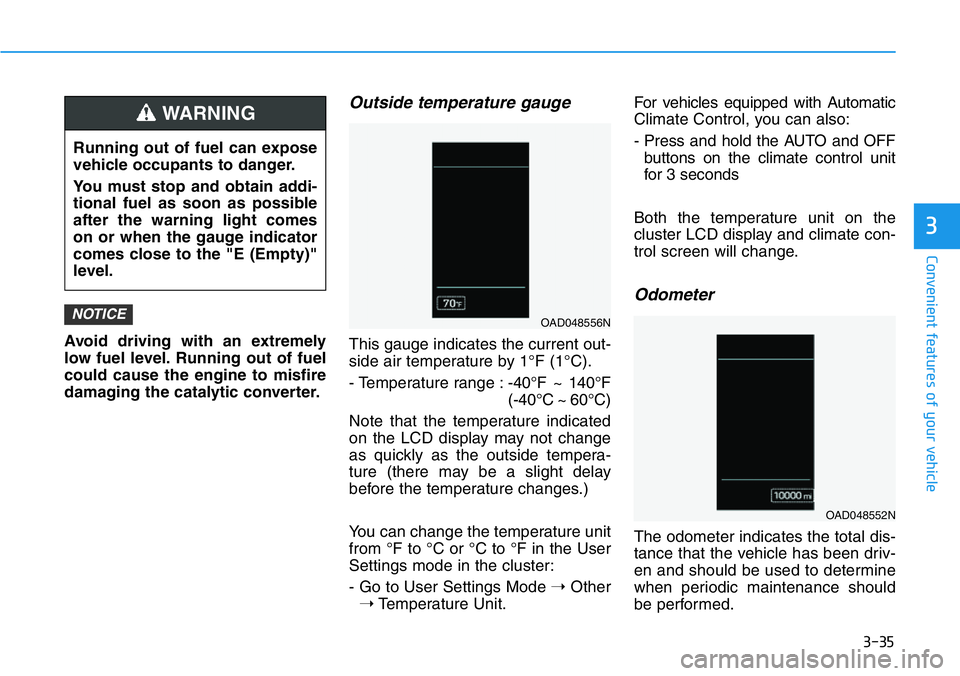
Outside temperature gauge
This gauge indicates the current out-
side air temperature by 1°F (1°C).
- Temperature range :-40°F ~ 140°F
(-40°C ~ 60°C)
Note that the temperature indicated
on the LCD display may not change
as quickly as the outside tempera-
ture (there may be a slight delay
before the temperature changes.)
You can change the temperature unit
from °F to °C or °C to °F in the User
Settings mode in the cluster:
- Go to User Settings Mode ➝Other
➝Temperature Unit.For vehicles equipped with Automatic
Climate Control, you can also:
- Press and hold the AUTO and OFF
buttons on the climate control unit
for 3 seconds
Both the temperature unit on the
cluster LCD display and climate con-
trol screen will change.
Odometer
The odometer indicates the total dis-
tance that the vehicle has been driv-
en and should be used to determine
when periodic maintenance should
be performed.
NOTICEOAD048556N
OAD048552N
Running out of fuel can expose
vehicle occupants to danger.
You must stop and obtain addi-
tional fuel as soon as possible
after the warning light comes
on or when the gauge indicator
comes close to the "E (Empty)"
level.
WARNING
Page 132 of 446
3-54
Convenient features of your vehicle
LCD DISPLAY
LCD Display Control
The LCD display modes can be
changed by using the control buttons.
(1) : MODE button for changing
modes
(2) , : MOVE switch for chang-
ing items
(3) OK : SELECT/RESET button for
setting or resetting the select-
ed item
OPDEN047404
Page 161 of 446
3-83
Convenient features of your vehicle
3
MANUAL CLIMATE CONTROL SYSTEM (IF EQUIPPED)
OJS048300N
1. Fan speed control knob
2. Temperature control knob
3. Mode selection buttons
4. Front windshield defroster button
5. Rear window defroster button
6. A/C (Air conditioning) button
7. Air intake control (recirculation) button
Page 170 of 446
3-92
Convenient features of your vehicle
Automatic Temperature
Control Mode
The Automatic Climate Control
System is controlled by setting the
desired temperature.
1. Press the AUTO button (3).
The modes, fan speeds, air intake
and air-conditioning will be con-
trolled automatically by the tem-
perature setting you select.
2. Turn the temperature control knob
(1) to the desired temperature. If
the temperature is set to the low-
est setting (Lo), the air condition-
ing system will operate continu-
ously. After the interior has cooled
sufficiently, adjust the knob to a
higher temperature set point
whenever possible.
To turn the automatic operation off,
select any button of the following:
- Mode selection button
- Front windshield defroster button
(Press the button one more time
to deselect the front windshield
defroster function. The 'AUTO'
sign will illuminate on the infor-
mation display once again.)
- Fan speed control buttonThe selected function will be con-
trolled manually while other functions
operate automatically.
For your convenience and to improve
the efficiency of the climate control,
use the AUTO button and set the
temperature to 72°F (22°C).
To change the temperature unit from
°F to °C or °C to °F:
- Press and hold the AUTO and OFF
buttons on the climate control unit
for 3 seconds.
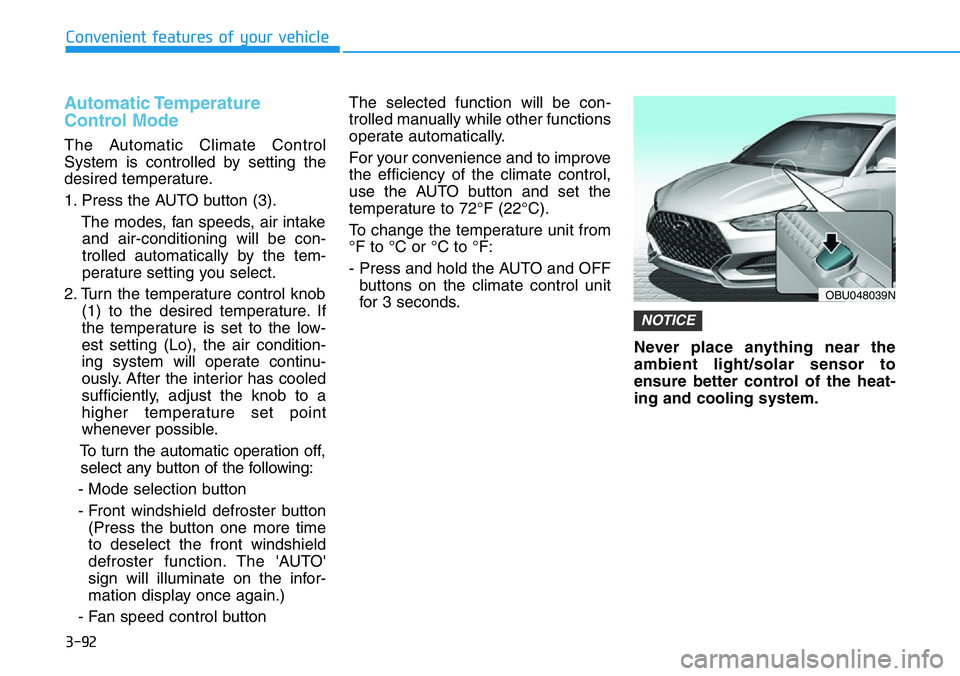
Never place anything near the
ambient light/solar sensor to
ensure better control of the heat-
ing and cooling system.
NOTICE
OBU048039N
Page 171 of 446
3-93
Convenient features of your vehicle
3
Manual Temperature Control
Mode
The heating and cooling system can
be controlled manually by pushing
buttons other than the AUTO button.
In this case, the system works
sequentially according to the order of
buttons selected.
When pressing any button except the
AUTO button while using automatic
operation, the functions not selected
will be controlled automatically.1. Start the engine.
2. Set the mode to the desired posi-
tion.
To improve the effectiveness of
heating and cooling, select the
mode according to the following:
- Heating:
- Cooling:
3. Set the temperature control to the
desired position.
4. Set the air intake control to Fresh
mode or Recirculation mode posi-
tion.
5. Set the fan speed control to the
desired speed.
6. If air conditioning is desired, turn
the air conditioning system on.
7. Press the AUTO button to convert
to full automatic control of the sys-
tem.When starting the vehicle in cold
weather a more efficient way to heat
the passenger compartment is to do
the following.
• Turn off or lower the blower, right
after starting the engine.
• Engine temperature is still low and
the air flow from the heater is still
cold.
• After a few minutes of engine warm
up, turn on or set the fan to a high-
er level and adjust the temperature
setting to hot.
Page 193 of 446
4-3
Infotainment System
4
Steering Wheel Audio Control
Do not operate multiple audio
remote control buttons simultane-
ously.
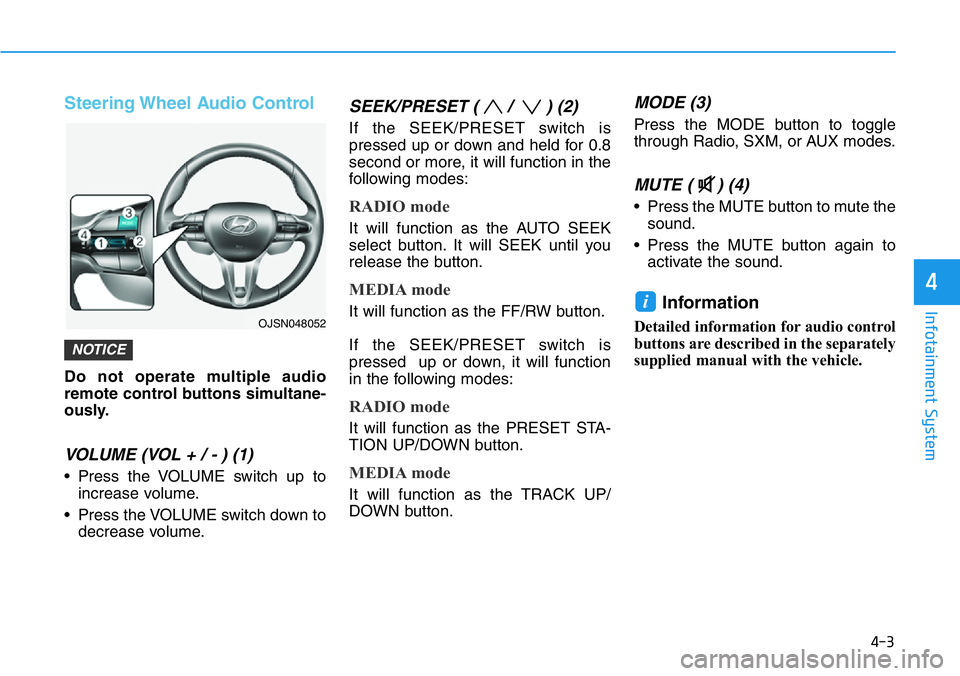
VOLUME (VOL + / - ) (1)
• Press the VOLUME switch up to
increase volume.
• Press the VOLUME switch down to
decrease volume.
SEEK/PRESET ( / ) (2)
If the SEEK/PRESET switch is
pressed up or down and held for 0.8
second or more, it will function in the
following modes:
RADIO mode
It will function as the AUTO SEEK
select button. It will SEEK until you
release the button.
MEDIA mode
It will function as the FF/RW button.
If the SEEK/PRESET switch is
pressed up or down, it will function
in the following modes:
RADIO mode
It will function as the PRESET STA-
TION UP/DOWN button.
MEDIA mode
It will function as the TRACK UP/
DOWN button.
MODE (3)
Press the MODE button to toggle
through Radio, SXM, or AUX modes.
MUTE ( ) (4)
• Press the MUTE button to mute the
sound.
• Press the MUTE button again to
activate the sound.
Information
Detailed information for audio control
buttons are described in the separately
supplied manual with the vehicle.
i
NOTICE
OJSN048052
Page 235 of 446
5-41
Driving your vehicle
5
ESC OFF usage
When Driving
The ESC OFF mode should only be
used briefly to help free the vehicle if
stuck in snow or mud, by temporarily
stopping operation of the ESC, to
maintain wheel torque.
To turn ESC off while driving, press
the ESC OFF button while driving on
a flat road surface.To prevent damage to the trans-
mission:
• Do not allow wheel(s) of one
axle to spin excessively while
the ESC, ABS, and parking brake
warning lights are displayed.
The repairs would not be cov-
ered by the vehicle warranty.
Reduce engine power and do
not spin the wheel(s) excessive-
ly while these lights are dis-
played.
• When operating the vehicle on a
dynamometer, make sure the
ESC is turned off (ESC OFF light
illuminated).
Information
Turning the ESC off does not affect
ABS or standard brake system opera-
tion.
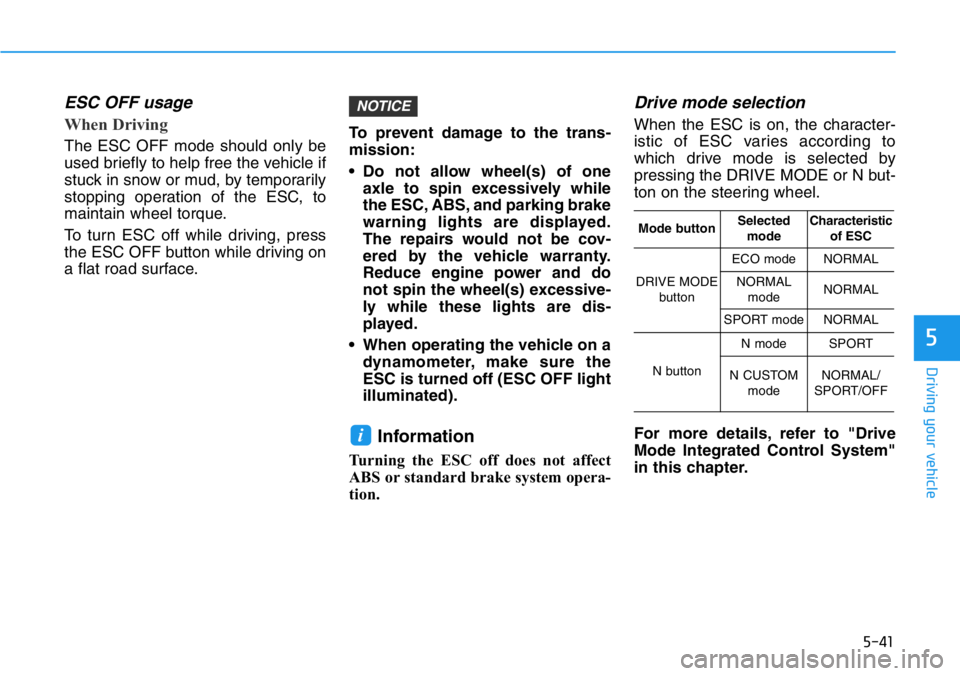
Drive mode selection
When the ESC is on, the character-
istic of ESC varies according to
which drive mode is selected by
pressing the DRIVE MODE or N but-
ton on the steering wheel.
For more details, refer to "Drive
Mode Integrated Control System"
in this chapter.
i
NOTICE
Mode buttonSelected
modeCharacteristic
of ESC
DRIVE MODE
button
ECO modeNORMAL
NORMAL
modeNORMAL
SPORT modeNORMAL
N button
N modeSPORT
N CUSTOM
modeNORMAL/
SPORT/OFF