Page 92 of 446

3-14
Convenient features of your vehicle
To allow a rear door to be opened
from inside the vehicle, unlock the
child safety lock.This system helps to protect your
vehicle and valuables. The horn will
sound and the hazard warning lights
will blink continuously if any of the
following occur:
- A door is opened without using the
smart key.
- The liftgate is opened without
using the smart key.
- The engine hood is opened.
The alarm continues for 30 seconds,
then the system resets. To turn off
the alarm, unlock the doors with the
smart key.
The Theft Alarm System automati-
cally sets 30 seconds after you lock
the doors and the liftgate. For the
system to activate, you must lock the
doors and the liftgate from outside
the vehicle with the smart key or by
pressing the button on the outside of
the door handle with the smart key in
your possession.
The hazard warning lights will blink
and the chime will sound once to
indicate the system is armed.Once the security system is set,
opening any door, the liftgate, or the
hood without using the smart key will
cause the alarm to activate.
The Theft Alarm System will not set if
the hood, the liftgate, or any door is
not fully closed. If the system will not
set, check the hood, the liftgate, or
the doors are fully closed.
Do not attempt to alter this system or
add other devices to it.
Information
• Do not lock the doors until all pas-
sengers have left the vehicle. If the
remaining passenger leaves the
vehicle when the system is armed,
the alarm will be activated.
• If the vehicle is not disarmed with the
smart key, open the doors by using
the mechanical key and start the
engine by directly pressing the igni-
tion switch with the smart key.
• If the system is disarmed by unlock-
ing the vehicle, but neither a door or
the liftgate is opened within 30 sec-
onds, the doors will relock and the
system will rearm automatically.
i
THEFT-ALARM SYSTEM
If children accidently open the
rear doors while the vehicle is
in motion, they could fall out of
the vehicle. The rear door safety
locks should always be used
whenever children are in the
vehicle.
WARNING
Page 101 of 446

3-23
Convenient features of your vehicle
3
Auto down window (if equipped)
Pressing the power window switch
down momentarily to the second
detent position (5) completely lowers
the window even when the switch is
released. To stop the window at the
desired position while the window is
in operation, pull up or press down
and release the switch.
Auto up/down window
(if equipped)
Pressing or pulling up the power win-
dow switch momentarily to the sec-
ond detent position (5) completely
lowers or lifts the window even when
the switch is released. To stop the
window at the desired position while
the window is in operation, pull up or
press down and release the switch.
To reset the power windows
If the power windows do not operate
normally, the automatic power win-
dow system must be reset as follows:
1. Place the ignition switch to the ON
position.
2. Close the window and continue
pulling up on the power window
switch for at least one second.
If the power windows do not operate
properly after resetting, have the
system checked by an authorized
HYUNDAI dealer.
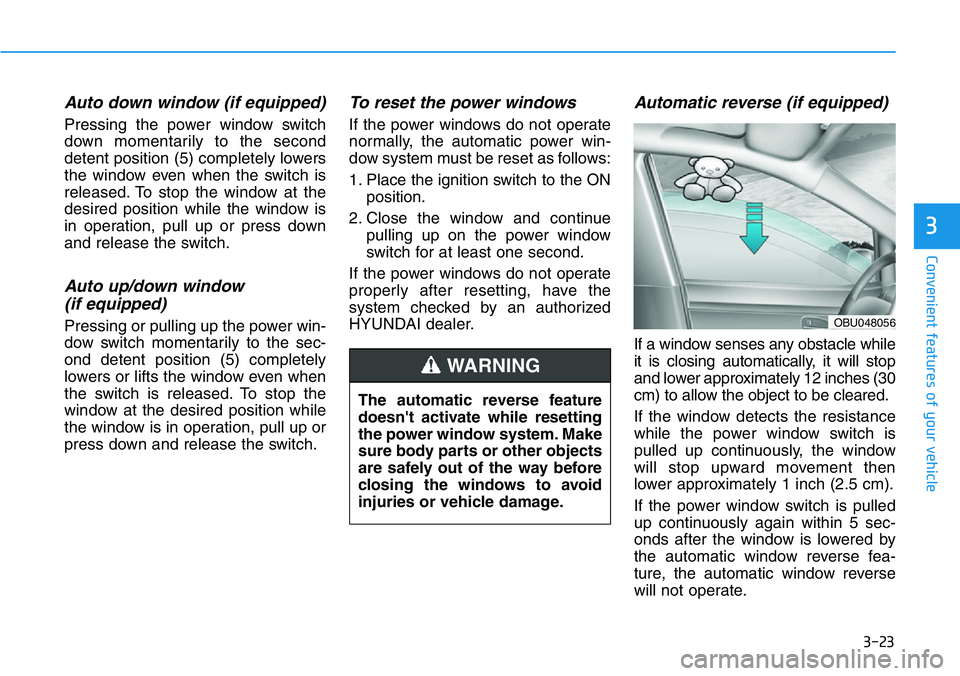
Automatic reverse (if equipped)
If a window senses any obstacle while
it is closing automatically, it will stop
and lower approximately 12 inches (30
cm) to allow the object to be cleared.
If the window detects the resistance
while the power window switch is
pulled up continuously, the window
will stop upward movement then
lower approximately 1 inch (2.5 cm).
If the power window switch is pulled
up continuously again within 5 sec-
onds after the window is lowered by
the automatic window reverse fea-
ture, the automatic window reverse
will not operate. The automatic reverse feature
doesn't activate while resetting
the power window system. Make
sure body parts or other objects
are safely out of the way before
closing the windows to avoid
injuries or vehicle damage.
WARNING
OBU048056
Page 132 of 446
3-54
Convenient features of your vehicle
LCD DISPLAY
LCD Display Control
The LCD display modes can be
changed by using the control buttons.
(1) : MODE button for changing
modes
(2) , : MOVE switch for chang-
ing items
(3) OK : SELECT/RESET button for
setting or resetting the select-
ed item
OPDEN047404
Page 134 of 446

3-56
Convenient features of your vehicle
Sport mode
Gauges
This mode displays information relat-
ed to your engine such as engine oil
temperature (1), current torque (2)
and turbo boost pressure (3).
Lap timer
(1) Total time
(2) Best lap
(3) Current lap
To start (A):
Press the OK button shortly on the
steering wheel. The lap timer will
start counting the current lap (3).
To stop (B):
Press and hold the OK button for
more than 1 second on the steering
wheel while the lap timer is counting
the current lap (3).
To reset (C):
Press and hold the OK button for
more than 1 second on the steering
wheel when the lap timer has
stopped counting the current lap (3).
If the OK button is pressed shortly,
the lap timer will continue counting
from the time it has been stopped.
To save laps:
Press the OK button shortly on the
steering wheel while the lap timer is
counting the current lap (3).
The timer can save L1~ L3 (4).
The best lap (2) will be displayed
automatically.
OIK047167N
OIK047170LOIK047168L/OIK047169L
Page 135 of 446
3-57
Convenient features of your vehicle
3
The saved laps can be reset when
the current lap is reset.
To start a new lap press the OK but-
ton when the current lap is reset.
G-Force
This mode displays the force deliv-
ered to the vehicle laterally while the
vehicle is in motion.
Trip computer mode
The trip computer mode displays
information related to vehicle driving
parameters including fuel economy,
tripmeter information and vehicle
speed.
For more details, refer to "Trip
Computer" in this chapter.
Assist mode
Tire Pressure
This mode displays information relat-
ed to Tire Pressure.
For more details, refer to "Tire
Pressure Monitoring System
(TPMS)" in chapter 6.
OIK047131
OIK047124NOJSN048119L
Page 136 of 446

3-58
Master warning mode
This warning light informs the driver
the following situations.
- Lamp malfunction
- Tire Pressure Monitoring System
(TPMS) malfunction
The Master Warning Light illumi-
nates if one or more of the above
warning situations occur. At this time,
the LCD Modes Icon will change
from ( ) to ( ).
If the warning situation is solved, the
master warning light will be turned
off and the LCD Modes Icon will be
changed back to its previous icon
().
User settings mode
In this mode, you can change the
settings of the instrument cluster,
doors, lamps, etc.
1. Driver Assistance
2. Door
3. Lights
4. Sound
5. Convenience
6. Service interval
7. Other
8. Language
9. Reset
The information provided may dif-
fer depending on which functions
are applicable to your vehicle.Information
Settings only available with parking
brake engaged and gear in neutral.
This warning message illuminates if you
try to select an item from the User
Settings mode while driving.
For your safety, change the User
Settings after engaging the parking
brake and shifting the gear to neutral.
i
Convenient features of your vehicle
Page 140 of 446
3-62
Convenient features of your vehicle
ItemsExplanation
Fuel Economy Reset
- Off: The average fuel economy will not reset automatically whenever refueling.
- After ignition: When the engine has been OFF for 4 hours or longer the average fuel economy
will reset automatically.
- After refueling: The average fuel economy will reset automatically after adding 1.6 gallons (6
liters) of fuel or more and after driving speed exceeds 1 mph (1 km/h).
For more details, refer to "Trip Computer" in this chapter.
Speed UnitTo select the speed unit.
- km / mile
Fuel Economy UnitTo select the fuel economy unit.
- US gallon / UK gallon
Temperature UnitTo select the temperature unit.
- °C / °F
Torque Unit To select the torque unit.
- Nm / lb·ft
Turbo Boost Pressure UnitTo select the turbo boost pressure unit.
- psi / kPa / bar
Tire Pressure Unit To select the tire pressure unit.
- psi / kPa / bar
6. Other
Page 141 of 446
3-63
Convenient features of your vehicle
3
ItemsExplanation
LanguageTo select language.
7. Language
ItemsExplanation
ResetYou can reset the menus in the User Settings mode. All menus in the User Settings mode are
reset to factory settings, except language and service interval.
8. Reset