Page 1 of 446
OWNER'S MANUAL
Operation
Maintenance
Specifications
All information in this Owner's Manual is current at the time of pub-
lication. However, HYUNDAI reserves the right to make changes at
any time so that our policy of continual product improvement may be
carried out.
This manual applies to all HYUNDAI models and includes descrip-
tions and explanations of optional as well as standard equipment.
As a result, you may find material in this manual that does not apply
to your specific vehicle.
Page 24 of 446

2-7
Safety system of your vehicle
2
Seat belts must be snug against your
hips and chest to work properly.
When the seatback is reclined, the
shoulder belt cannot do its job
because it will not be snug against
your chest. Instead, it will be in front
of you. During an accident, you could
be thrown into the seat belt, causing
neck or other injuries.
The more the seatback is reclined,
the greater chance the passenger's
hips will slide under the lap belt or
the passenger's neck will strike the
shoulder belt.
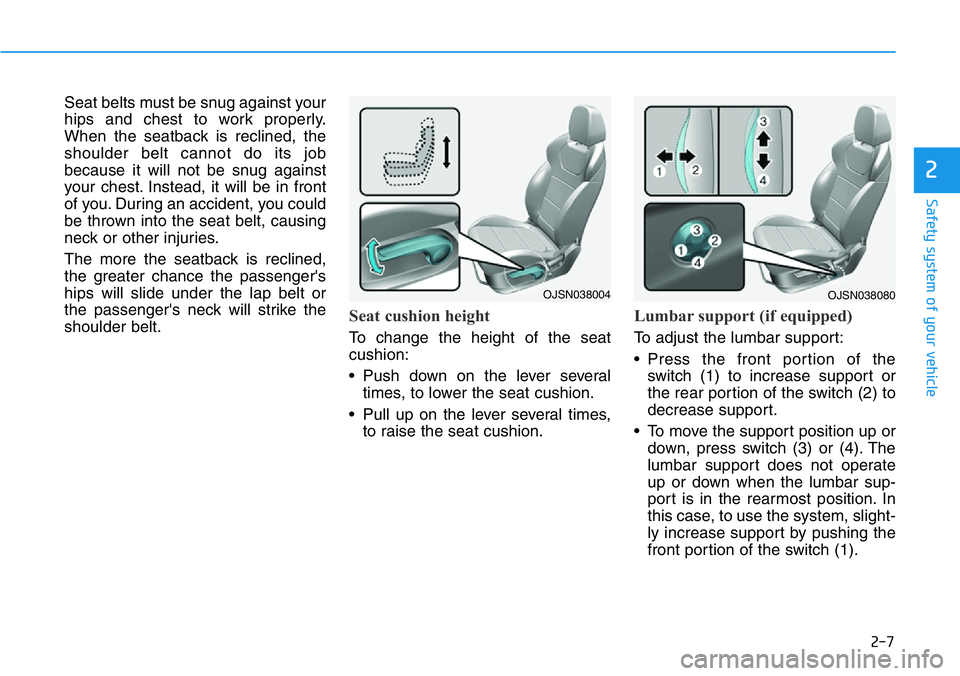
Seat cushion height
To change the height of the seat
cushion:
• Push down on the lever several
times, to lower the seat cushion.
• Pull up on the lever several times,
to raise the seat cushion.
Lumbar support (if equipped)
To adjust the lumbar support:
• Press the front portion of the
switch (1) to increase support or
the rear portion of the switch (2) to
decrease support.
• To move the support position up or
down, press switch (3) or (4). The
lumbar support does not operate
up or down when the lumbar sup-
port is in the rearmost position. In
this case, to use the system, slight-
ly increase support by pushing the
front portion of the switch (1).
OJSN038004 OJSN038080
Page 88 of 446

3-10
Operating Door Locks from
Outside the Vehicle
Mechanical key
If you lock the driver's door with a
mechanical key, all vehicle doors will
lock.
If you unlock the driver's door with a
mechanical key, you can open and
close the driver's door only.
Once the doors are unlocked, they
may be opened by pulling the door
handle. When closing the door, push
the door by hand. Make sure that
doors are closed securely.
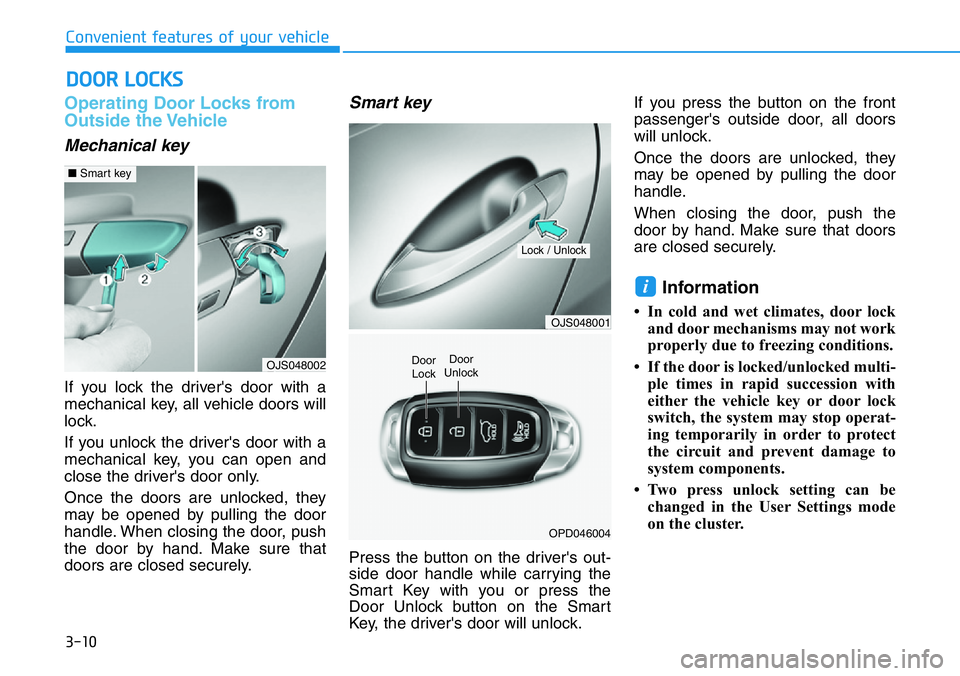
Smart key
Press the button on the driver's out-
side door handle while carrying the
Smart Key with you or press the
Door Unlock button on the Smart
Key, the driver's door will unlock.If you press the button on the front
passenger's outside door, all doors
will unlock.
Once the doors are unlocked, they
may be opened by pulling the door
handle.
When closing the door, push the
door by hand. Make sure that doors
are closed securely.
Information
• In cold and wet climates, door lock
and door mechanisms may not work
properly due to freezing conditions.
• If the door is locked/unlocked multi-
ple times in rapid succession with
either the vehicle key or door lock
switch, the system may stop operat-
ing temporarily in order to protect
the circuit and prevent damage to
system components.
• Two press unlock setting can be
changed in the User Settings mode
on the cluster.
i
DOOR LOCKS
Convenient features of your vehicle
OJS048002
■Smart key
OJS048001
OPD046004
Door
Unlock
Lock / Unlock
Door
Lock
Page 93 of 446

3-15
Convenient features of your vehicle
3
STEERING WHEEL
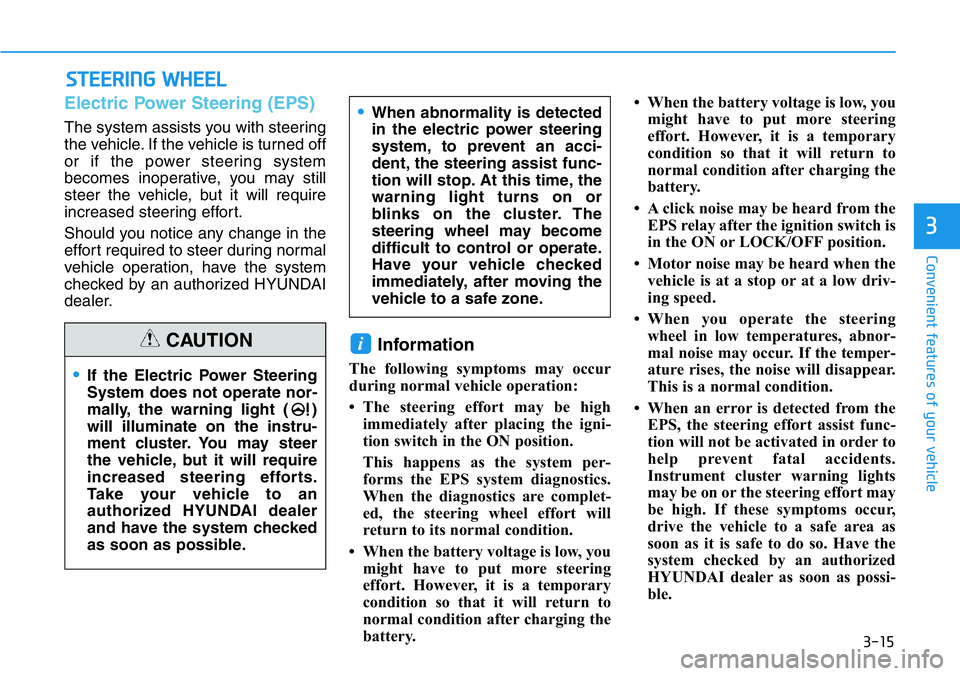
Electric Power Steering (EPS)
The system assists you with steering
the vehicle. If the vehicle is turned off
or if the power steering system
becomes inoperative, you may still
steer the vehicle, but it will require
increased steering effort.
Should you notice any change in the
effort required to steer during normal
vehicle operation, have the system
checked by an authorized HYUNDAI
dealer.
Information
The following symptoms may occur
during normal vehicle operation:
• The steering effort may be high
immediately after placing the igni-
tion switch in the ON position.
This happens as the system per-
forms the EPS system diagnostics.
When the diagnostics are complet-
ed, the steering wheel effort will
return to its normal condition.
• When the battery voltage is low, you
might have to put more steering
effort. However, it is a temporary
condition so that it will return to
normal condition after charging the
battery.• When the battery voltage is low, you
might have to put more steering
effort. However, it is a temporary
condition so that it will return to
normal condition after charging the
battery.
• A click noise may be heard from the
EPS relay after the ignition switch is
in the ON or LOCK/OFF position.
• Motor noise may be heard when the
vehicle is at a stop or at a low driv-
ing speed.
• When you operate the steering
wheel in low temperatures, abnor-
mal noise may occur. If the temper-
ature rises, the noise will disappear.
This is a normal condition.
• When an error is detected from the
EPS, the steering effort assist func-
tion will not be activated in order to
help prevent fatal accidents.
Instrument cluster warning lights
may be on or the steering effort may
be high. If these symptoms occur,
drive the vehicle to a safe area as
soon as it is safe to do so. Have the
system checked by an authorized
HYUNDAI dealer as soon as possi-
ble.
i
•If the Electric Power Steering
System does not operate nor-
mally, the warning light ( )
will illuminate on the instru-
ment cluster. You may steer
the vehicle, but it will require
increased steering efforts.
Take your vehicle to an
authorized HYUNDAI dealer
and have the system checked
as soon as possible.
•When abnormality is detected
in the electric power steering
system, to prevent an acci-
dent, the steering assist func-
tion will stop. At this time, the
warning light turns on or
blinks on the cluster. The
steering wheel may become
difficult to control or operate.
Have your vehicle checked
immediately, after moving the
vehicle to a safe zone.
CAUTION
Page 136 of 446

3-58
Master warning mode
This warning light informs the driver
the following situations.
- Lamp malfunction
- Tire Pressure Monitoring System
(TPMS) malfunction
The Master Warning Light illumi-
nates if one or more of the above
warning situations occur. At this time,
the LCD Modes Icon will change
from ( ) to ( ).
If the warning situation is solved, the
master warning light will be turned
off and the LCD Modes Icon will be
changed back to its previous icon
().
User settings mode
In this mode, you can change the
settings of the instrument cluster,
doors, lamps, etc.
1. Driver Assistance
2. Door
3. Lights
4. Sound
5. Convenience
6. Service interval
7. Other
8. Language
9. Reset
The information provided may dif-
fer depending on which functions
are applicable to your vehicle.Information
Settings only available with parking
brake engaged and gear in neutral.
This warning message illuminates if you
try to select an item from the User
Settings mode while driving.
For your safety, change the User
Settings after engaging the parking
brake and shifting the gear to neutral.
i
Convenient features of your vehicle
Page 142 of 446
3-64
The trip computer is a microcomput-
er-controlled driver information sys-
tem that displays information related
to driving.
Information
Some driving information stored in the
trip computer (for example Average
Vehicle Speed) resets if the battery is
disconnected.
Trip modes
To change the trip mode, toggle the
" , " switch on the steering
wheel.
i
TRIP COMPUTER
Convenient features of your vehicle
OPDEN047404
• Tripmeter
• Fuel Economy
• Timer
Drive Info
• Tripmeter
• Fuel Economy
• Timer
Accumulated Info
• Average Fuel Economy
• Instant Fuel Economy
Fuel Economy
Digital Speedometer
↕
↕
↕
Page 148 of 446
3-70
Convenient features of your vehicle
To flash the high beam headlamp,
pull the lever towards you, then
release the lever. The high beams
will remain ON as long as you hold
the lever towards you.
Turn signals and lane change
signals
To signal a turn, push down on the
lever for a left turn or up for a right
turn in position (A).
If an indicator stays on and does not
flash or if it flashes abnormally, one of
the turn signal bulbs may be burned
out and will require replacement.
Onetouch turn signal function
To activate the One Touch Turn
Signal function, push the turn signal
lever up or down to position (B) and
then release it.
The lane change signals will blink 3,
5 or 7 times.
You can activate or deactivate the
One Touch Turn Signal function or
choose the number of blinks (3, 5, or
7) from the User Settings mode in
the LCD display.
For more details, refer to the "LCD
Display" section in this chapter.
OOS047408N
OOS047410N
Page 156 of 446
3-78
Convenient features of your vehicle
•At times, High Beam Assist
may not work properly. It is
the responsibility of the driver
for safe driving practices and
always check the road condi-
tions for your safety.
•When High Beam Assist does
not operate normally, change
the headlamp position manu-
ally between high beam and
low beam.
WARNING