Page 235 of 446
5-41
Driving your vehicle
5
ESC OFF usage
When Driving
The ESC OFF mode should only be
used briefly to help free the vehicle if
stuck in snow or mud, by temporarily
stopping operation of the ESC, to
maintain wheel torque.
To turn ESC off while driving, press
the ESC OFF button while driving on
a flat road surface.To prevent damage to the trans-
mission:
• Do not allow wheel(s) of one
axle to spin excessively while
the ESC, ABS, and parking brake
warning lights are displayed.
The repairs would not be cov-
ered by the vehicle warranty.
Reduce engine power and do
not spin the wheel(s) excessive-
ly while these lights are dis-
played.
• When operating the vehicle on a
dynamometer, make sure the
ESC is turned off (ESC OFF light
illuminated).
Information
Turning the ESC off does not affect
ABS or standard brake system opera-
tion.
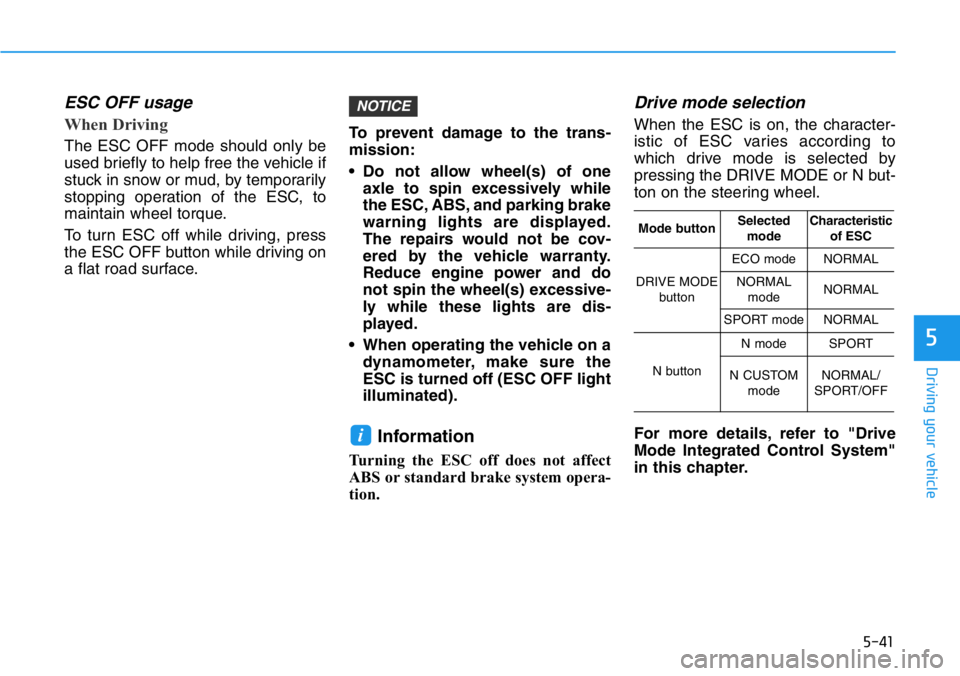
Drive mode selection
When the ESC is on, the character-
istic of ESC varies according to
which drive mode is selected by
pressing the DRIVE MODE or N but-
ton on the steering wheel.
For more details, refer to "Drive
Mode Integrated Control System"
in this chapter.
i
NOTICE
Mode buttonSelected
modeCharacteristic
of ESC
DRIVE MODE
button
ECO modeNORMAL
NORMAL
modeNORMAL
SPORT modeNORMAL
N button
N modeSPORT
N CUSTOM
modeNORMAL/
SPORT/OFF
Page 237 of 446
5-43
Driving your vehicle
5
VSM operation
VSM ON condition
The VSM operates when:
• The Electronic Stability Control
(ESC) is on.
• Vehicle speed is approximately
above 9 mph (15 km/h) on curve
roads.
• Vehicle speed is approximately
above 12 mph (20 km/h) when the
vehicle is braking on rough roads.
When operating
When you apply your brakes under
conditions which may activate the
ESC, you may hear sounds from the
brakes, or feel a corresponding sen-
sation in the brake pedal. This is nor-
mal and it means your VSM is active.
The VSM does not operate when:
• Driving on a banked road such
as gradient or incline.
• Driving rearward.
• ESC OFF indicator light is on.
• EPS (Electric Power Steering)
warning light ( ) is on or
blinks.Driving with wheels and tires with dif-
ferent sizes may cause the ESC sys-
tem to malfunction. Before replacing
tires, make sure all four tires and
wheels are the same size. Never
drive the vehicle with different sized
tires and wheels installed.
NOTICE
If ESC indicator light ( ) or
EPS warning light ( ) stays on
or blinks, your vehicle may have
a malfunction with the VSM sys-
tem. When the warning light illu-
minates, have your vehicle
checked by an authorized
HYUNDAI dealer as soon as
possible.
WARNING
Page 244 of 446
5-50
Driving your vehicle
When ECO mode is activated:
• The acceleration response may be
slightly reduced as the accelerator
pedal is depressed moderately.
• The air conditioner performance
may be limited.
• The engine noise may get louder.
The above situations are normal
conditions when ECO mode is acti-
vated, to improve fuel efficiency.Limitation of ECO mode opera-
tion:
If the following conditions occur while
ECO mode is operating, the system
operation is limited even though
there is no change in ECO indicator.
• When the coolant temperature is
low:
The system will be limited until
engine performance becomes nor-
mal.
• When driving up a hill:
The system will be limited to gain
power when driving uphill because
engine torque is restricted.
The system will be limited due to
the shift location.
• When the accelerator pedal is
deeply depressed for a few sec-
onds:
The system will be limited, judging
that the driver wants to speed up.
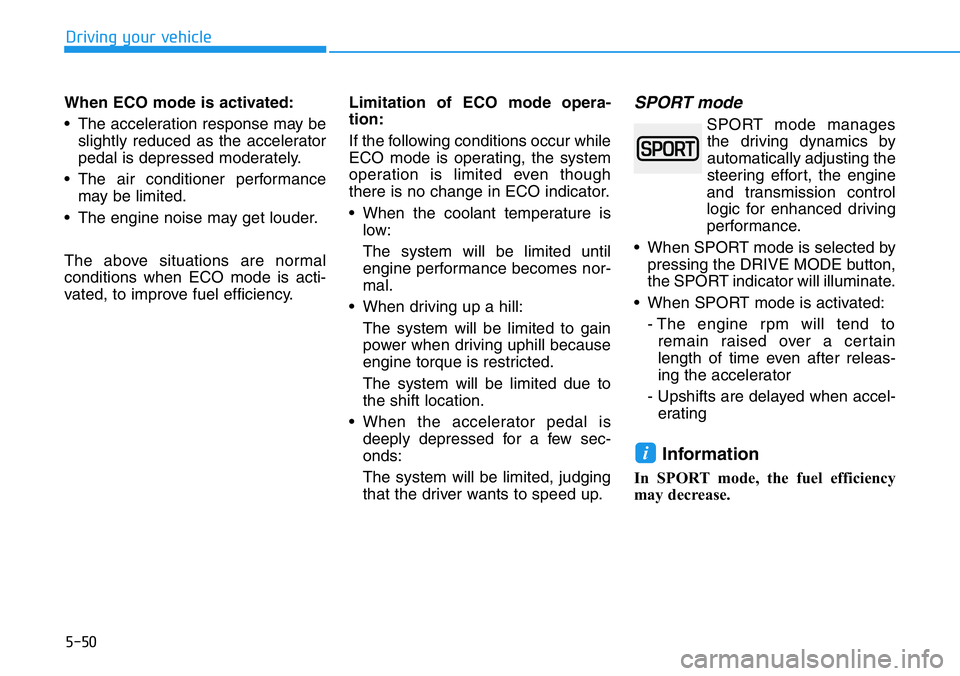
SPORT mode
SPORT mode manages
the driving dynamics by
automatically adjusting the
steering effort, the engine
and transmission control
logic for enhanced driving
performance.
• When SPORT mode is selected by
pressing the DRIVE MODE button,
the SPORT indicator will illuminate.
• When SPORT mode is activated:
- The engine rpm will tend to
remain raised over a certain
length of time even after releas-
ing the accelerator
- Upshifts are delayed when accel-
erating
Information
In SPORT mode, the fuel efficiency
may decrease.
i
Page 350 of 446
6-23
What to do in an emergency
6
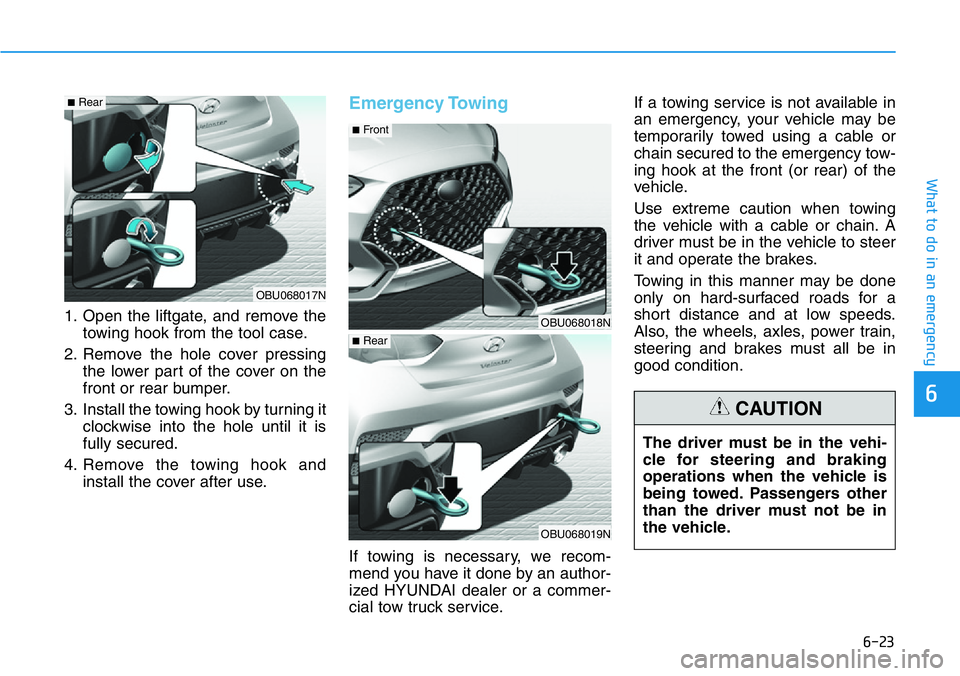
1. Open the liftgate, and remove the
towing hook from the tool case.
2. Remove the hole cover pressing
the lower part of the cover on the
front or rear bumper.
3. Install the towing hook by turning it
clockwise into the hole until it is
fully secured.
4. Remove the towing hook and
install the cover after use.
Emergency Towing
If towing is necessary, we recom-
mend you have it done by an author-
ized HYUNDAI dealer or a commer-
cial tow truck service.If a towing service is not available in
an emergency, your vehicle may be
temporarily towed using a cable or
chain secured to the emergency tow-
ing hook at the front (or rear) of the
vehicle.
Use extreme caution when towing
the vehicle with a cable or chain. A
driver must be in the vehicle to steer
it and operate the brakes.
Towing in this manner may be done
only on hard-surfaced roads for a
short distance and at low speeds.
Also, the wheels, axles, power train,
steering and brakes must all be in
good condition.
OBU068017N
■Rear
OBU068018N
OBU068019N
■Front
■Rear
The driver must be in the vehi-
cle for steering and braking
operations when the vehicle is
being towed. Passengers other
than the driver must not be in
the vehicle.
CAUTION
Page 351 of 446
6-24
What to do in an emergency
Always follow these emergency tow-
ing precautions:
• Place the ignition switch in the
ACC position so the steering wheel
is not locked. (if equipped)
• Place the shift lever in N (Neutral).
• Release the parking brake.
• Depress the brake pedal with more
force than normal since you will
have reduced braking perform-
ance.
• More steering effort will be
required because the power steer-
ing system will be disabled.
• Use a vehicle heavier than your
own to tow your vehicle.
• The drivers of both vehicles should
communicate with each other fre-
quently.
• Before emergency towing, check
that the hook is not broken or dam-
aged.
• Fasten the towing cable or chain
securely to the hook.
• Do not jerk the hook. Apply steady
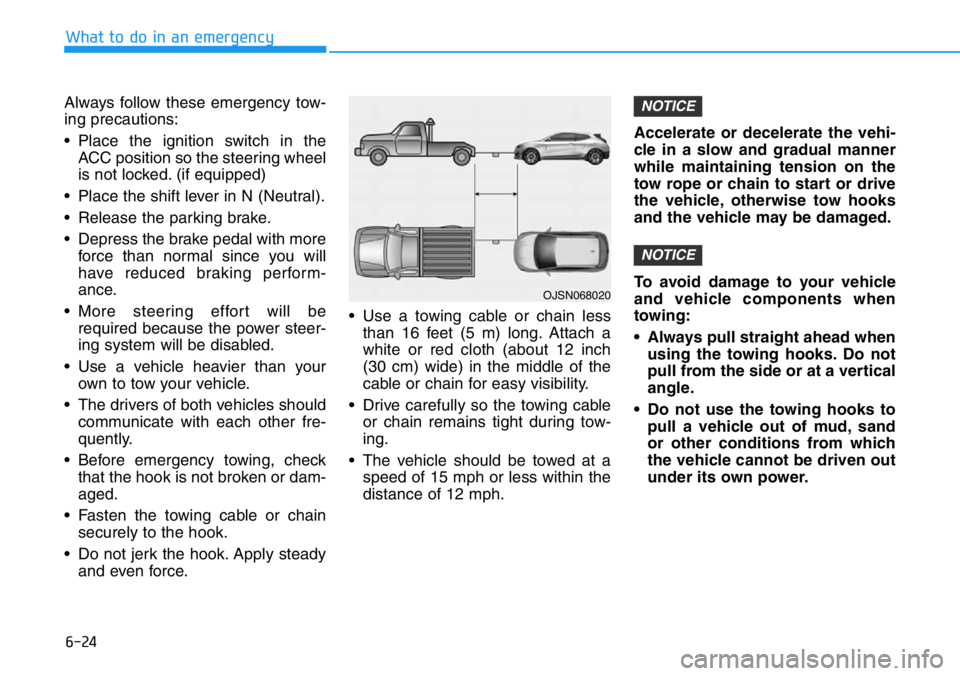
and even force.• Use a towing cable or chain less
than 16 feet (5 m) long. Attach a
white or red cloth (about 12 inch
(30 cm) wide) in the middle of the
cable or chain for easy visibility.
• Drive carefully so the towing cable
or chain remains tight during tow-
ing.
• The vehicle should be towed at a
speed of 15 mph or less within the
distance of 12 mph.Accelerate or decelerate the vehi-
cle in a slow and gradual manner
while maintaining tension on the
tow rope or chain to start or drive
the vehicle, otherwise tow hooks
and the vehicle may be damaged.
To avoid damage to your vehicle
and vehicle components when
towing:
• Always pull straight ahead when
using the towing hooks. Do not
pull from the side or at a vertical
angle.
• Do not use the towing hooks to
pull a vehicle out of mud, sand
or other conditions from which
the vehicle cannot be driven out
under its own power.
NOTICE
NOTICE
OJSN068020
Page 384 of 446
7-32
Maintenance
TIRES AND WHEELS
Information - Power Hop
When fully accelerating the vehicle
from standstill, a front tire oscillation
called “Power Hop“ of Veloster N may
occur due to the high torque of engine
and the characteristics of high per-
formance tire. This may be affected by
road condition and temperatures.
Additionally it is a normal phenome
non in powerful front-wheel drive
vehicles. Veloster N will act on this
phenomenon with the traction control
in all ESC modes with the main focus
on high performance character.i•Replace tires that are worn,
show uneven wear, or are
damaged. Worn tires can
cause loss of braking effec-
tiveness, steering control, or
traction.
•ALWAYS replace tires with the
same size as each tire that
was originally supplied with
this vehicle. Using tires and
wheels other than the recom-
mended sizes could cause
unusual handling characteris-
tics, poor vehicle control, or
negatively affect your vehi-
cle's Anti-Lock Brake System
(ABS) resulting in a serious
accident.
Tire failure may cause loss of
vehicle control resulting in an
accident. To reduce risk of
SERIOUS INJURY or DEATH,
take the following precautions:
•Inspect your tires monthly for
proper inflation as well as
wear and damage.
•The recommended cold tire
pressure for your vehicle can
be found in this manual and
on the tire label located on the
driver's side center pillar.
Always use a tire pressure
gauge to measure tire pres-
sure. Tires with too much or
too little pressure wear
unevenly causing poor han-
dling.
•Check the pressure of the
spare every time you check
the pressure of the other tires
on your vehicle.
WARNING
Page 404 of 446
Maintenance
Fuse NameFuse RatingProtected Component
MODULE57.5ACrash Pad Switch, Electro Chromic Mirror, Audio, A/C Control Module, Front Seat Warmer Module
MODULE37.5ABCM
TAIL GATE
OPEN10AT/Gate Relay
P/WINDOW
LH25ADriver Safety Power Window Module
MULTI MEDIA15AAudio, Keyboard
P/WINDOW
RH25APower Window RH Relay
P/SEAT (DRV)25ADriver Seat Manual Switch
MODULE47.5AECS Unit, LSD Unit, Steering Angle Sensor, Stop Lamp Switch, Active Exhaust Valve, BCM
PDM27.5ASmart Key Control Module
INTERIOR
LAMP7.5AOverhead Console Lamp, Center Room Lamp, Luggage Lamp, Vanity Lamp LH/RH
MEMORY10AInstrument Cluster, A/C Control Module
AMP30AAMP
Instrument panel fuse panel
7-52
Page 407 of 446
7-55
7
Maintenance
Fuse NameFuse RatingProtected Component
WIPER RR15ARear Wiper Relay, Rear Wiper Motor
WIPER FRT25AFront Wiper Motor, PCB Block (Front Wiper (Low) Relay)
HEATED
MIRROR10ADriver/Passenger Power Outside Mirror, A/C Control Module
POWER
OUTLET20AFront Power Outlet
HEATED
STEERING15ABCM
E-LSD20ALSD Unit
Instrument panel fuse panel