2022 HYUNDAI SONATA HYBRID instrument cluster
[x] Cancel search: instrument clusterPage 218 of 527
Convenient Features
5-70
HEAD UP DISPLAY (HUD) (IF EQUIPPED)
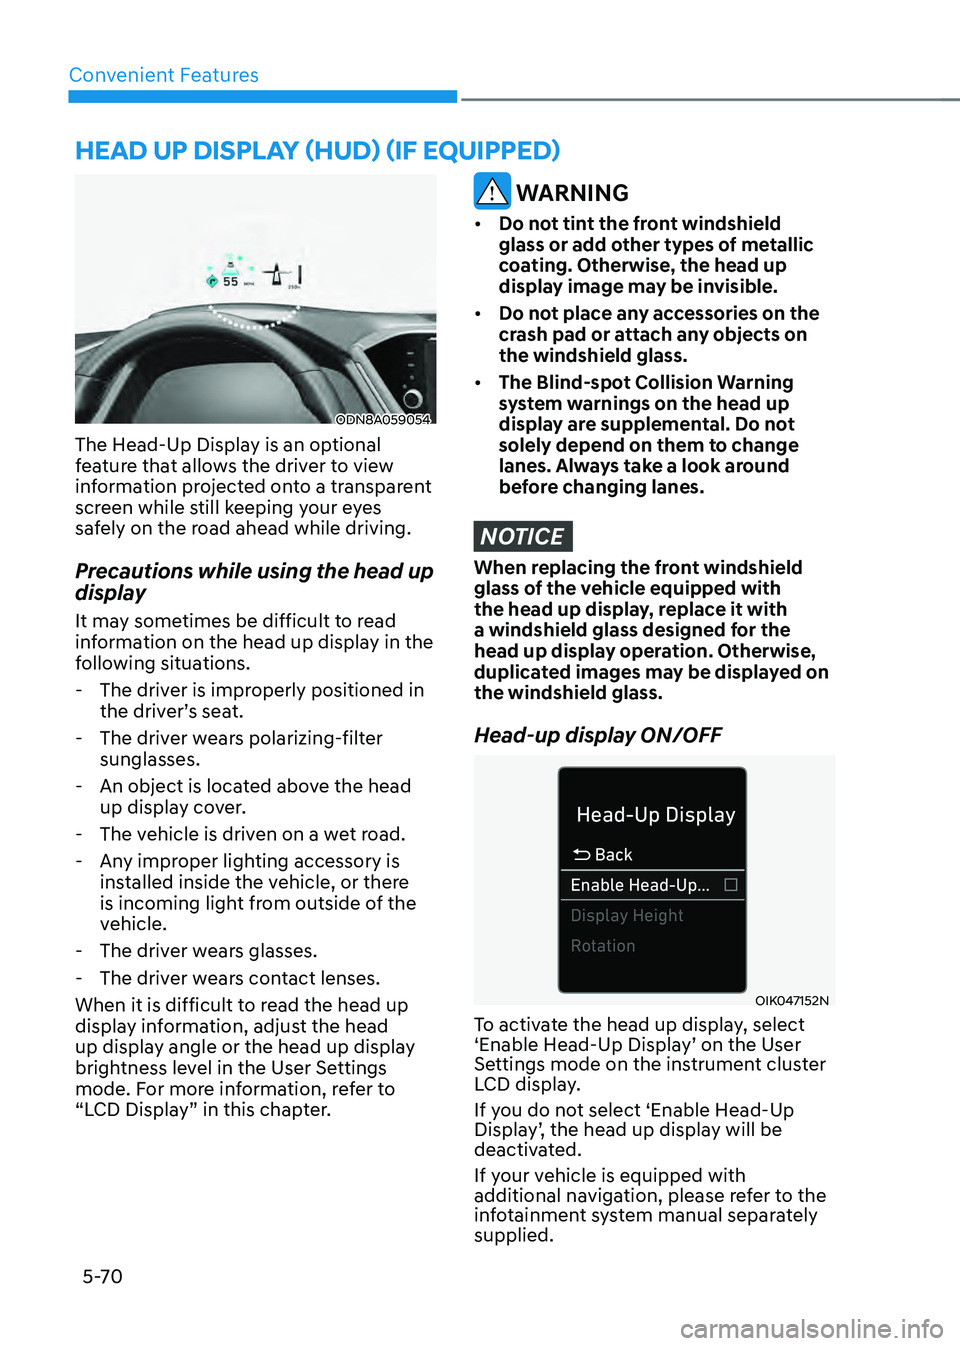
ODN8A059054
The Head-Up Display is an optional
feature that allows the driver to view
information projected onto a transparent
screen while still keeping your eyes
safely on the road ahead while driving.
Precautions while using the head up
display
It may sometimes be difficult to read
information on the head up display in the
following situations.
-The driver is improperly positioned in
the driver’s seat.
-The driver wears polarizing-filter
sunglasses.
-An object is located above the head
up display cover.
-The vehicle is driven on a wet road.
-Any improper lighting accessory is
installed inside the vehicle, or there
is incoming light from outside of the
vehicle.
-The driver wears glasses.
-The driver wears contact lenses.
When it is difficult to read the head up
display information, adjust the head
up display angle or the head up display
brightness level in the User Settings
mode. For more information, refer to
“LCD Display” in this chapter.
WARNING
• Do not tint the front windshield
glass or add other types of metallic
coating. Otherwise, the head up
display image may be invisible.
• Do not place any accessories on the
crash pad or attach any objects on
the windshield glass.
• The Blind-spot Collision Warning
system warnings on the head up
display are supplemental. Do not
solely depend on them to change
lanes. Always take a look around
before changing lanes.
NOTICE
When replacing the front windshield
glass of the vehicle equipped with
the head up display, replace it with
a windshield glass designed for the
head up display operation. Otherwise,
duplicated images may be displayed on
the windshield glass.
Head-up display ON/OFF
OIK047152N
To activate the head up display, select
‘Enable Head-Up Display’ on the User
Settings mode on the instrument cluster
LCD display.
If you do not select ‘Enable Head-Up
Display’, the head up display will be
deactivated.
If your vehicle is equipped with
additional navigation, please refer to the
infotainment system manual separately
supplied.
Page 219 of 527
05
5-71
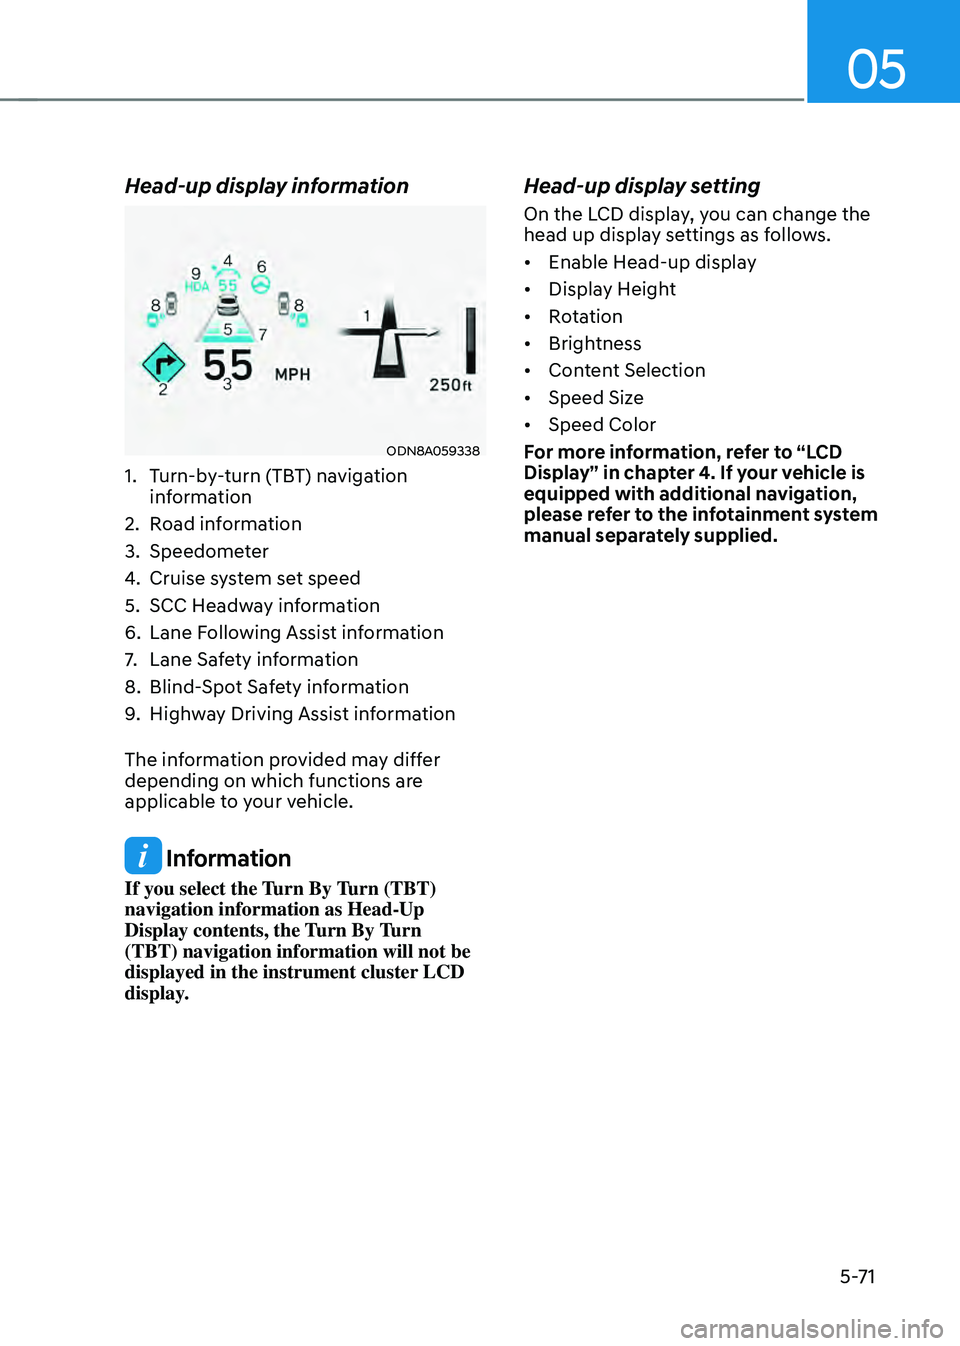
Head-up display information
ODN8A059338
1. Turn-by-turn (TBT) navigation
information
2. Road information
3. Speedometer
4. Cruise system set speed
5. SCC Headway information
6. Lane Following Assist information
7. Lane Safety information
8. Blind-Spot Safety information
9. Highway Driving Assist information
The information provided may differ
depending on which functions are
applicable to your vehicle.
Information
If you select the Turn By Turn (TBT)
navigation information as Head-Up
Display contents, the Turn By Turn
(TBT) navigation information will not be
displayed in the instrument cluster LCD
display.
Head-up display setting
On the LCD display, you can change the
head up display settings as follows.
• Enable Head-up display
• Display Height
• Rotation
• Brightness
• Content Selection
• Speed Size
• Speed Color
For more information, refer to “LCD
Display” in chapter 4. If your vehicle is
equipped with additional navigation,
please refer to the infotainment system
manual separately supplied.
Page 255 of 527
05
5-107
Temperature conversion
If the battery has been discharged or
disconnected, the temperature mode
display will reset to Centigrade.
To change the temperature unit from °C
to °F or °F to °C :
-Automatic climate control system
Press the AUTO button for 3 seconds
while pressing the OFF button.
-Instrument cluster
-Go to User Settings → Other → Temperature Unit.
The temperature unit on both the cluster
LCD display and the climate control
screen will change.
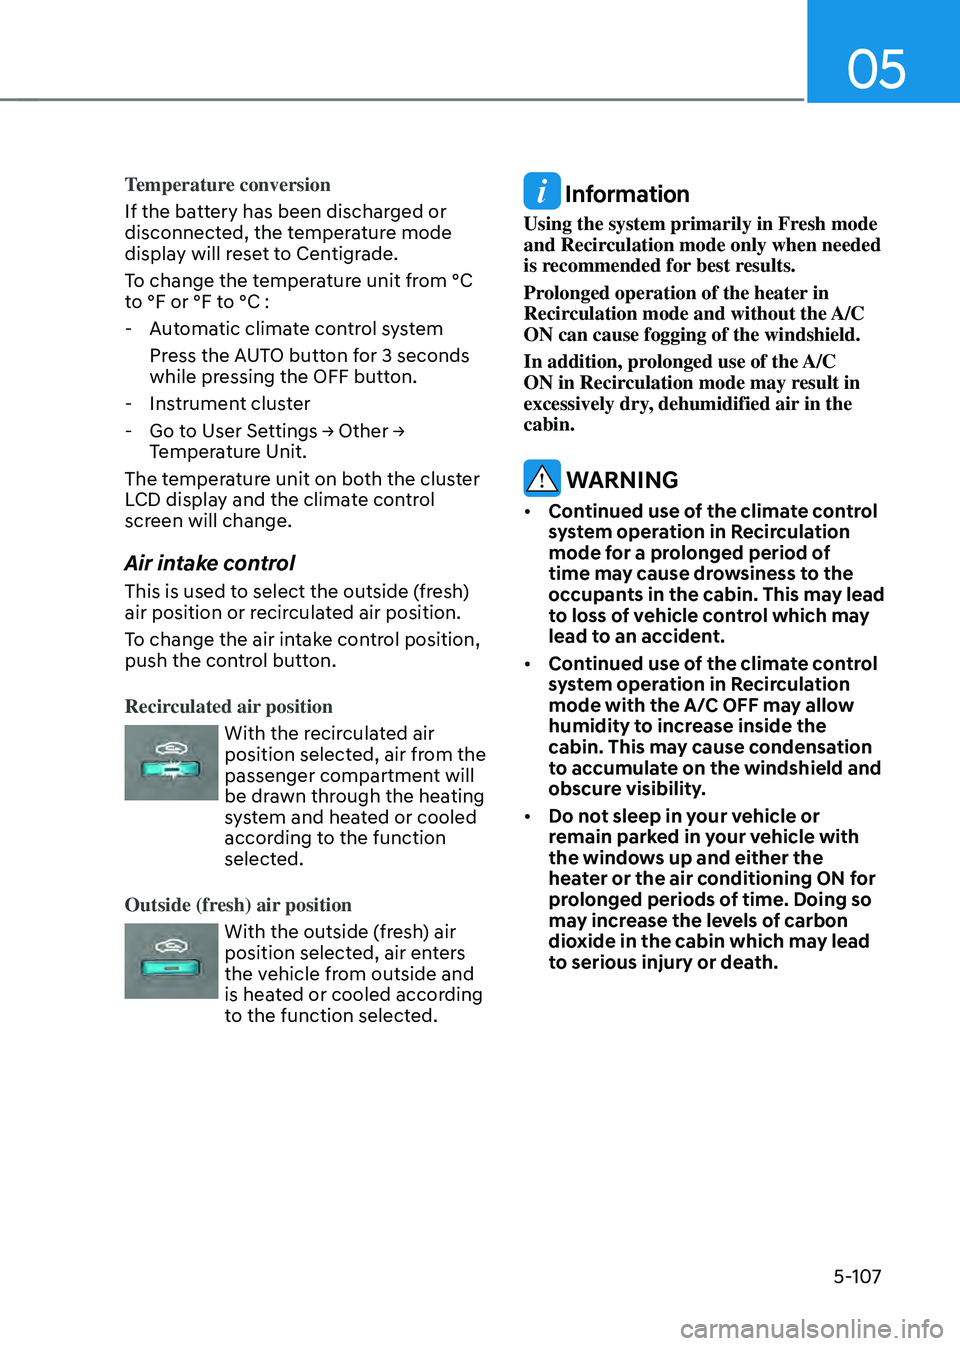
Air intake control
This is used to select the outside (fresh)
air position or recirculated air position.
To change the air intake control position,
push the control button.
Recirculated air position
With the recirculated air position selected, air from the
passenger compartment will
be drawn through the heating
system and heated or cooled
according to the function
selected.
Outside (fresh) air position
With the outside (fresh) air position selected, air enters
the vehicle from outside and
is heated or cooled according
to the function selected.
Information
Using the system primarily in Fresh mode
and Recirculation mode only when needed
is recommended for best results.
Prolonged operation of the heater in
Recirculation mode and without the A/C
ON can cause fogging of the windshield.
In addition, prolonged use of the A/C
ON in Recirculation mode may result in
excessively dry, dehumidified air in the
cabin.
WARNING
• Continued use of the climate control
system operation in Recirculation
mode for a prolonged period of
time may cause drowsiness to the
occupants in the cabin. This may lead
to loss of vehicle control which may
lead to an accident.
• Continued use of the climate control
system operation in Recirculation
mode with the A/C OFF may allow
humidity to increase inside the
cabin. This may cause condensation
to accumulate on the windshield and
obscure visibility.
• Do not sleep in your vehicle or
remain parked in your vehicle with
the windows up and either the
heater or the air conditioning ON for
prolonged periods of time. Doing so
may increase the levels of carbon
dioxide in the cabin which may lead
to serious injury or death.
Page 270 of 527
![HYUNDAI SONATA HYBRID 2022 Owners Manual Convenient Features
5-122
Wireless Cellular Phone
Charging System (if equipped)
ODN8059223
[A]: Indicator light, [B]: Charging pad
On certain models, the vehicle comes
equipped with a wireless cellu HYUNDAI SONATA HYBRID 2022 Owners Manual Convenient Features
5-122
Wireless Cellular Phone
Charging System (if equipped)
ODN8059223
[A]: Indicator light, [B]: Charging pad
On certain models, the vehicle comes
equipped with a wireless cellu](/manual-img/35/56188/w960_56188-269.png)
Convenient Features
5-122
Wireless Cellular Phone
Charging System (if equipped)
ODN8059223
[A]: Indicator light, [B]: Charging pad
On certain models, the vehicle comes
equipped with a wireless cellular phone
charger.
The system is available when all doors
are closed, and when the ignition switch
is ON.
To charge a cellular phone
The wireless cellular phone charging
system charges only the Qi-enabled
cellular phones. Read the label on the
cellular phone accessory cover or visit
your cellular phone manufacturer’s
website to check whether your cellular
phone supports the Qi technology.
The wireless charging process starts
when you put a Qi-enabled cellular
phone on the wireless charging unit.
1. Remove other items, including the
smart key, from the wireless charging
unit. If not, the wireless charging
process may be interrupted. Place the
cellular phone on the center of the
charging pad (
).
2. The indicator light is orange when
the cellular phone is charging. The
indicator light turns green when
phone charging is complete.
3. You can turn ON or OFF the wireless
charging function in the user settings
mode on the instrument cluster. For
further information, refer to the “LCD
Display Modes” in this chapter.
If your cellular phone is not charging:
- Slightly change the position of the
cellular phone on the charging pad.
-Make sure the indicator light is
orange.
The indicator light will blink orange for 10
seconds if there is a malfunction in the
wireless charging system.
In this case, temporarily stop the
charging process, and re-attempt to
charge your cellular phone again.
The system warns you with a message
on the LCD display if the cellular phone
is still on the wireless charging unit after
the engine is turned OFF and the front
door is opened.
Information
For some manufacturers’ cellular phones,
the system may not warn you even though
the cellular phone is left on the wireless
charging unit. This is due to the particular
characteristic of the cellular phone and
not a malfunction of the wireless charging.
Page 286 of 527
6-10
While Driving
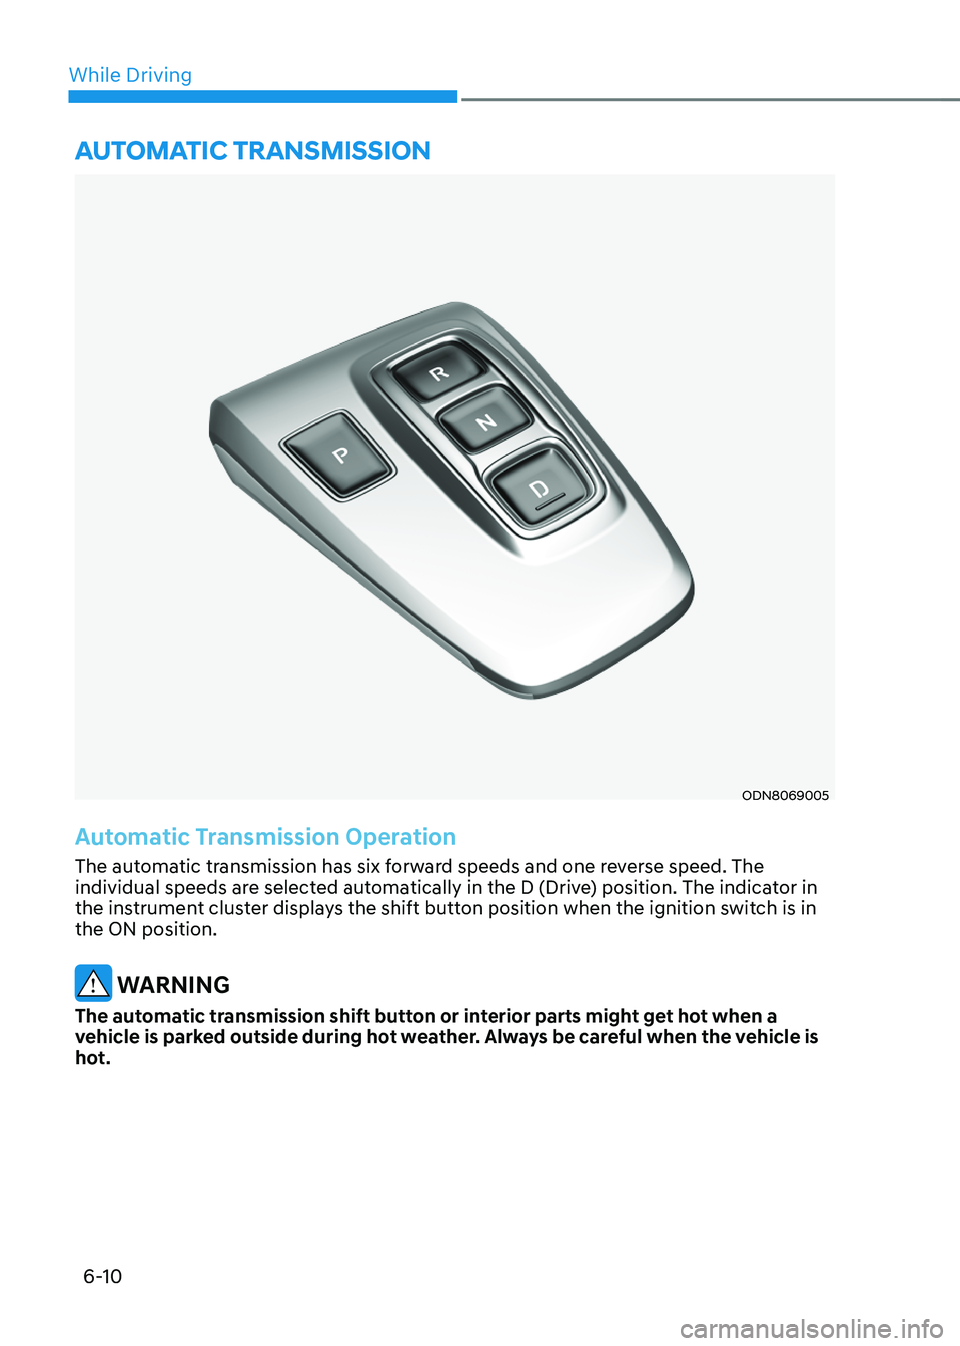
ODN8069005
Automatic Transmission Operation
The automatic transmission has six forward speeds and one reverse speed. The
individual speeds are selected automatically in the D (Drive) position. The indicator in
the instrument cluster displays the shift button position when the ignition switch is in
the ON position.
WARNING
The automatic transmission shift button or interior parts might get hot when a
vehicle is parked outside during hot weather. Always be careful when the vehicle is
hot.
AUTOMATIC TRANSMISSION
Page 293 of 527
06
6-17
OOSH069019L
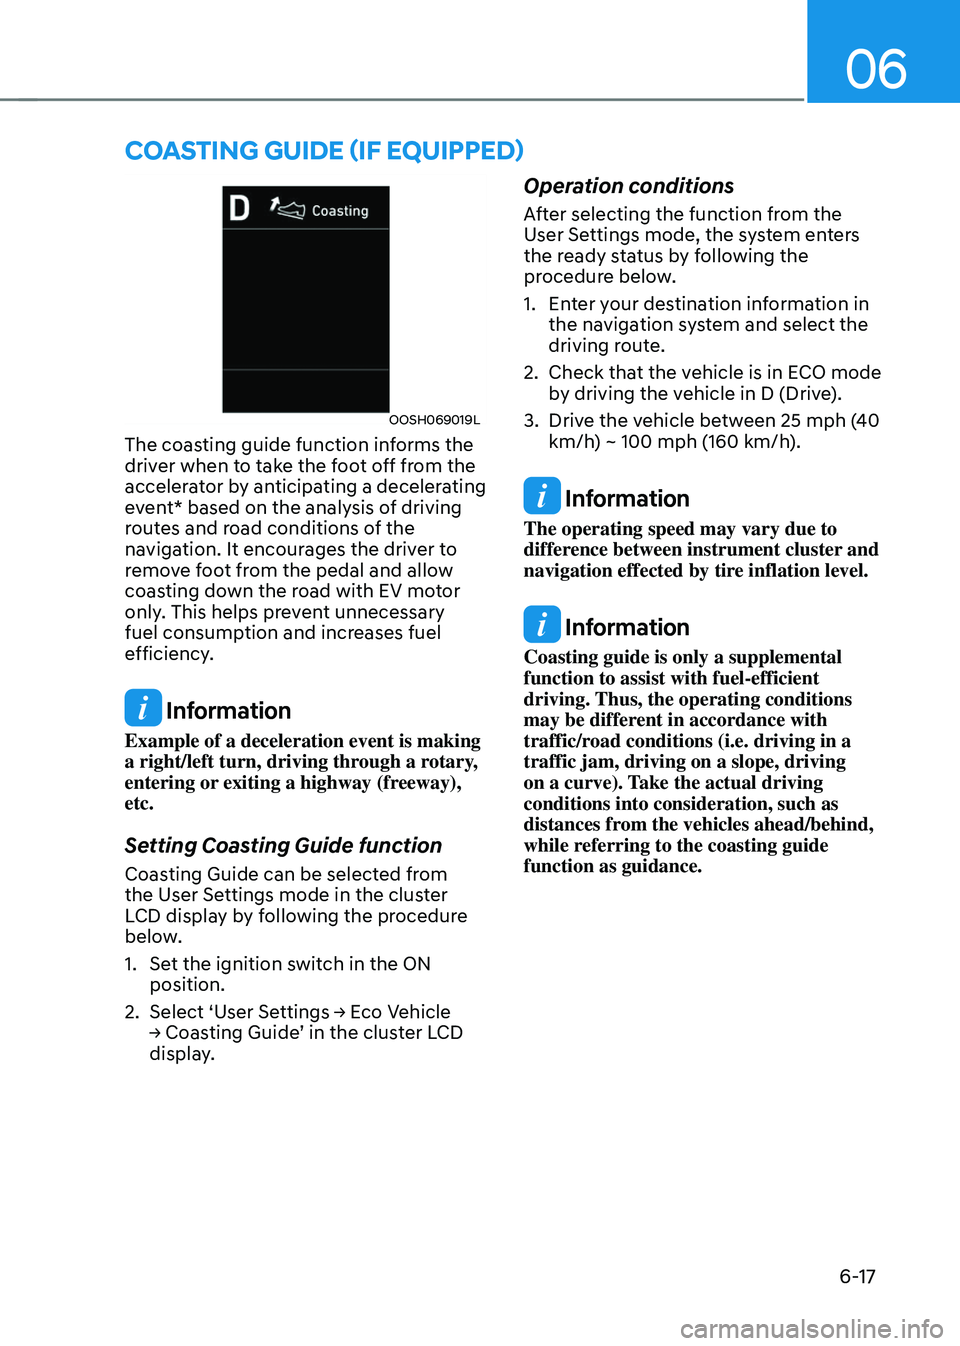
The coasting guide function informs the
driver when to take the foot off from the
accelerator by anticipating a decelerating
event* based on the analysis of driving
routes and road conditions of the
navigation. It encourages the driver to
remove foot from the pedal and allow
coasting down the road with EV motor
only. This helps prevent unnecessary
fuel consumption and increases fuel
efficiency.
Information
Example of a deceleration event is making
a right/left turn, driving through a rotary,
entering or exiting a highway (freeway),
etc.
Setting Coasting Guide function
Coasting Guide can be selected from
the User Settings mode in the cluster
LCD display by following the procedure
below.
1. Set the ignition switch in the ON
position.
2. Select ‘User Settings → Eco Vehicle → Coasting Guide’ in the cluster LCD display.
Operation conditions
After selecting the function from the
User Settings mode, the system enters
the ready status by following the
procedure below.
1. Enter your destination information in
the navigation system and select the
driving route.
2. Check that the vehicle is in ECO mode
by driving the vehicle in D (Drive).
3. Drive the vehicle between 25 mph (40
km/h) ~ 100 mph (160 km/h).
Information
The operating speed may vary due to
difference between instrument cluster and
navigation effected by tire inflation level.
Information
Coasting guide is only a supplemental
function to assist with fuel-efficient
driving. Thus, the operating conditions
may be different in accordance with
traffic/road conditions (i.e. driving in a
traffic jam, driving on a slope, driving
on a curve). Take the actual driving
conditions into consideration, such as
distances from the vehicles ahead/behind,
while referring to the coasting guide
function as guidance.
COASTING GUIDE (IF EQUIPPED)
Page 309 of 527
06
6-33
DRIVE MODE INTEGRATED CONTROL SYSTEM (IF EQUIPPED)
Drive Mode
ODN8069020
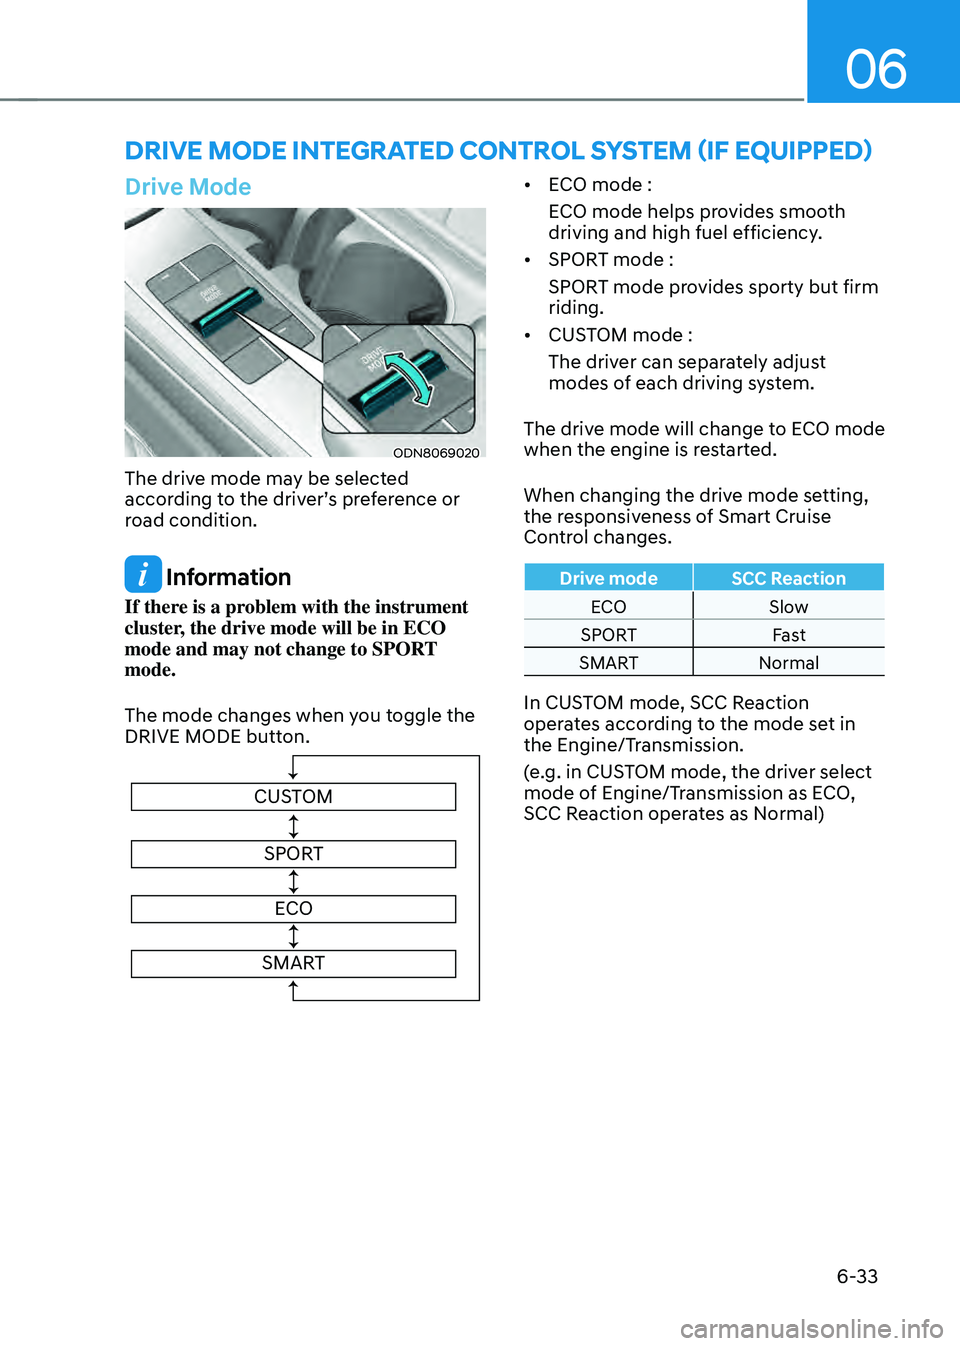
The drive mode may be selected
according to the driver’s preference or
road condition.
Information
If there is a problem with the instrument
cluster, the drive mode will be in ECO
mode and may not change to SPORT
mode.
The mode changes when you toggle the
DRIVE MODE button.
CUSTOMSPORT
ECO
SMART
• ECO mode :
ECO mode helps provides smooth
driving and high fuel efficiency.
• SPORT mode :
SPORT mode provides sporty but firm
riding.
• CUSTOM mode :
The driver can separately adjust
modes of each driving system.
The drive mode will change to ECO mode
when the engine is restarted.
When changing the drive mode setting,
the responsiveness of Smart Cruise
Control changes.
Drive mode SCC Reaction
ECO Slow
SPORT Fast
SMART Normal
In CUSTOM mode, SCC Reaction
operates according to the mode set in
the Engine/Transmission.
(e.g. in CUSTOM mode, the driver select
mode of Engine/Transmission as ECO,
SCC Reaction operates as Normal)
Page 311 of 527
06
6-35
SPORT mode
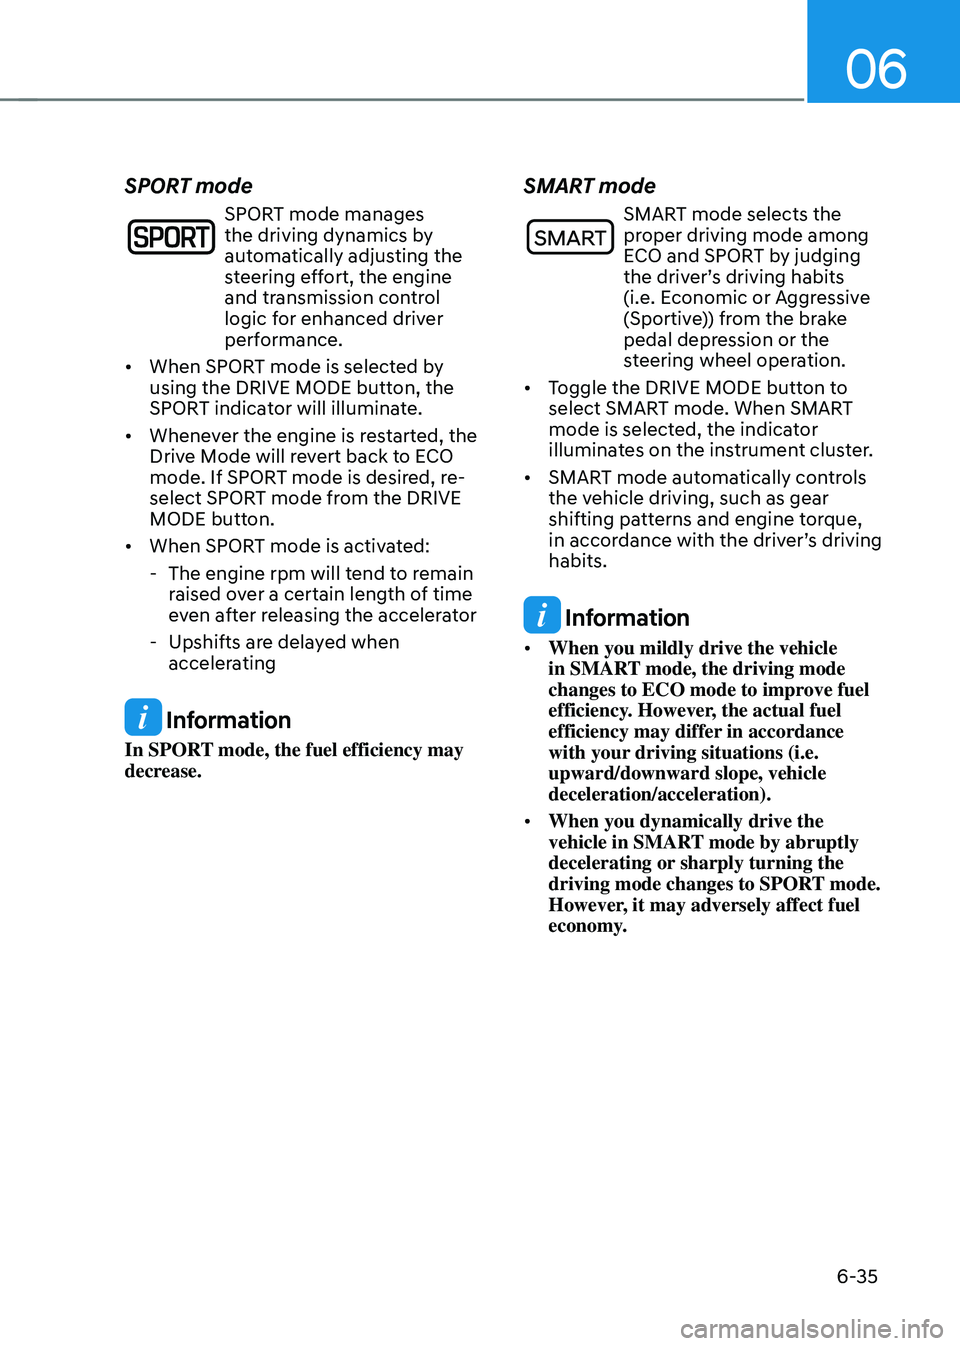
SPORT mode manages
the driving dynamics by
automatically adjusting the
steering effort, the engine
and transmission control
logic for enhanced driver
performance.
• When SPORT mode is selected by
using the DRIVE MODE button, the
SPORT indicator will illuminate.
• Whenever the engine is restarted, the
Drive Mode will revert back to ECO
mode. If SPORT mode is desired, re-
select SPORT mode from the DRIVE
MODE button.
• When SPORT mode is activated:
-The engine rpm will tend to remain
raised over a certain length of time
even after releasing the accelerator
-Upshifts are delayed when
accelerating
Information
In SPORT mode, the fuel efficiency may
decrease.
SMART mode
SMART mode selects the proper driving mode among
ECO and SPORT by judging
the driver’s driving habits
(i.e. Economic or Aggressive
(Sportive)) from the brake
pedal depression or the
steering wheel operation.
• Toggle the DRIVE MODE button to
select SMART mode. When SMART
mode is selected, the indicator
illuminates on the instrument cluster.
• SMART mode automatically controls
the vehicle driving, such as gear
shifting patterns and engine torque,
in accordance with the driver’s driving
habits.
Information
• When you mildly drive the vehicle
in SMART mode, the driving mode
changes to ECO mode to improve fuel
efficiency. However, the actual fuel
efficiency may differ in accordance
with your driving situations (i.e.
upward/downward slope, vehicle
deceleration/acceleration).
• When you dynamically drive the
vehicle in SMART mode by abruptly
decelerating or sharply turning the
driving mode changes to SPORT mode.
However, it may adversely affect fuel
economy.