Page 11 of 579

Foreword
1-6
Using Fuel Additives (except Detergent Fuel Additives)
Using fuel additives such as:
- Silicone fuel additive
- Ferrocene (iron-based) fuel additive
- Other metallic-based fuel additives
May result in cylinder misfire, poor acceleration, engine stalling, damage to the
catalyst, or abnormal corrosion, and may cause damage to the engine resulting in a
reduction in the overall life of the powertrain.
- The Malfunction Indicator Lamp (MIL) may illuminate.
NOTICE
Damage to the fuel system or performance problem caused by the use of these fuels
may not be covered by your New Vehicle Limited Warranty.
Gasoline containing MMT
Some gasoline contains harmful manganese-based fuel additives such as MMT
(Methylcyclopentadienyl Manganese Tricarbonyl).
HYUNDAI does not recommend the use of gasoline containing MMT.
This type of fuel can reduce vehicle performance and affect your emission control
system.
The malfunction indicator lamp on the cluster may come on.
Detergent Fuel Additives
HYUNDAI recommends that you use good quality gasolines treated with detergent
additives such as TOP TIER Detergent Gasoline, which help prevent deposit formation
in the engine. These gasolines will help the engine run cleaner and enhance
performance of the Emission Control System. For more information on TOP TIER
Detergent Gasoline, please go to the website (www. toptiergas.com).
For customers who do not use TOP Tier Detergent Gasoline regularly, and have
problems starting or the engine does not run smoothly, detergent-based fuel additives
that you can purchase separately may be added to the gasoline. If TOP TIER Detergent
Gasoline is not available, one bottle of additive added to the fuel tank according to the
maintenance schedule is recommended (refer to the Maintenance Schedule in chapter
9).
Additives are available from your authorized HYUNDAI dealer along with information
on how to use them. Do not mix other additives.
Operation in foreign countries
If you are going to drive your vehicle in another country, be sure to:
Observe all regulations regarding registration and insurance.
Determine that acceptable fuel is available.
Page 48 of 579

03
3-17
Seat Warmers and Air Ventilation
Seats
Front seat warmers (if equipped)
Seat warmers are provided to warm the
seats during cold weather.
WARNING
The seat warmers can cause a SERIOUS
BURN, even at low temperatures and
especially if used for long periods of
time.
Passengers must be able to feel if the
seat is becoming too warm so they can
turn it off, if needed.
People who cannot detect temperature
change or pain to the skin should
use extreme caution, especially the
following types of passengers:
Infants, children, elderly or disabled
persons, or hospital outpatients.
People with sensitive skin or who
burn easily.
Fatigued individuals.
Intoxicated individuals.
People taking medication that can
cause drowsiness or sleepiness.
Individuals with medical condition
affecting their ability to detect
temperature change
WARNING
NEVER place anything on the seat
that insulates against heat when the
seat warmer is in operation, such as a
blanket or seat cushion. This may cause
the seat warmer to overheat, causing a
burn or damage to the seat.
NOTICE
To prevent damage to the seat warmers
and seats:
Never use a solvent such as paint
thinner, benzene, alcohol or gasoline
to clean the seats.
Do not place heavy or sharp objects
on seats equipped with seat
warmers.
Do not change the seat cover. It may
damage the seat warmer.
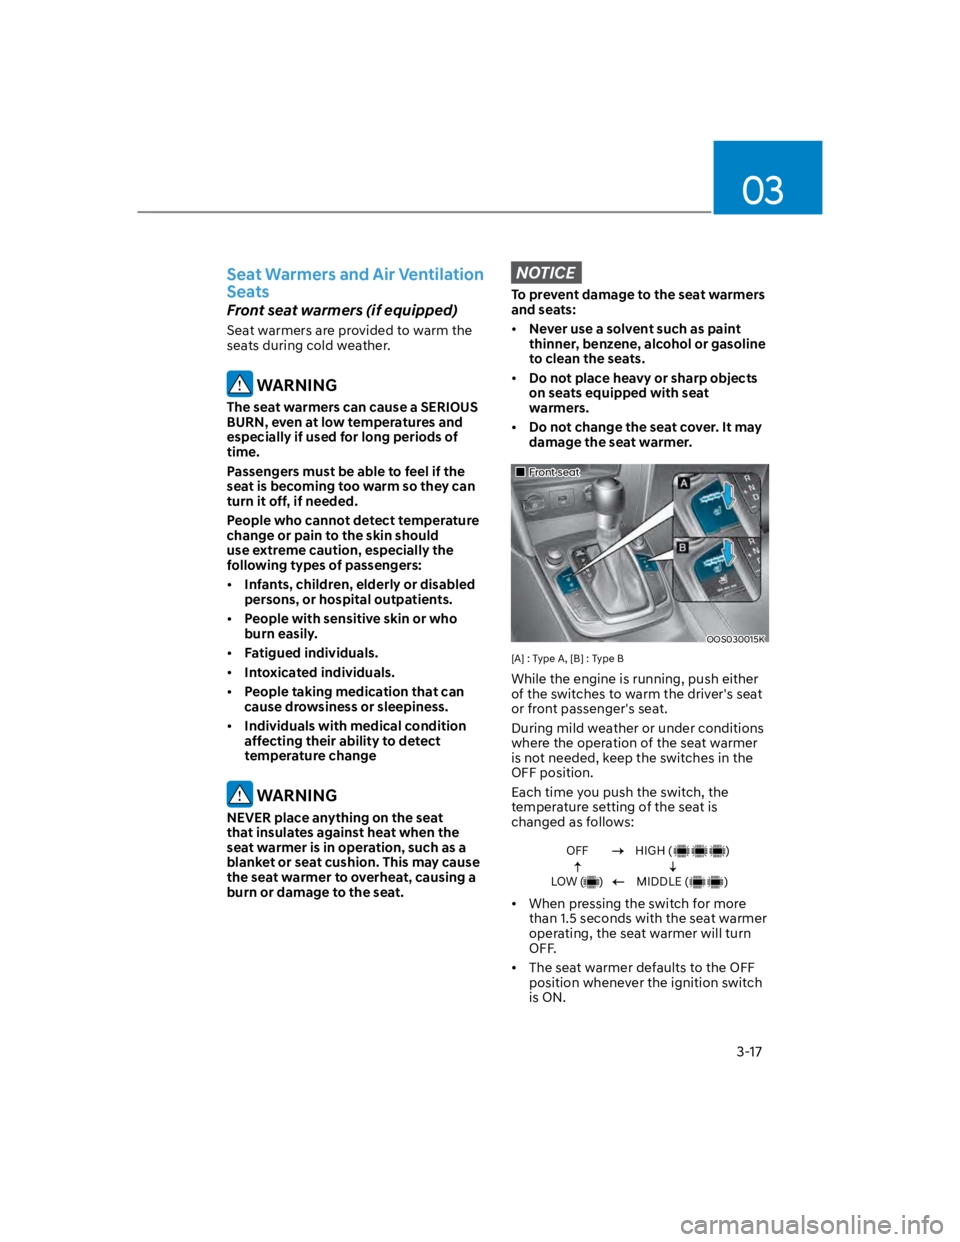
Front seat
OOS030015K
[A] : Type A, [B] : Type B
While the engine is running, push either
of the switches to warm the driver's seat
or front passenger's seat.
During mild weather or under conditions
where the operation of the seat warmer
is not needed, keep the switches in the
OFF position.
Each time you push the switch, the
temperature setting of the seat is
changed as follows:
OFF
LOW ( )
HIGH ( )
MIDDLE ( )
When pressing the switch for more
than 1.5 seconds with the seat warmer
operating, the seat warmer will turn
OFF.
The seat warmer defaults to the OFF
position whenever the ignition switch
is ON.
Page 200 of 579

Convenient features
5-66
Do not over-fill or top-off your
vehicle tank, which can cause fuel
spillage.
If a fire breaks out during refueling,
leave the vicinity of the vehicle, and
immediately contact the manager
of the gas station and then contact
the local fire department. Follow any
safety instructions they provide.
If pressurized fuel sprays out, it can
cover your clothes or skin and thus
subject you to the risk of fire and
burns. Always remove the fuel cap
carefully and slowly. If the cap is
venting fuel or if you hear a hissing
sound, wait until the condition stops
before completely removing the cap.
Always check that the fuel cap is
installed securely to prevent fuel
spillage in the event of an accident.
Information
NOTICE
Do not spill fuel on the exterior
surfaces of the vehicle. Any type of
fuel spilled on painted surfaces may
damage the paint.
If the fuel filler cap requires
replacement, use only a genuine
HYUNDAI cap or the equivalent
specified for your vehicle. An
incorrect fuel filler cap can result
in a serious malfunction of the fuel
system or emission control system.
Page 548 of 579

Maintenance
9-62
WARNING
OLMB073042L
Handle halogen bulbs with care.
Halogen bulbs contain pressurized
gas that will produce flying pieces
of glass that could cause injuries if
broken.
Wear eye protection when changing
a bulb. Allow the bulb to cool down
before handling it.
Always handle them carefully, and
avoid scratches and abrasions. If
the bulbs are lit, avoid contact with
liquids.
Never touch the glass with bare
hands. Residual oil may cause the
bulb to overheat and burst when lit.
A bulb should be operated only when
installed in a headlamp.
If a bulb becomes damaged or
cracked, replace it immediately and
carefully dispose of it.
If the LED lamp does not operate, have
the vehicle checked by an authorized
HYUNDAI dealer.
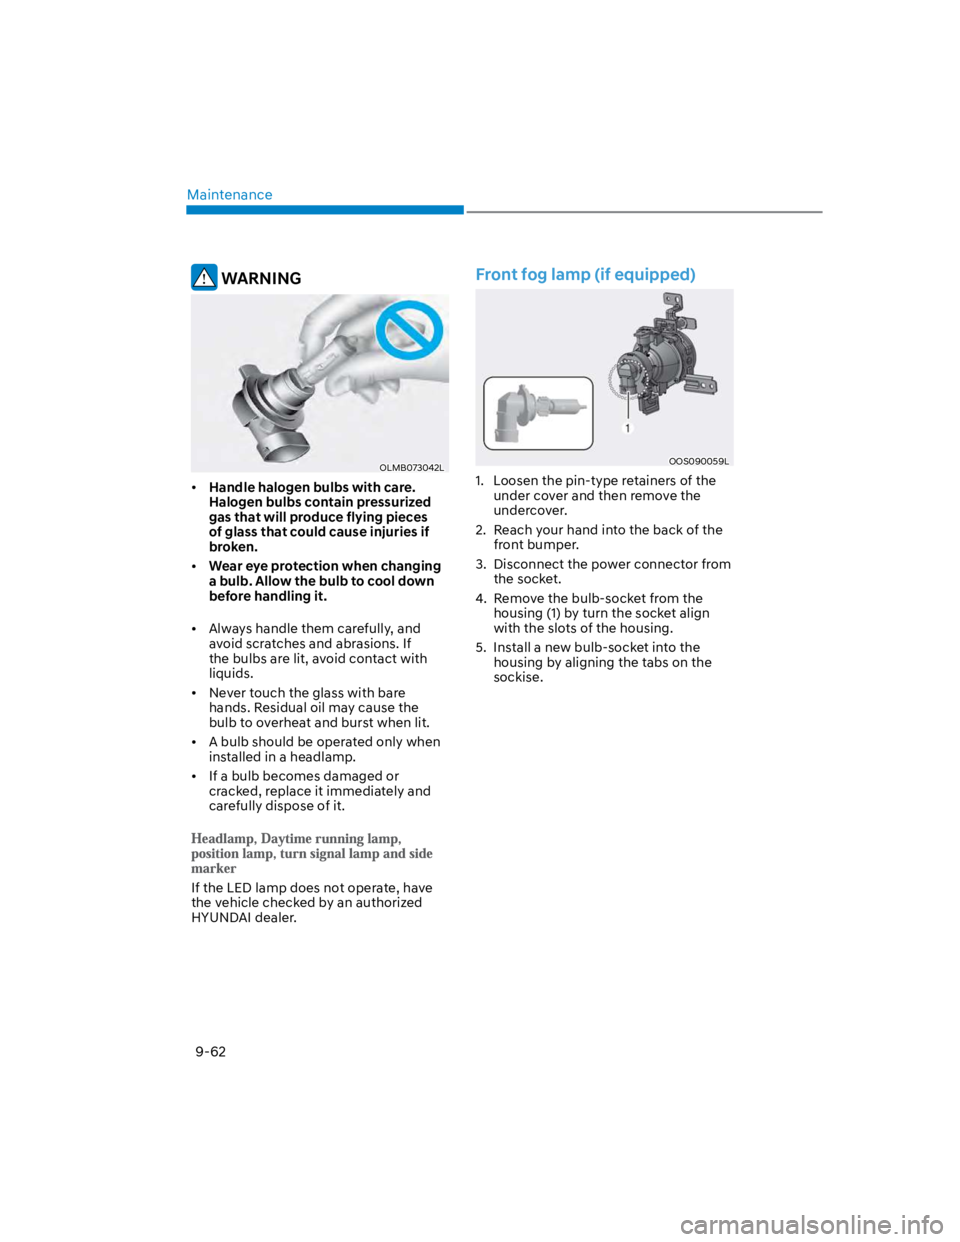
Front fog lamp (if equipped)
OOS090059L
1. Loosen the pin-type retainers of the
under cover and then remove the
undercover.
2. Reach your hand into the back of the
front bumper.
3. Disconnect the power connector from
the socket.
4. Remove the bulb-socket from the
housing (1) by turn the socket align
with the slots of the housing.
5. Install a new bulb-socket into the
housing by aligning the tabs on the
sockise.